

Multi-tenancy
Multi-tenancy allows team members to belong to multiple companies in the Truv Dashboard.
Overview
Multi-tenancy in the Truv Dashboard enables clients to create and manage separate Truv Dashboard instances for business units, testing environments or other use-cases. This guide explains how multi-tenancy is setup, how team members can navigate between companies, and other important information.
Setting up multi-tenancy
First reach out to your Truv Customer Success Manager for assistance setting up new companies. You will need to specify the following information for each new company:
- What the company should be called (ideally differentiating the new and original company).
- Who should be the owner of the company (each team member can only be owner of 1 company).
- Whether billing for the new company should roll up into the original company.
- Which configurations (if any) should be different in the new company.
The Customer Success Manager will create new company invites using the above information to ensure correct configuration. If the owner of the new company was an already active member, they will not receive a Dashboard invite email and can simply login using their existing credentials. If the owner of the new company was a non-existent or declined member, they will receive a Dashboard invite email to login.
Adding and approving team members in the new company
Once the new companies are created, members can be added either by Truv or by Clients via Settings Team tab in the Truv Dashboard. To add new members, simply select the Add member button and add their First Name, Last Name, Email, Role, and Available orders (templates) to the form.
- Similar to creating a new company, if the invited team member is already an active member, they will not receive a Dashboard invite email and can simply login using their existing credentials. If the member was non-existent or declined, they will receive a Dashboard invite email to login.
- Members can have different assigned Roles in each company.
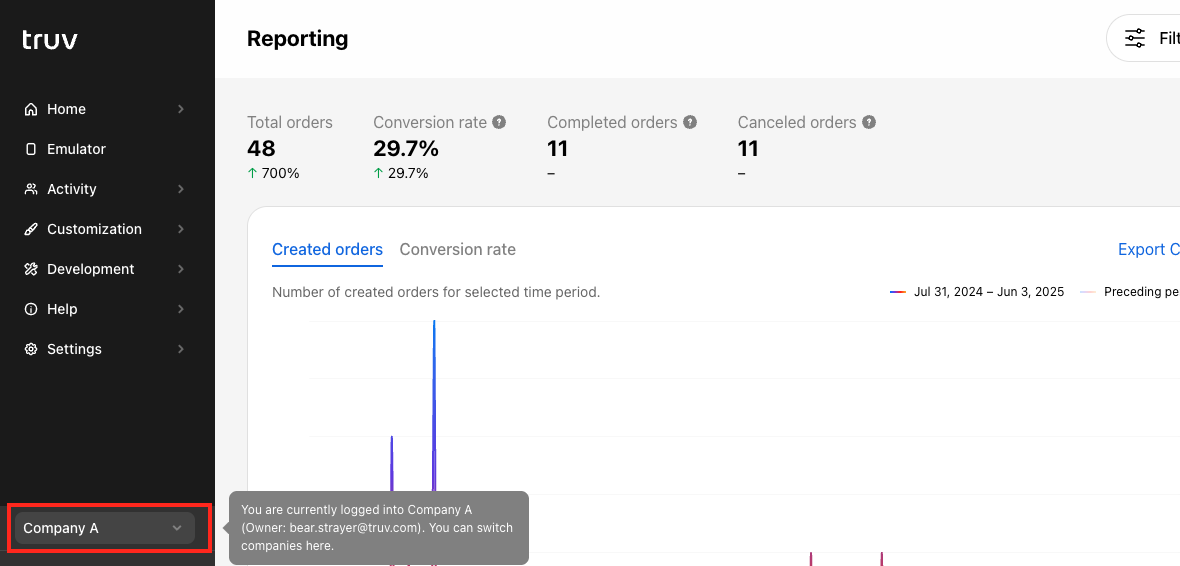
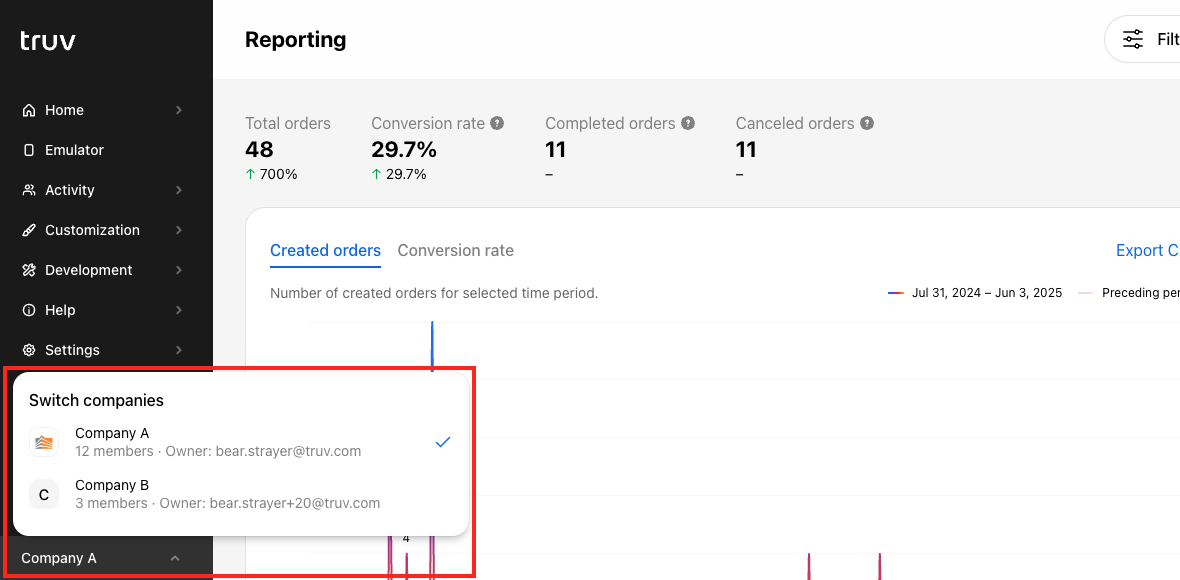
Switching between companies
To switch between companies, we have introduced a company toggle on the bottom left of the Home page in the Truv Dashboard. The toggle will display the current company and can be expanded to show the full list of companies the member belongs to, including important information like number of members in each company and the owner's email address.
To switch to a different company, simply select a different company from the list and the page will be refreshed to change companies.
- If a member has had their access removed from a company, it will no longer appear in the list.
- If they only have access to 1 company, the tile will not appear and they will only be logged into the 1 company they have access to.
- Members access all their companies with the same set of login credentials, once they login, they can switch between assigned companies.
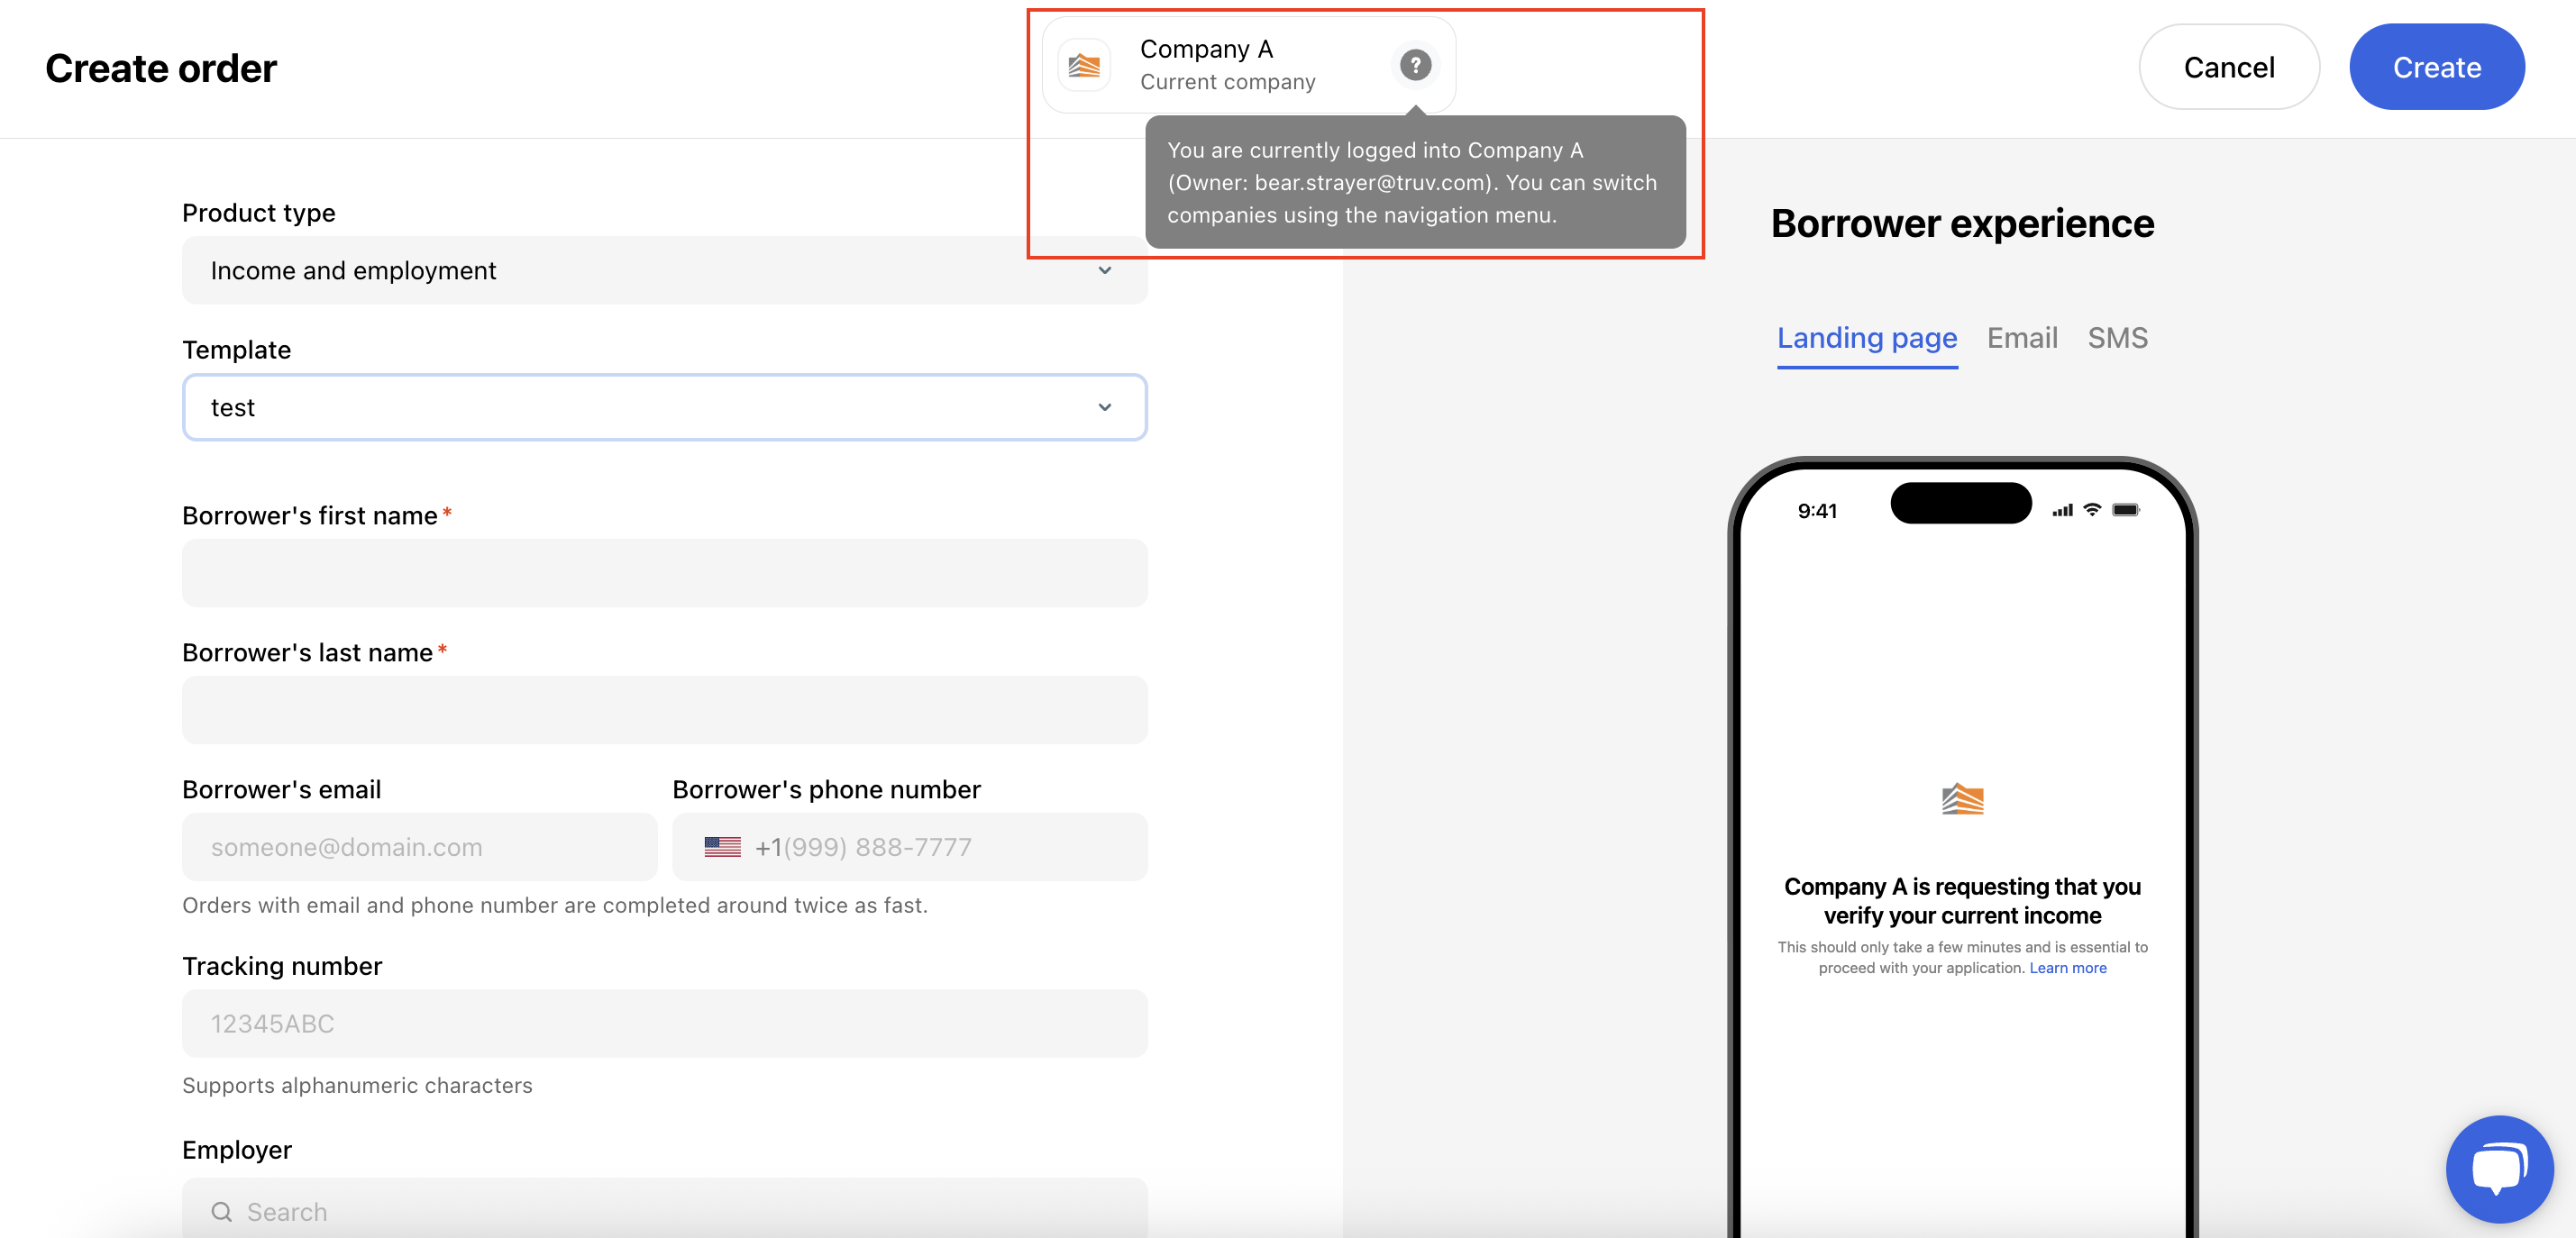
Identifying the current company
On other pages that don't have the side menu, we have introduced a static company tile in the Header section to provide visual reference for which company a team member is logged into. The tile shows the current company and owner email address, but the company can't be toggled from here. To change companies the member needs to navigate to the Home page to use the toggle described prior.
This tile is present on the following Dashboard pages: Create order, New template, Add member
Finishing new company setup
Once the new company is created and the team members are added, remember to finish setup by:
- Requesting production keys
- Setting up customization templates and setting the correct company name in the Branding section of each Template
- Creating webhooks and customizing returned data (if necessary)