LodaSoft
Leverage Truv's Verification of Income and Employment (VOI/E) solution within the Lodasoft point-of-sale system to efficiently access and verify borrower employment and income information from authenticated accounts.
Overview
Transform your loan verification process with our seamless Truv integration in Lodasoft. Get instant access to verified employment and income data directly from source payroll systems, helping you make faster, more confident lending decisions.
Key Benefits
Our integration delivers immediate value by providing:
- Real-time verification that eliminates manual documentation reviews and reduces processing time
- Source-verified employment and income data that minimizes fraud risk and increases accuracy
- A streamlined borrower experience with simple account connectivity and automated updates
How it Works
The verification process integrates smoothly into your existing loan workflow:
- When borrowers reach the income verification stage, they have the ability to connect their payroll accounts through Truv's secure interface. This gives you instant access to their verified employment and income details.
- Your loan origination system automatically receives comprehensive Truv verification reports once accounts are connected. If borrowers skip the verification step initially, you can easily create tasks prompting them to complete it later.
- The system continuously monitors connected accounts for new payroll information, ensuring you always have the most current verification data throughout the loan process.
Truv in Lodasoft can be enabled in one of the two ways
- Embedded Truv experience for all borrowers
- Enable as a task or a To-do for borrowers
- Both of the above, i.e, show embedded Truv experience and enable task workflow
Borrower Experience
We've designed the process to be straightforward for borrowers. They can either:
Verify their income directly through the dedicated verification section while completing their application
Respond to automated task reminders in their to-do list to connect their accounts through Truv at their convenience
The system guides them through each step, making it easy to provide the verification you need while maintaining security and control over their information. CopyRetryClaude can make mistakes. Please double-check responses.
Enable Truv in Lodasoft
-
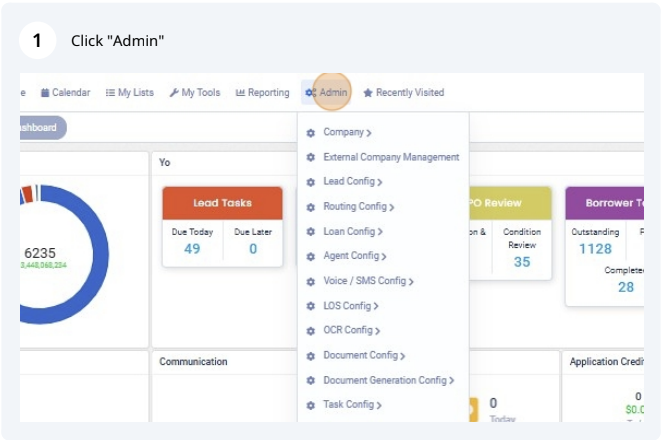
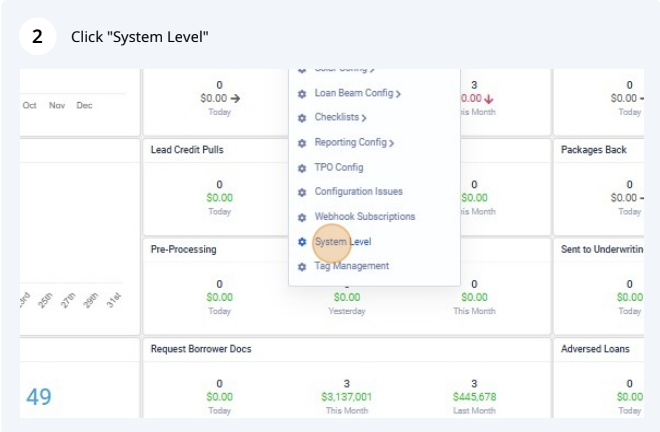
Navigate to Admin in your Lodasoft instance and select System Level.
-
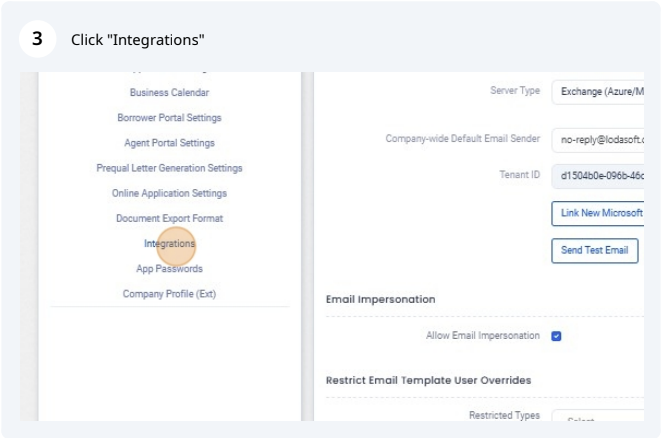
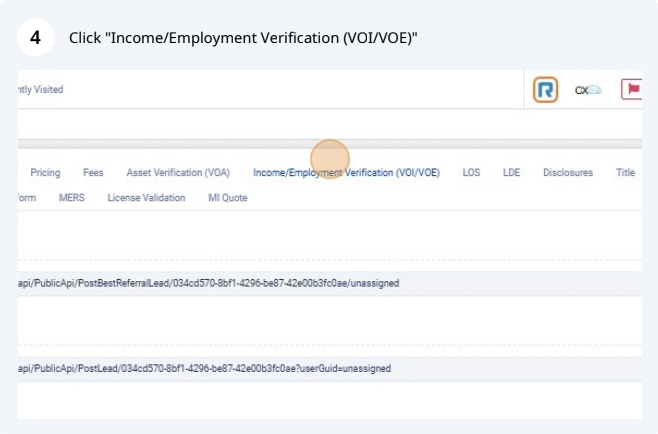
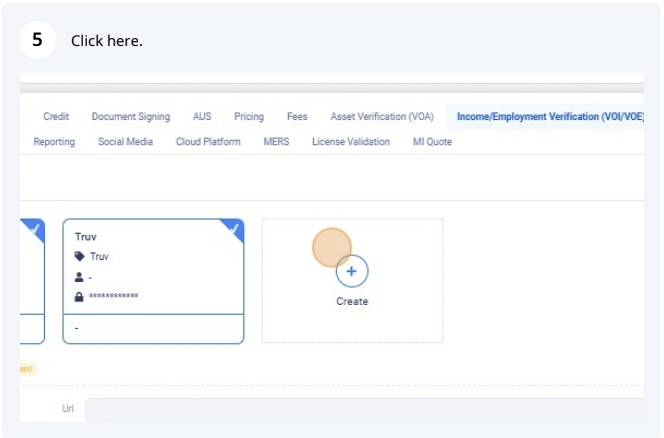
Navigate to Integrations and select Income/Employment Verification (VOI/VOE) tab.
-
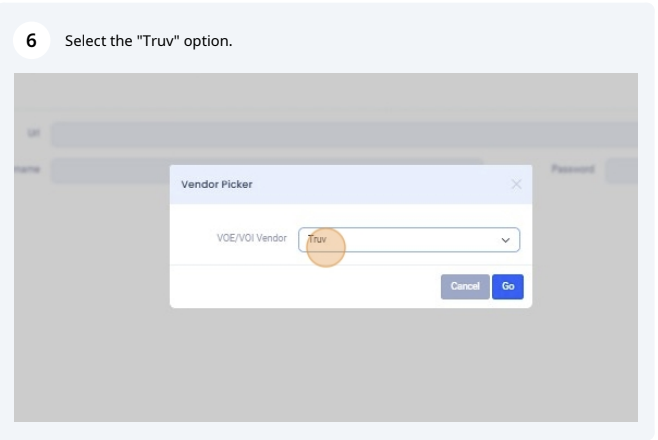
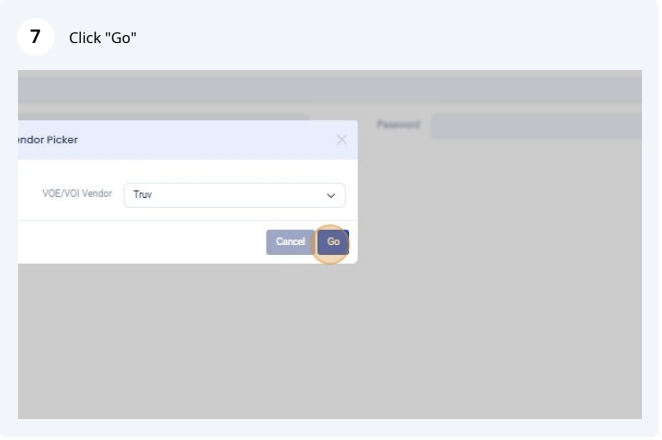
Once here select Create New and select the Truv option from the dropdown for VOE/VOI Vendor. Once selected click on Go to ensure the selection has been saved.
Launch with Truv in Lodasoft
-
Contact Lodasoft Customer Success: Reach out to validate and complete the one-time admin setup for integrating Truv.
-
Enable Truv in Lodasoft: Activate the Truv integration within your Lodasoft account.
-
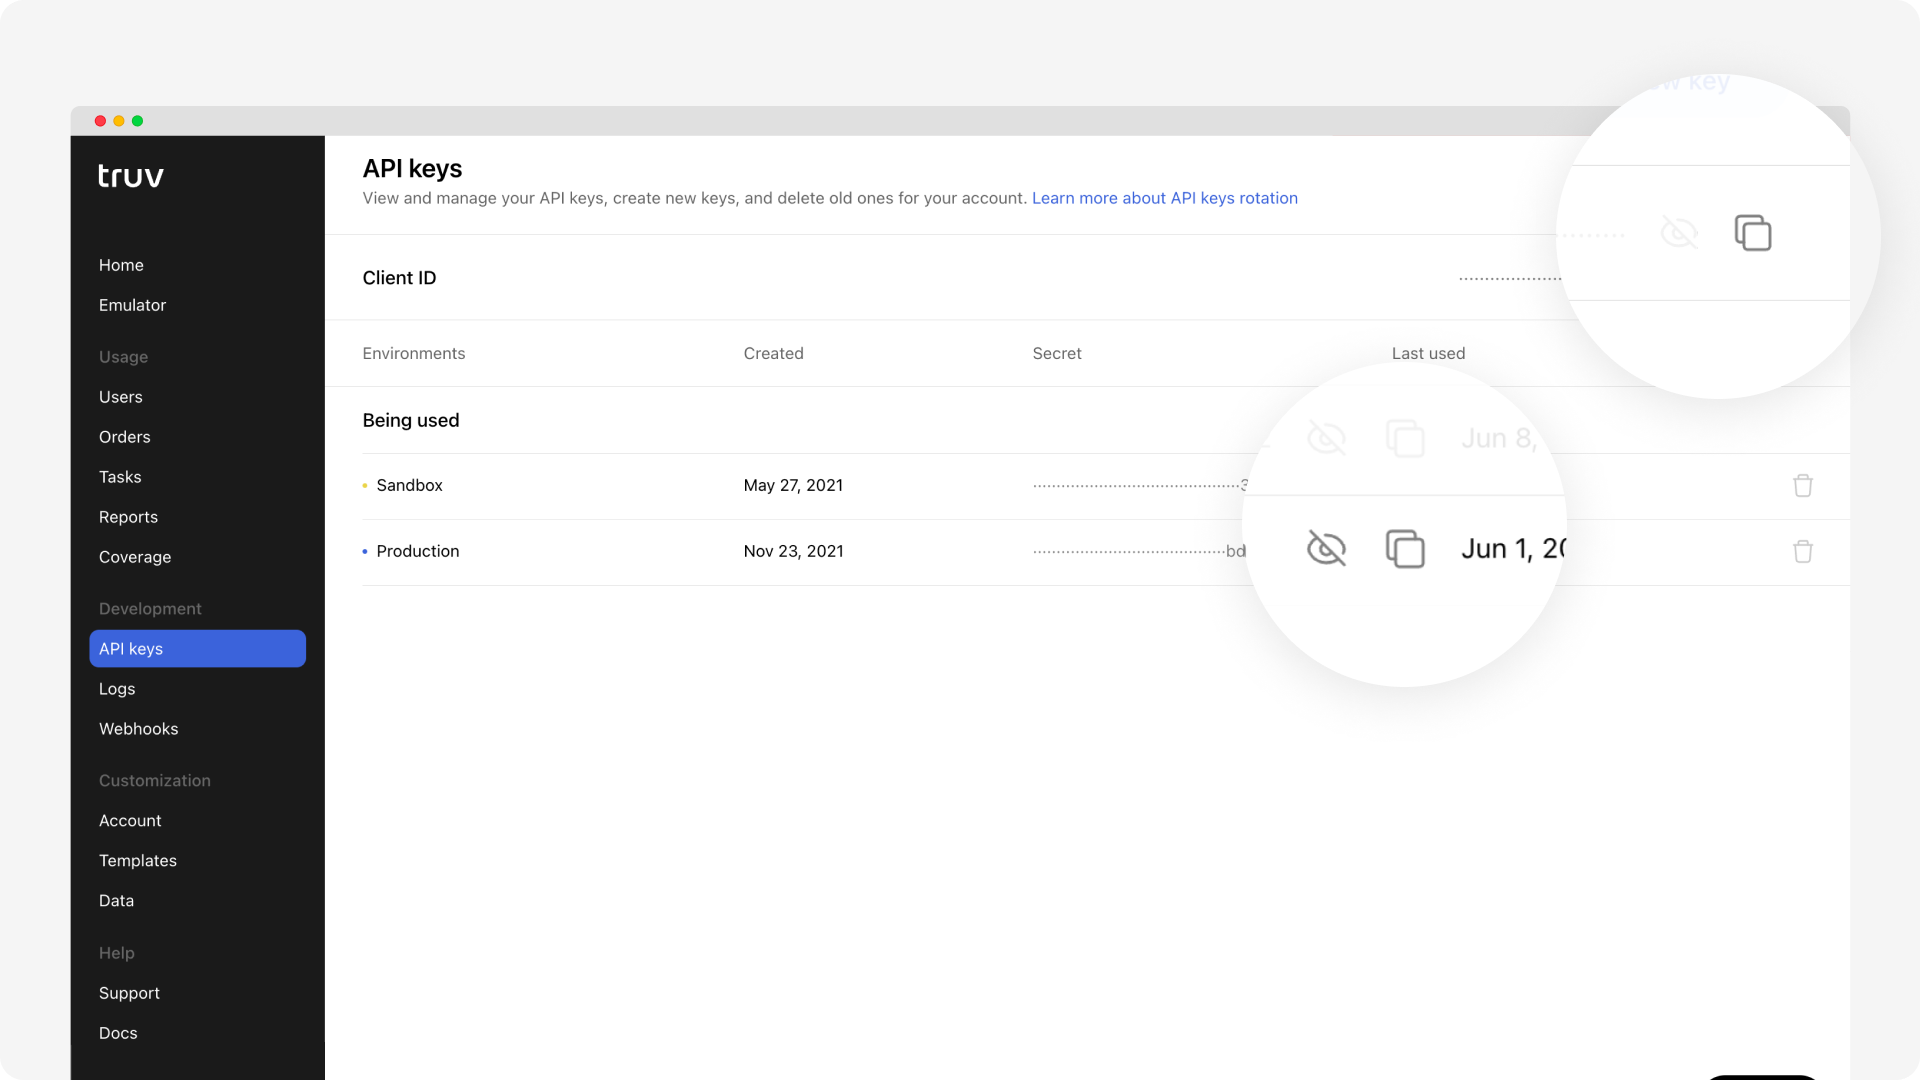
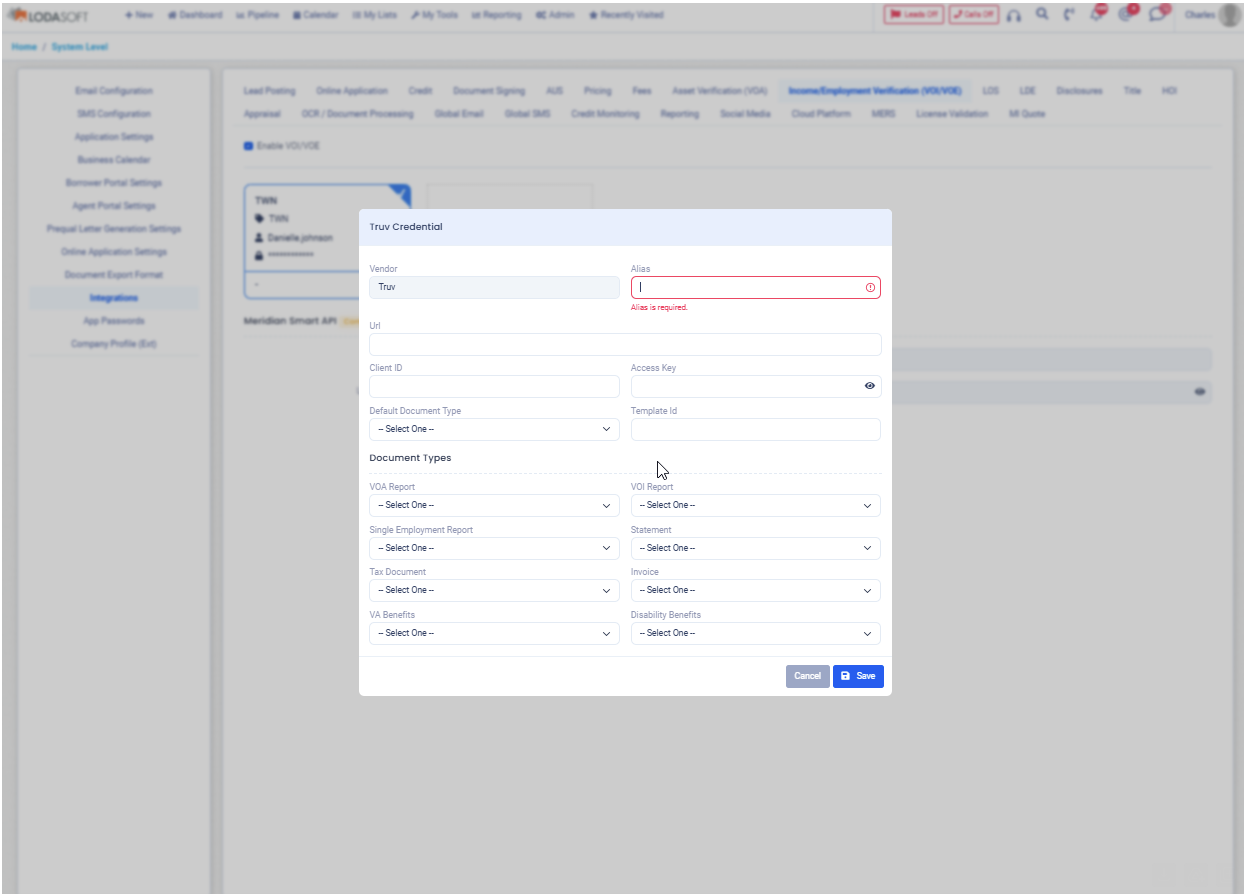
Ensure to copy credentials from Truv Dashboard: Visit Truv’s API Dashboard and select API Keys. Copy the credential values from your environment using the Copy icon.
-
Ensure Truv is enabled: Navigate to Admin -> System Level -> Integrations -> Income/Employment Verification select Truv tile.
-
Add in the Client ID from Truv Dashboard to the Client ID field in Lodasoft.
-
Add in the Secret from Truv Dashboard to the Access Key field in Lodasoft.
-
Click Save to ensure the entries are saved.
-
-
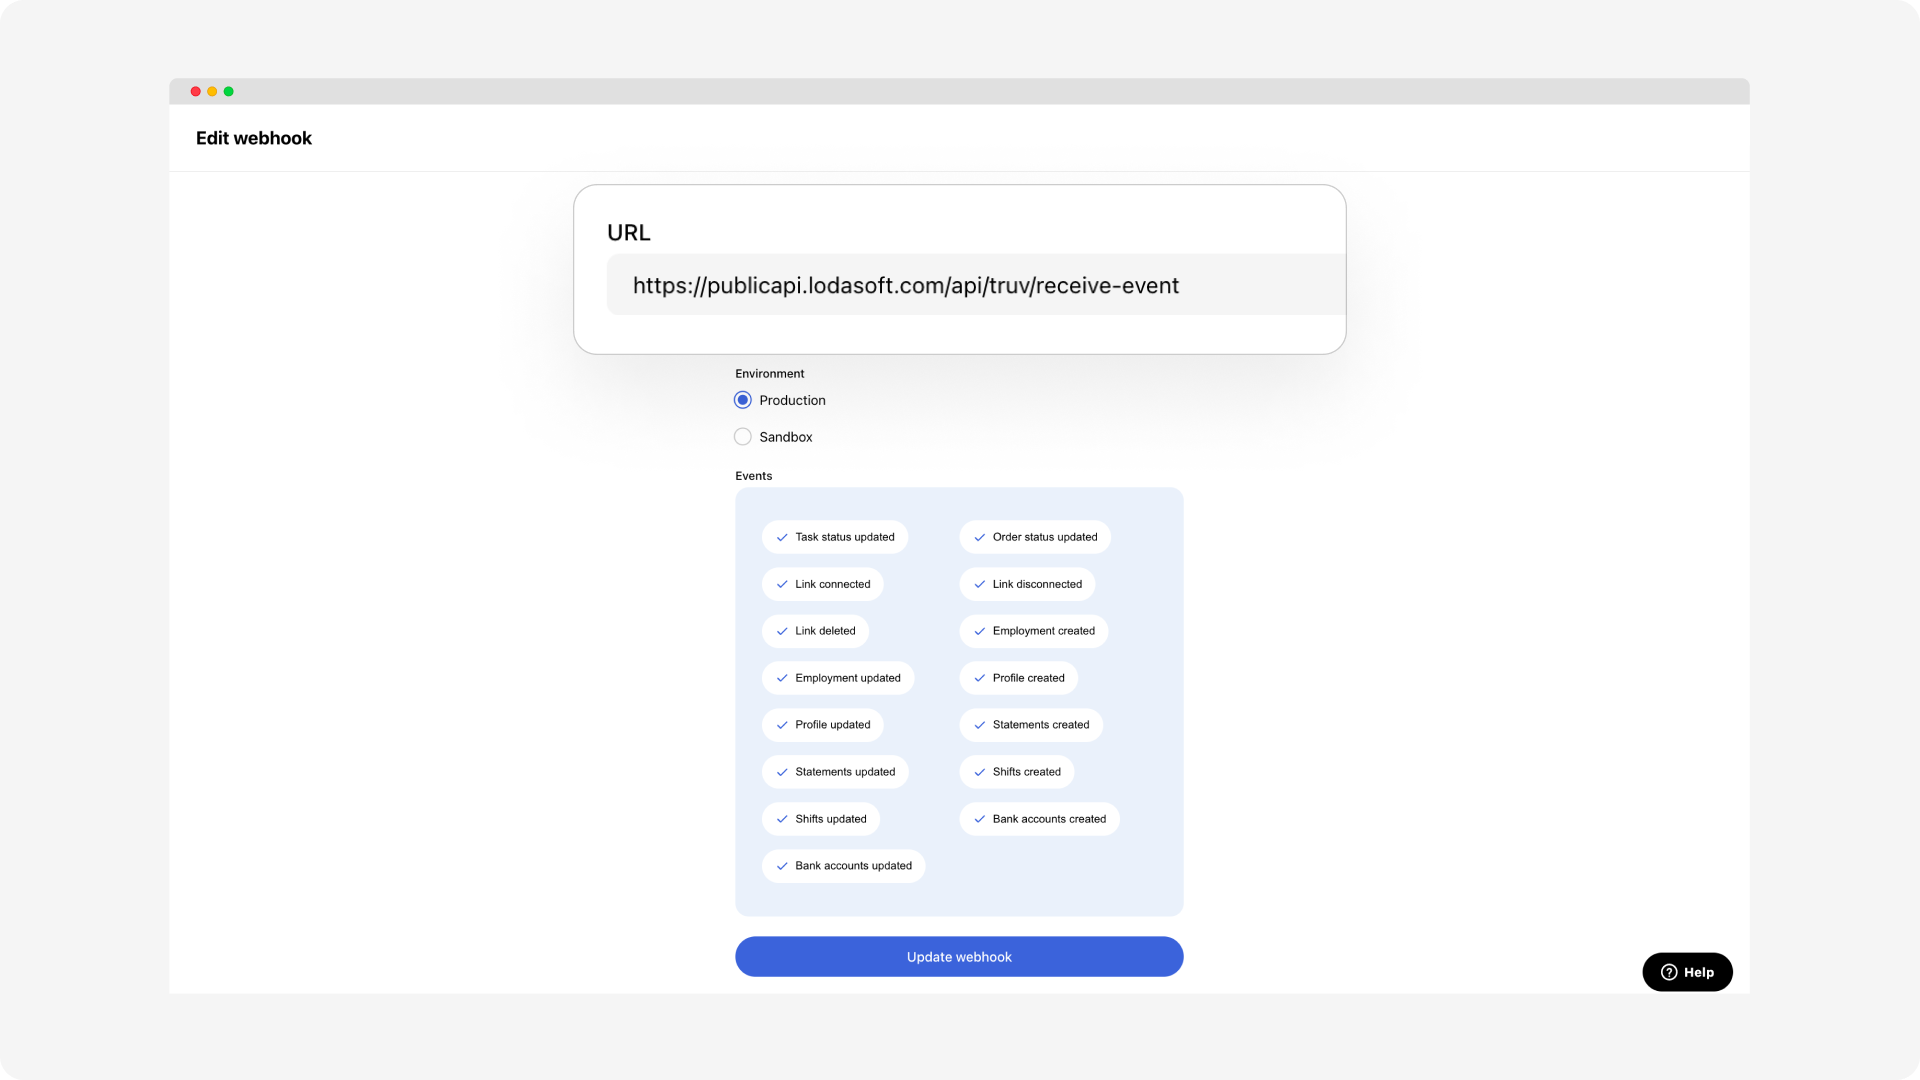
Ensure to setup Webhooks in Truv Dashboard: Lodasoft utilizes webhooks to listen to events on every order from Truv and get updated statuses.
-
Navigate to Truv’s API Dashboard-> Development Section -> Webhooks tab and add a URL for your environment. Each environment requires a specific and separate URL.
-
Copy the URL's - https://publicapi.lodasoft.com/api/truv/receive-event for both Sandbox and Production environment.
-
Ensure to select all the
Eventsas shown in the image above.
-
-
-
Customize Templates: Configure your verification templates in the Truv Dashboard.
-
Test in Sandbox Mode: Familiarize yourself with the integration by testing in the Sandbox environment.
-
Obtain Production Access: Complete the end-to-end setup with Truv and Lodasoft, and ensure successful submission to DU (Desktop Underwriter) and LPA (Loan Product Advisor) systems.
-
Go Live: Launch the Truv integration within Lodasoft.
You are now live with Truv within Lodasoft!!
Refer to the detailed step-by-step guide for a comprehensive walkthrough of launching Truv within Lodasoft.
Updated 6 months ago