

Manual Verification of Assets (VOA) in ICE Encompass®
Manually ordering Guide within Encompass® (SmartClient/Desktop and web editions)
Overview
Once an administrator has completed the setup of Truv in Encompass®, use the guide below to manually create VOA orders for borrowers.
Creating a new order
Step 1: Select the Truv Service
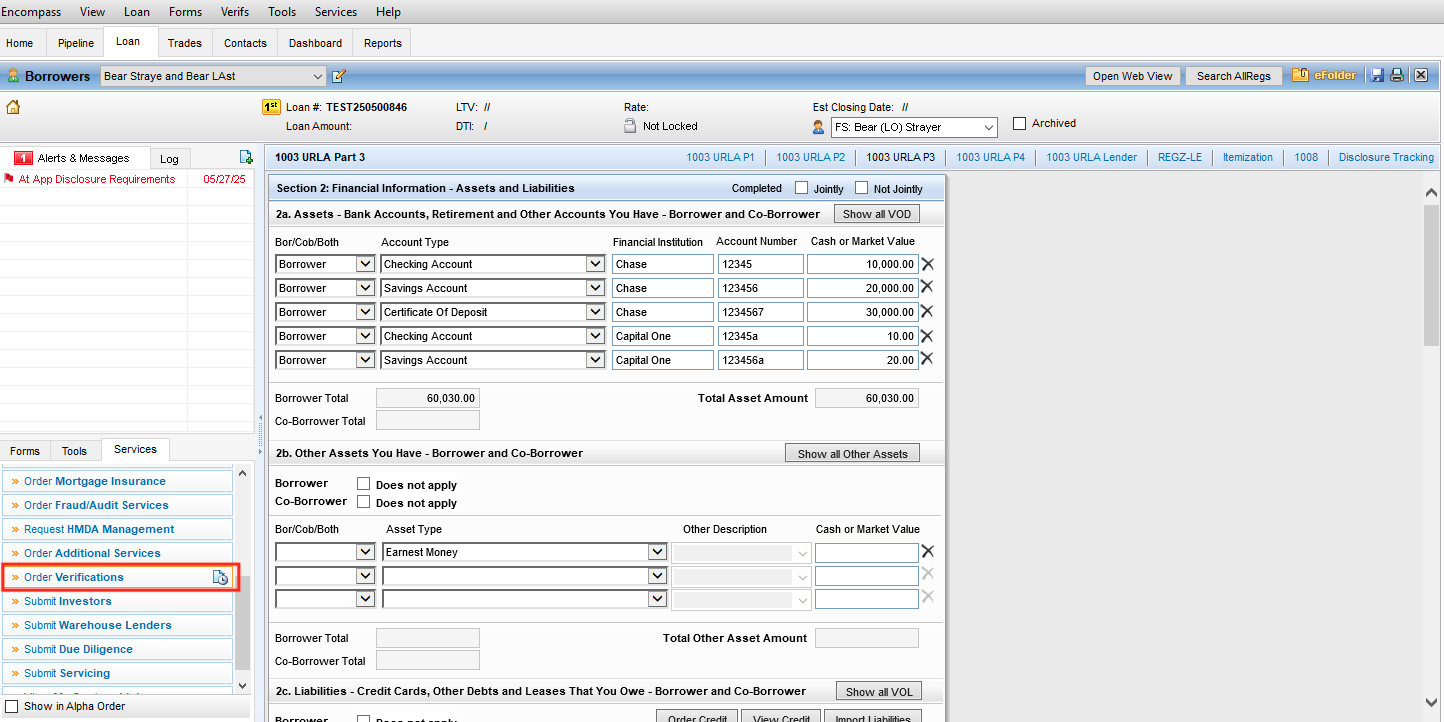
- Open a loan file, and add financial institution information to the 1003 URLA P3 section. Once all required financial institutions are added, select the Services tab and the Order Verifications option.
- In the Verifications provider list, select Truv - Verification of Income/Employment/Assets, then press Submit.
Step 2: Set the order details
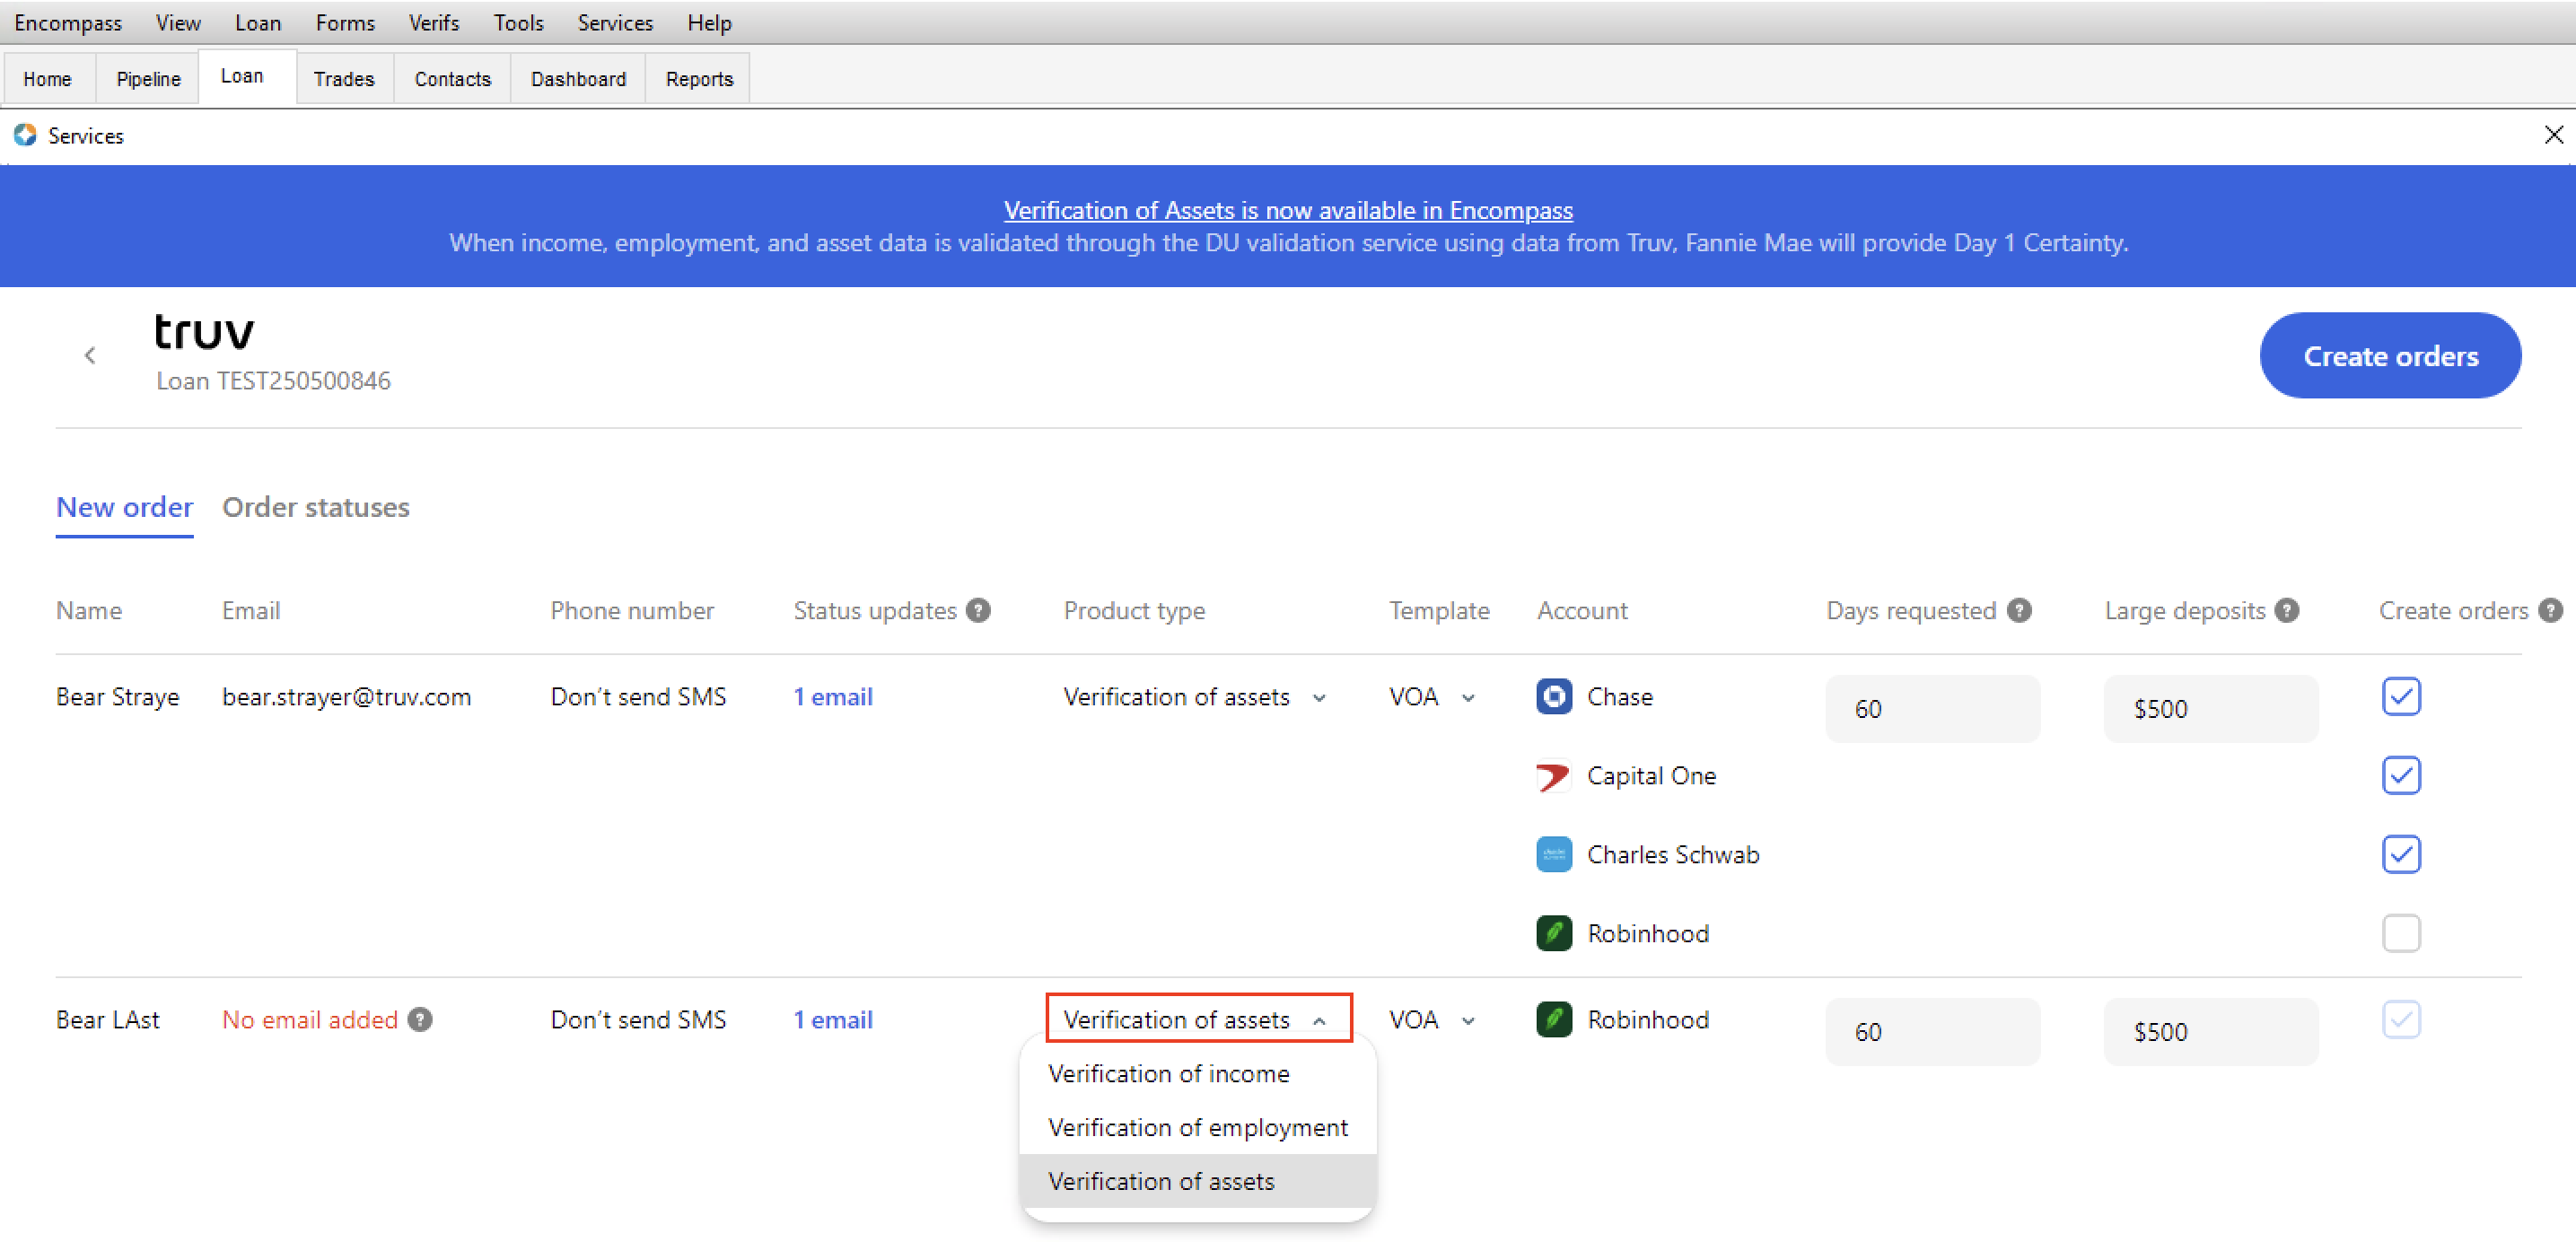
In the Truv new order form, specify all the required order details
- Verify that the Borrower and Coborrower email and phone number are correct
- If additional members of the loan team should receive status update emails for the order, add their email address to the Status updates column
- In the Product type column, set the "Verification of assets" option and select an applicable Template (if order customization is needed)
- The Accounts column shows all the unique financial institutions provided for the Borrower and Coborrower in the Assets section of the 1003.
- Chose which financial institutions should be included in the VOA order by checking the associated box in the Create orders column.
- Up to 5 financial institutions can be included in an order for a borrower. To change which are included, simply check the corresponding box to select or deselect.
- Set the Days requested for the connected financial institutions, or the number of days of account history that is included in the VOA Report PDF.
- By default we set 60 days, but this default can be changed in the Truv template or overridden in the field before creating the order.
- Truv allows a min and max of 30 and 730 days respectively.
- Set the Large deposits threshold for the VOA Report. Any deposits that met or exceed this amount across all connected accounts will be identified in a separate large deposits section in the Report PDF.
Step 4: Create the order
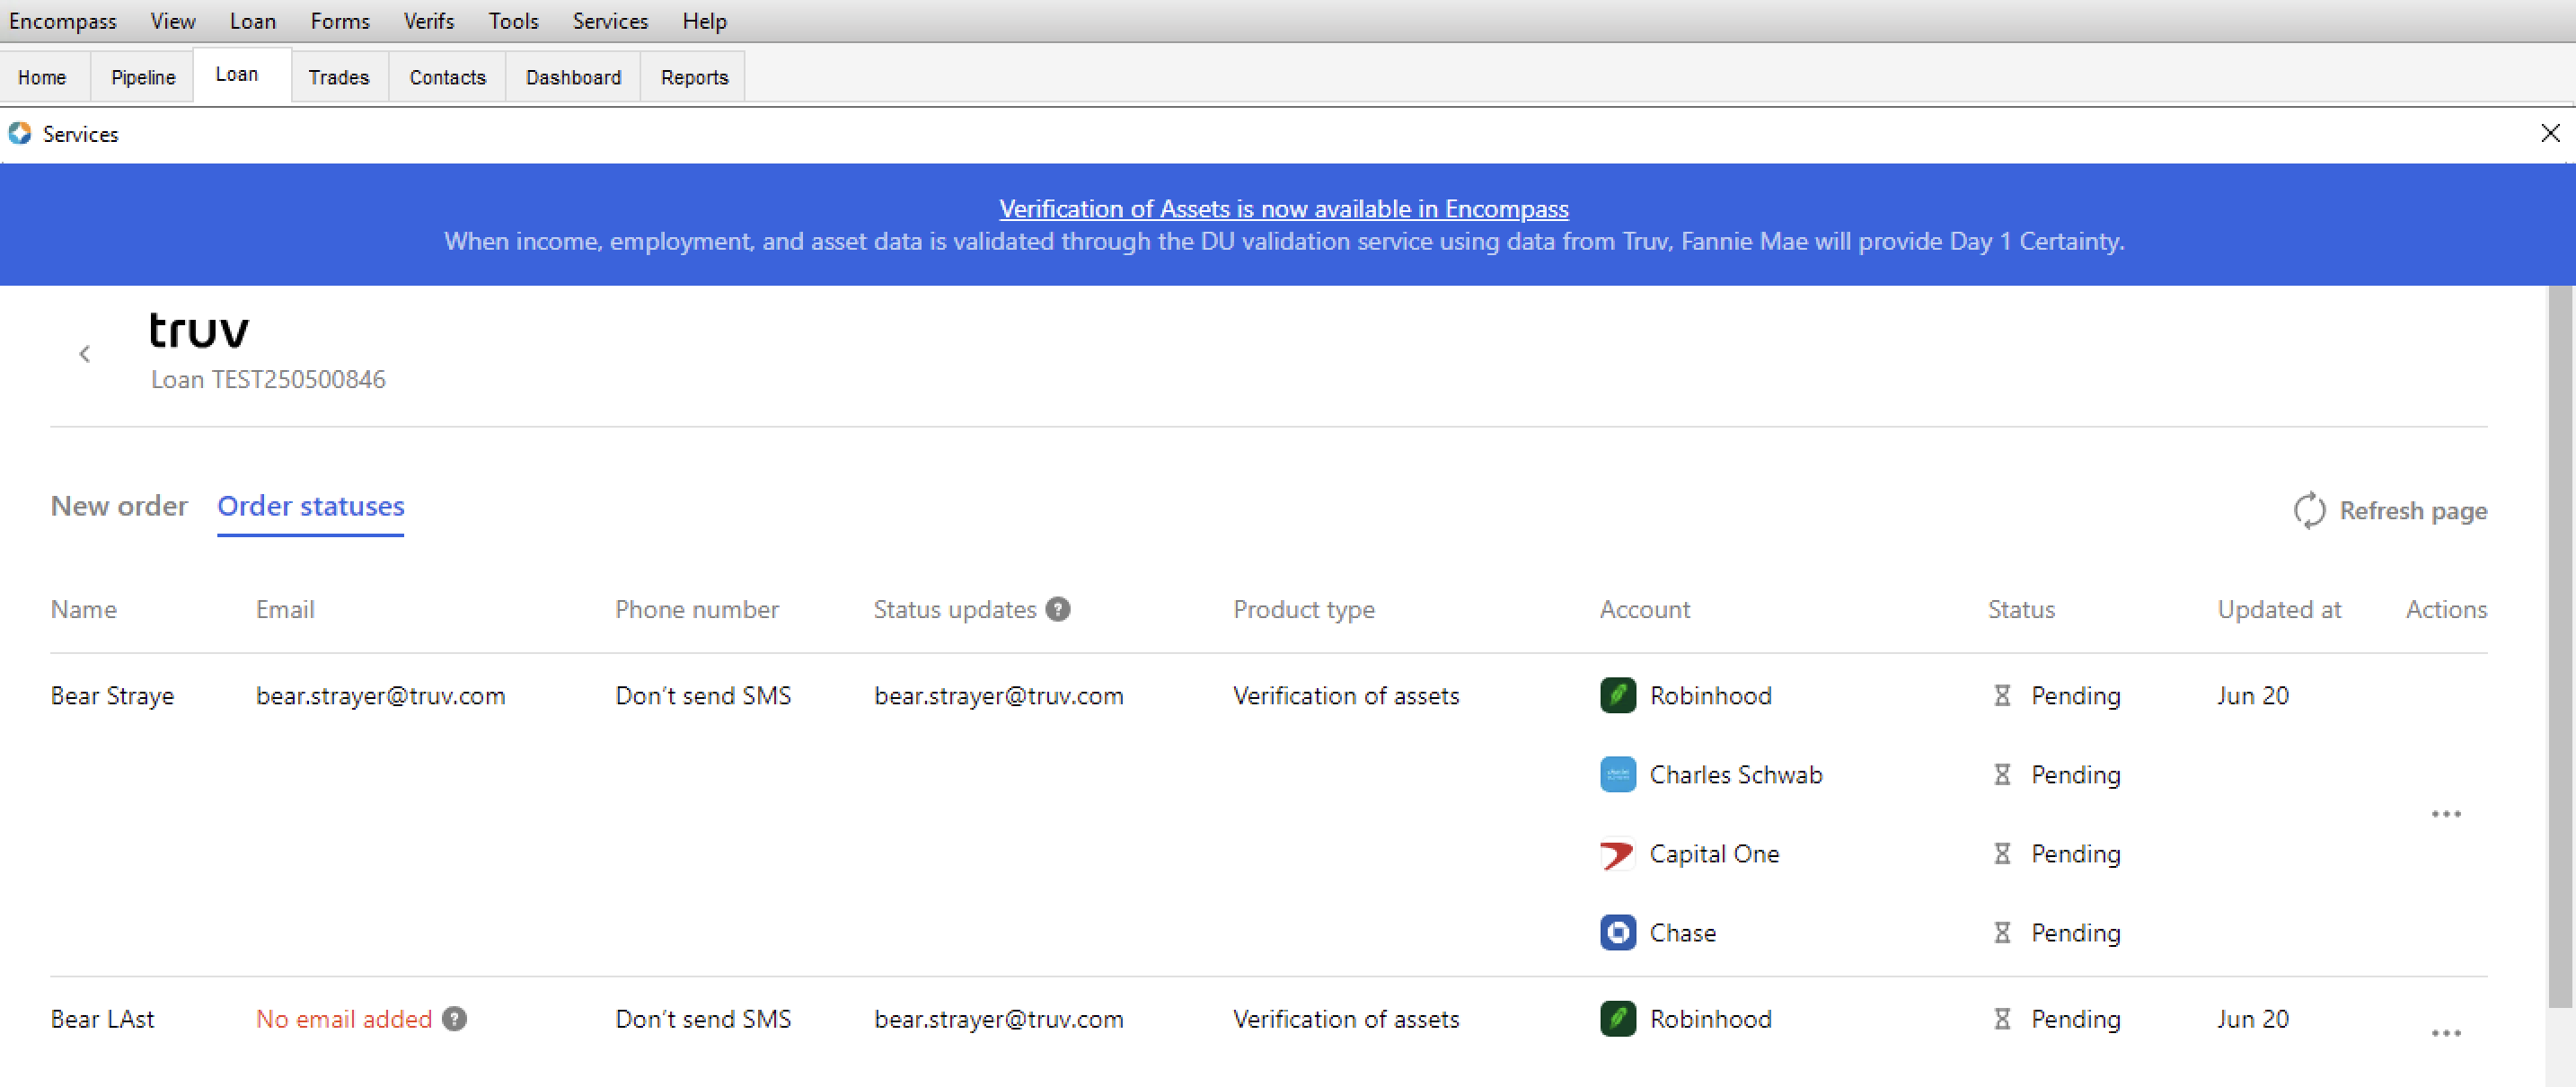
Once the order details are set, press the Create orders button to send the verification request.
After creating the order, you will be taken to the Order statuses tab where you can see the order status and additional details like the Timeline by clicking the order row.
- Truv recommends reaching out to the Borrowers to confirm they have received the request and address any questions or concerns.
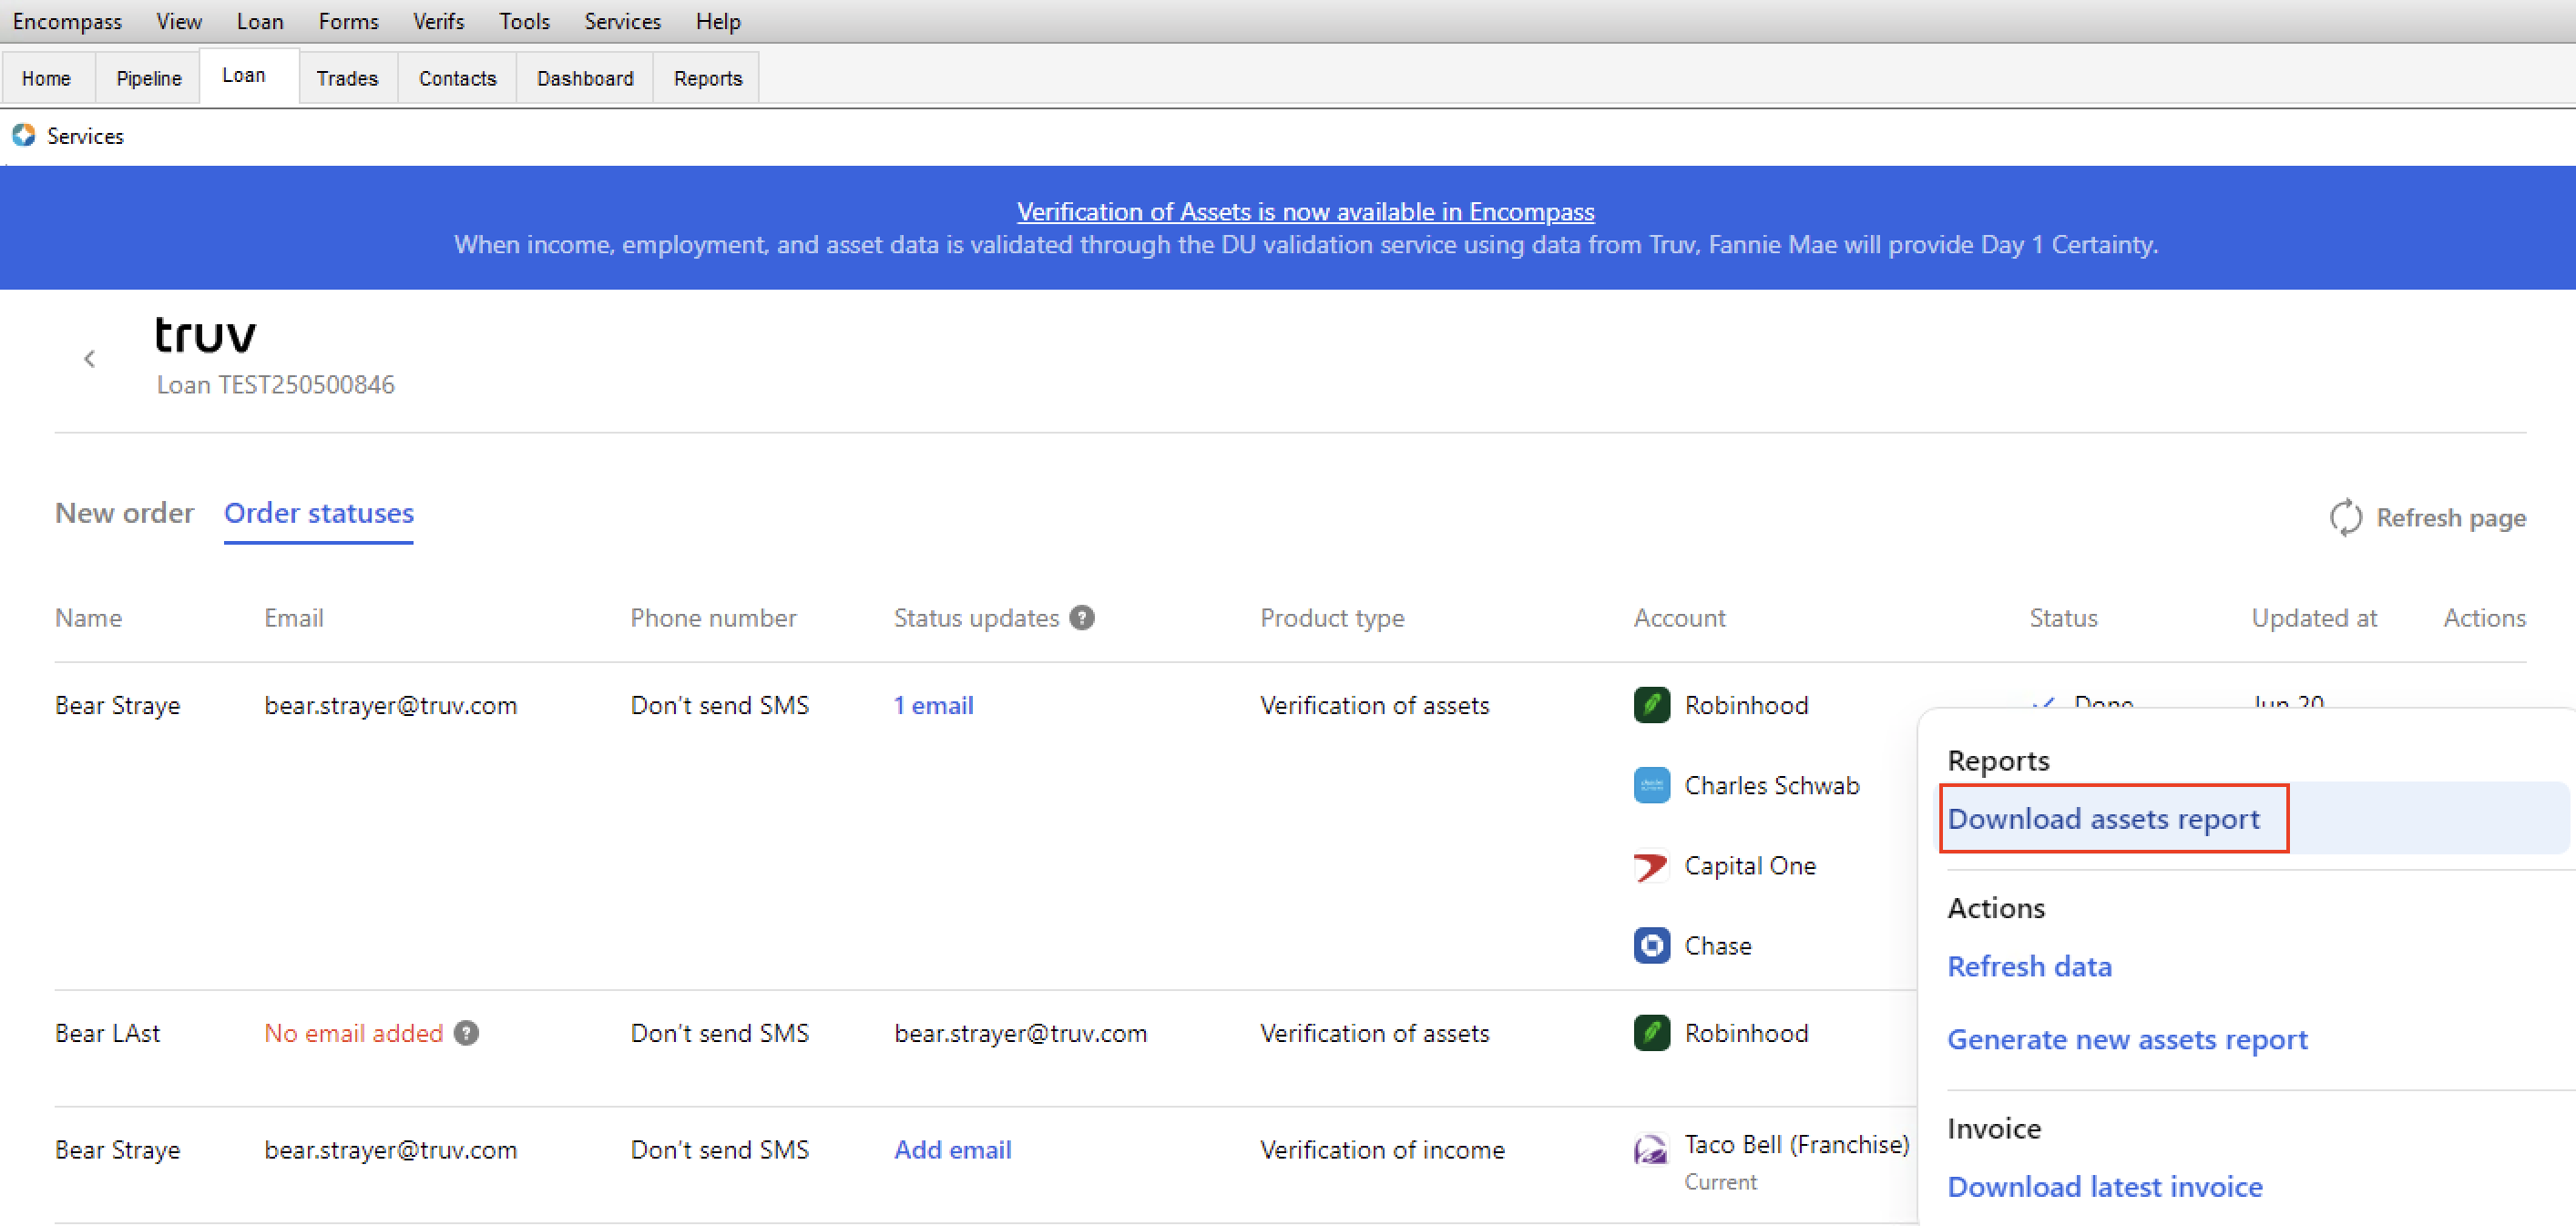
Step 5: Accessing the completed order
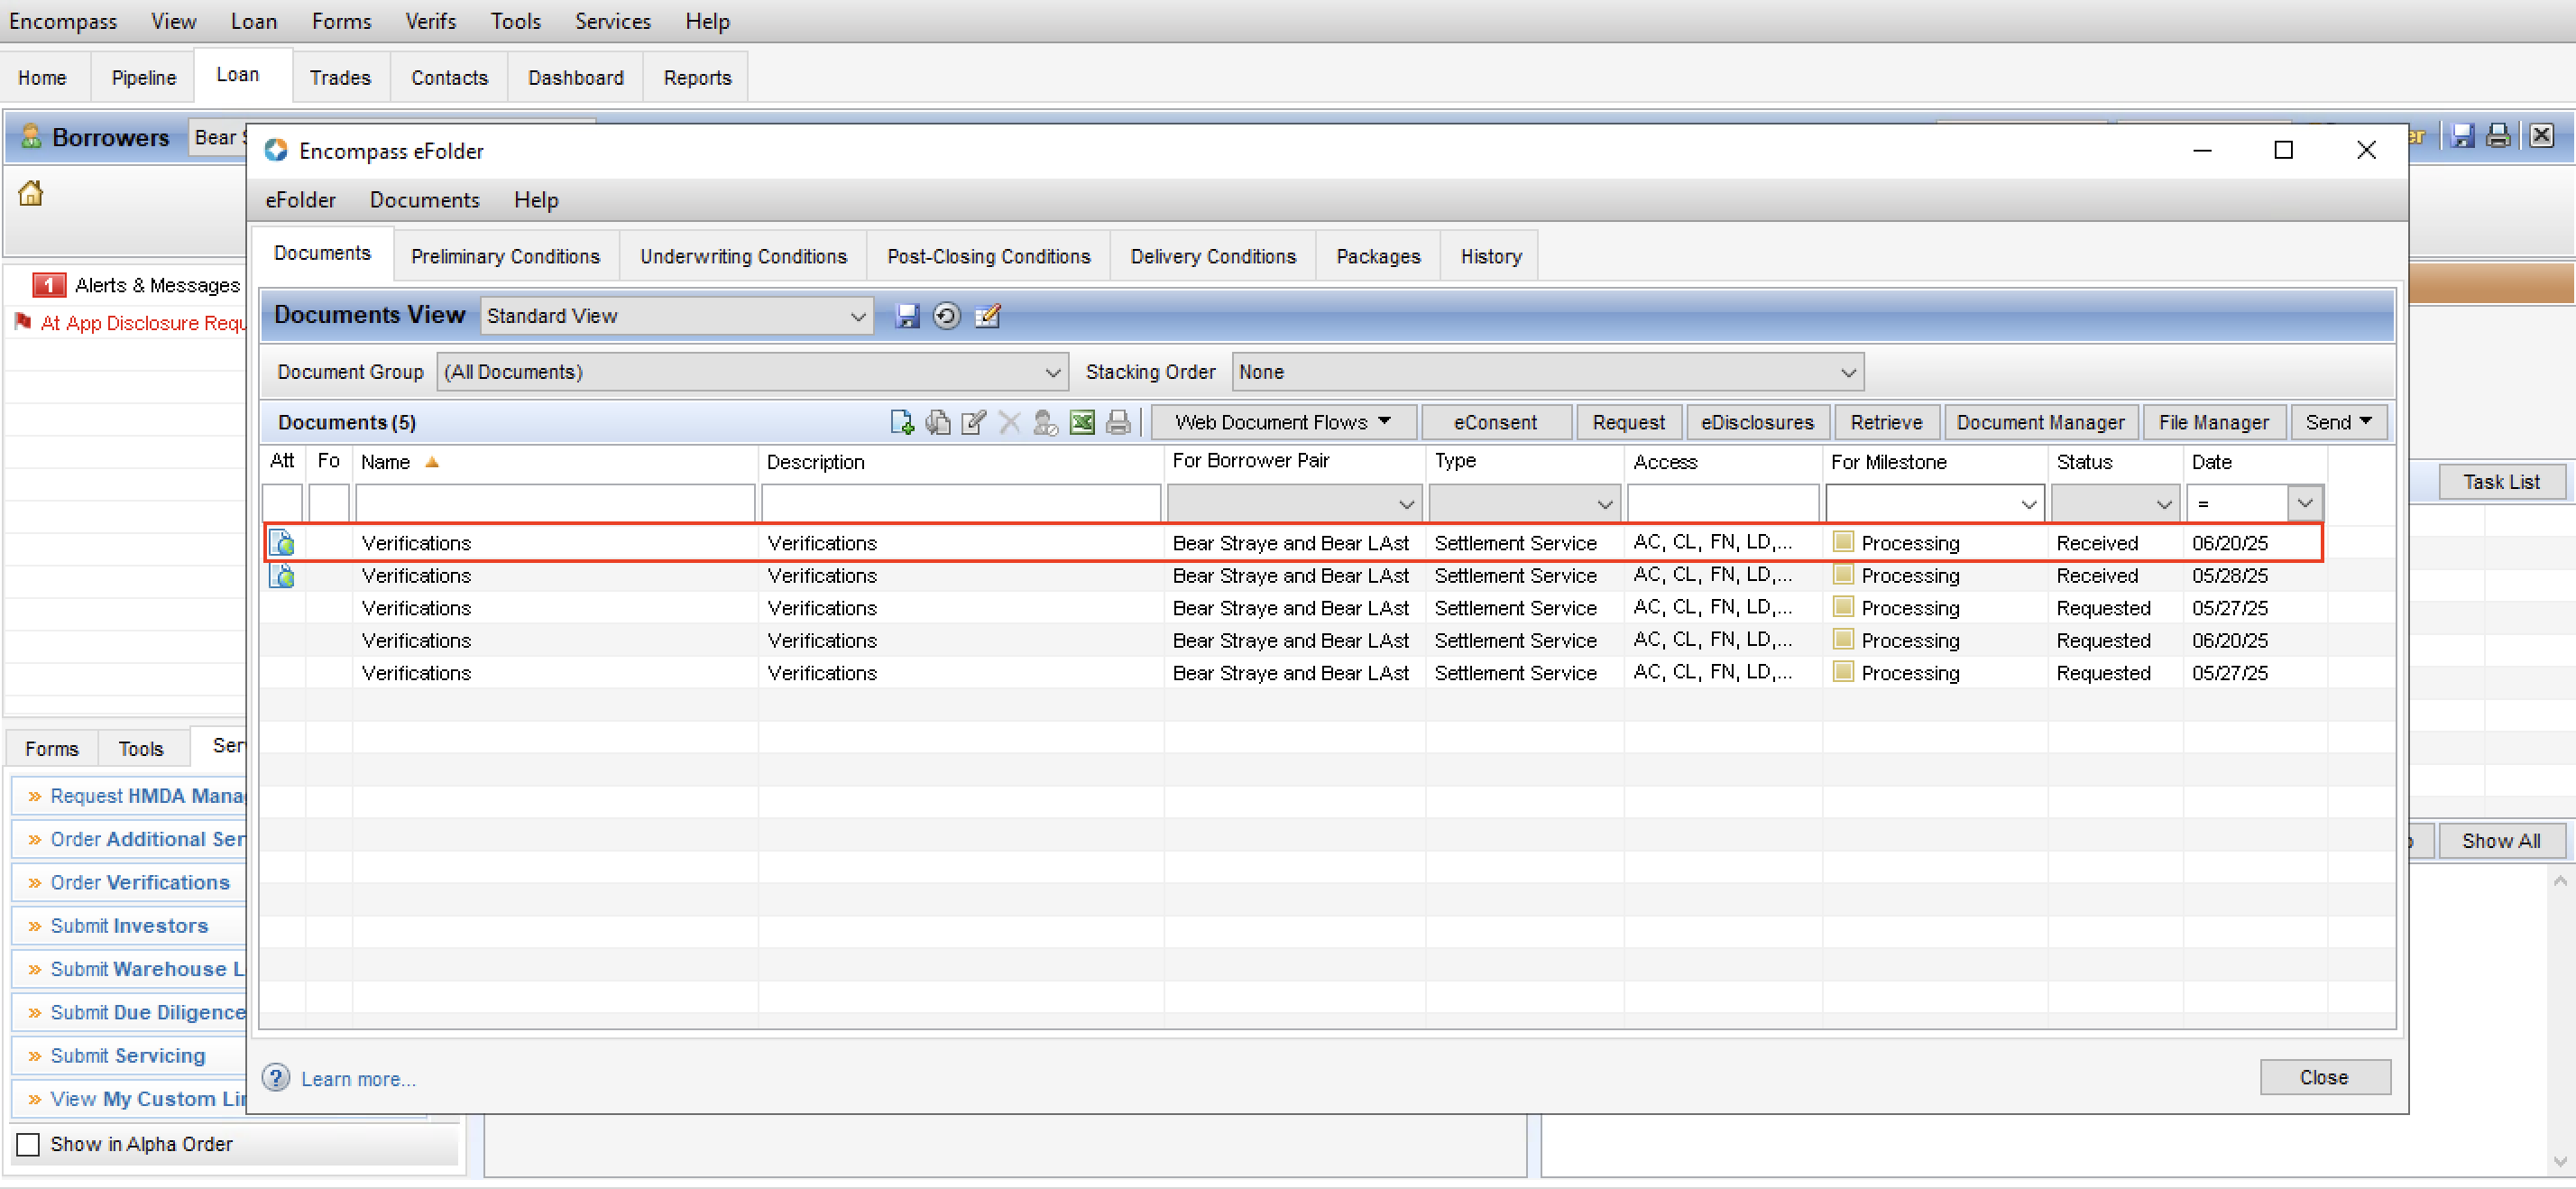
Once the order is complete, Truv will send a status update email to the emails entered in the Status updates column, summarizing what has been completed in the order. To access the report you can either:
- Open the eFolder, then find the Verifications folder (unless a custom folder mapping is enabled) to access the VOA report PDF.
- Or open the Truv Encompass app, navigate to the Order statuses tab. Click the ... for the completed order, and press the Download assets report button.
Step 6: Fannie Mae D1Certainty and Freddie Mac AIM Submissions
Truv automatically writes the Report ID from the VOA Report into the Fannie Mae and Freddie Mac generic service provider fields to automate submission for lenders.
- Fannie Mae
- Field ID: GSEVENDOR.X37 (Borrower), GSEVENDOR.X38 (Co-Borrower)
- Format: Truv:report_id
- Freddie Mac:
- Field ID: GSEVENDOR.X43 (Borrower), GSEVENDOR.X44 (Co-Borrower)
- Format: TRUV:report_id
If VOA report data is refreshed or new VOA reports are generated, the Report ID will be overwritten with the most recent report's ID. If the required Report ID is not entered into these fields, it can be manually copied and pasted from the Report PDF into the field. Note, the correct "Truv/TRUV" prefix must be used for each GSE to receive the data in DU and LPA
Re-verification or Refresh the data
As the loan nears closing, lenders can order a refresh of the Verification of Assets report data in Encompass to pull the most recent assets data.
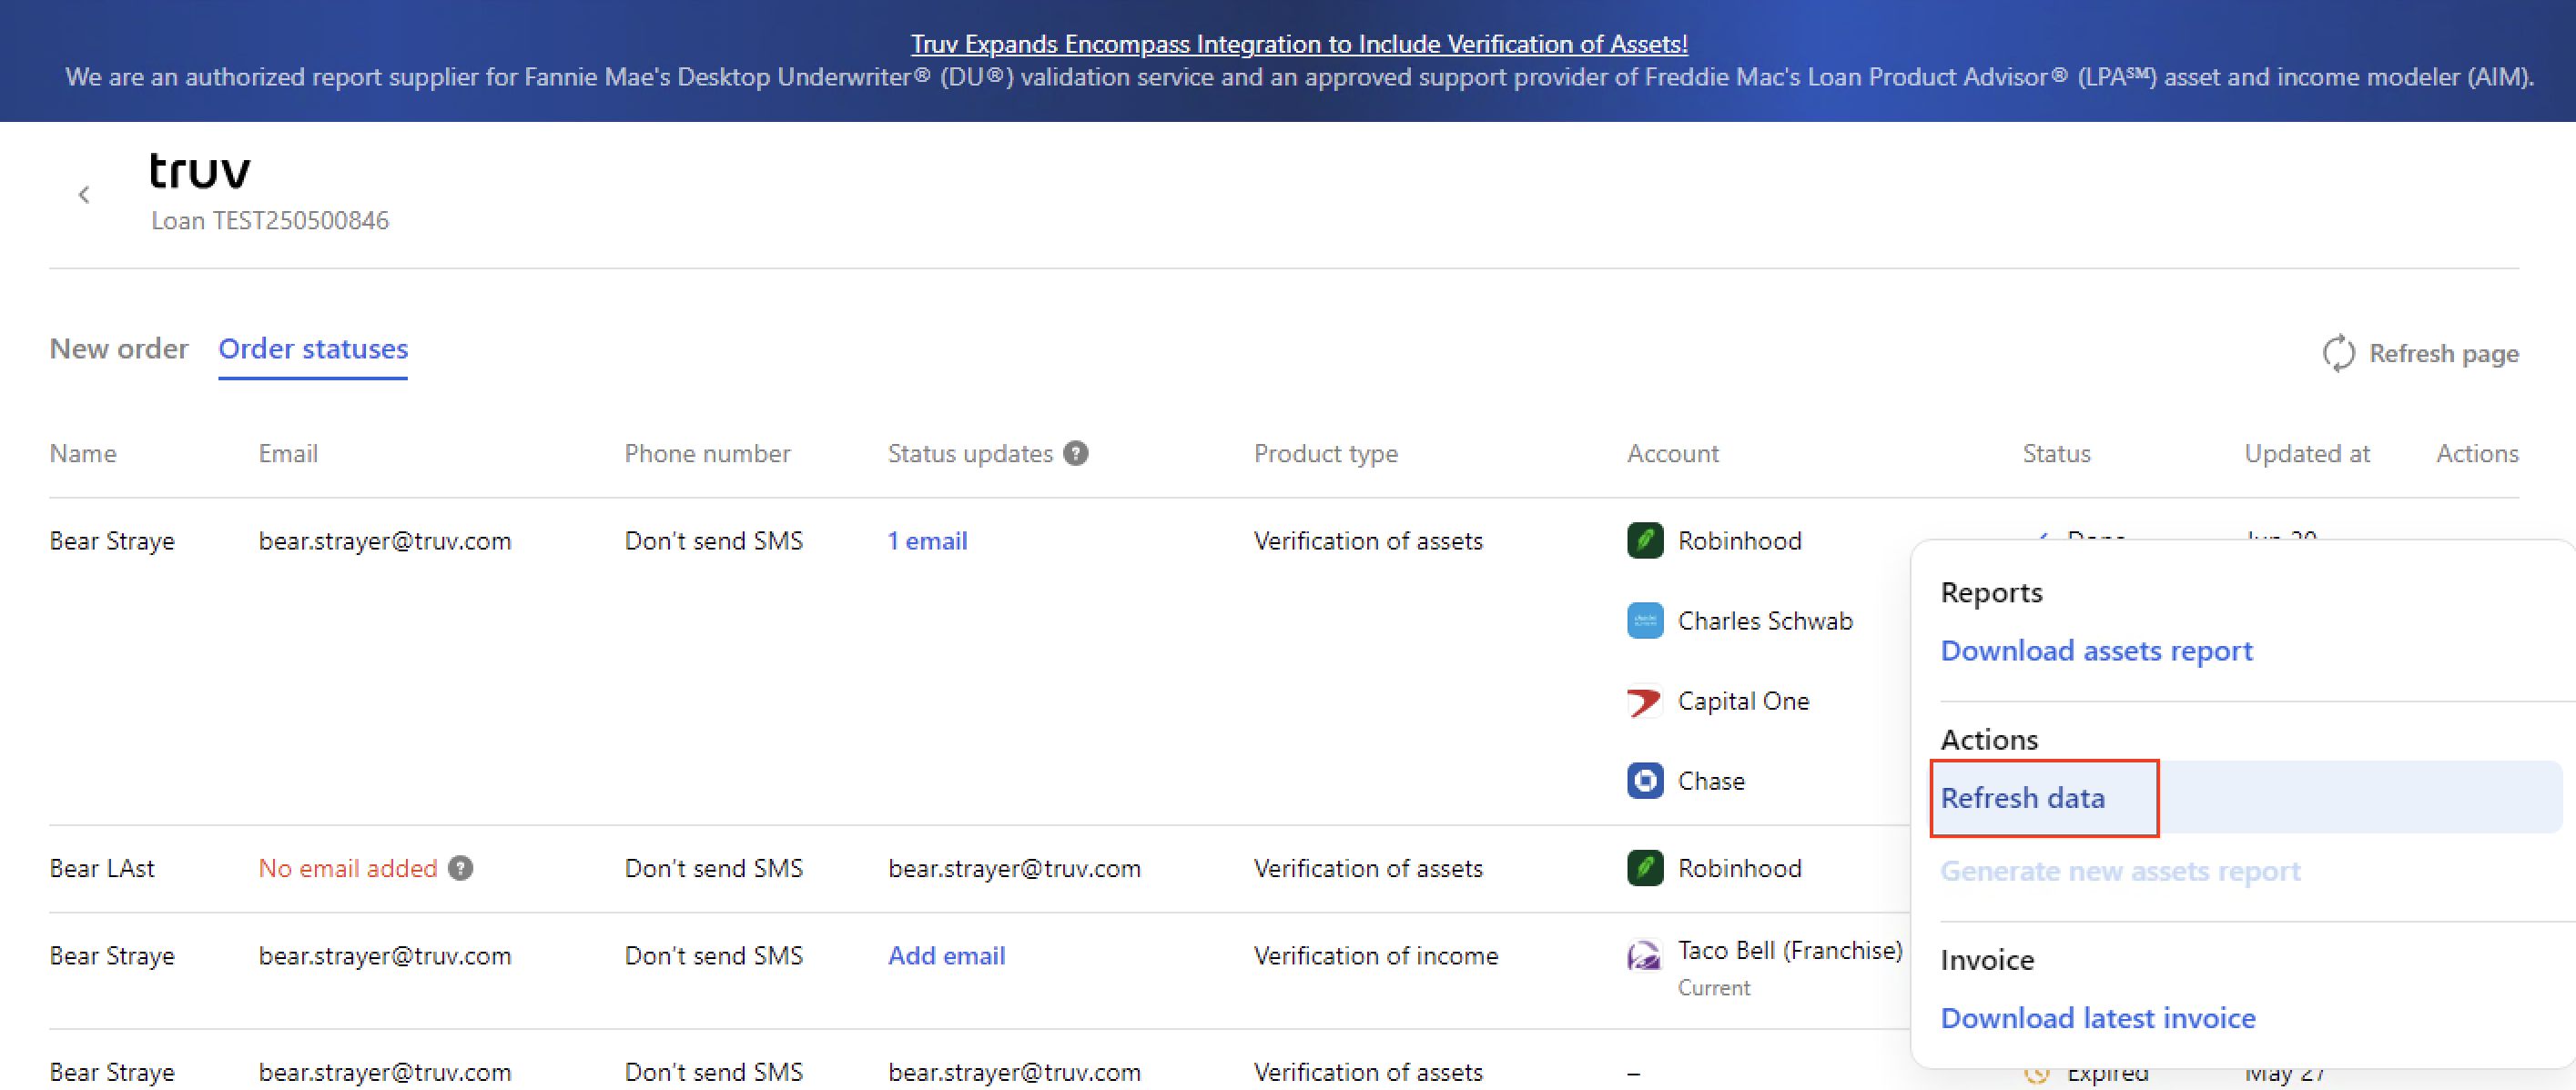
Step 1: Set the refresh order details
- Navigate back to the Truv App in Encompass and select the Order status tab. Find the order that needs to be refreshed, then click Refresh data button.
- Select the refresh order parameters in the pop-up to specify what is included in the
- Product type: Select which report type should be generated for the newly refreshed data
- Verification of assets (VOA) is a full assets report that includes Account summaries, Large deposits and Transactions.
- Deposit-based verification of employment (DVOE) is a simplified version of the assets report used for re-verifying employment via deposits. All balances, debits and transaction amounts are removed, ensuring only deposits
- Accounts: Select which financial institutions or account data should be included in the new report
- Days requested: Select the number of days of account history that will be included in the new report. 30 days is the default for refreshes, which can be edited in the pop-up.
- Product type: Select which report type should be generated for the newly refreshed data
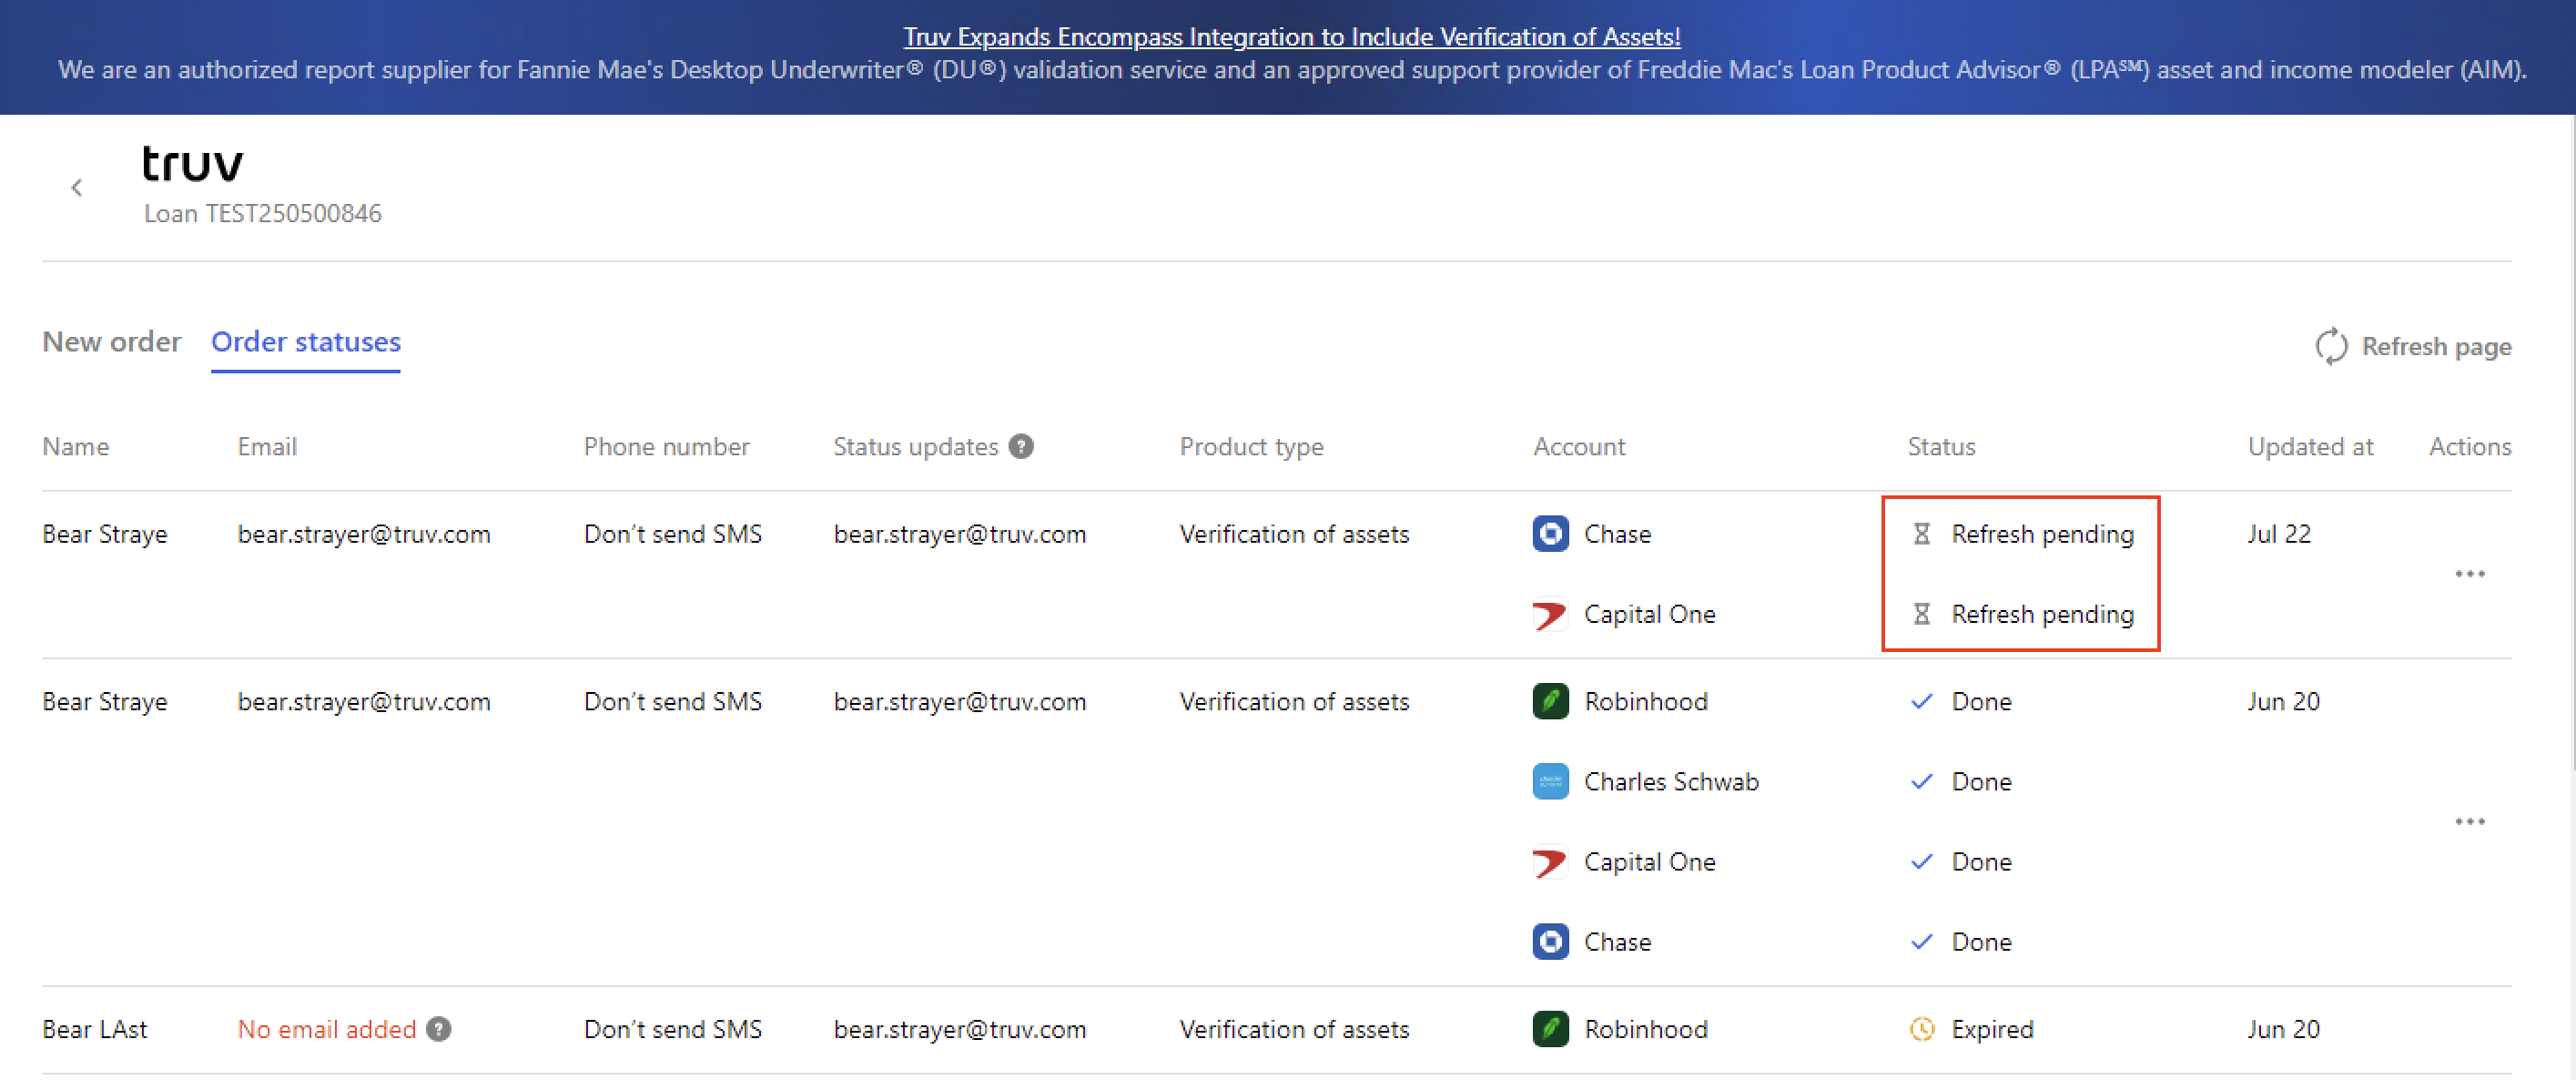
- A new order row will appear with Refresh pending status. Truv will attempt to refresh the data without any borrower action by using the existing provided credentials. If this refresh fails, a request to re-authenticate will be emailed to the borrower, similar to the new order workflow.
- Once the order is complete, the Status updates recipients will receive a status update email and the new report will be uploaded to the eFolder.
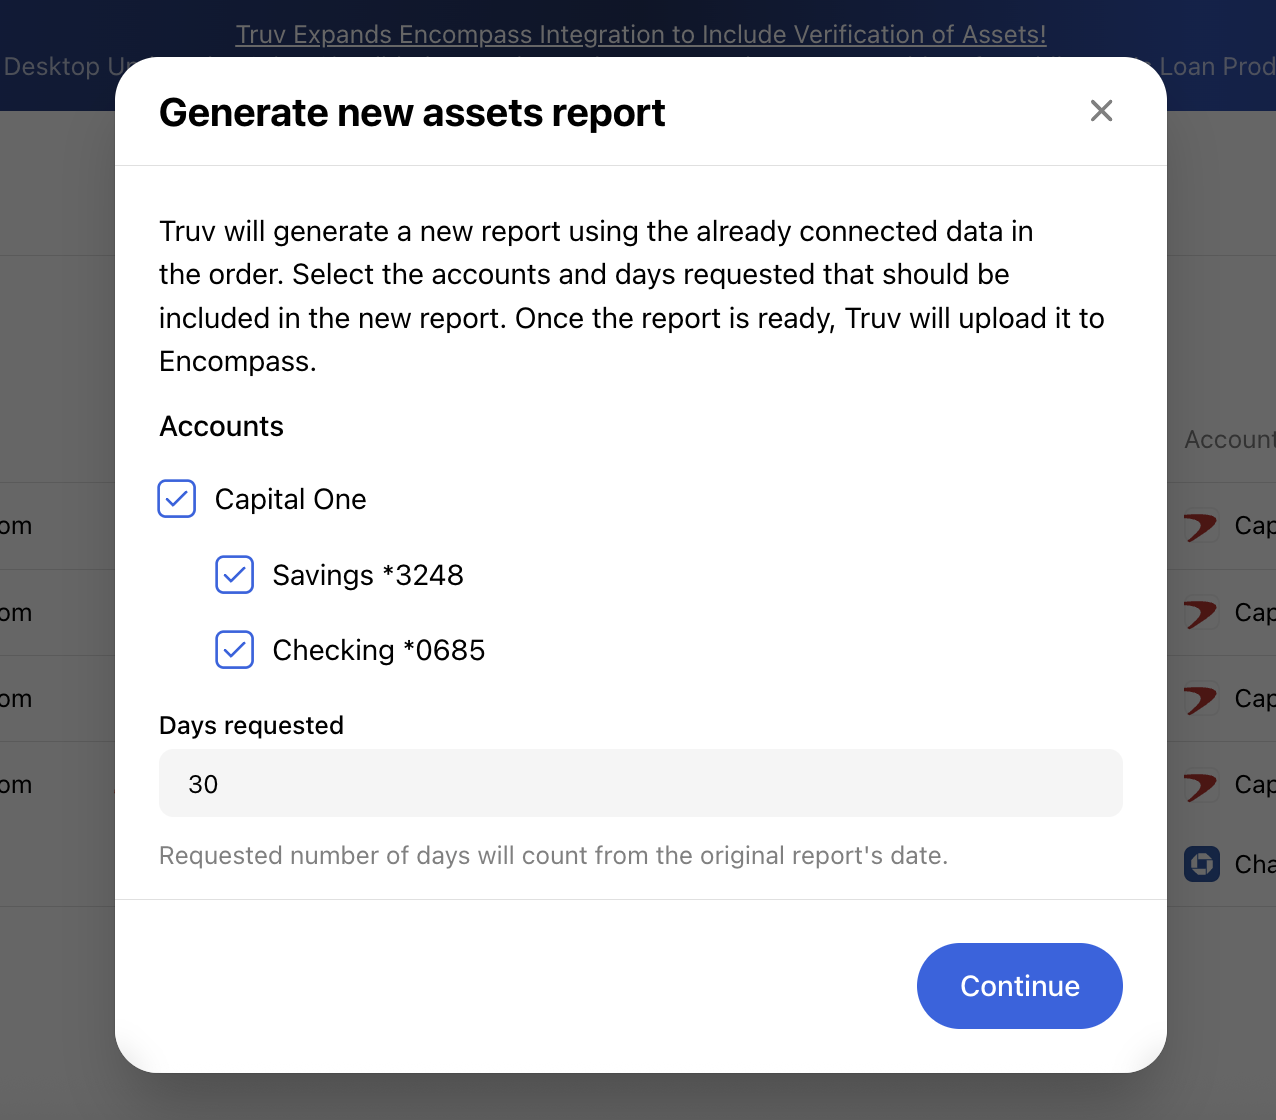
Generating a new report with existing data
To enable lenders to submit a report with only the required report data, Truv allows generating a new report using existing connected data. Users can edit the parameters and generate as many new reports as desired at no charge. In Encompass, generating a new report for an order is available for 30 days from the initial report.
- Navigate back to the Truv App in Encompass and select the Order status tab. Find the order that needs a new report.
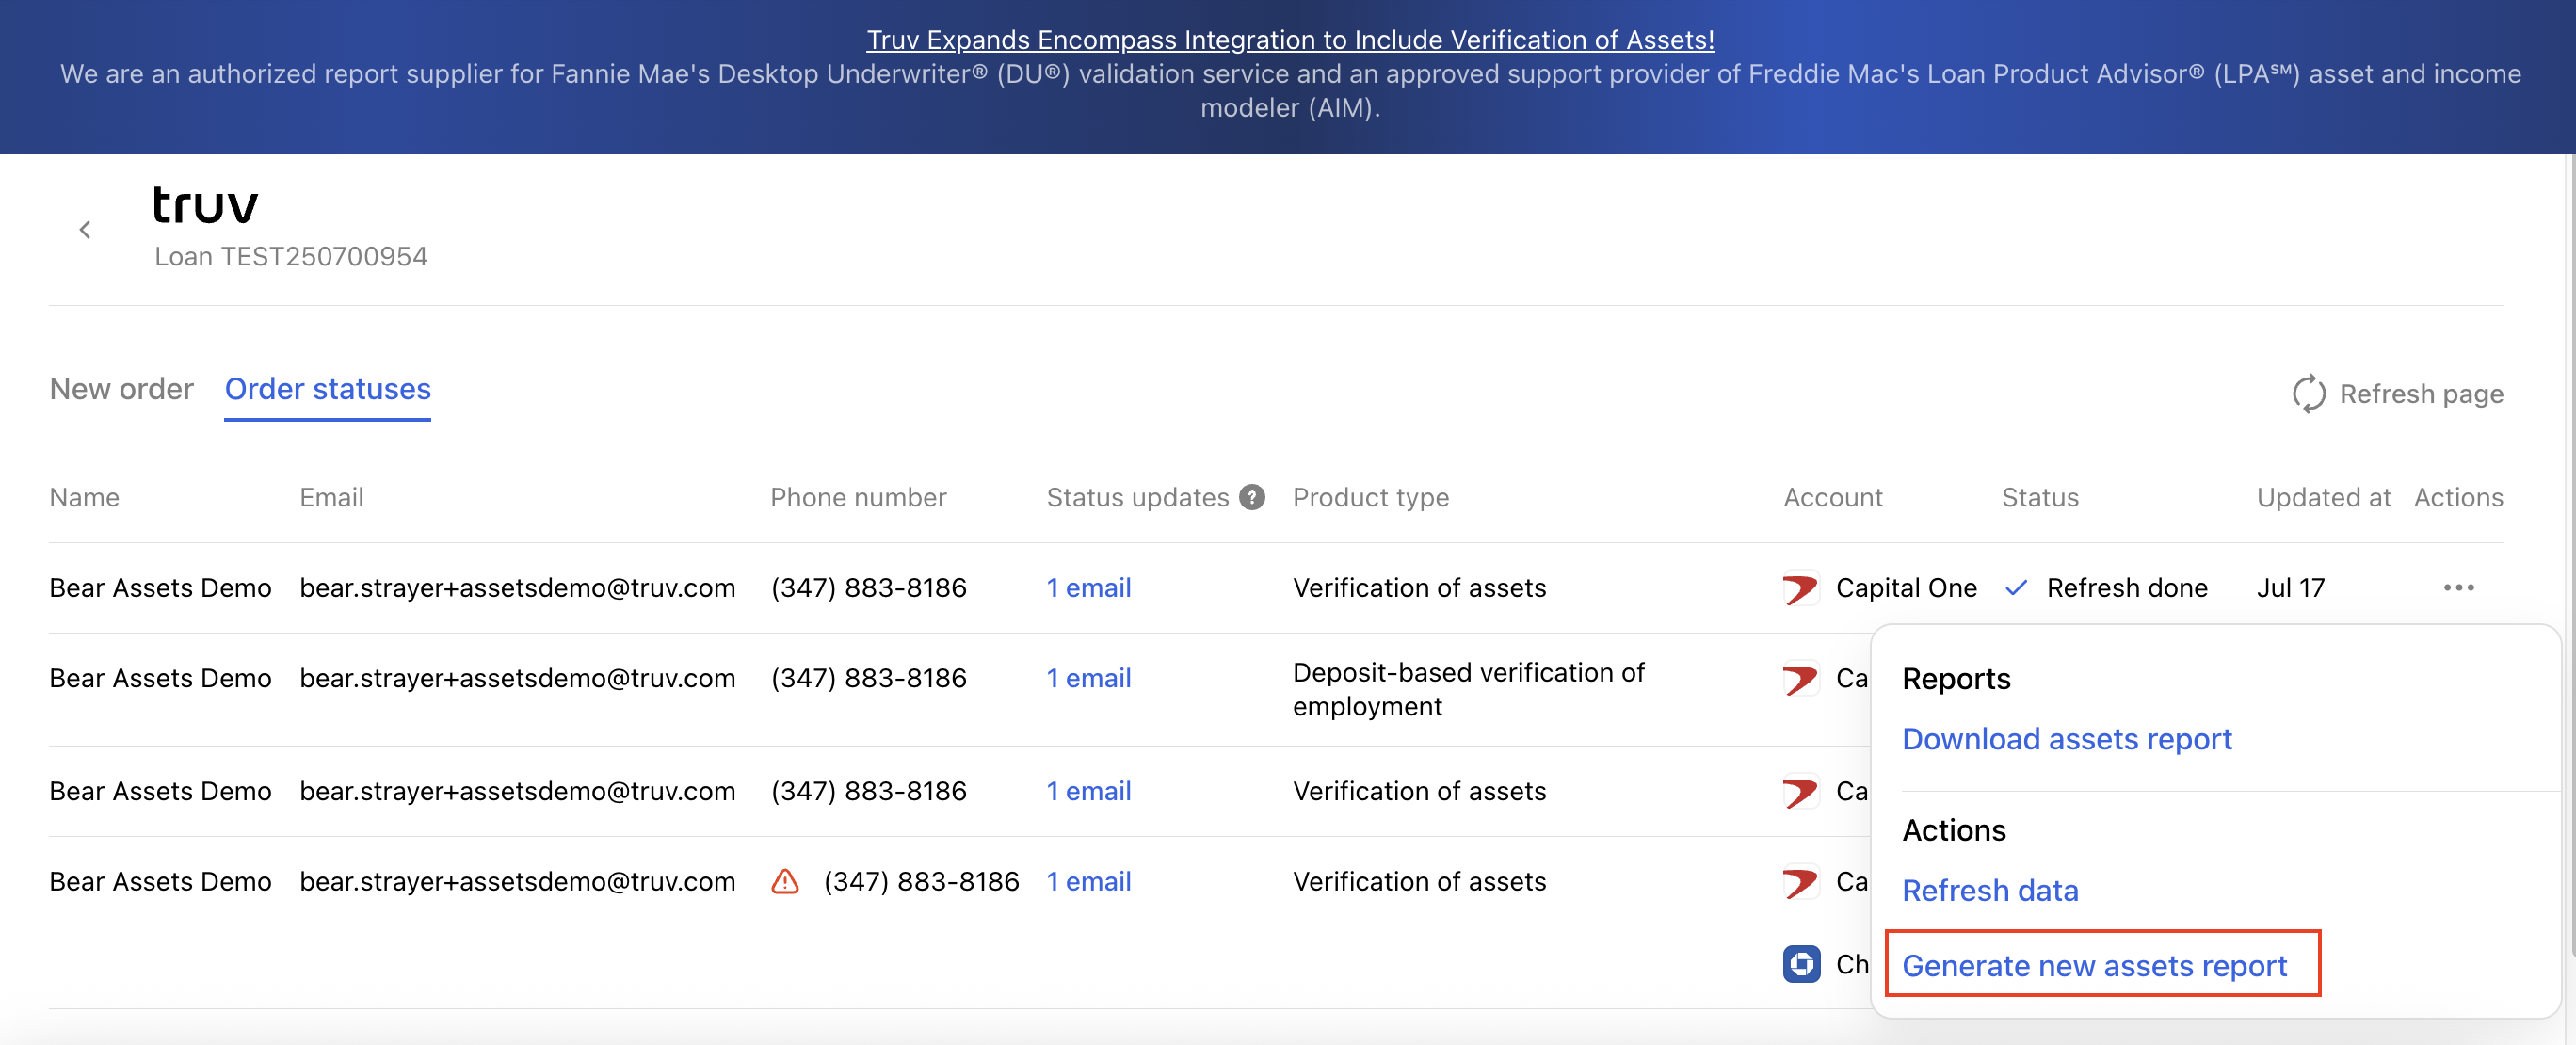
-
Select the report parameters in the generate new report pop-up
- Accounts: Select which financial institutions or account data should be included in the new report
- Days requested: Select the number of days of account history that will be included in the new report. 30 days is the default for refreshes, which can be edited in the pop-up. Note, the days requested will count from when the data was first pulled in the original report.
-
After pressing Continue, Encompass will show a Pending generation status in the order row and the Download report and Generate new report buttons will be disabled until the new report is uploaded.
-
Once complete, the newly generated report will be available for download in the Truv app and uploaded to the eFolder
Support
Need help? Email [email protected] or contact Truv through your dashboard.