Platform support
See SDK documentation for installation guides and code samples.
Token exchange flow
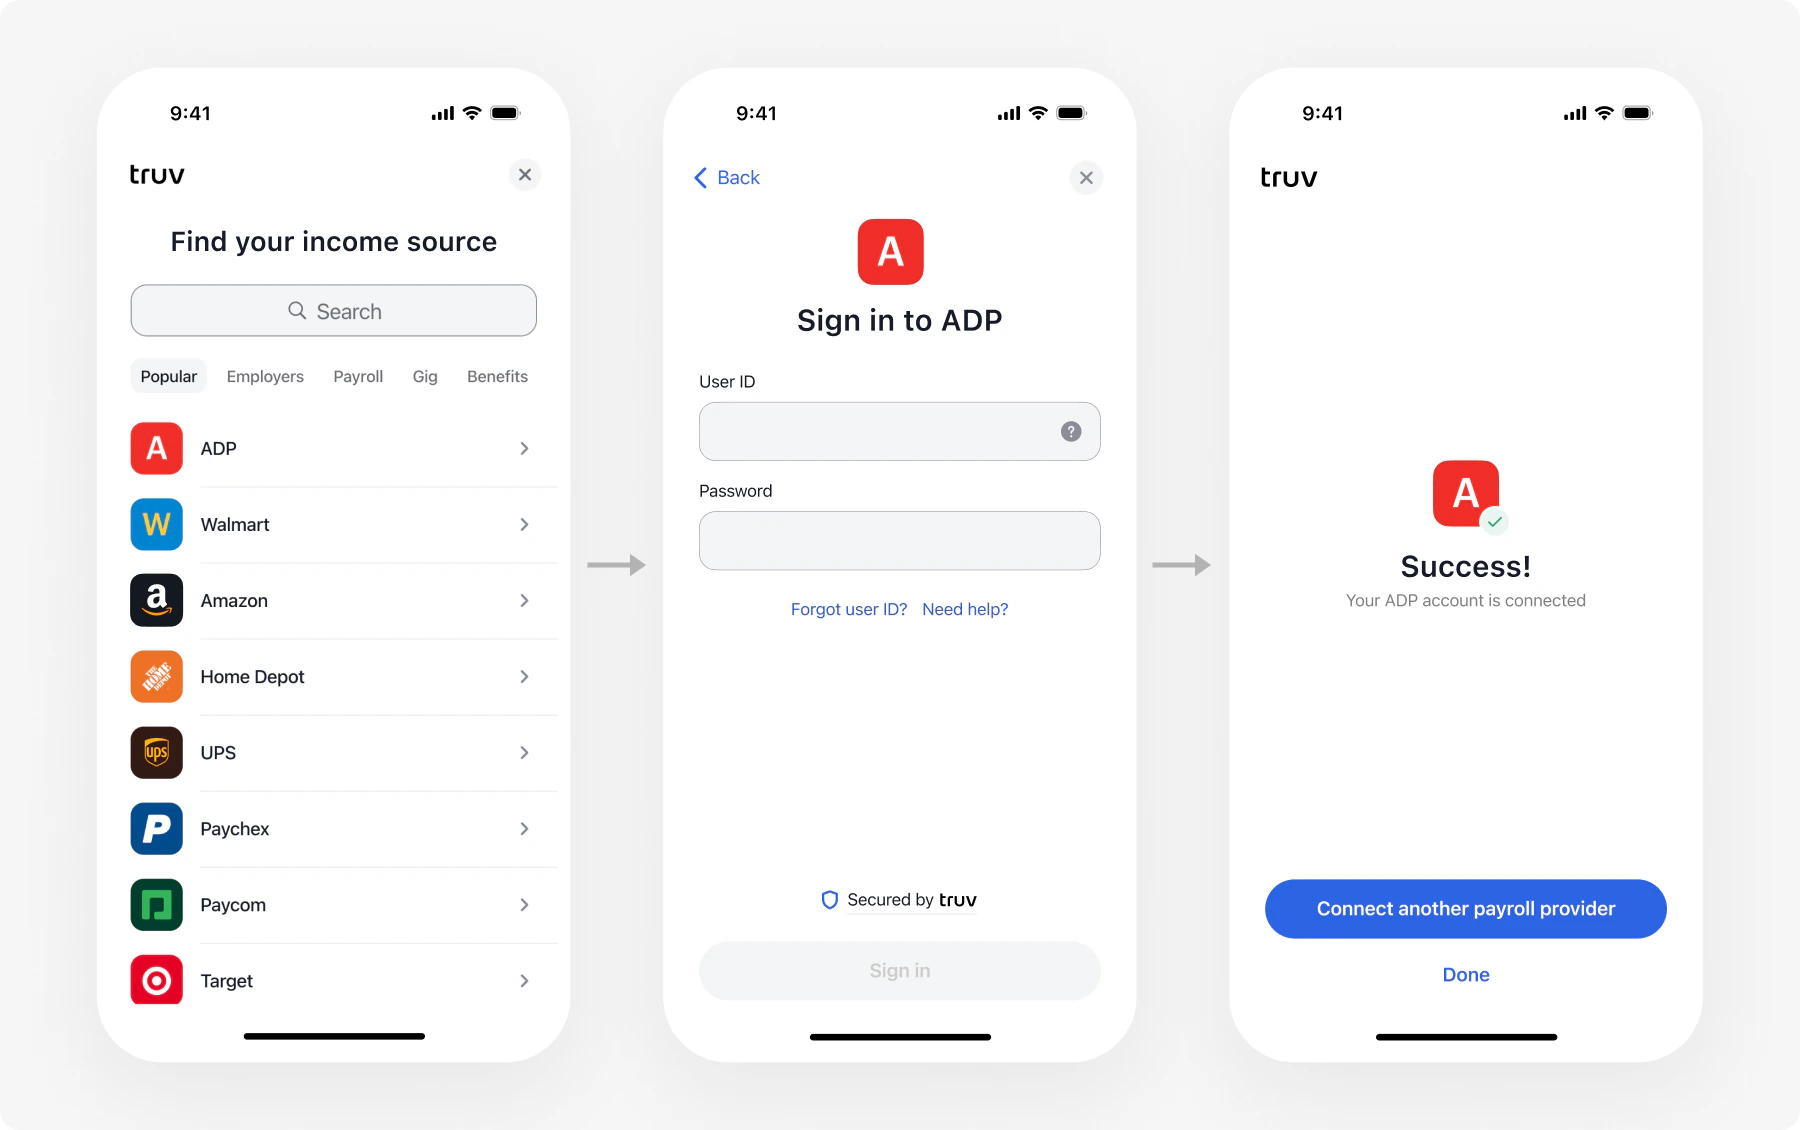
The Bridge Widget uses a token exchange pattern to keep credentials secure. Your backend handles all secret-bearing API calls; your frontend only touches thebridge_token and public_token.
Embed Bridge in your page
Add the Bridge script and initialize it with abridge_token from your backend.
Parameters
Set the position
Theposition parameter controls how Bridge renders on the page.
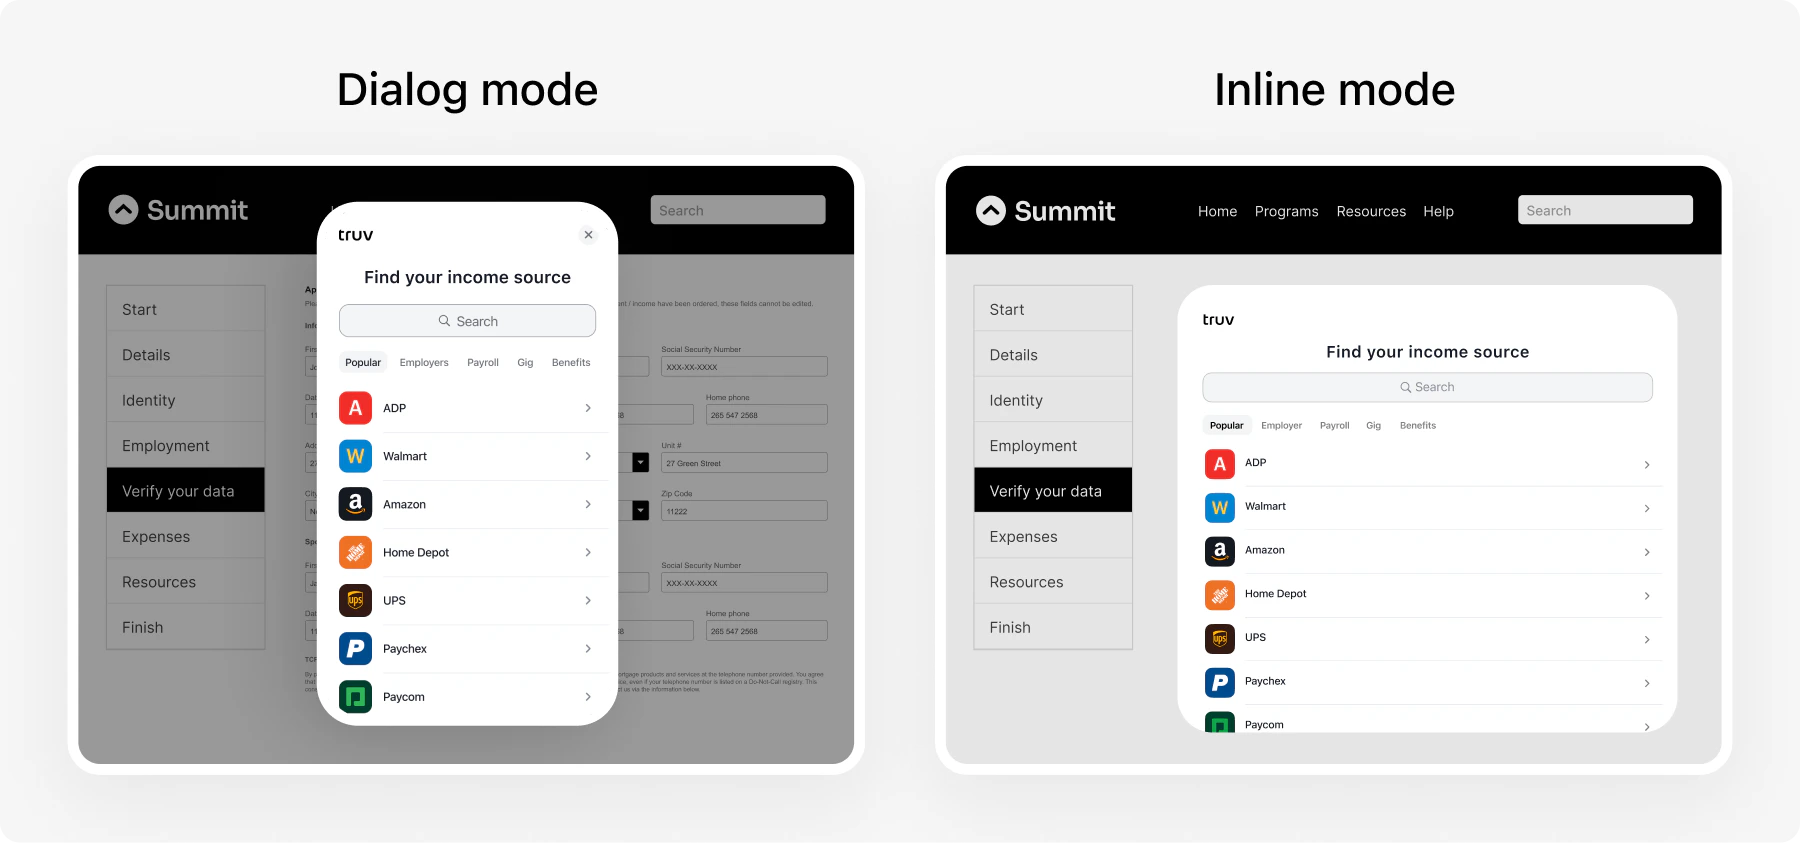
Dialog (default)
Bridge opens as a centered overlay and disables page scrolling.Inline
Bridge embeds inside an existing DOM element. Use this for seamless page layouts.Inline mode requires the container element to exist in the DOM before calling
TruvBridge.init.Close Bridge programmatically
Callbridge.close() to dismiss the widget from your code.
Close options
bridge.close() accepts an optional { mode } parameter that controls which frames are dismissed.
| isOrder | position.type | mode: ‘all’ | mode: ‘onlyModal’ |
|---|---|---|---|
false | dialog | Closes the modal Bridge | Closes the modal Bridge |
false | inline | Removes the inline Bridge from the page | No-op |
true | dialog | Closes the modal order page and the inner connection widget | Closes the modal order page and the inner connection widget |
true | inline | Removes the inline order page and closes the inner connection widget | Closes the inner connection widget; leaves the inline order page mounted |
mode: 'onlyModal' when your app needs to display its own modal (for example, a session-timeout dialog) on top of an inline Embedded Order. Without dismissing the inner connection widget first, your dialog would be unreachable behind it.
Callbacks
Errors surface through
onEvent with type=ERROR and an ErrorData payload — there is no separate onError callback. See Bridge events for the full list of event types and payloads.
Customize the widget
Customize Bridge appearance through Customization Templates in the Dashboard: company branding, search experience, success pages, document upload settings, and privacy agreements.Next steps
Embedded Orders
Multi-connection verification (VOIE, VOA, VOE)
Bridge Widget
Single-connection flow (DDS, PLL)
Consumer Credit Demo
Bundle income, deposit switch, and PLL in one Bridge session
SDKs
Platform-specific installation guides