
Enable Truv in ICE Encompass®
Setup Truv within ICE Encompass® (SmartClient/Desktop and web editions)
Overview
Truv helps loan officers and processors submit income and employment verification requests on behalf of borrowers. Now with Encompass® integrations, customers retrieve and refresh aggregate reports and store them in the Encompass® eFolder during the mortgage loan origination process.
One time setup guide
The steps below cover each part of setting Truv up with Encompass® using administrator privileges.
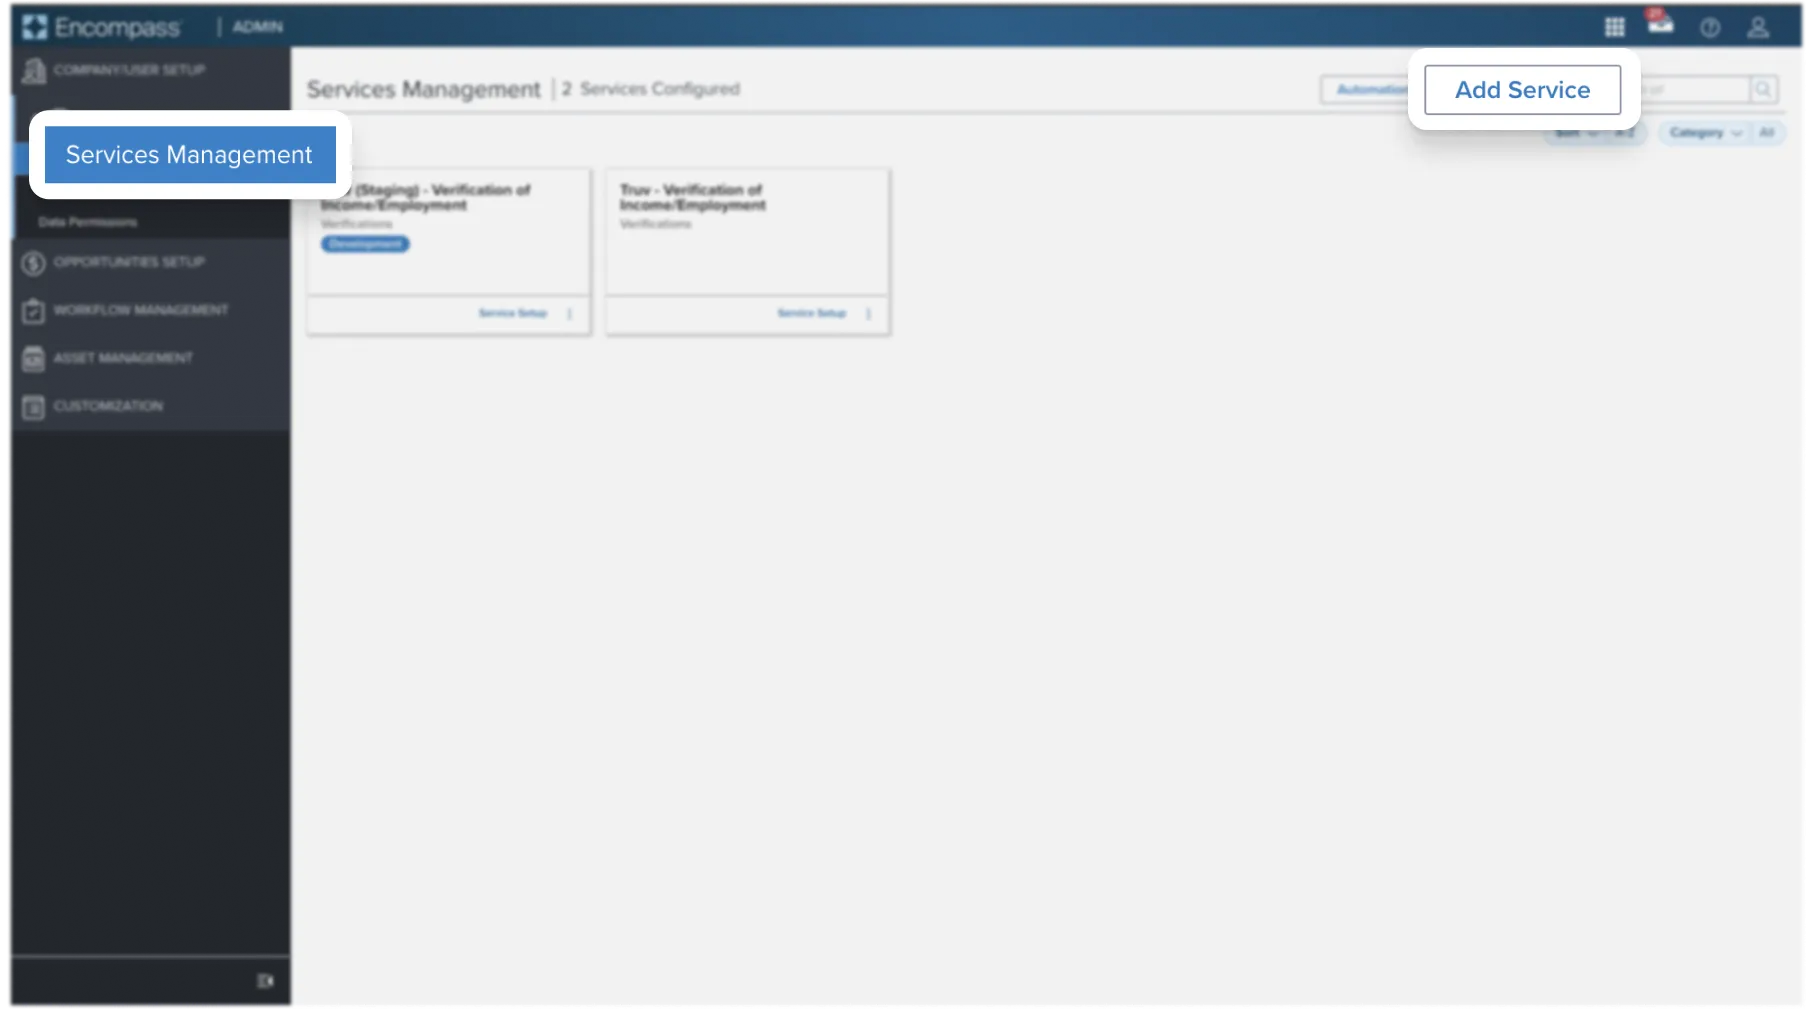
Step 1 : Add Truv as a Service
Log into Encompass® as an administrator using Encompass® Web. Navigate to the Admin tab at the top of the screen, select Services on the left navigation. Select Services Management and then Add Service on the right.
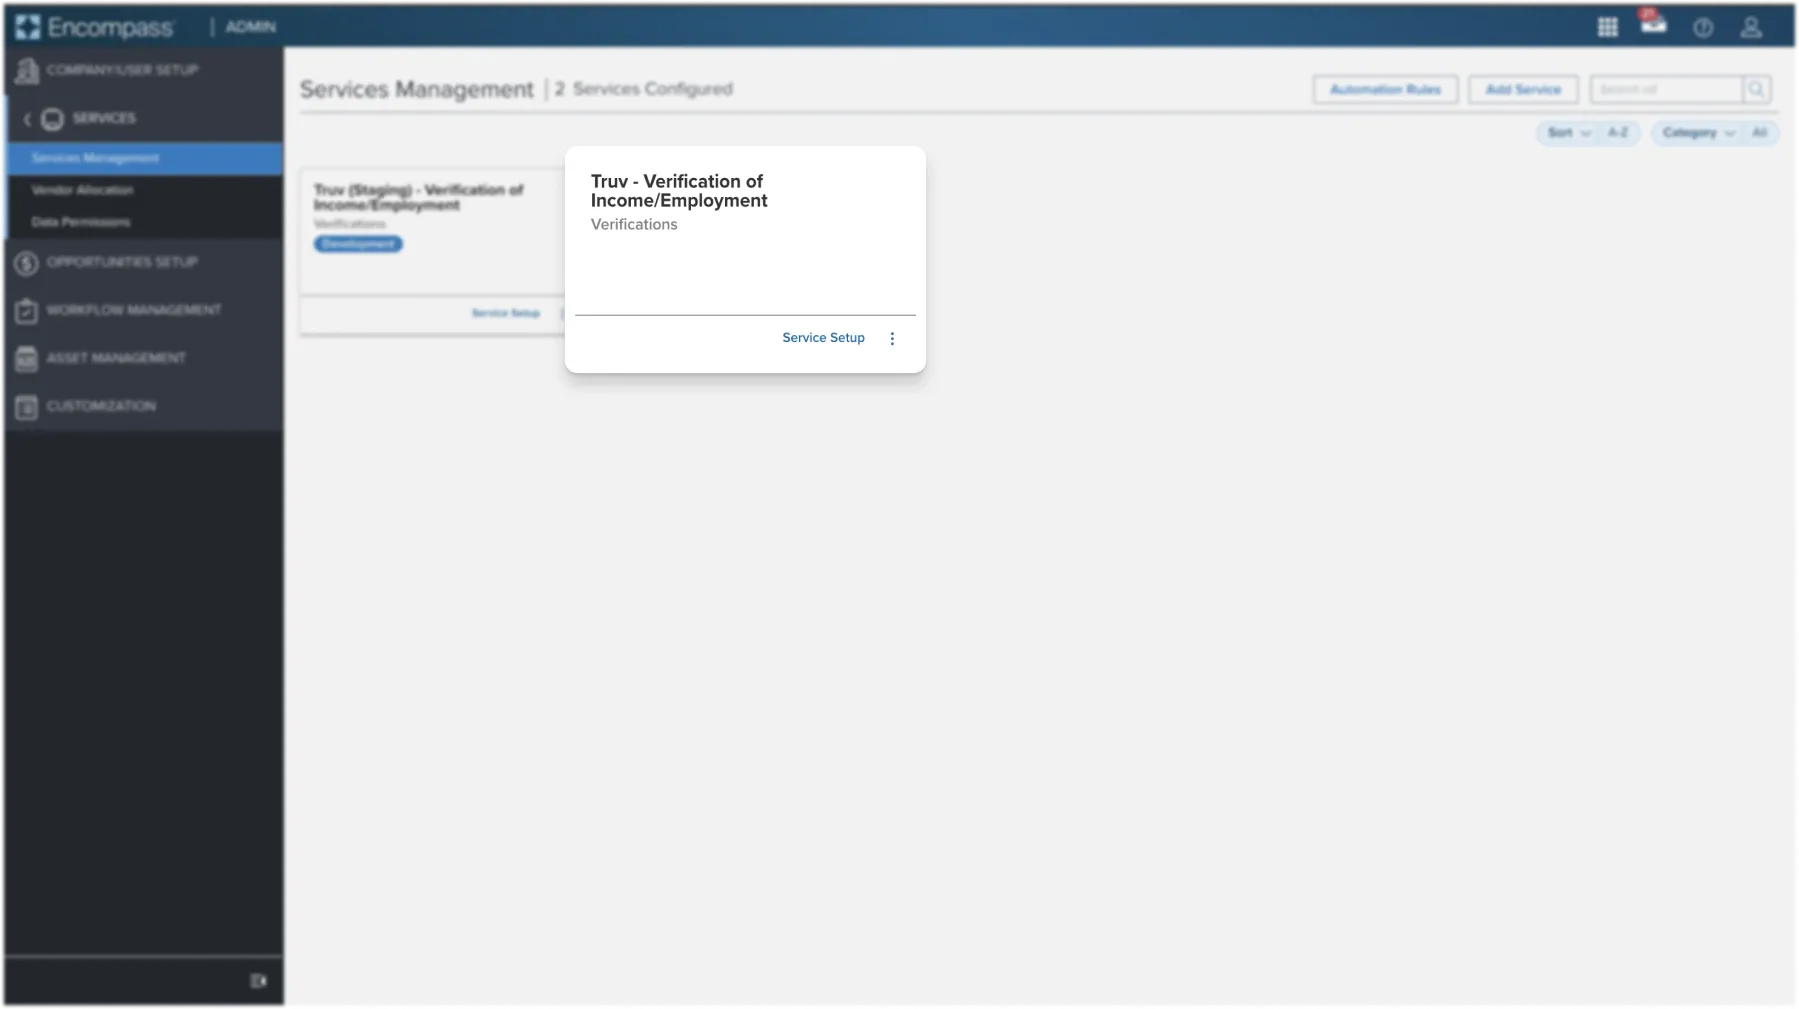
Step 2: Select Truv - Verification of Assets/Income/Employment as a Service within Encompass®
- Select Verifications in the Category dropdown on the right.
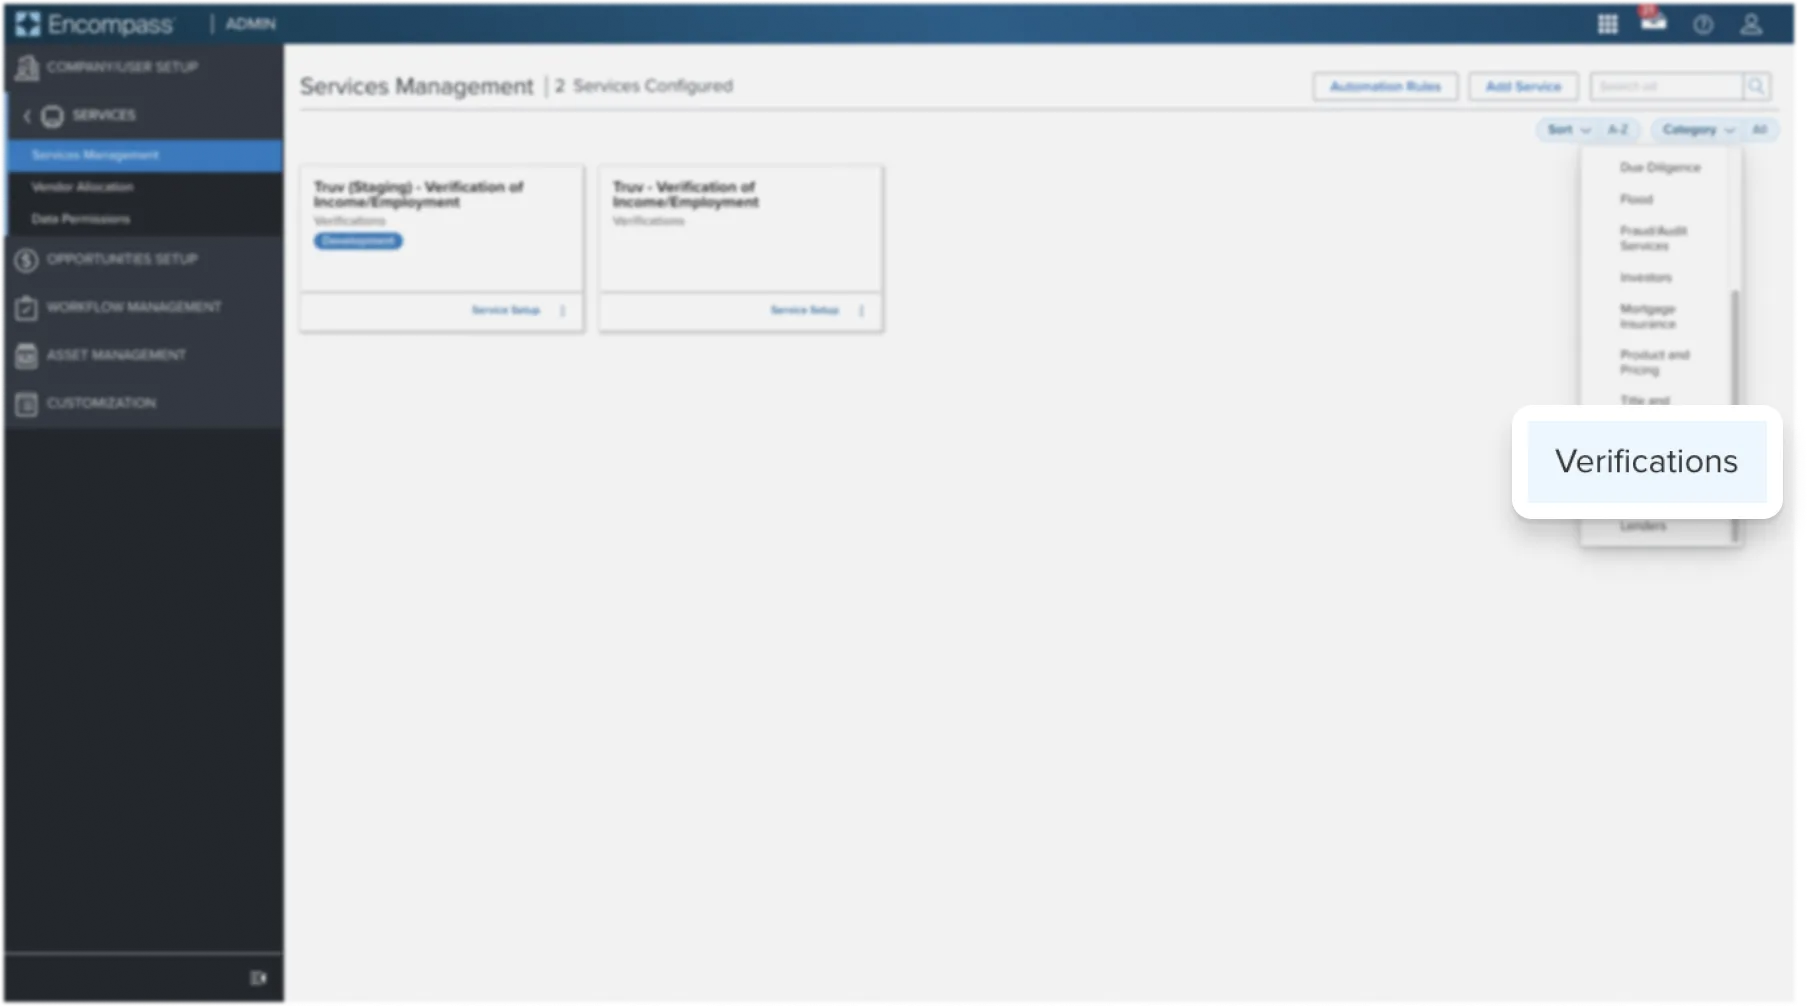
- Select the Truv tile for your integration. Select Manual for triggering Truv verifications manually.
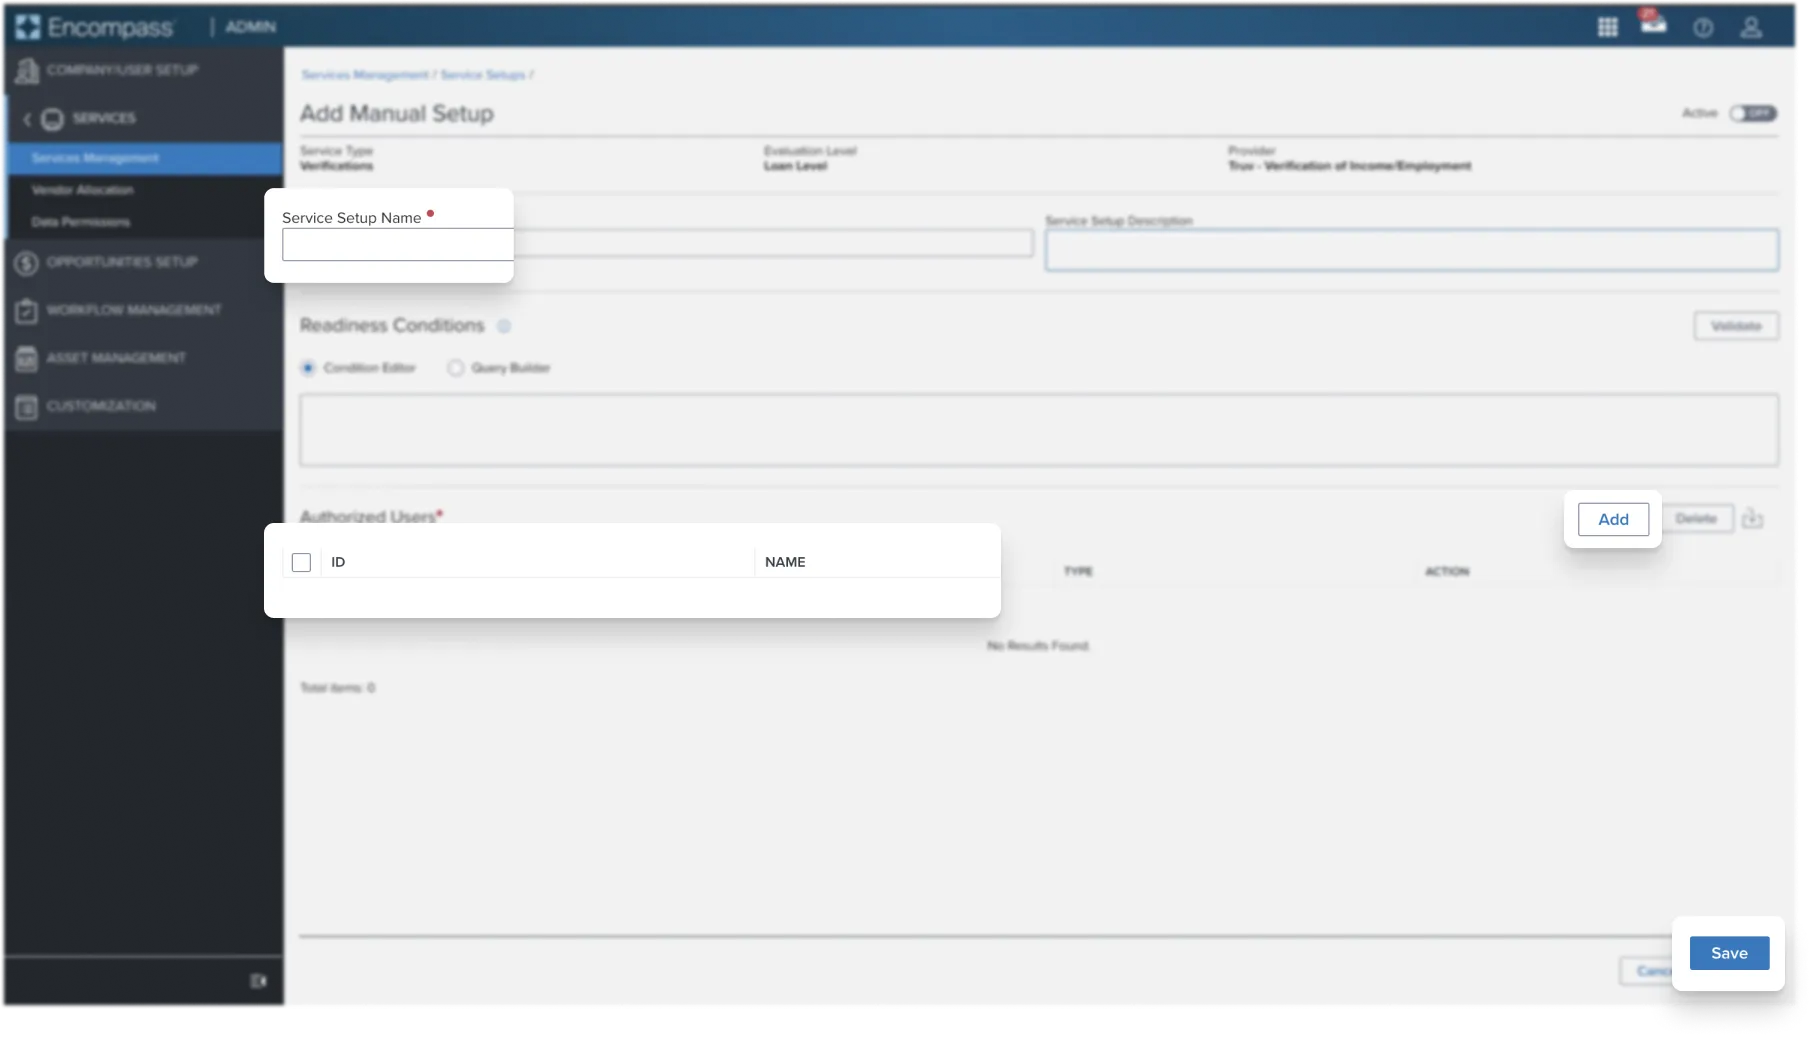
Step 3: User setup
On the Add Manual Setup page, complete the Service Setup Name field. Add any Authorized Users to the configuration in the section below. Select Save to continue.
Step 4: Copy Credentials from Truv Dashboard
Visit Truv’s API Dashboard and select API Keys. Copy the credential values from your environment using the Copy icon.
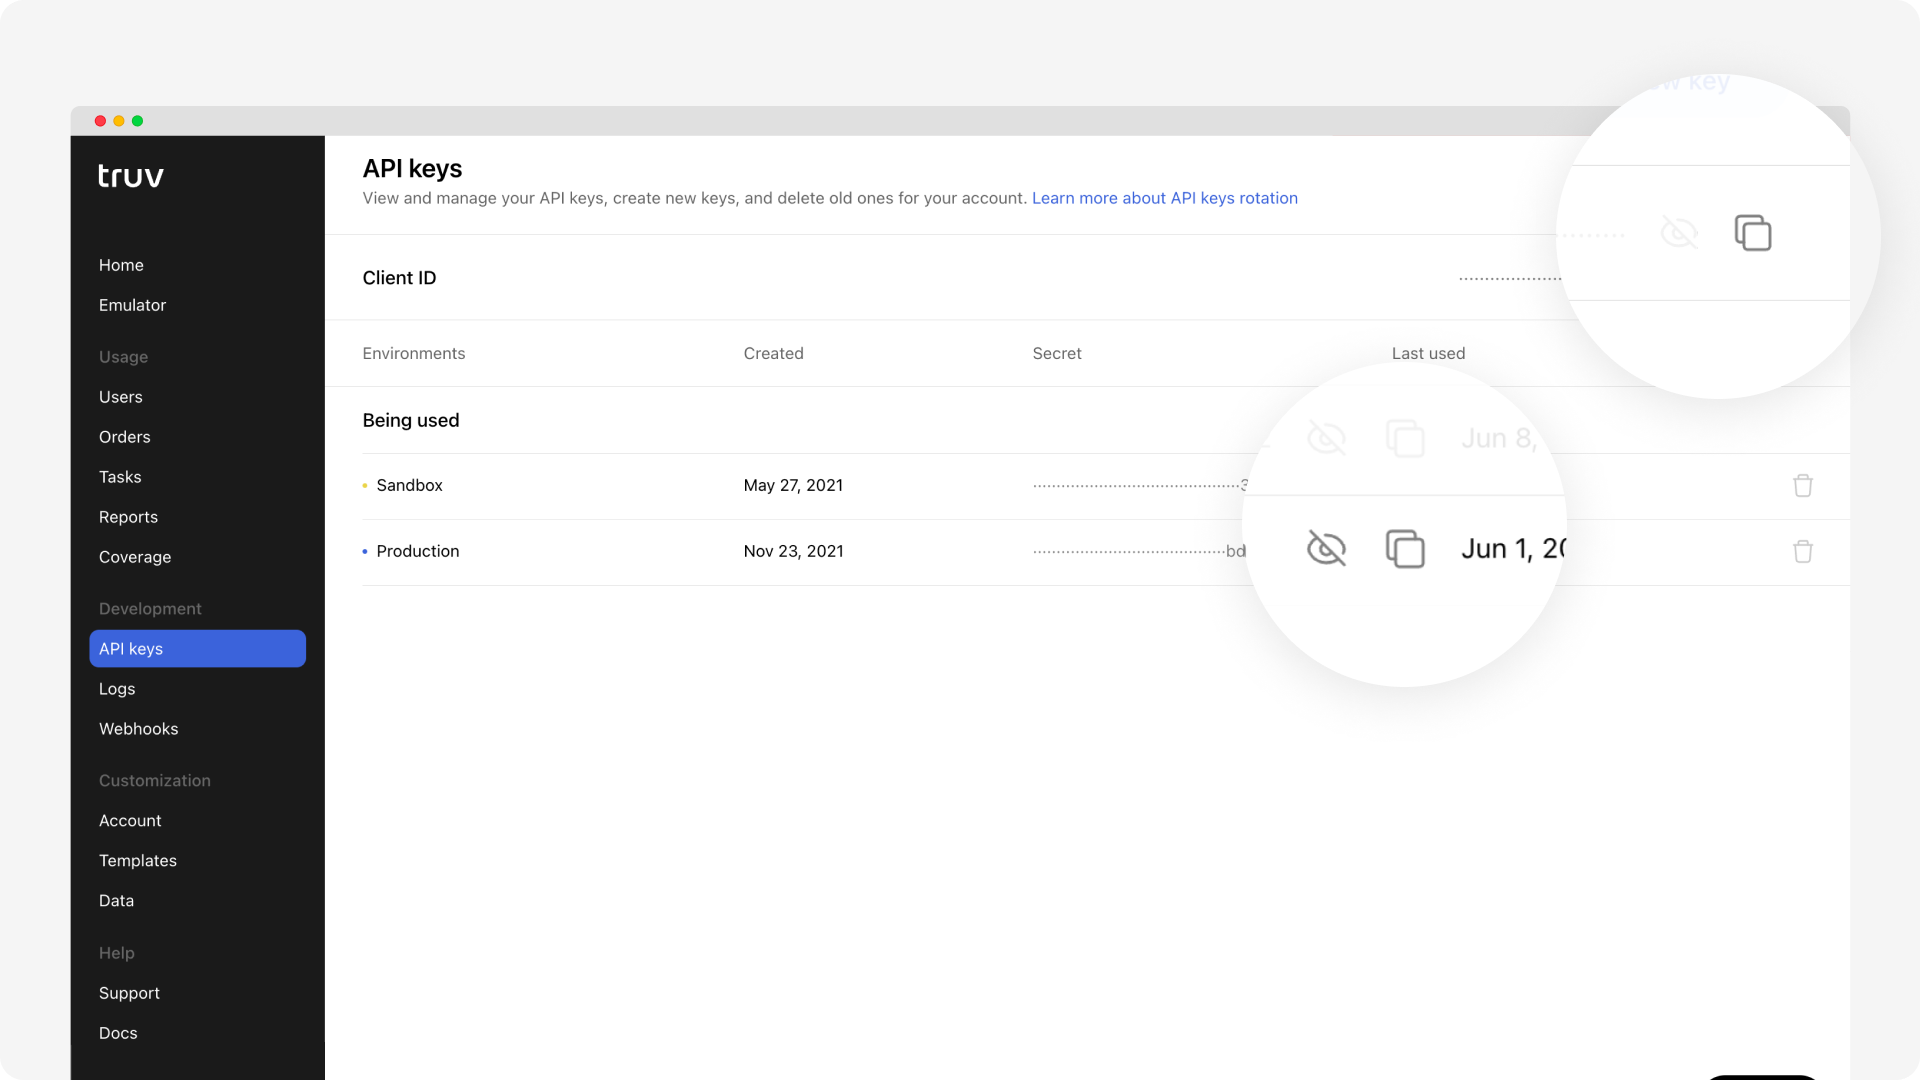
NoteTruv has three environments, sandbox, development, and production. Each requires an associated Access secret for their respective uses. Sandbox is for checking structure and getting sample data, Development is a production-like environment for end to end testing. Confirm your configurations in these environments before moving to Production. Test verifications in the development environment are not billed or limited. For sandbox data, please refer to Truv's Testing page.
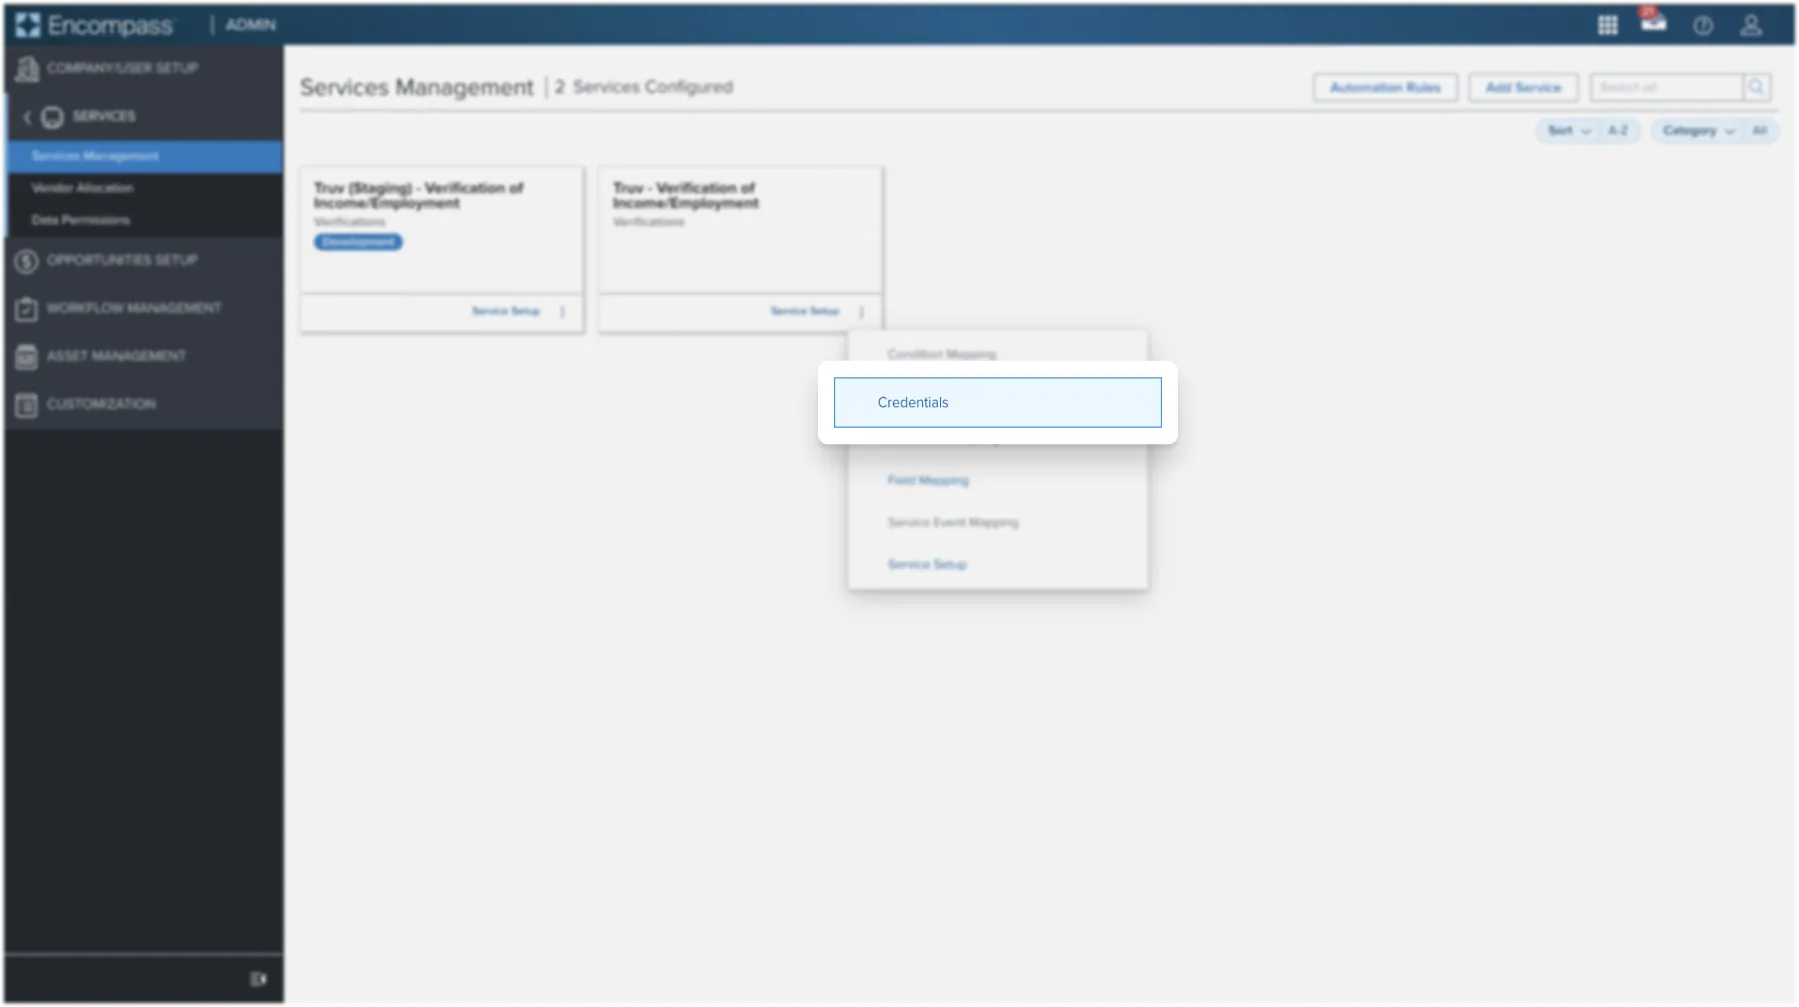
Step 5: Enter Truv Credentials into Encompass®
Navigate back to the Encompass® platform for the Services Management section. Select your Truv integration, then select Credentials on the right.
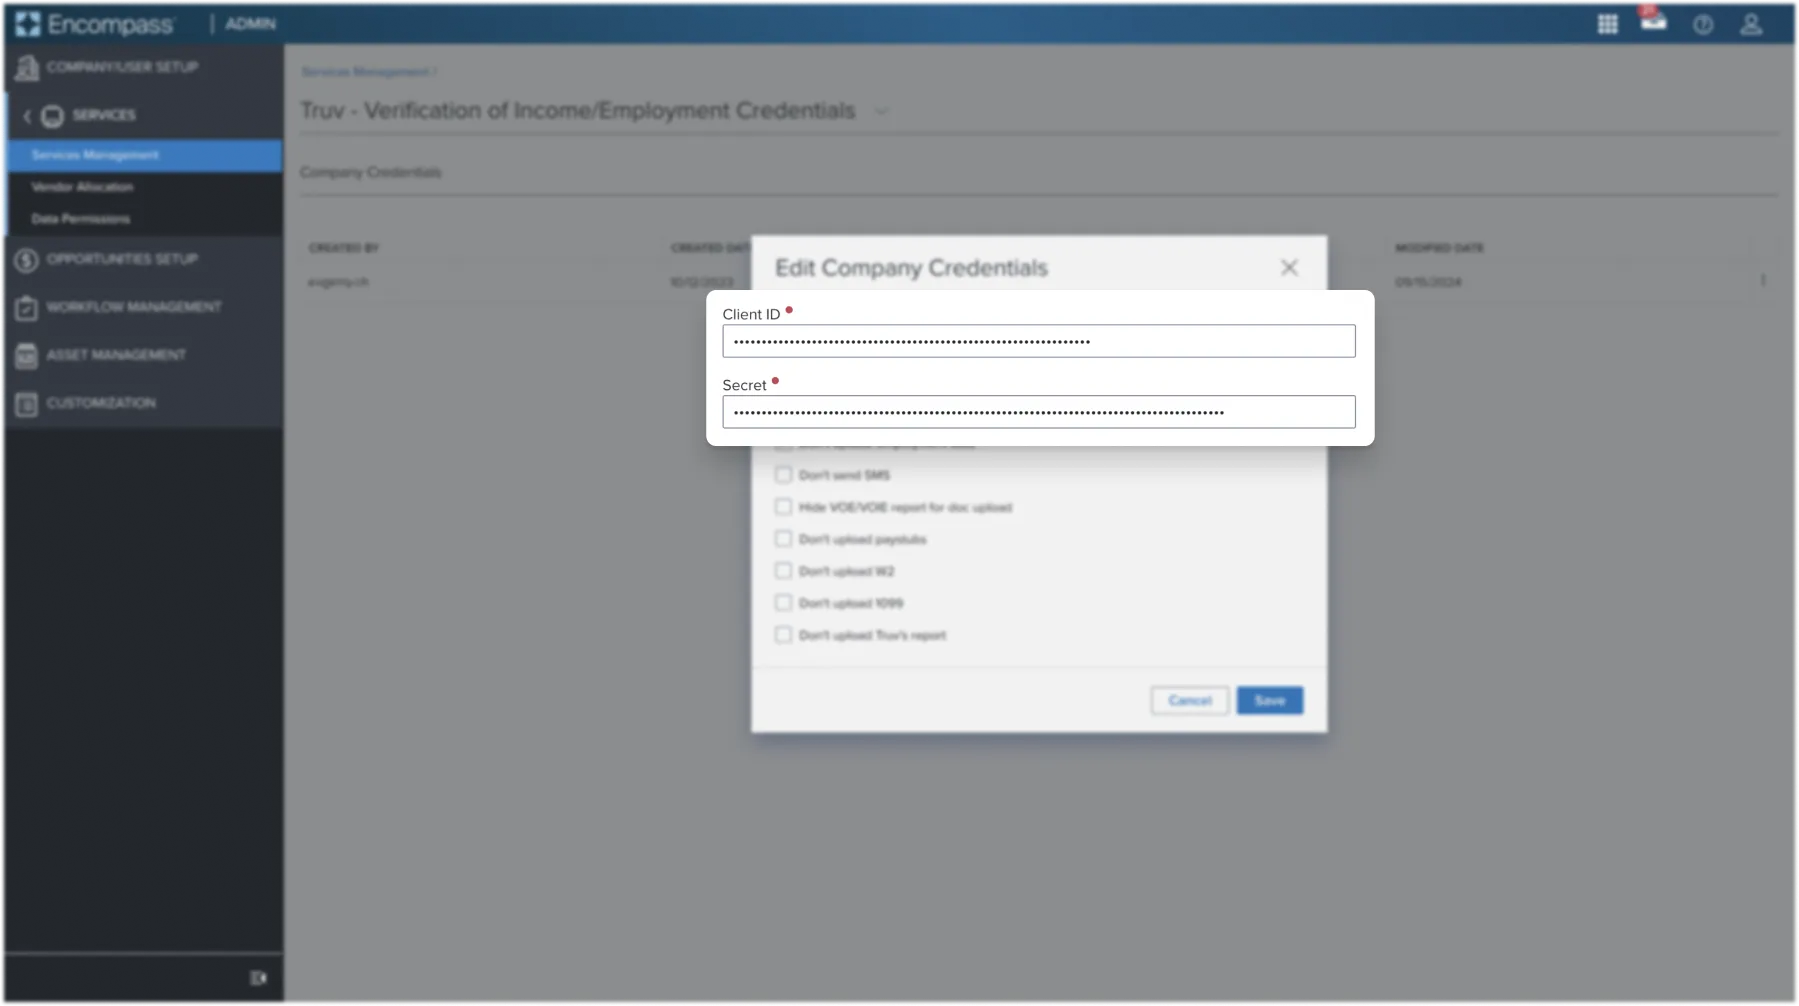
For the Add Company Credentials pop-up, input the Client ID and Access secret for the associated environment and select Save.
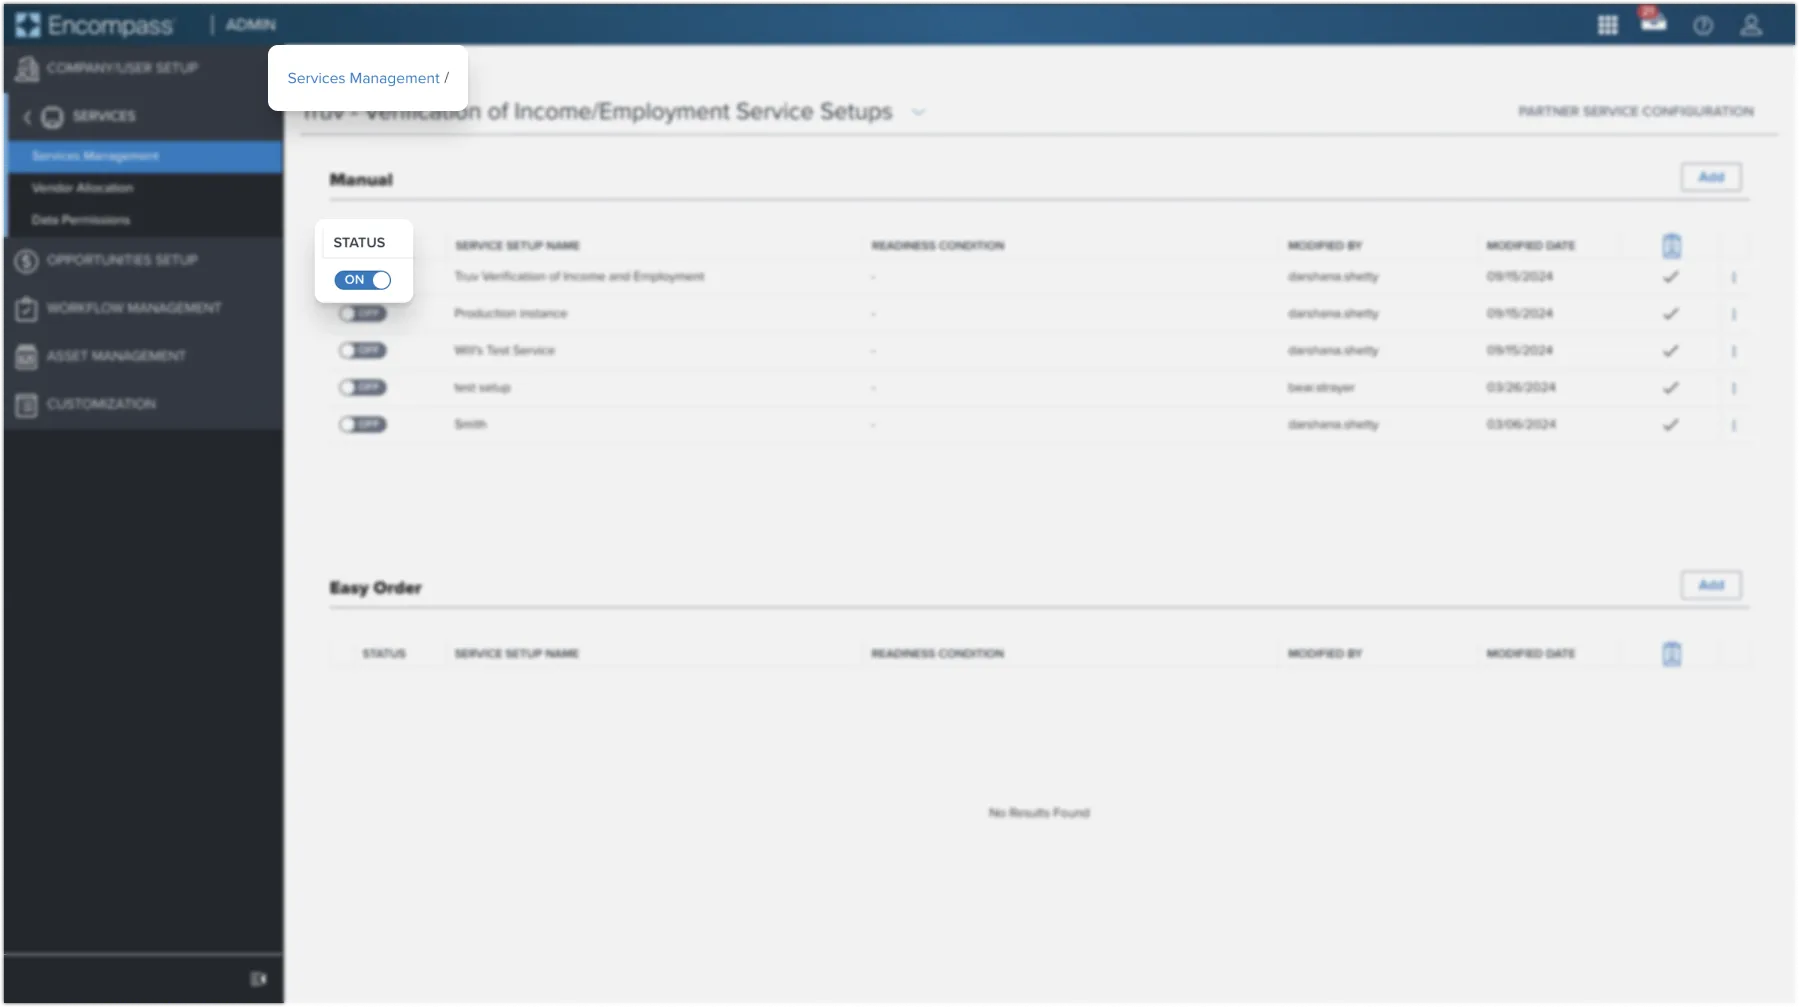
Step 6: Toggle to go-live
Activate the Truv Verification by toggling the Status button for the service setup. If the client_id and access_secret are incorrect, an error message appears when creating an Order.
Success!You've activated Truv for Encompass®!
Setup Guide for Manual Ordering with Encompass®
Support
Need help? Email [email protected] or contact your Truv Customer Success Manager.