Implementation
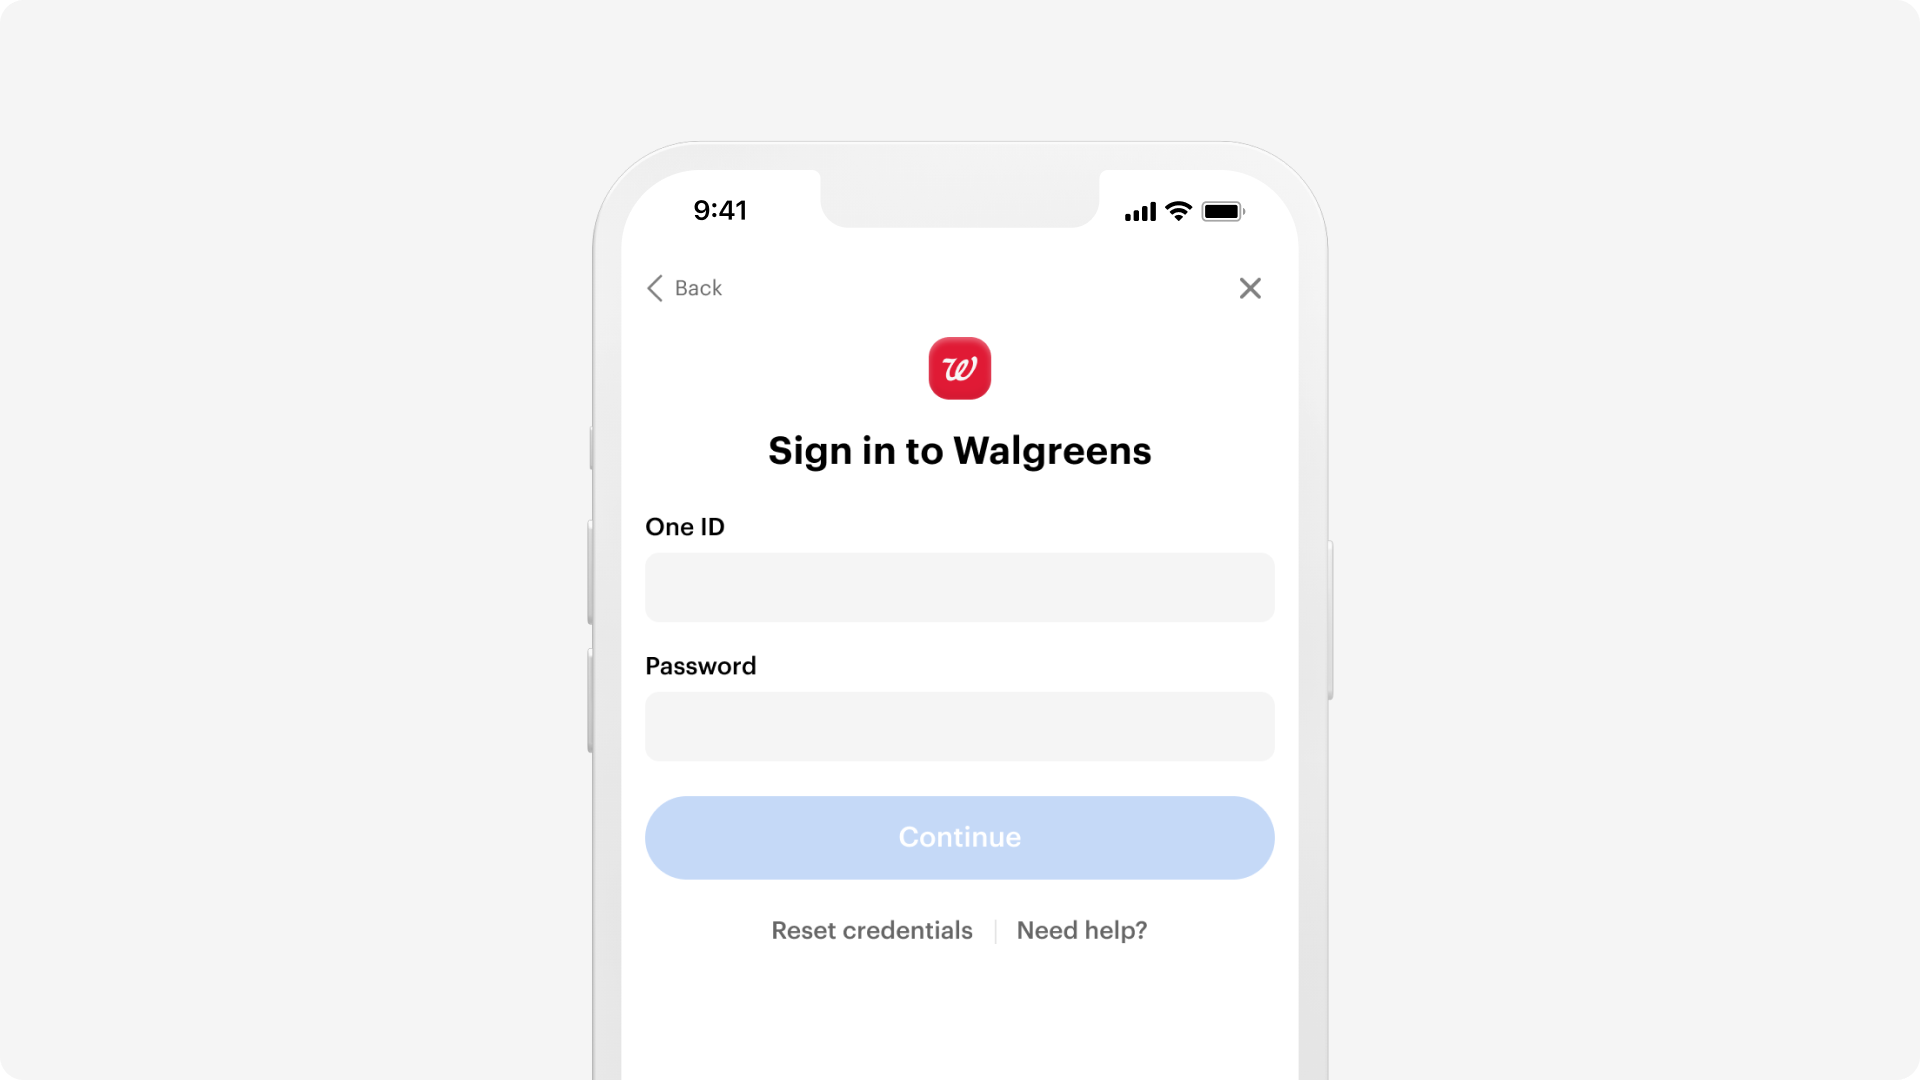
Truv Bridge is the client-side component and module for users to connect accounts.
Overview
Truv Bridge is a drop-in module for your users to connect their accounts to Truv. This allows you to access their data using Truv's API. Truv Bridge handles employer search, credentials, multi-factor authentication, and error handling.

Use the Quickstart guide to learn about Truv Bridge and start implementing Truv in your workflow.
Summary of sequence diagram
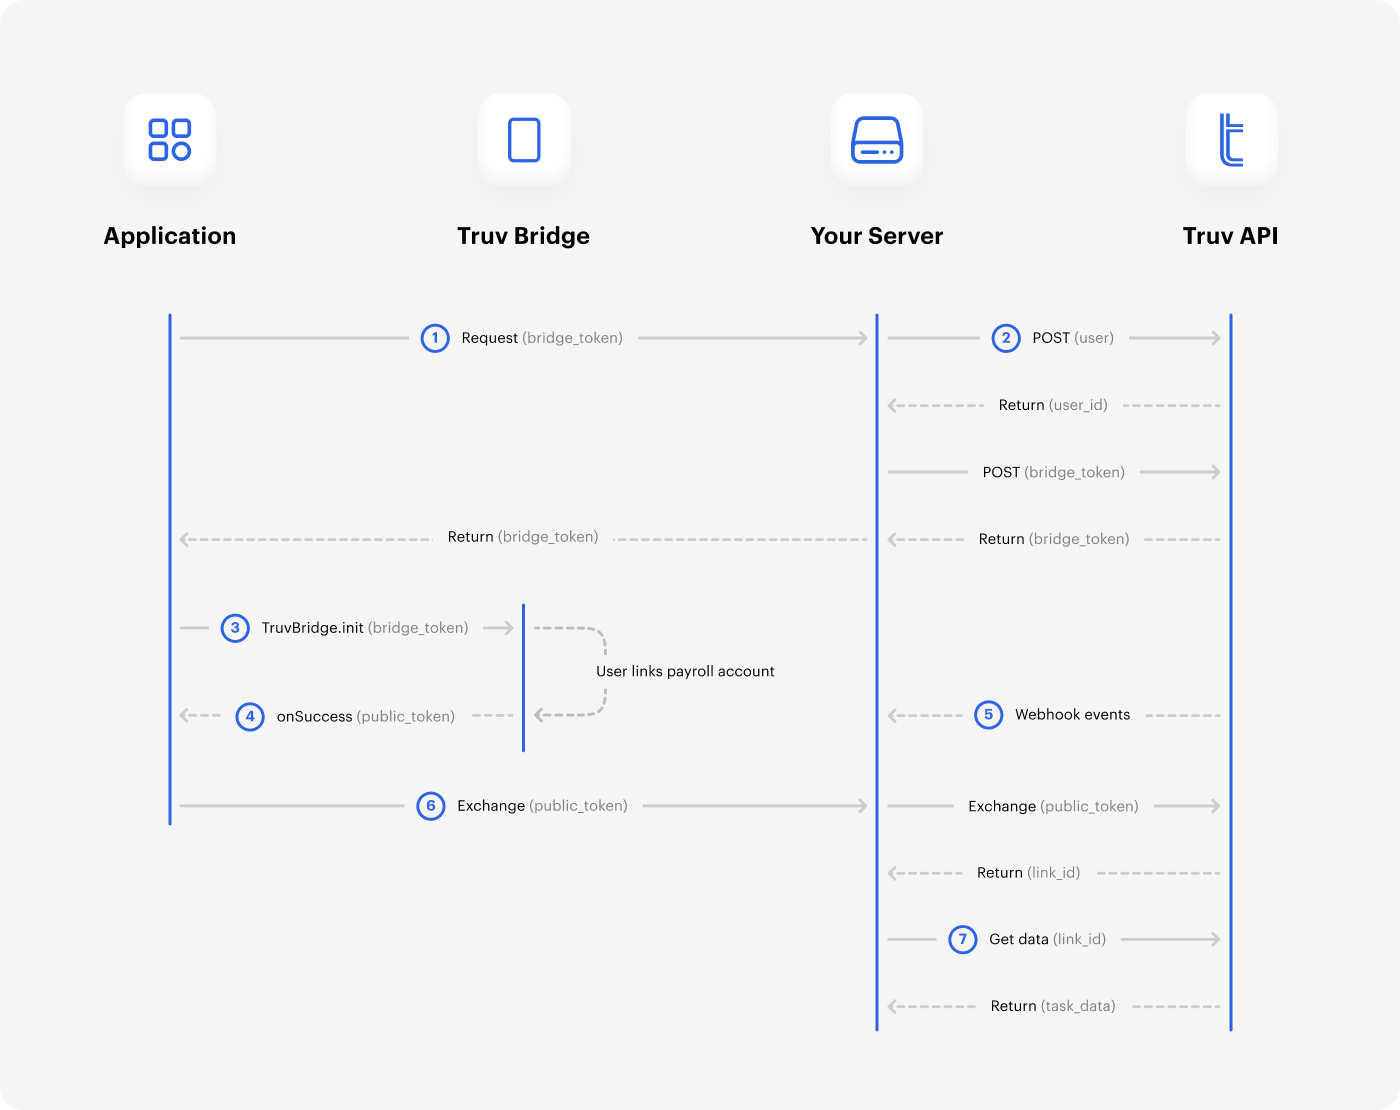
The diagram below shows the overview of token and data exchanges. The sequence covers your application, Truv Bridge, your server and backend, as well as the Truv API. View the Steps section to get started.
- Request a
bridge_tokenvalue from your backend. - On your backend server, create a user and request a bridge token from Truv's API.
- Initialize Truv Bridge in your application and pass the
bridge_tokento TruvBridge.init. - When a user successfully connects their account, it generates a
public_token. Truv Bridge hands off thepublic_tokento the client through the onSuccess or onEvent callback. - After the connection status changes, webhook events begin to arrive.
- Exchange the temporary
public_tokenfor a permanentaccess_token. - Make an API request to Truv to get the data.

Steps
Integrate Truv Bridge after you've collected your Client ID and Access secret values.
Truv Bridge handles credential validation, multi-factor authentication, and error handling for each supported integration. Use the steps below to get started.
- Load the
bridge.jslibrary file from Truv, see the Embedding Truv Bridge section below. - Create a user on your backend server, then request a Bridge Token from the API.
- Initialize Truv Bridge with
TruvBridge.initand use thebridge_tokenvalue as a parameter.
Embedding Truv Bridge
Use Truv's SDKs to embed Truv Bridge in mobile, web apps, or both. The Javascript code below also works as a separate example.
<html>
<head>
    <!-- Step 1 - add the Bridge library to your app with a script tag -->
    <script src="https://cdn.truv.com/bridge.js"></script>
</head>
<body>
<script>
  // Step 2 - Call your back end to retrieve a bridge_token from truv
  const bridgeToken = <%= Value returned by API call to acquire bridge_token %>

  // Step 3 - Initialize Bridge
  const bridge = TruvBridge.init({
        bridgeToken: bridgeToken.bridge_token,
        onLoad:function(){
          // Optional, called when Bridge loads
          console.log('Bridge loaded')
        },
        onSuccess:function(public_token, metadata){
          console.log('success handler')
          // Send the public_token to your server to exchange for an access_token
          // and retrieve payroll data.
          // The metadata object contains info about the Link.
          console.log("token: ", public_token)
          console.log("metadata: ", metadata)
        },
        onEvent: function(event_type, payload) {
          // all events fire this function. event_type indicates what the event is,
          // payload has additional information depending on the event.
          console.log('event: ', event_type)
          console.log('payload: ', payload)
        },
        onClose:function(){
          // Optional, called when Bridge is closed by the user.
          console.log('Bridge closed')
        }
    })
</script>
<!-- Normal page content -->
<!-- Step 4 - Create a button or action that calls bridge.open() to Bridge -->
<button type="button" id="button" onclick="bridge.open()">
  Connect
</button>
</body>
</html>
Authentication
Truv Bridge is for authorized environments only. Confirm your application's request with your Client ID and Access secret values for security. Initialize Truv Bridge with the valid bridge_token value for TruvBridge.init to continue.
Parameters
The table covers the required parameter for Truv Bridge.
| Property | Description | Required |
|---|---|---|
| bridgeToken | Returned bridge_token value from Create Bridge Token endpoint | required |
| position | Determines how the bridge is displayed. The behavior by default is Dialog, see Position parameter | optional |
Position parameter
Determines how the bridge is displayed. The default type is Dialog.
Dialog
The bridge appears as a dialog window, which overlays the rest of the interface and disables scrolling.
{ type: 'dialog' }
Inline
The bridge is integrated within an existing element, allowing the interface to function without blocking the rest of the interface or global scrolling. However, it's crucial to ensure that your interface functions seamlessly across various devices, particularly on mobile devices such as iPhones and Androids, including compatibility with virtual keyboards.
{ type: 'inline', container: HTMLElement }
Example
Simple call to TruvBridge.init
const bridge = TruvBridge.init({
        bridgeToken: bridgeToken.bridge_token,
        position: {
          type: 'inline',
          container: document.querySelector('#bridge-container')
        },
        onSuccess:function(public_token, metadata){
        }
})
Callbacks
The functions in this table cover specific actions.
| Callback | Description | Required |
|---|---|---|
| onSuccess | User has successfully connected to a payroll provider and closed Bridge, function expects two arguments, the public_token and a metadata object | required |
| onLoad | Truv Bridge has finished loading | optional |
| onEvent | Specific event occurs with Truv Bridge, see Event Reference for Truv Bridge | optional |
| onClose | Truv Bridge closes | optional |
Closing Truv Bridge
Close Truv Bridge programmatically with the close method. This is from the Truv Bridge instance returned by init function.
The default behavior for Truv Bridge to close is with user input.
// call close method of the bridge instance
bridge.close();
Updated 4 months ago
Learn more about Truv Bridge and how it works within your integration.