- Higher success rates — orders are placed at the right moment in the loan lifecycle
- Increased productivity — eliminates repetitive manual ordering for loan officers and processors
- Faster closings — earlier, automated data retrieval reduces turnaround time
Implementation Options
Setup Guide
1
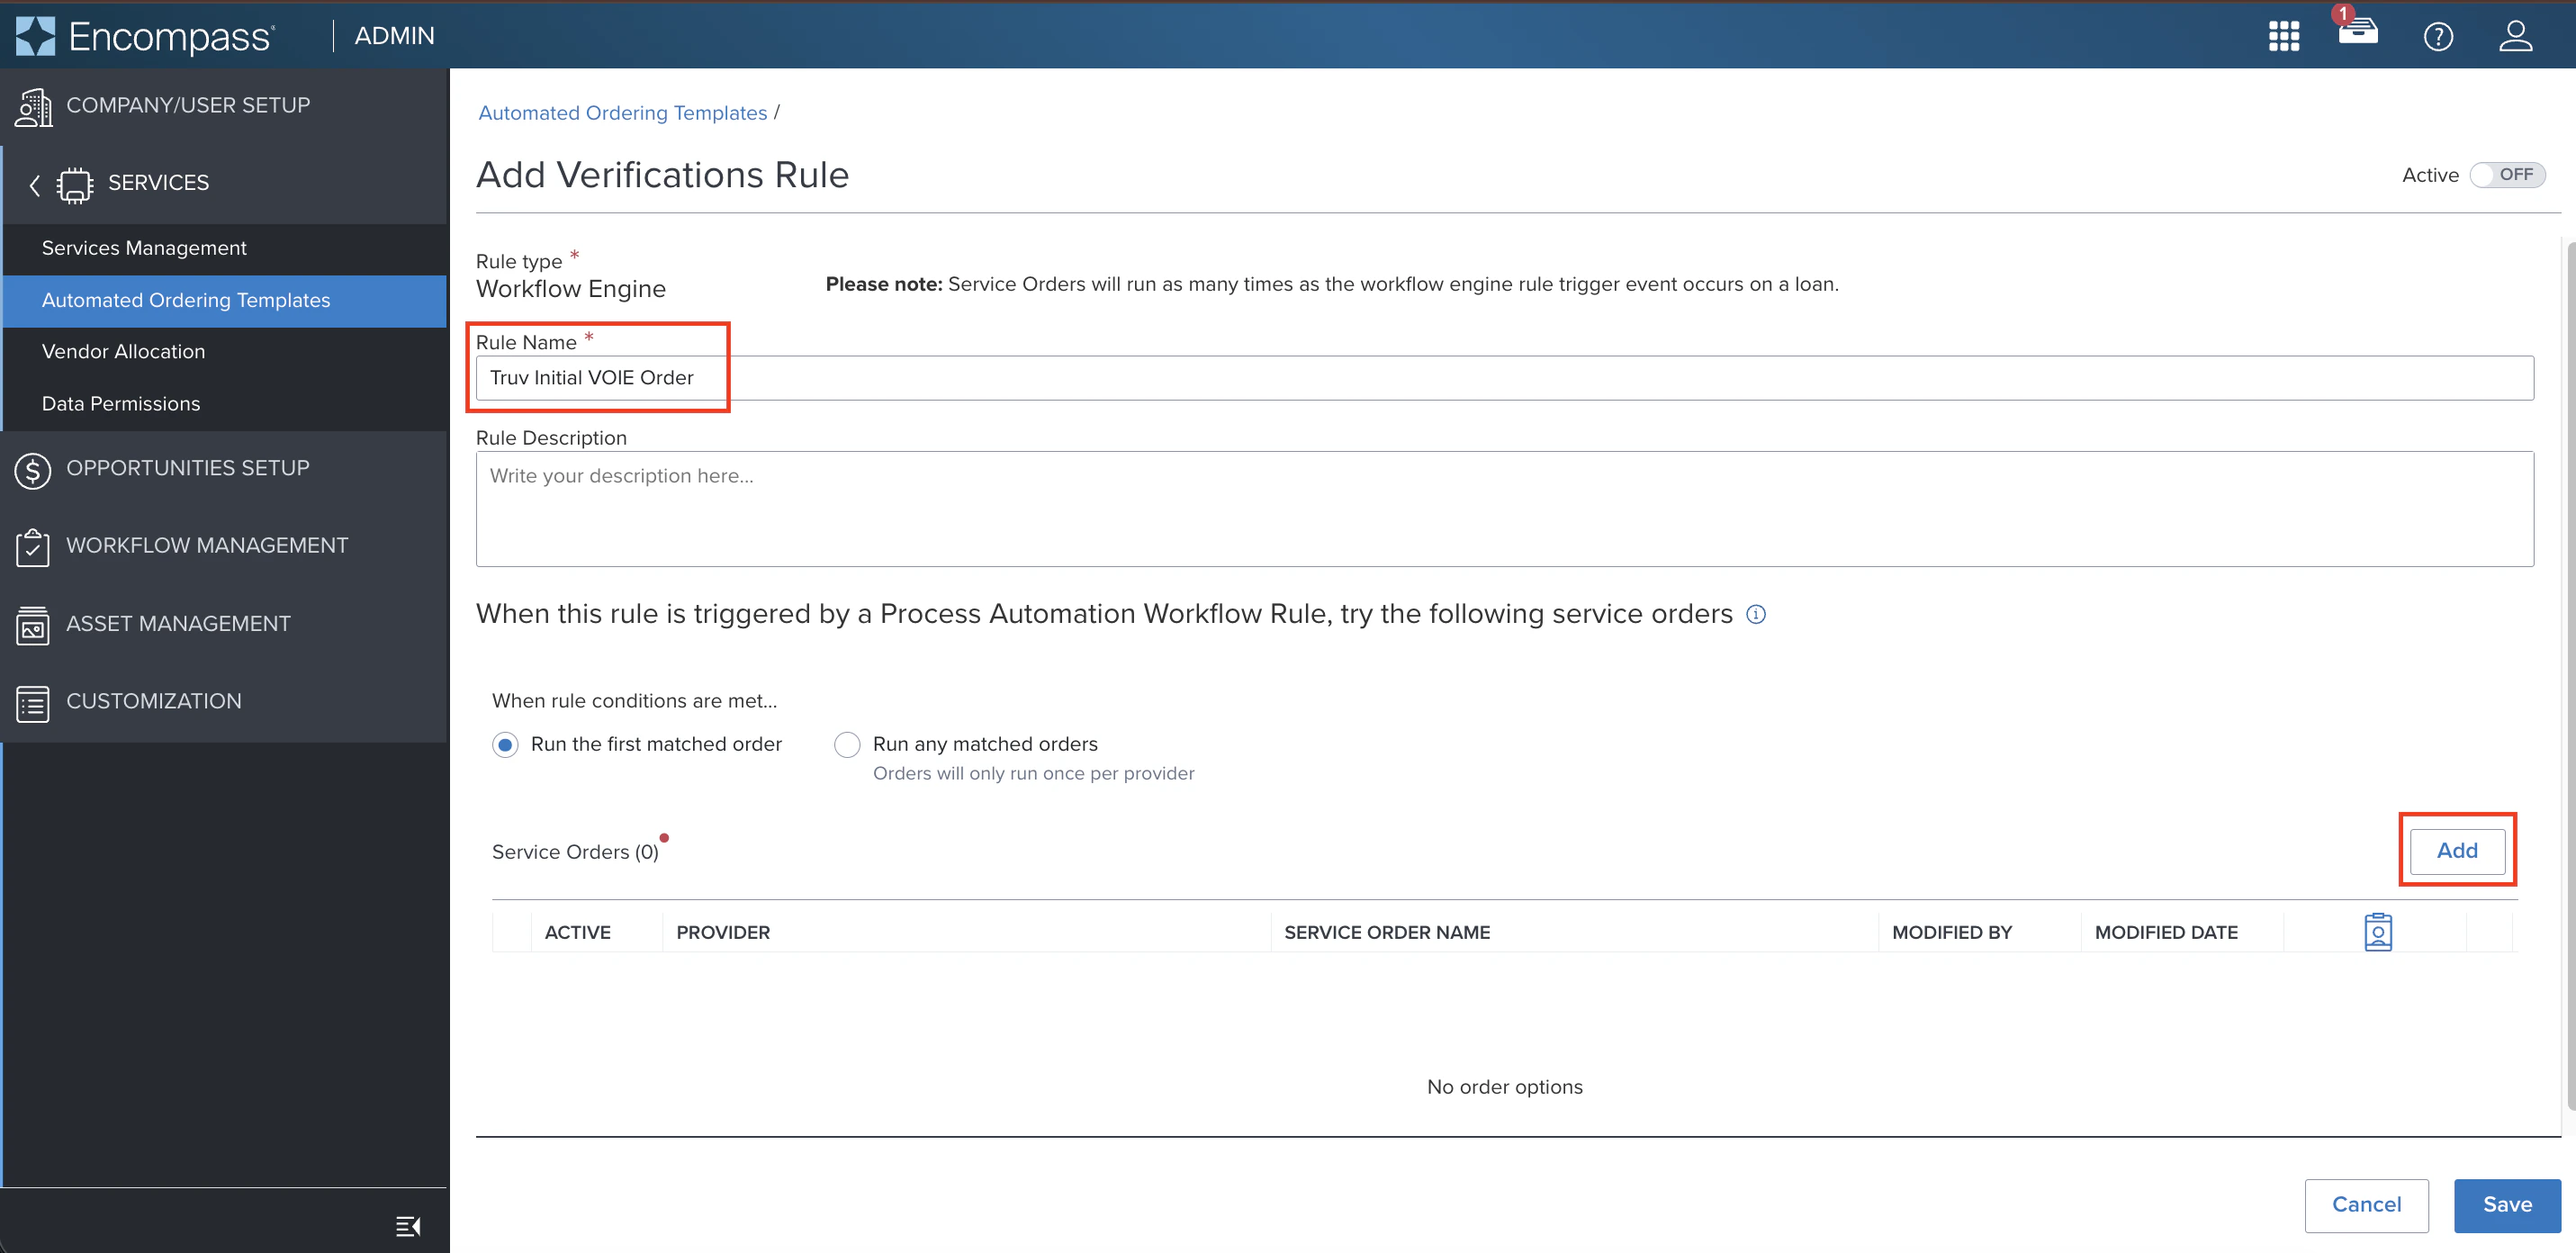
Create a New Rule
Log into Encompass as an administrator via Encompass LO Connect. Navigate to the Services tab and select Automated Ordering Templates. Click Add, select the Verifications category, enter a Rule Name, and select Truv - Verification of Income/Employment/Assets.
2
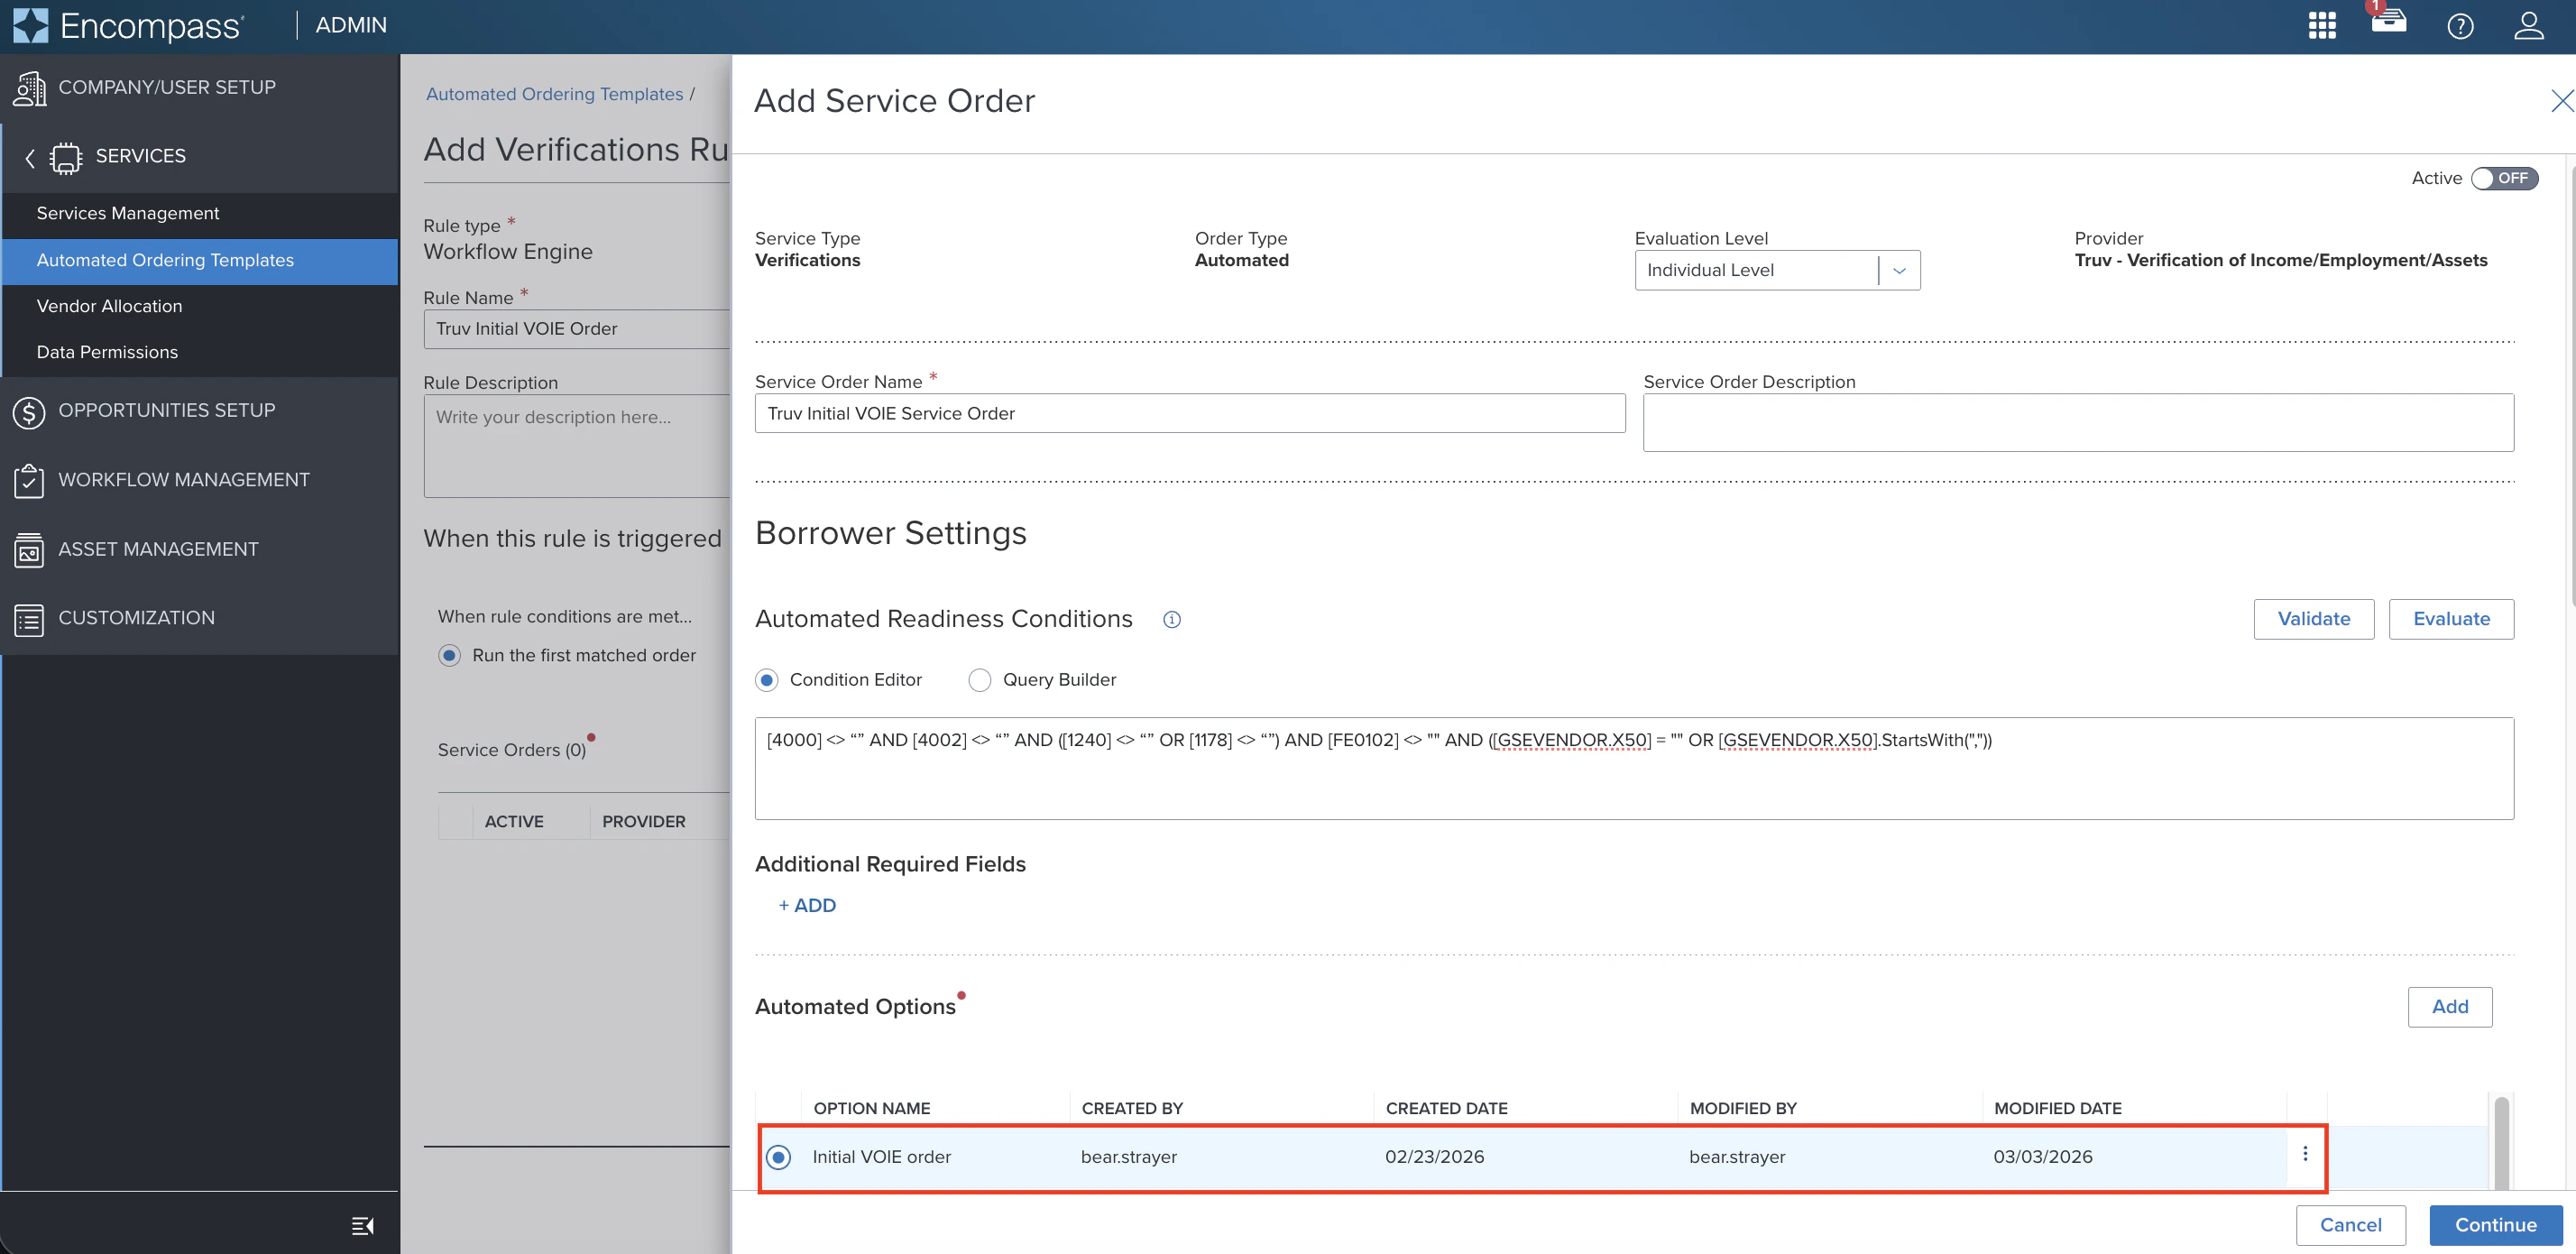
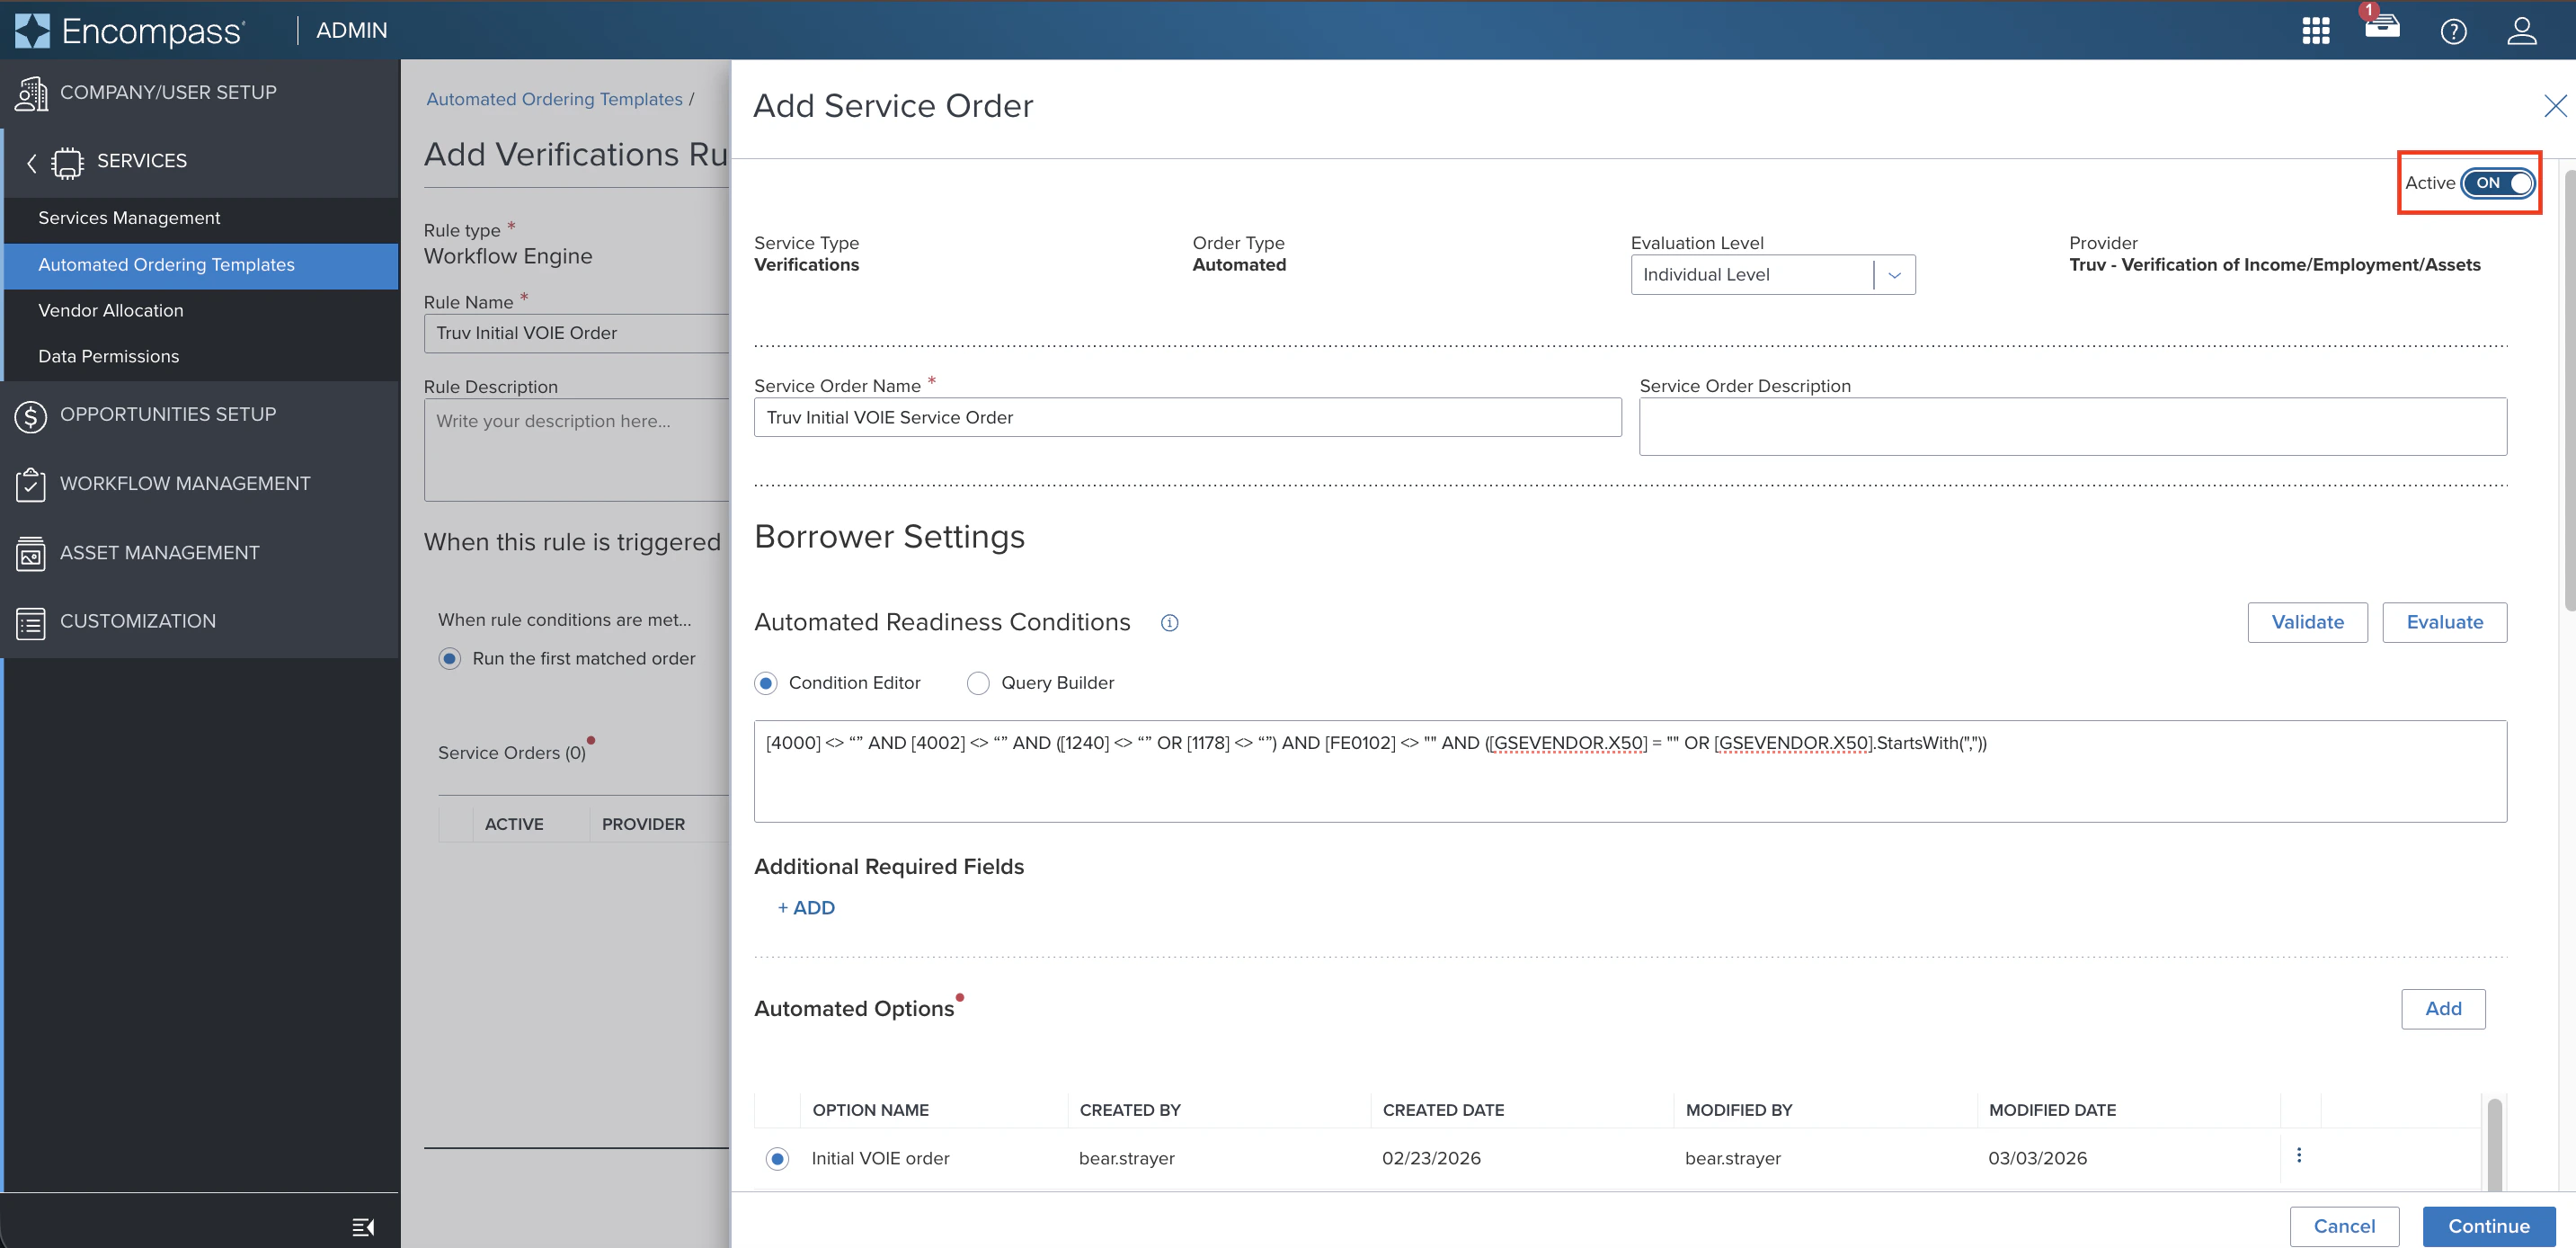
Create a Service Order
Configure the service order with the following fields:Initial order — Borrower (VOA / DVOE):Initial order — Co-Borrower (VOIE / VOE):Initial order — Co-Borrower (VOA / DVOE):Refresh order — Borrower (VOIE / VOE):Refresh order — Borrower (VOA / DVOE):Refresh order — Co-Borrower (VOIE / VOE):Refresh order — Co-Borrower (VOA / DVOE):Under Automated Options, click Add to create a new option or select an existing one for the borrower and co-borrower.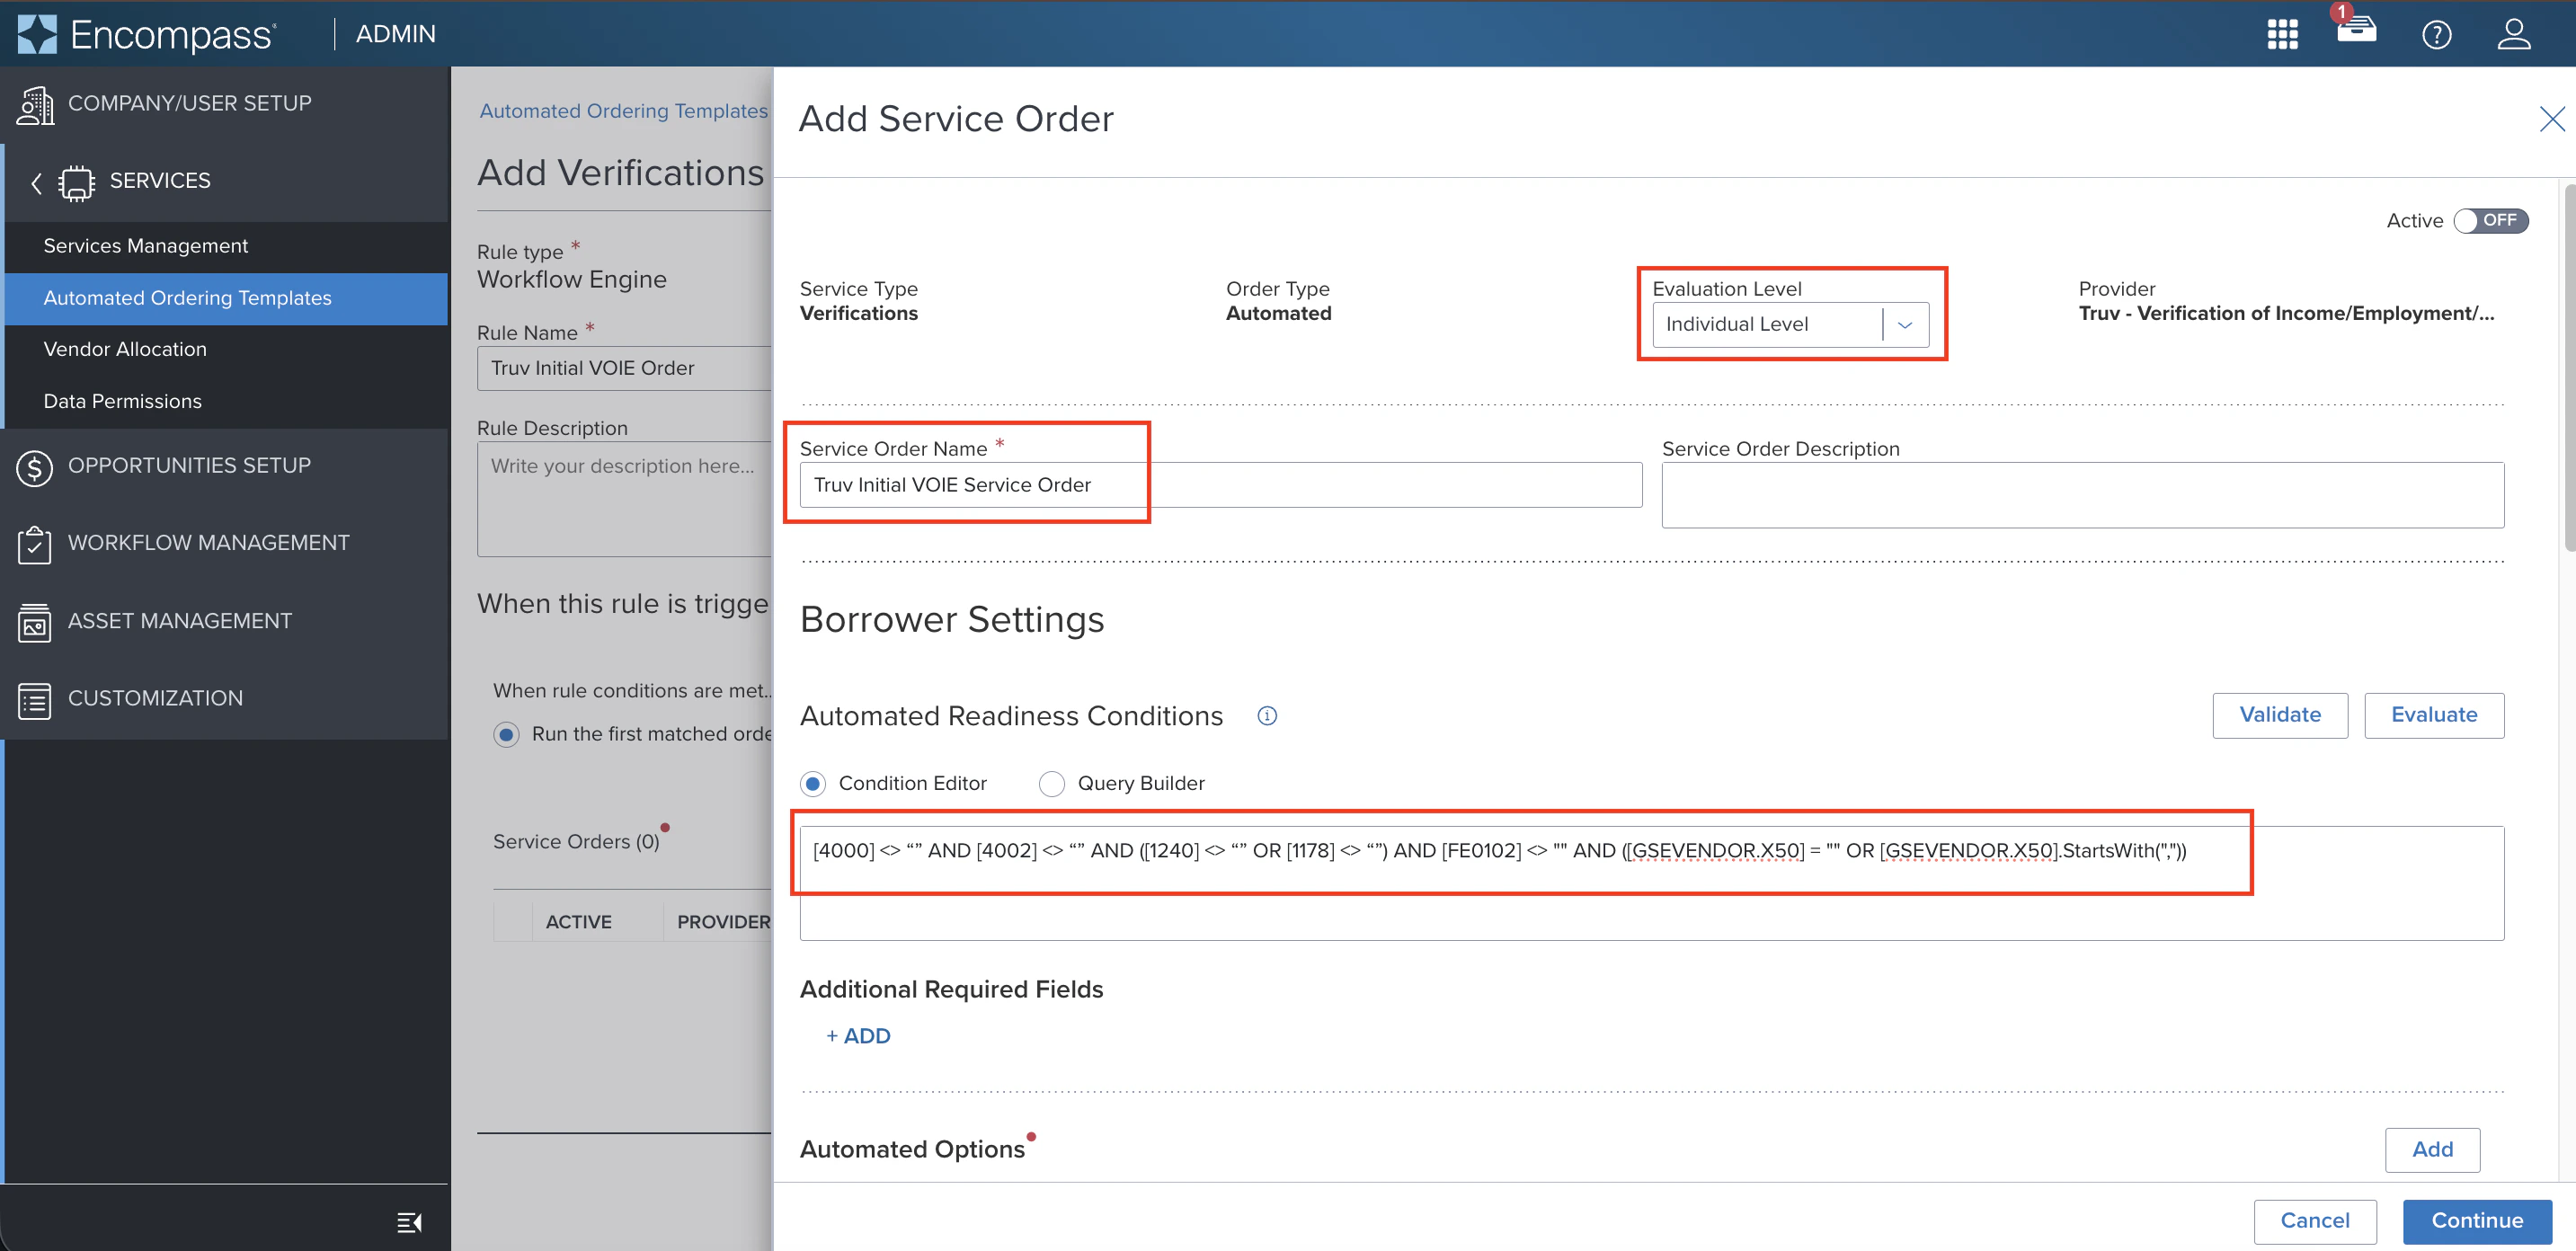
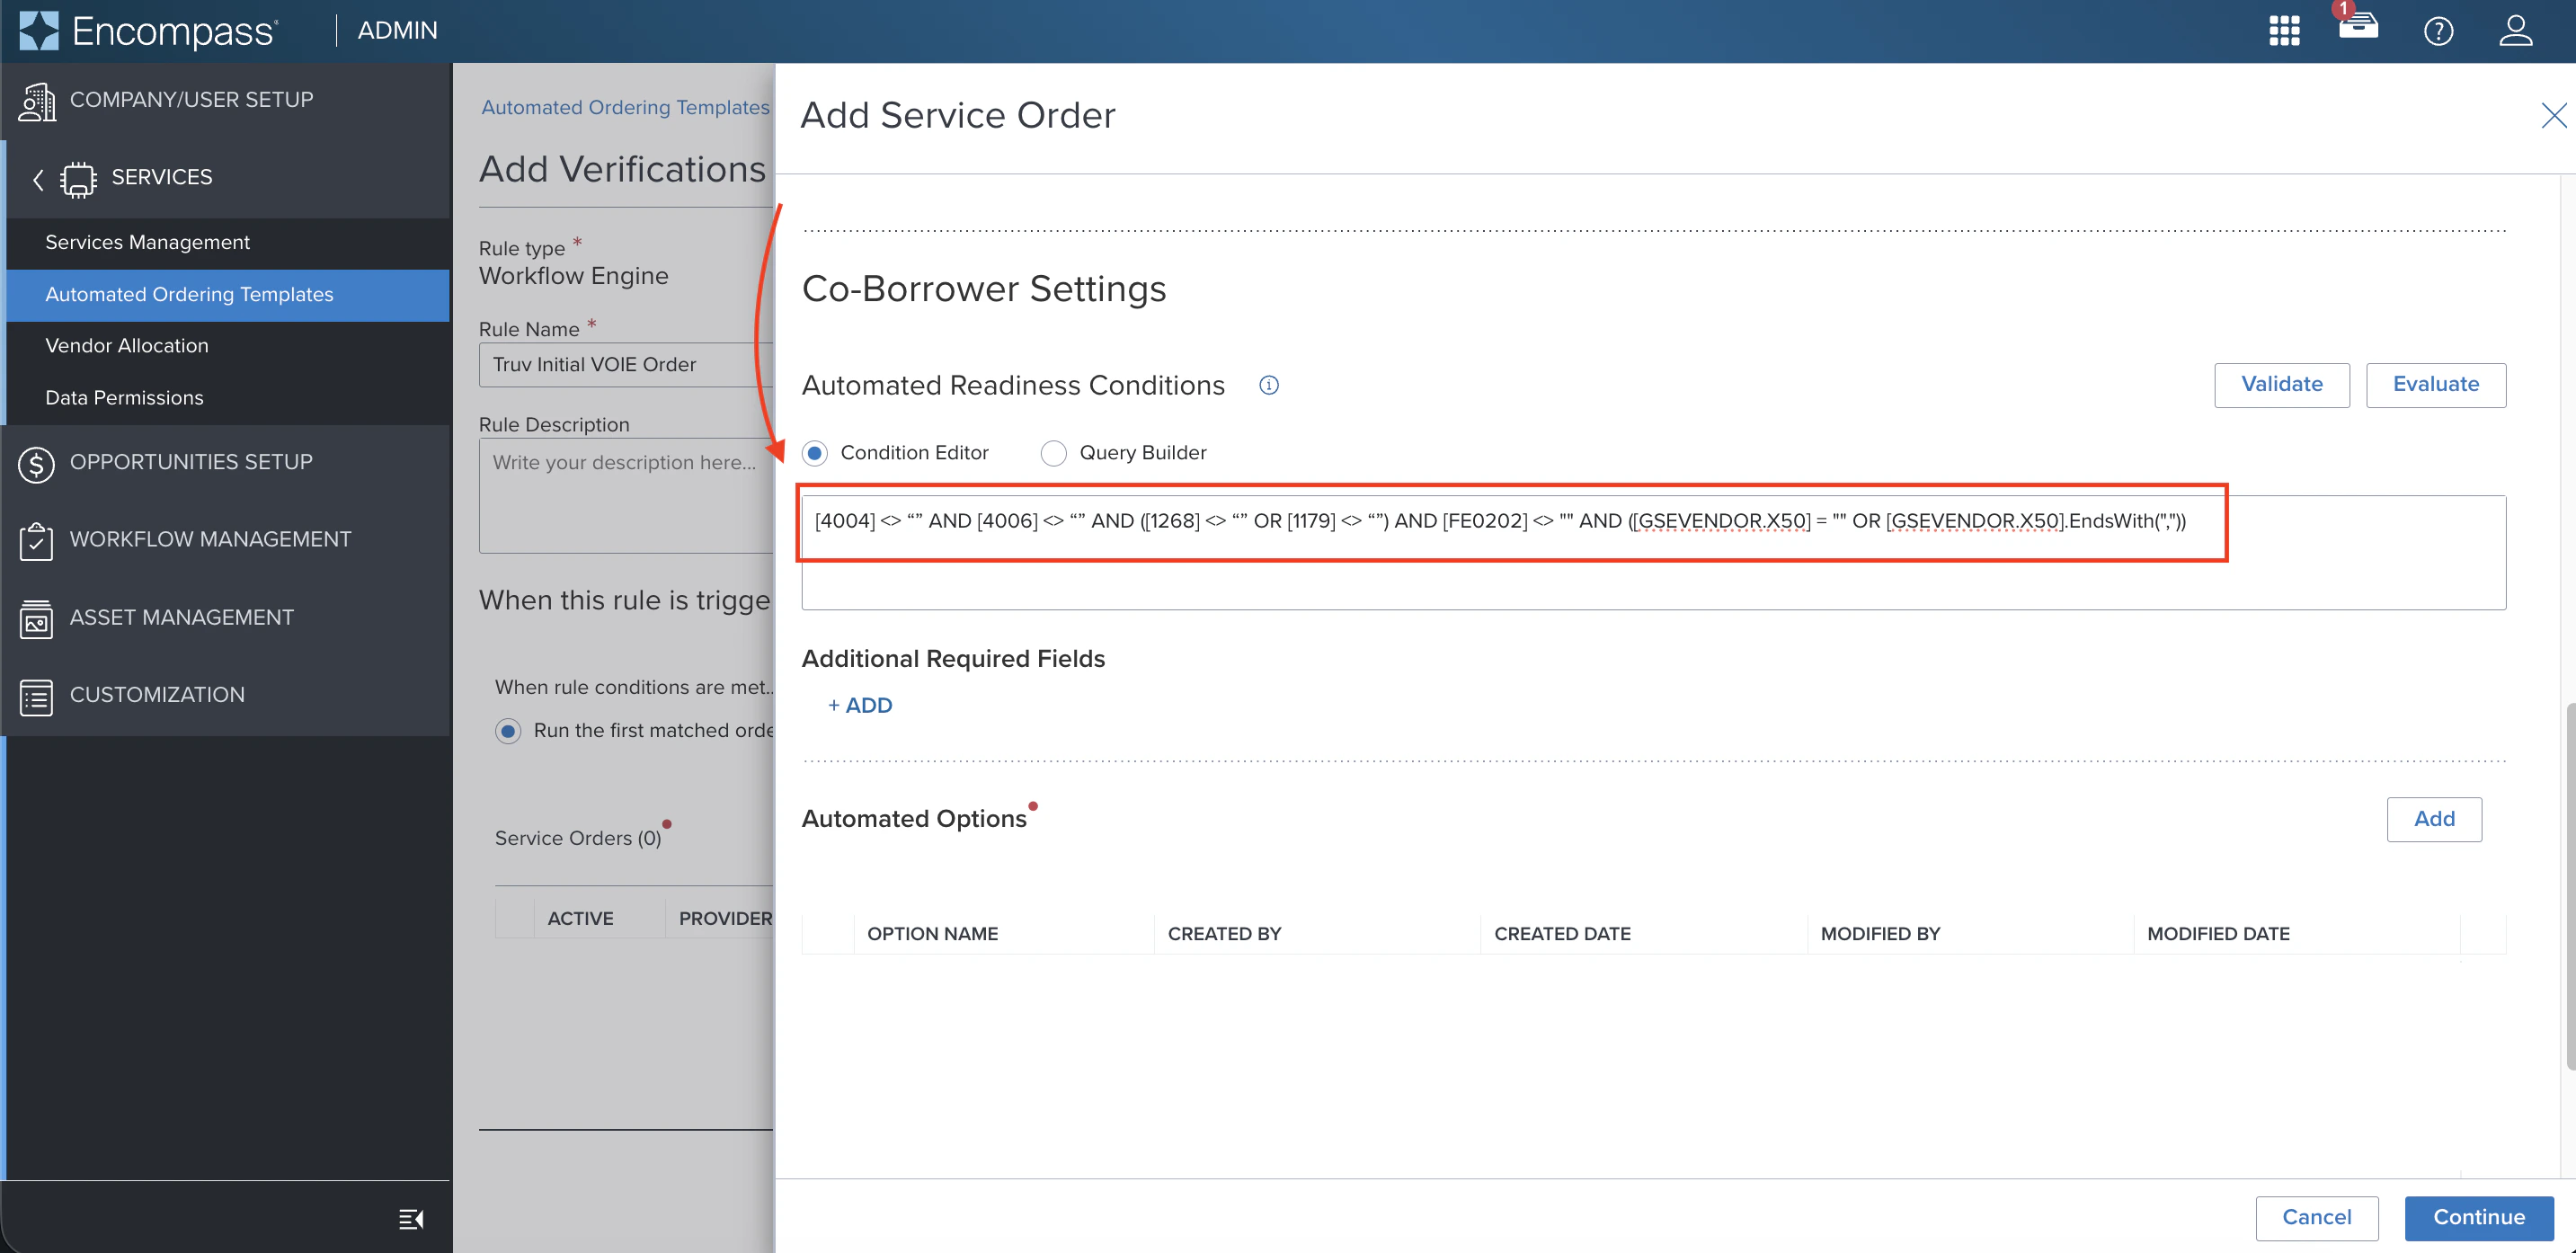
Automated Readiness ConditionsCopy the appropriate condition query into the Condition Editor for the borrower and co-borrower.Initial order — Borrower (VOIE / VOE):
3
Create an Automated Option
Configure the automated option with the following fields: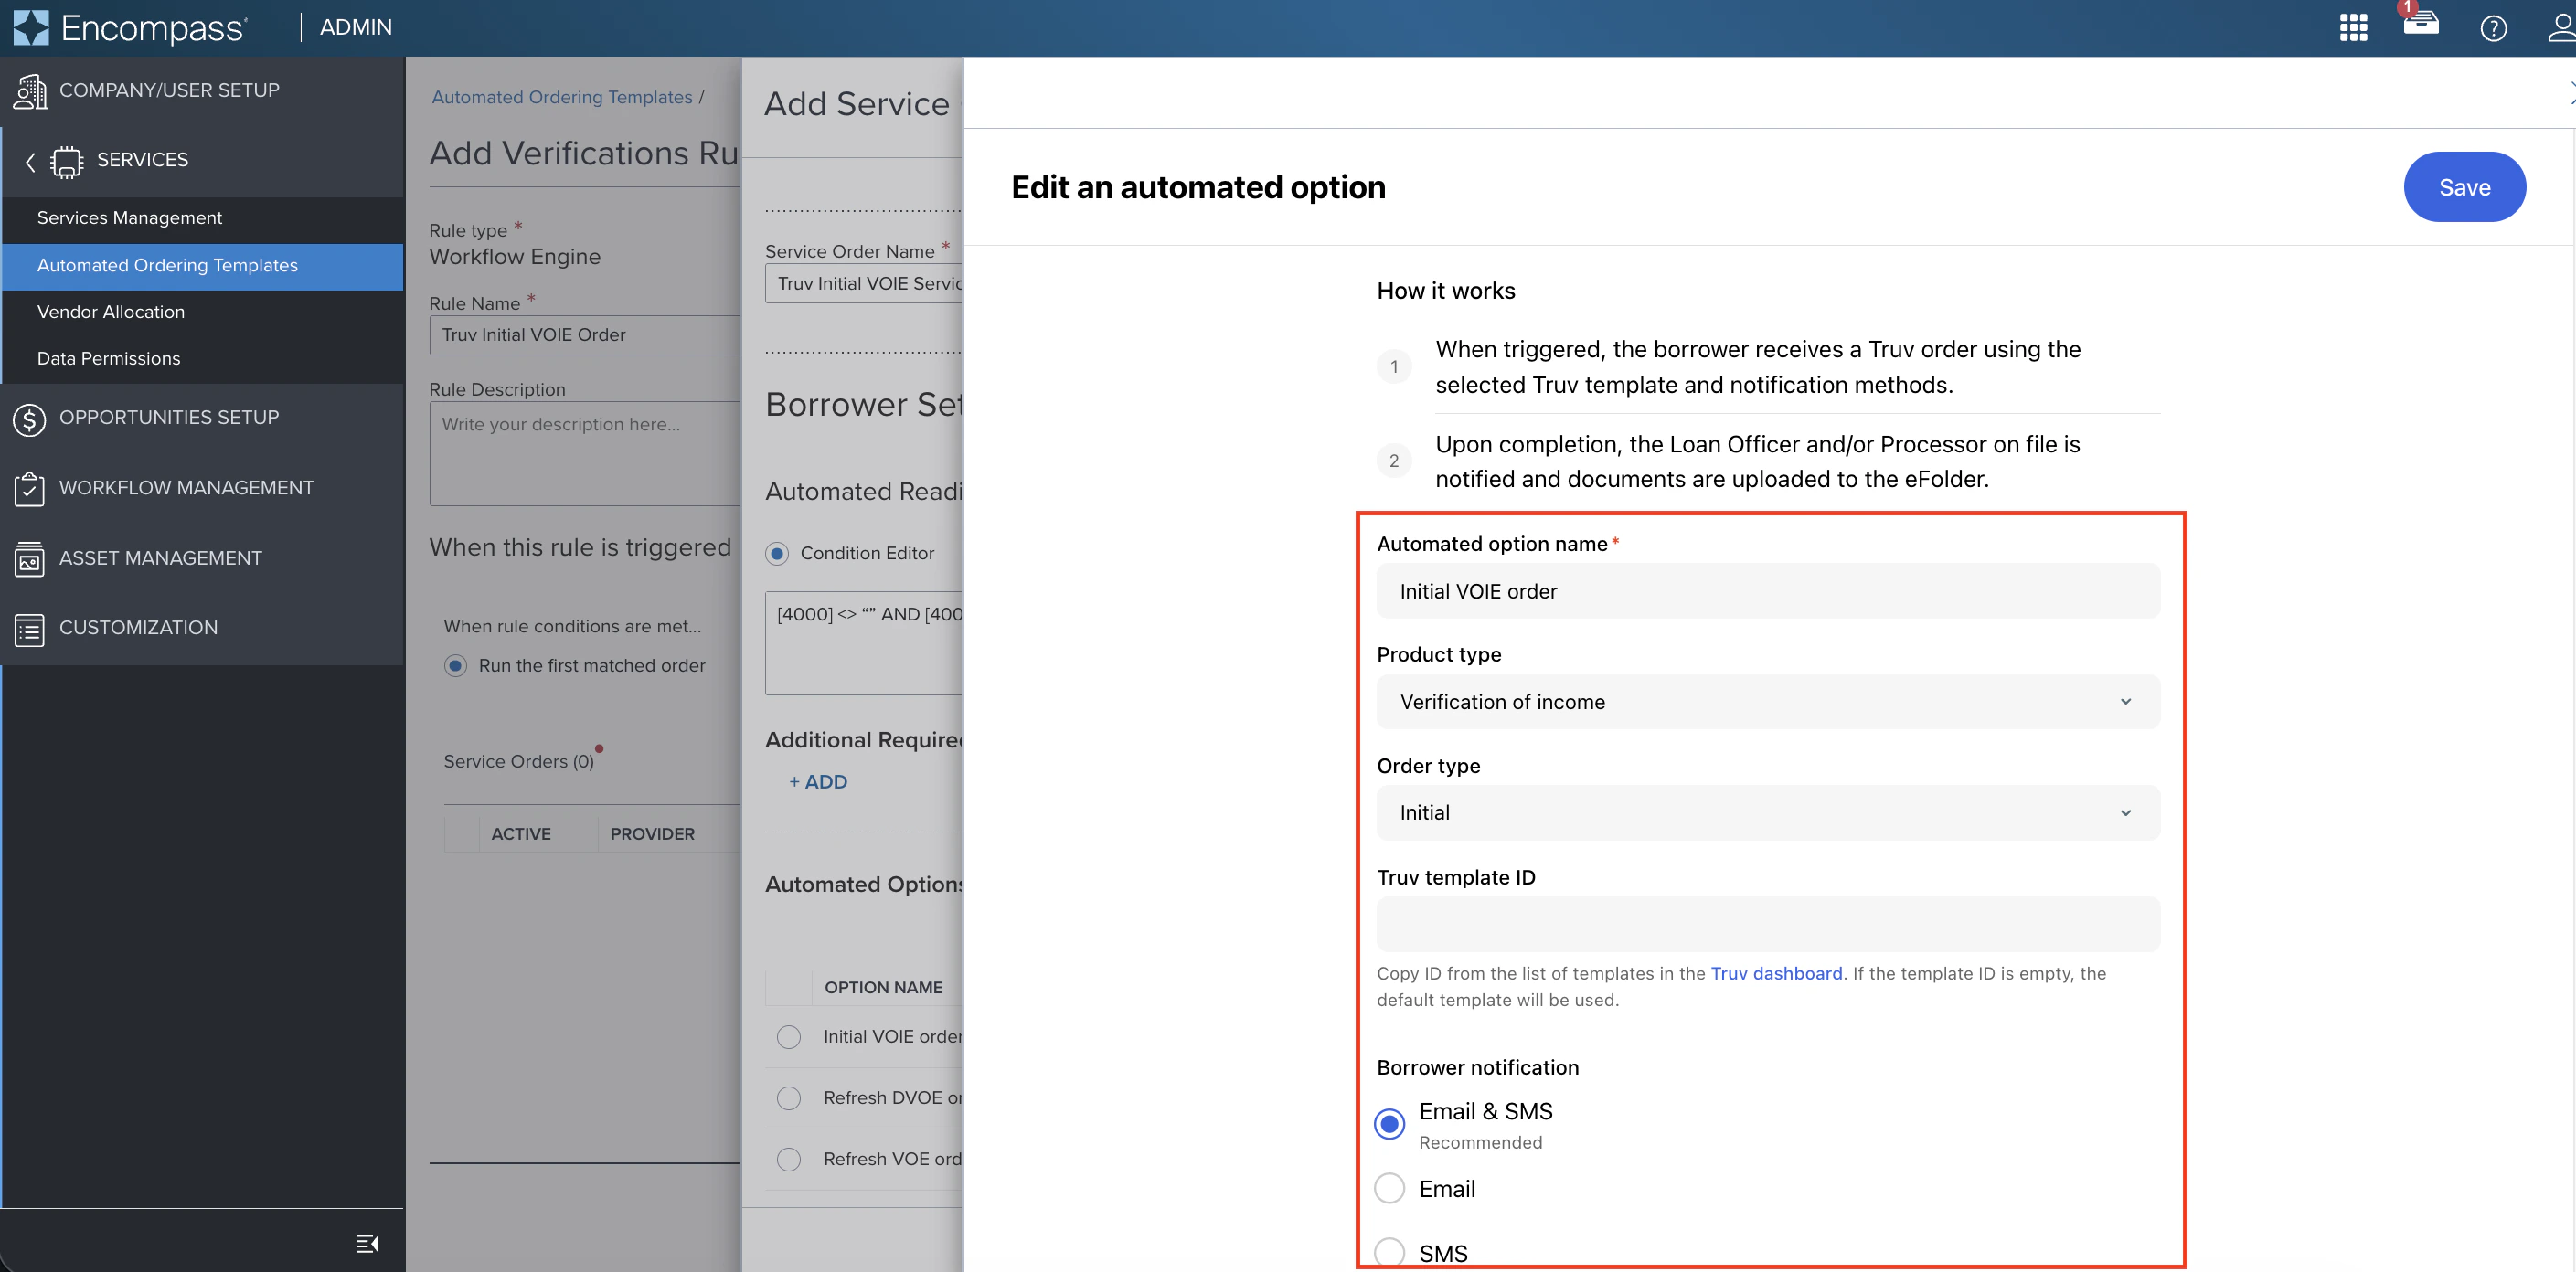
4
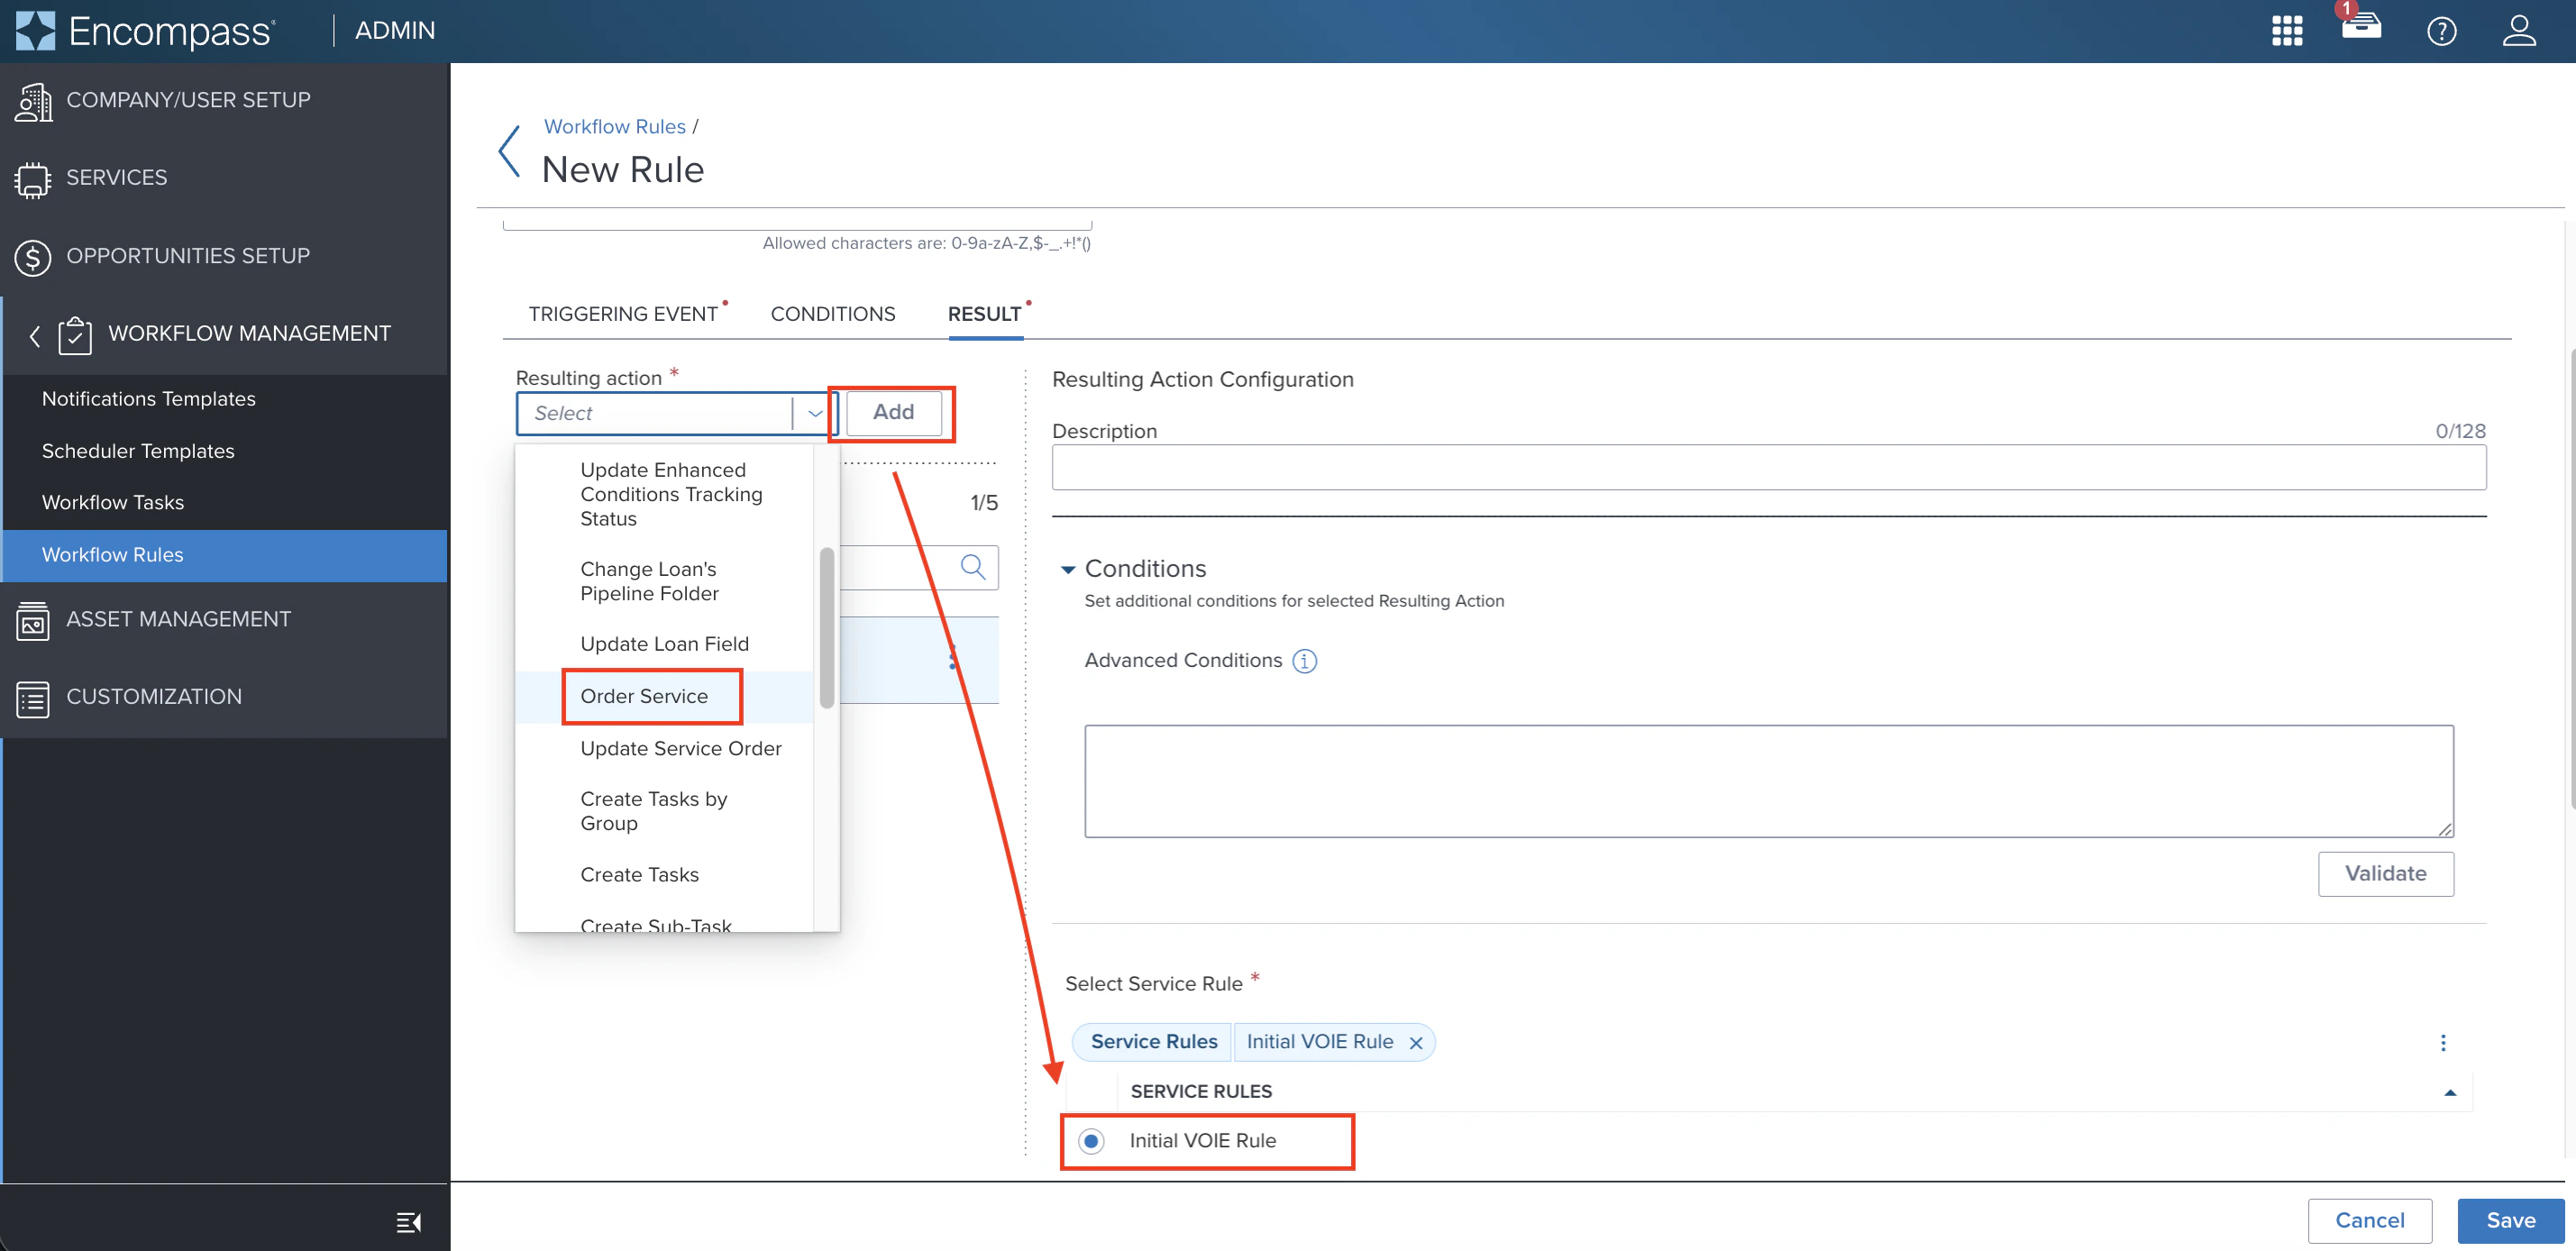
Create a Workflow Rule
Navigate to the Workflow Management tab and select Workflow Rules. Click New Rule.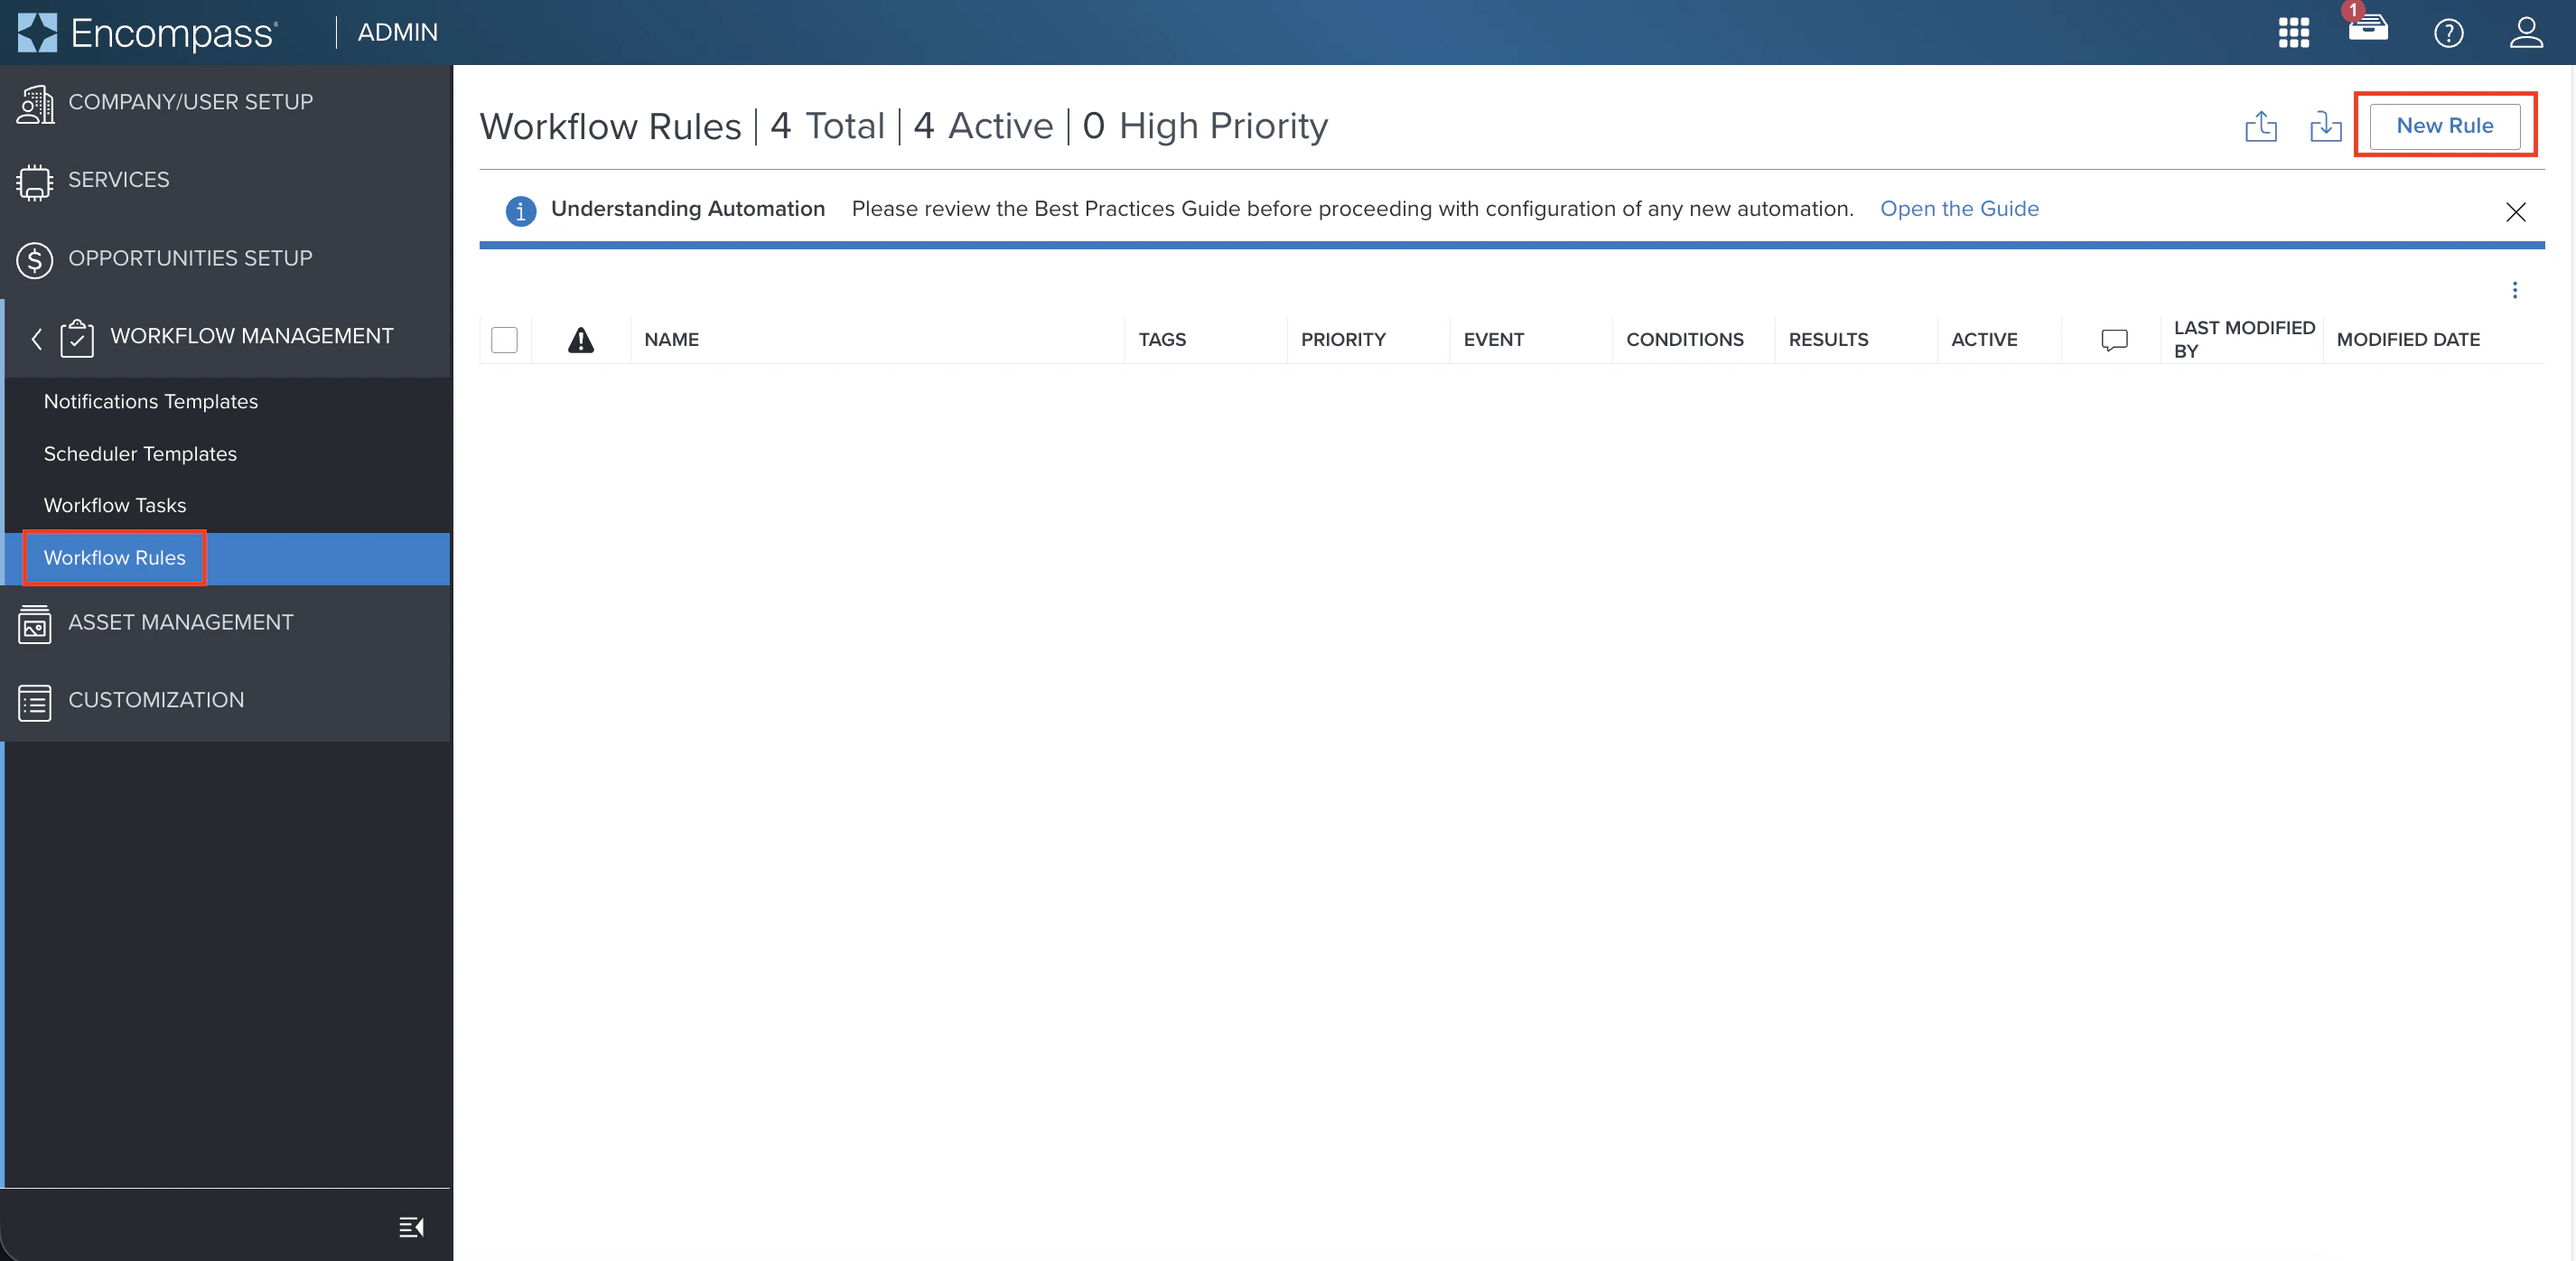

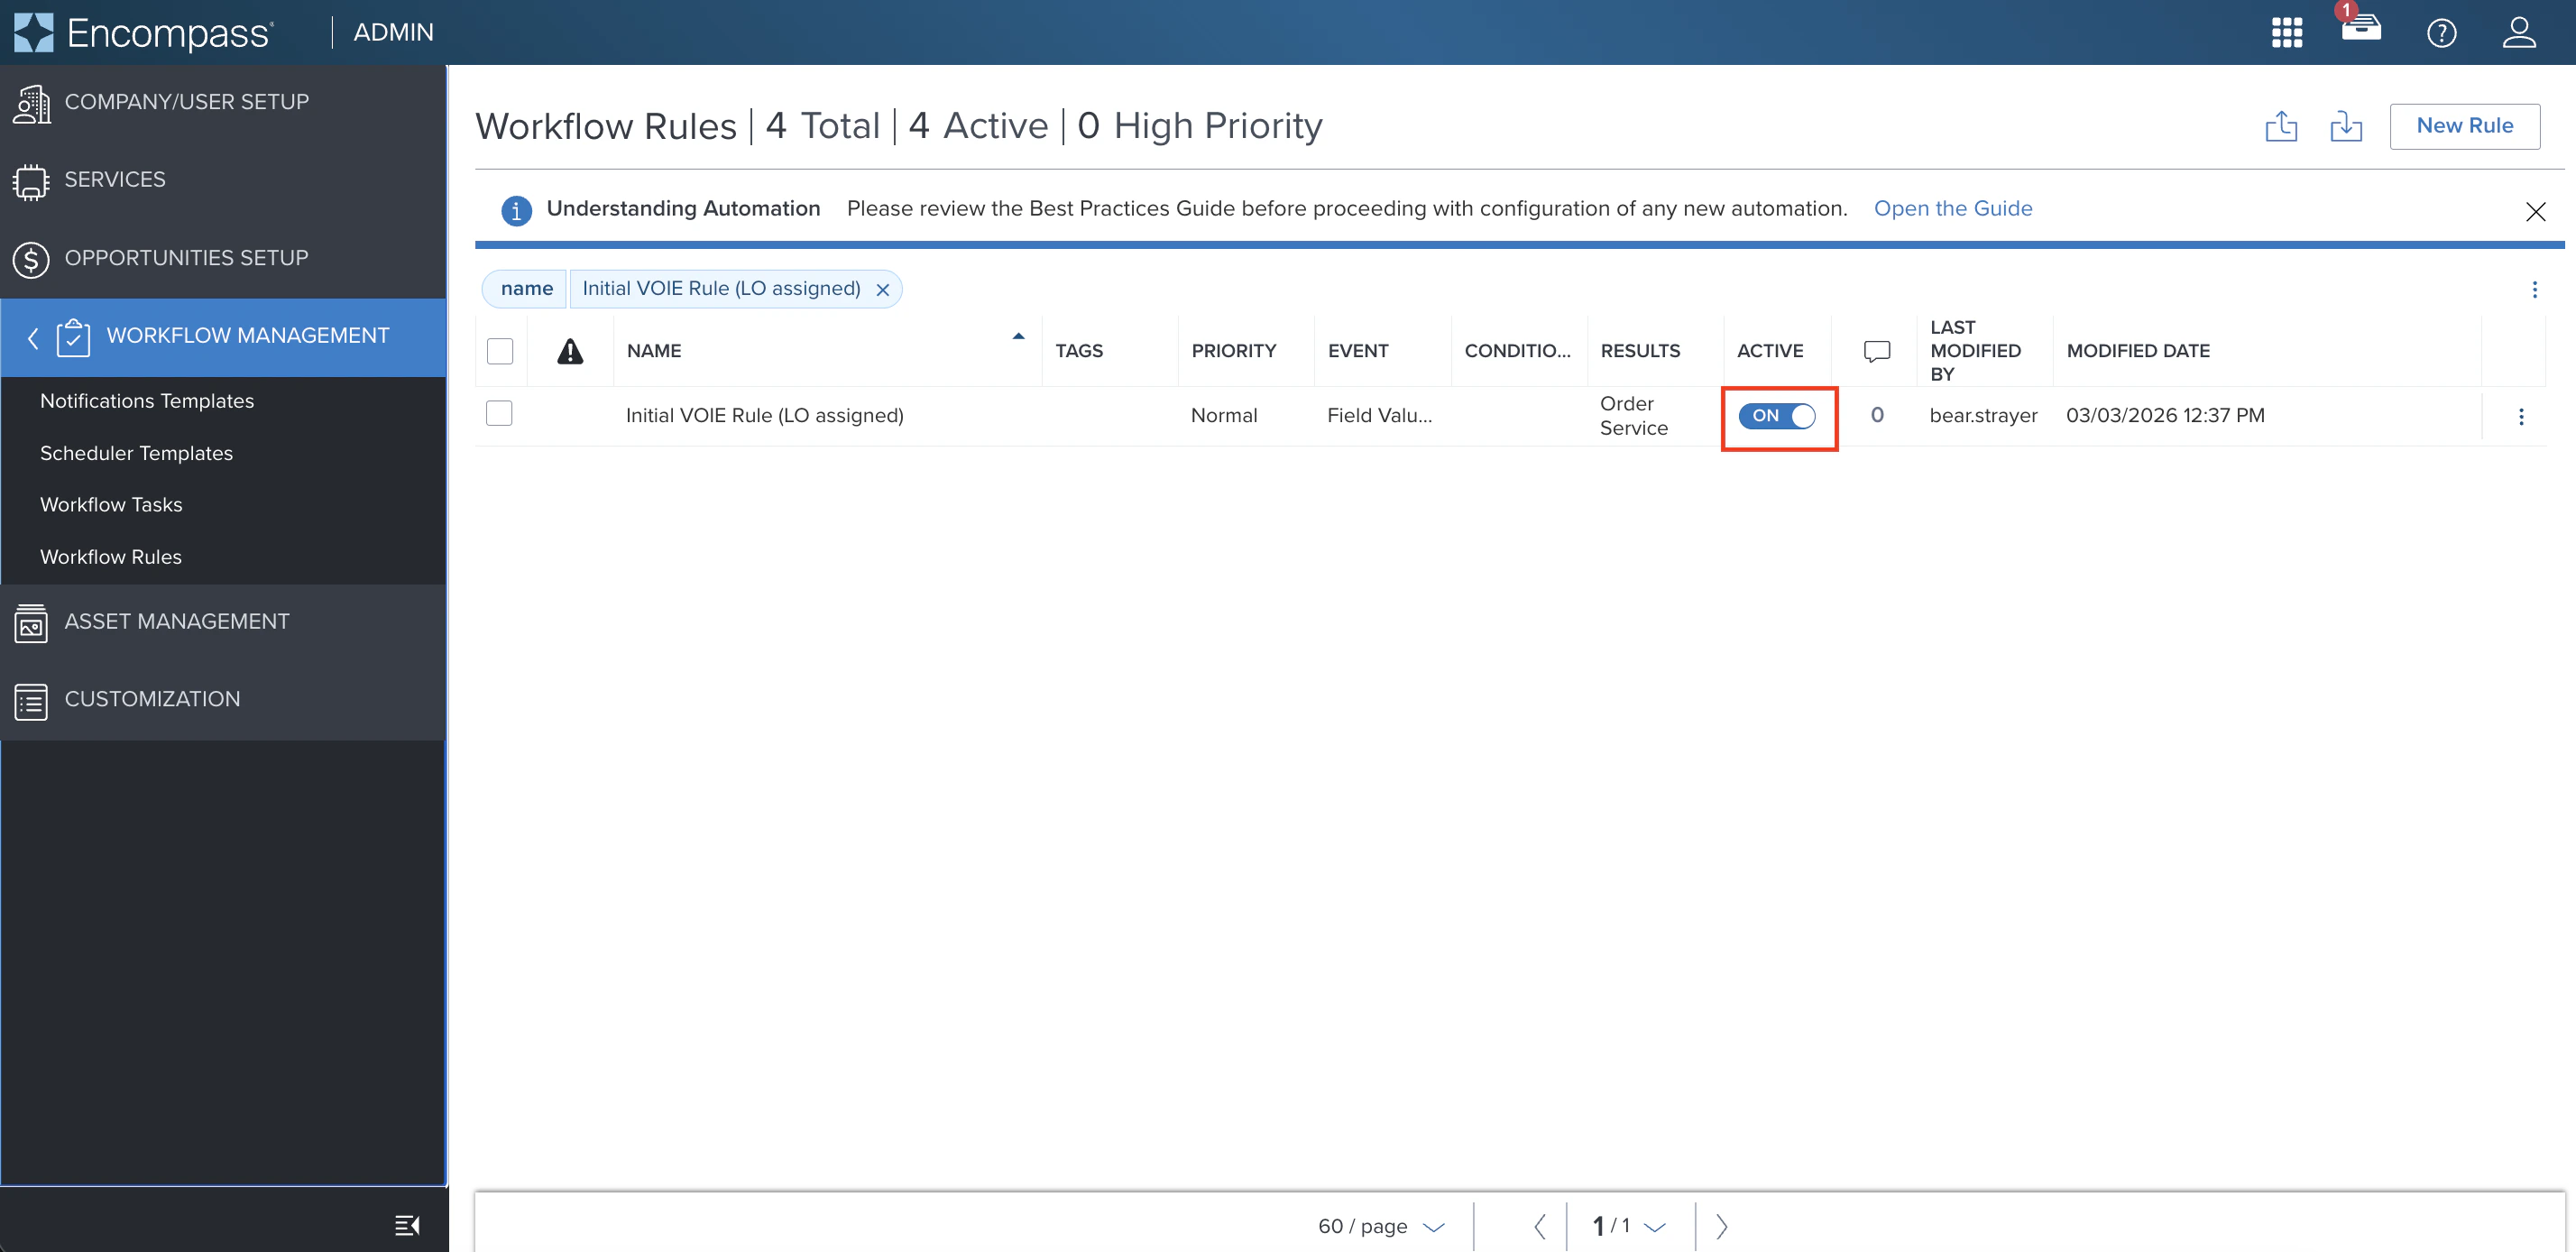
Also set:
- Rule Name: Use a name that reflects what triggers the rule and when
-
Rule Effective Date: Set to Loan Created Date or Application Date after the agreed go-live date

- Open the Resulting action dropdown and select Order service
- Scroll down and select the Service Order configured in Step 2
-
Click Save
5
Additional Truv Configurations
Work with your Truv Customer Success Manager to configure:
- Employer filtering by Truv success rate — include only Green, Yellow, Red, or Gray rated employers
- Current employers only — limit ASO to currently active employers
- Status update recipients — notify loan officers, processors, group inboxes, or other roles when order status changes
Setup Walkthroughs
Initial ASO Setup
Refresh ASO Setup
Next steps
Create and Manage Orders
Manual ordering for VOIE, VOE, VOA, and Income and Assets
Customization
Templates, eFolder mapping, and notification settings
Encompass LOS Setup Guide
One-time Encompass configuration