Deposit Switch
Automatically switch customer direct deposit to your bank
Paycheck Linked Lending
Automatic loan repayment from paycheck
85%+ Coverage
Connect to most US payroll providers
Instant Setup
Changes take effect on next pay cycle
Quick start
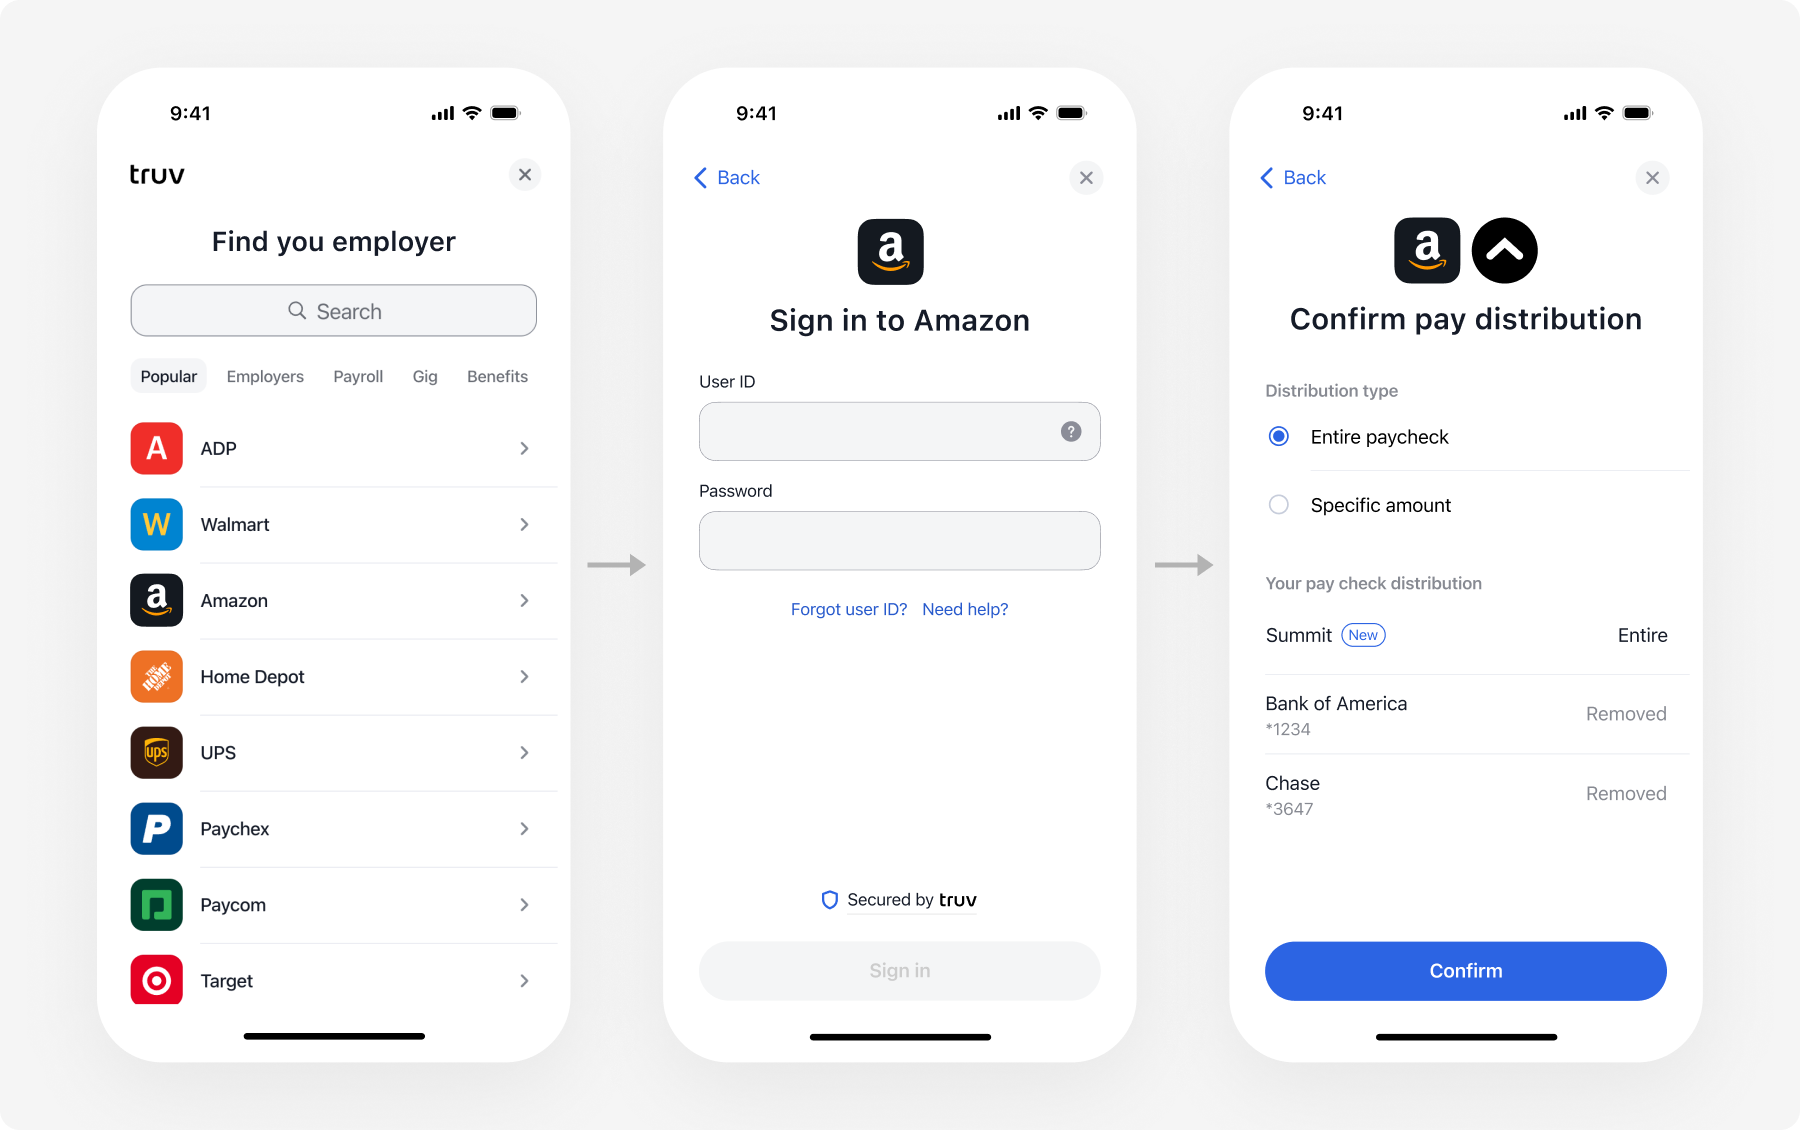
Direct Deposit Switch Demo
Run the demo app to see deposit switching end-to-end, then follow the integration guide to build it into your app. Clone the demo app →
What you can do
Deposit Switch
Use cases:
- New account funding
- Customer acquisition
- Payroll deposit capture
- Customer connects their payroll account
- Truv updates direct deposit settings
- Next paycheck deposits to your bank
Paycheck Linked Lending
Use cases:
- Consumer loan repayment
- Earned wage access repayment
- Subscription collection
- Customer authorizes payroll deduction
- Set repayment amount (fixed or percentage)
- Payment automatically deducted each pay period
Integration: User Token Flow
Deposit Switch and Paycheck Linked Lending use the Bridge Widget flow (User + Bridge Token). Other verification use cases use Embedded Orders.
How it works
Deposit Switch Flow
Paycheck Linked Lending Flow
Implementation timeline
| Integration Method | Timeline | Code Required |
|---|---|---|
| Deposit Switch | 2-4 weeks | Moderate |
| Paycheck Linked Lending | 2-4 weeks | Moderate |
Get started
Choose your product
- Acquiring deposits? —> Deposit Switch
- Loan repayment? —> Paycheck Linked Lending
Implement your product
Direct Deposit Switch
Switch customer deposits to your bank
Paycheck Linked Lending
Set up paycheck-linked loan repayment
Next steps
Direct Deposit Switch
Implement deposit switching
API Reference
Complete API documentation
Schedule Demo
Talk to our banking solutions team