

Automation Rules of Truv Verifications in Encompass
Overview
Truv operates on a consumer-permissioned model, empowering users to verify income and employment by seamlessly logging into their payroll system. The integration with Encompass enhances Truv's capabilities, enabling the automatic triggering of Truv Orders directly within the Encompass platform.
Traditionally, loan officers and processors had to manually initiate Truv Order within Encompass. The new automated feature eliminates this manual step, providing a seamless and time-saving solution. The automatic triggering is particularly advantageous at the loan creation stage in Encompass, expediting the verification process.
Setup
- Log into Encompass as an administrator using Encompass Web.
- Navigate to the Admin tab at the top of the screen, select Services on the left navigation.
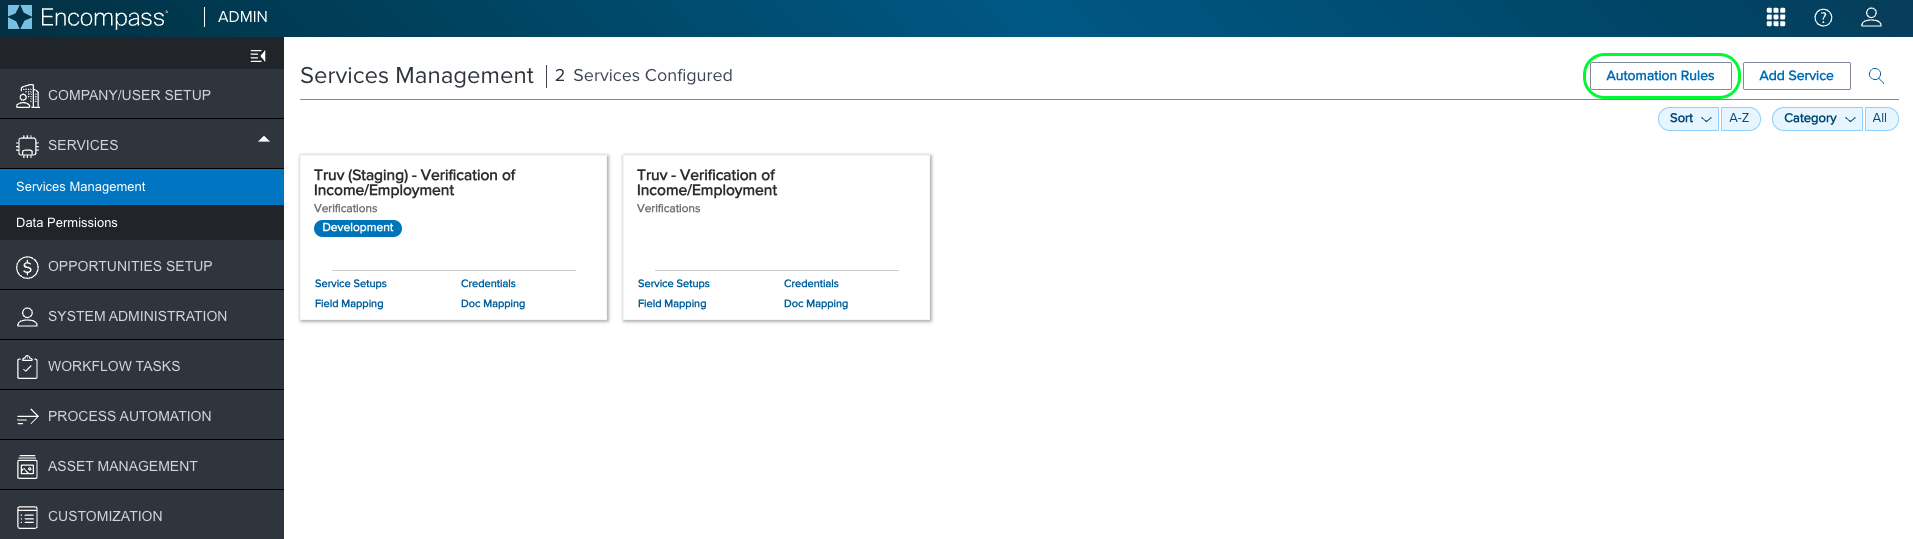
- Under Services Management, ensure Truv is configured following the Encompass Admin User Guide.
- On the top right side of the screen, click the Automation Rules button
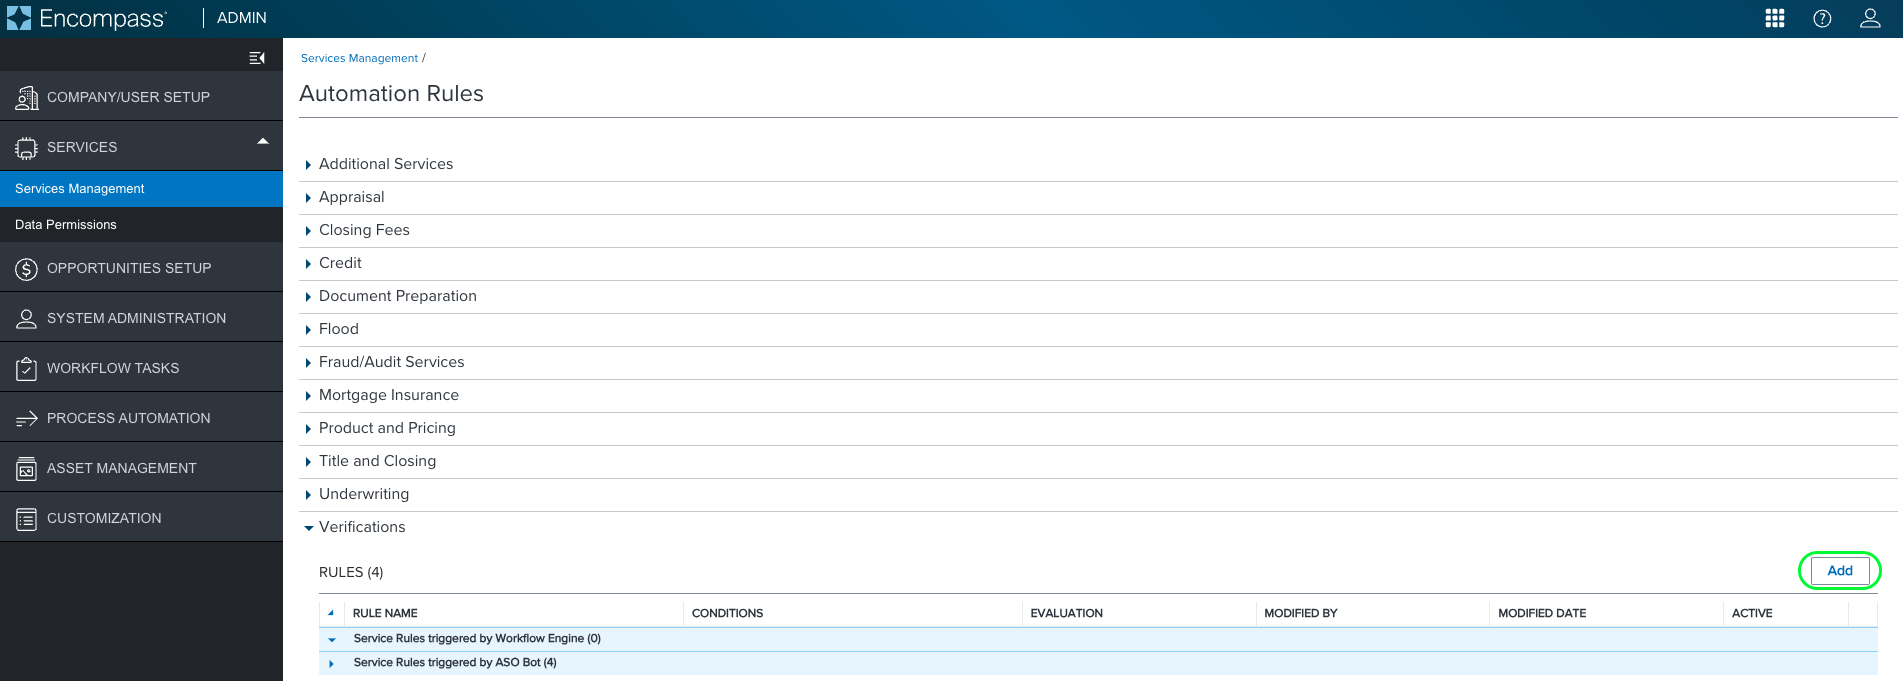
- Expand the Verifications category and click the Add button.
This step enables the definition of rules for automated verifications.
NoteEstablish a single rule to trigger Truv automatically. Once the set up is done, this applies to all Borrower and co-borrower pairs within the loan.
Adding a new Rule
The following steps guide the creation of rules for (multiple) employments for both borrowers and co-borrowers.
-
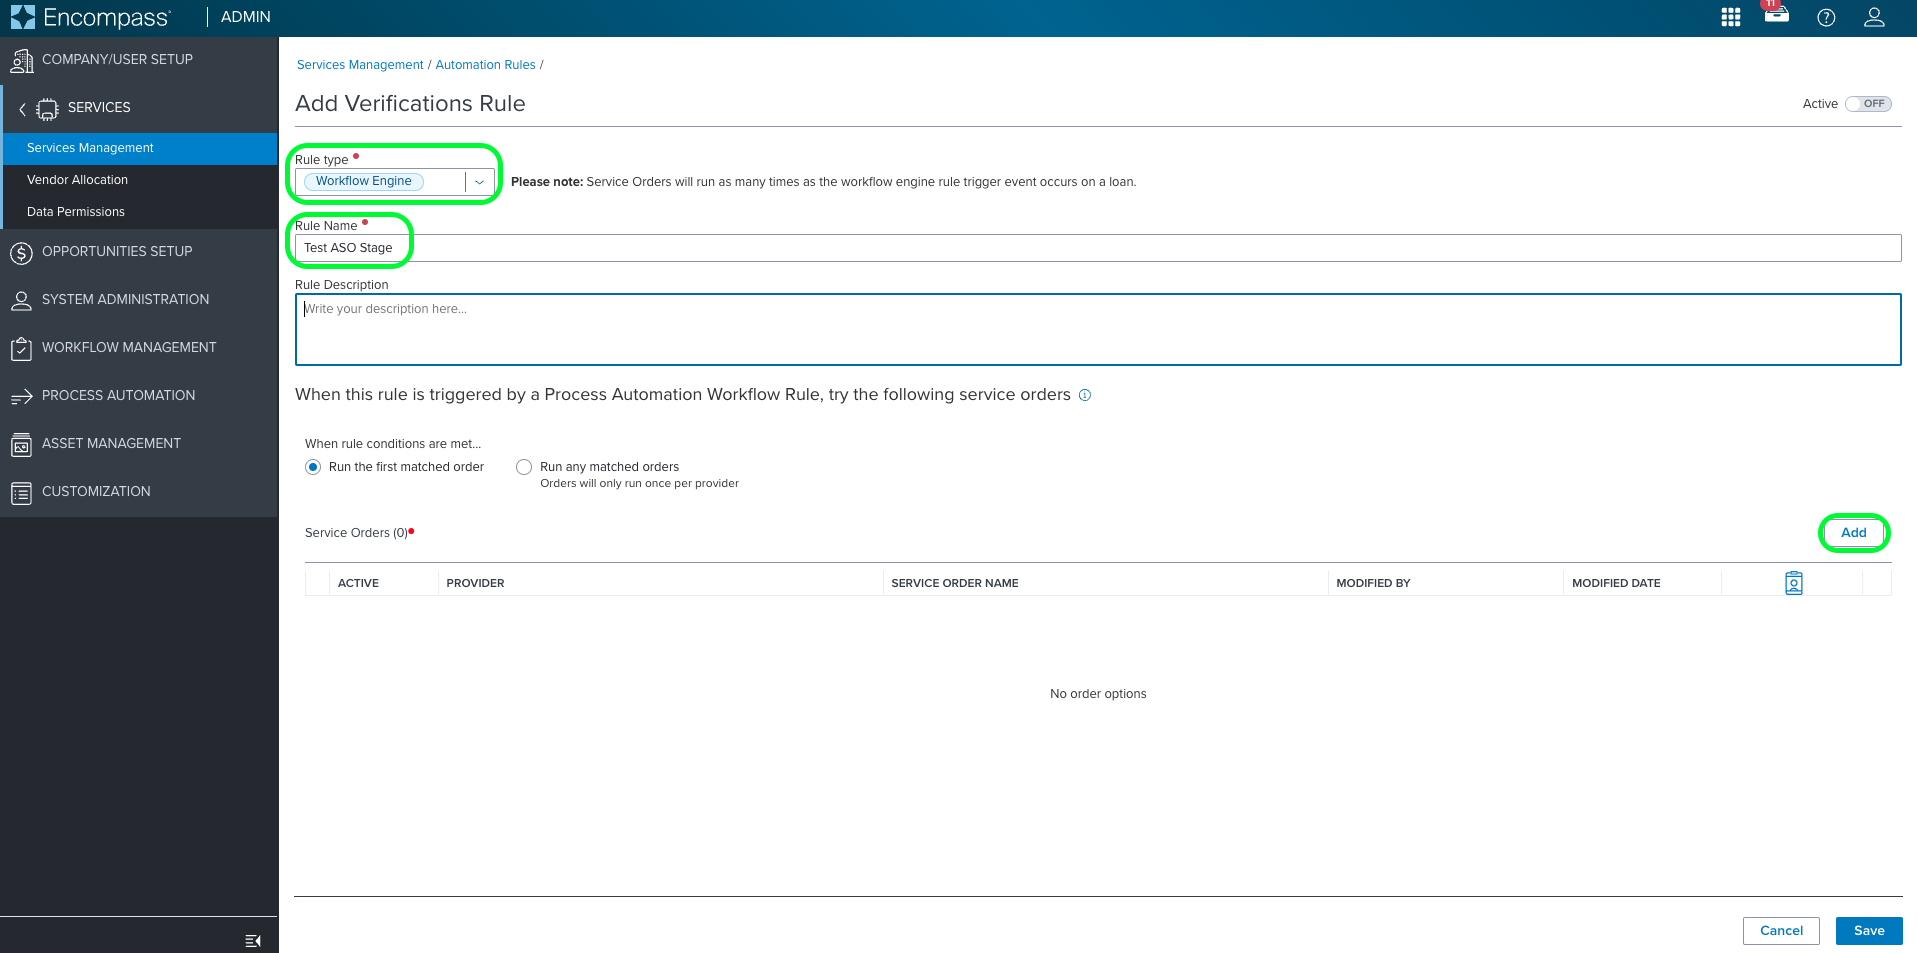
Select the Rule Type as Workflow Engine.
-
Add a Rule Name and Description to uniquely identify your ASO rule.
- NOTE: Conditions for when the Workflow Engine rule should be executed are defined later in the Process Automation tab.
-
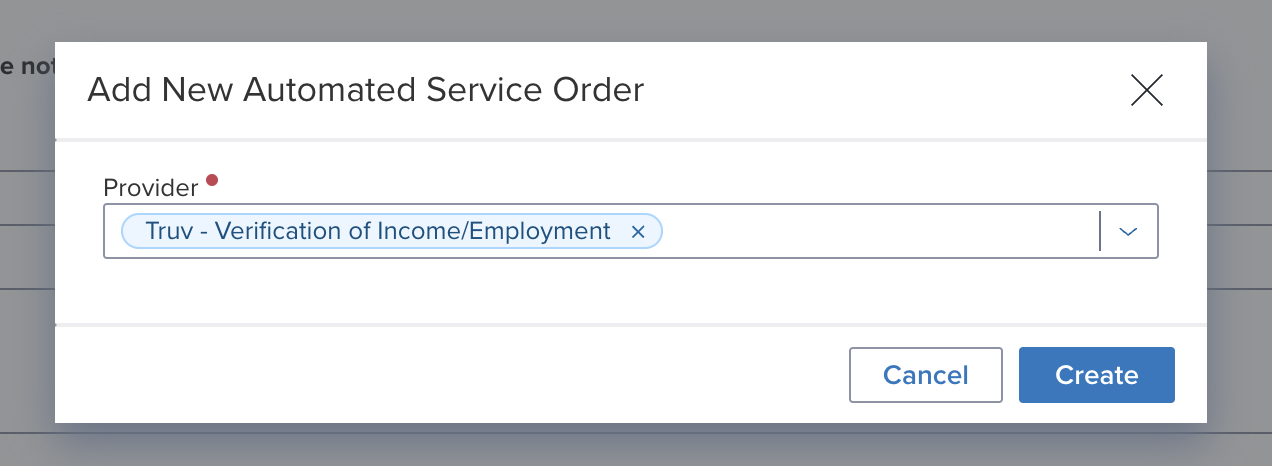
Select the Add button under the Service Order section, then choose Truv as the Provider in the Add New Automated Setup pop-up, and click Create.
Adding a Service Order
-
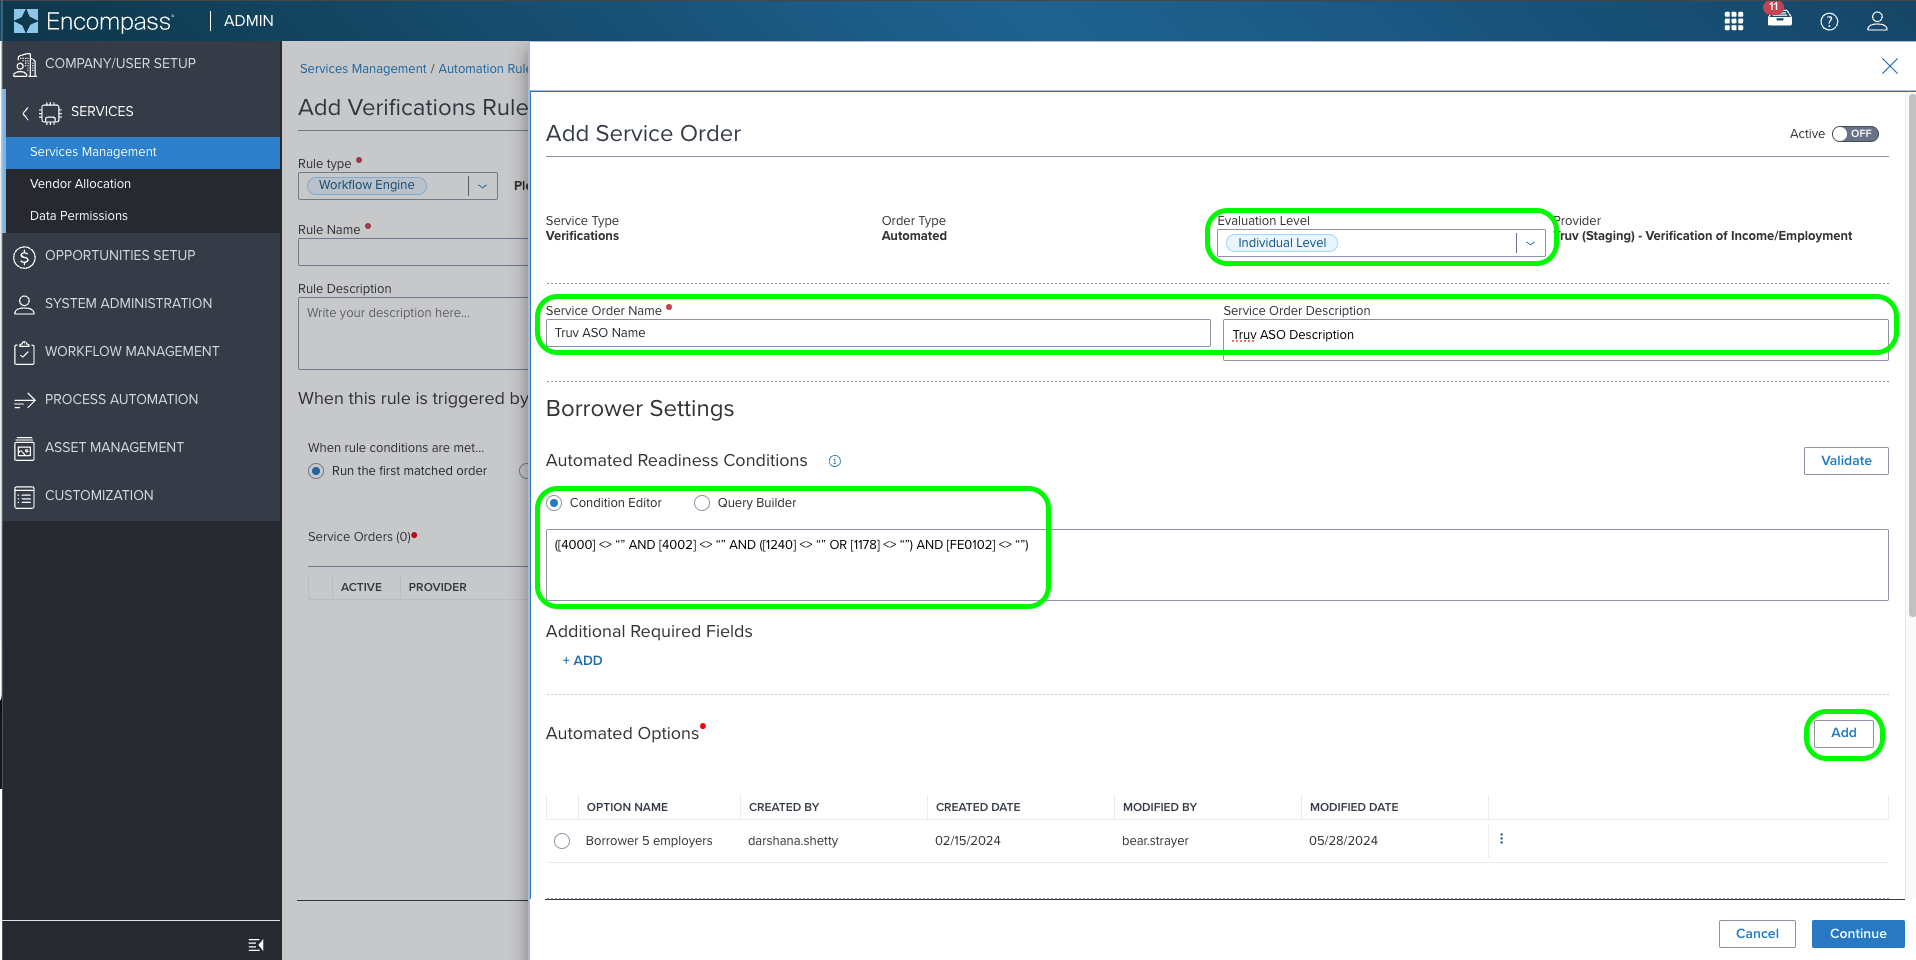
You should see the Add Service Order window open up
- Under Evaluation Level field, select Individual Level
- Enter the Service Order Name and Service Order Description,
- Under Borrower Settings, in Automated Readiness Conditions, pick Condition Editor paste the below condition and click 'Validate'
- ([4000] <> “” AND [4002] <> “” AND ([1240] <> “” OR [1178] <> “”) AND 2] <> “ <> “”)
- Co-borrower has a different query as it relates to different fields
- ([4000] <> “” AND [4002] <> “” AND ([1240] <> “” OR [1178] <> “”) AND 2] <> “ <> “”)
- Click on the Add next to Automated Options under Borrower Settings
-
This now opens up the Truv Template .
-
Enter the Name of the template and Number of employments and then click on Save.
- NOTE: Truv allows up to 5 employers per borrower. We recommend selecting this as 5.
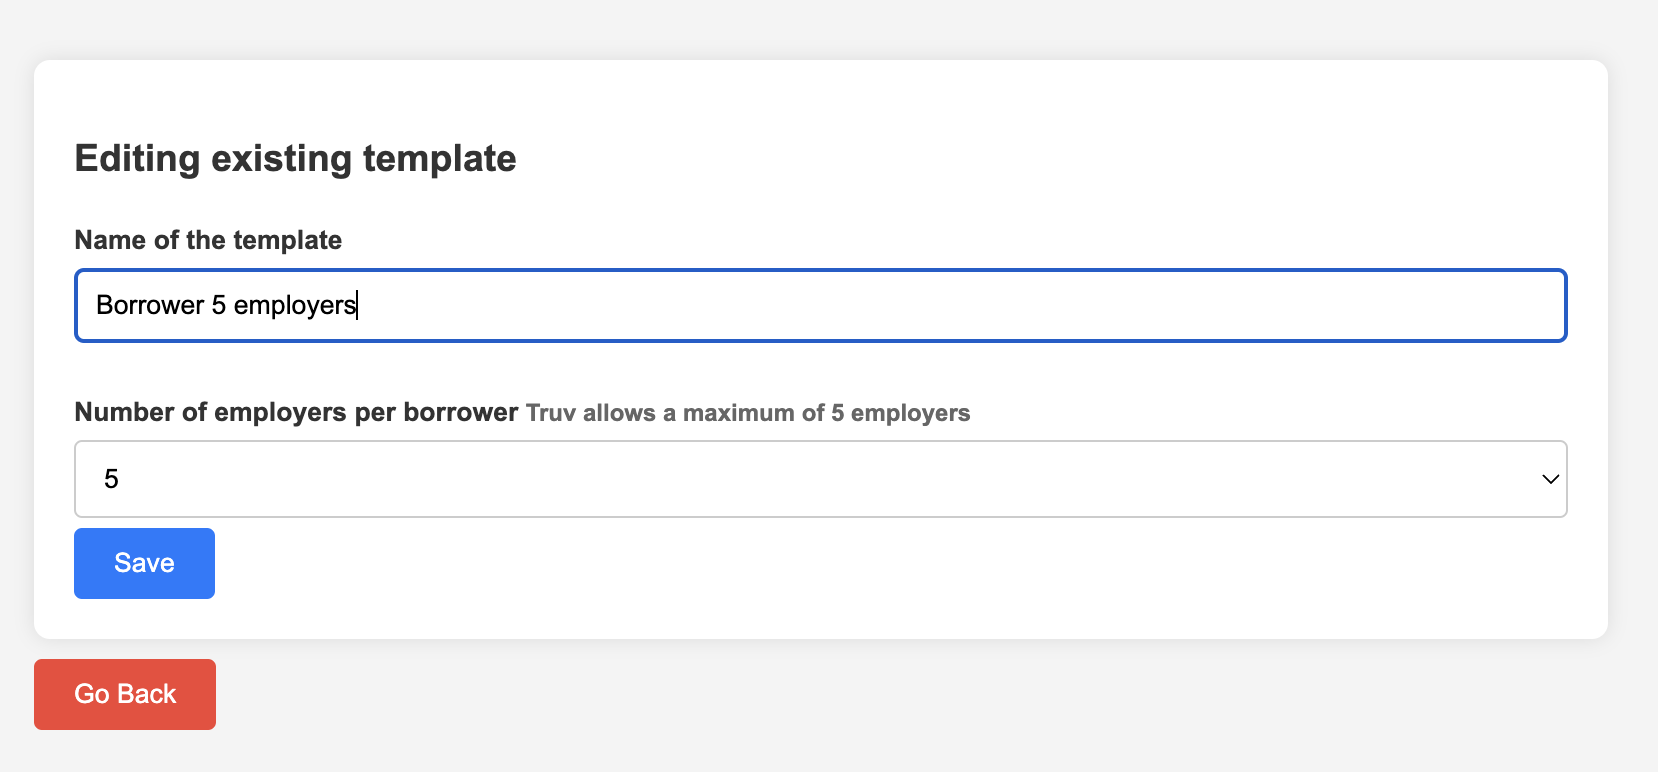
- Click on the Go Back button to go to the Service Order if you are not automatically navigated.
-
-
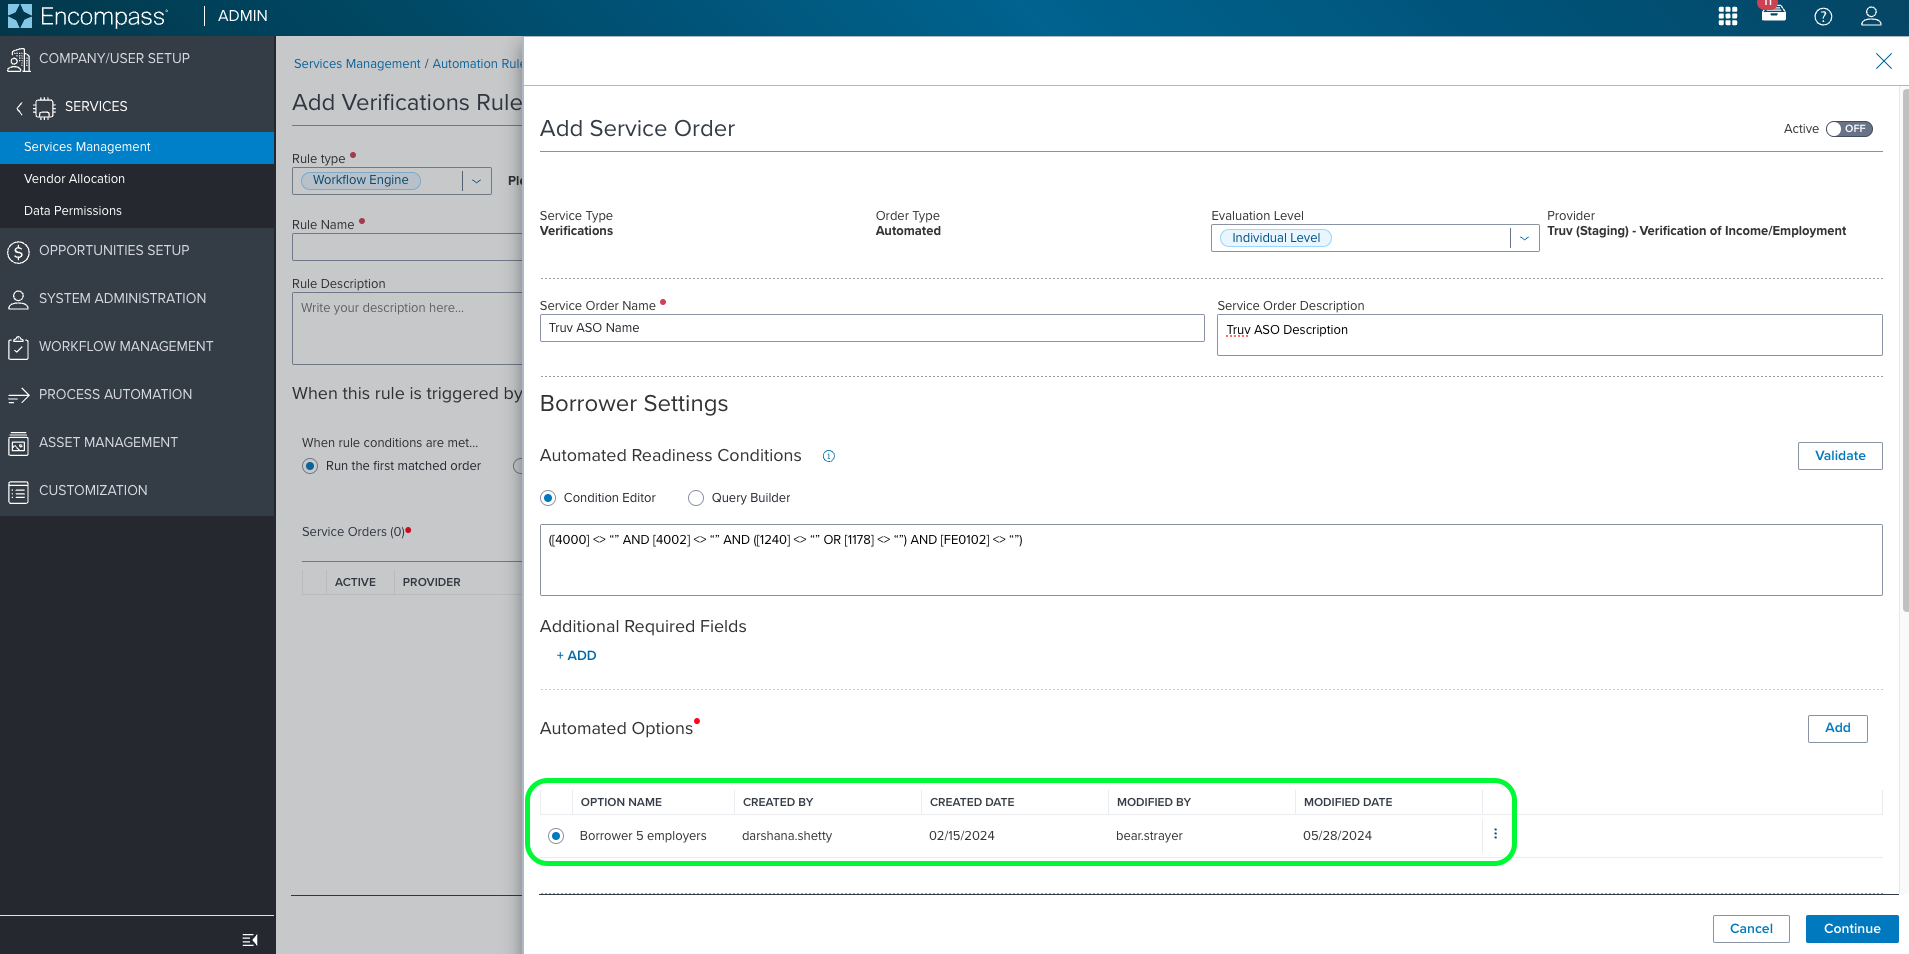
Select the Truv Template in Automated Optionsthat you just created for Borrower
-
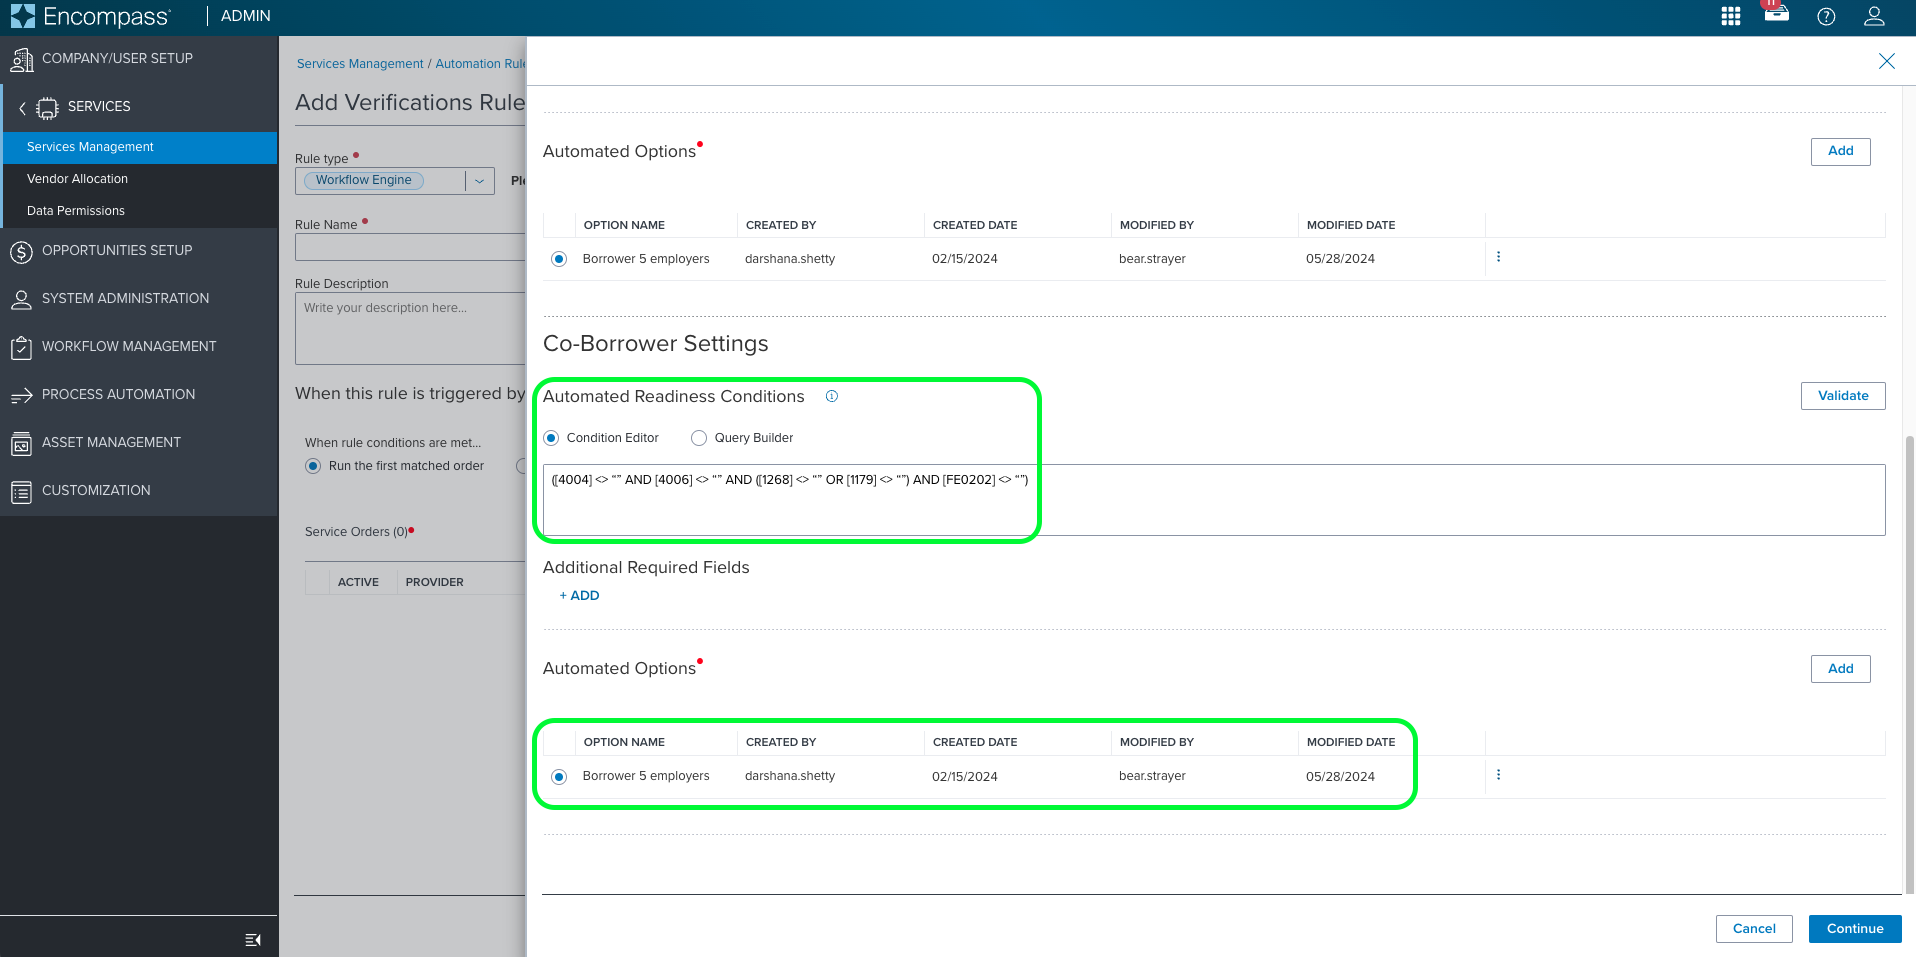
Scroll to the Co-Borrower Settings and repeat Steps 1 - 3 for the Co-Borrower.
- Please NOTE the Condition Editor query for the Co-Borrower is different from the Borrower
- ([4004] <> “” AND [4006] <> “” AND ([1268] <> “” OR [1179] <> “”) AND 2] <> “ <> “”)
- You can skip Step 2 if you plan to use the same template for the Borrower and Co-Borrower, but you'll still need to select the template for the Co-Borrower in the corresponding Automated Options
- If you want to create a different template, see Step 2 and select that template for the Co-Borrower
- Please NOTE the Condition Editor query for the Co-Borrower is different from the Borrower
-
Click on the Continue button at the right bottom corner to proceed after selecting the template for both the Borrower and Co-borrower.
- Ensure you see Truv with the newly created Service order under the Service Order
- As a final step ensure you have the Service order as Active and click on the Save button
Creating Workflow Rules
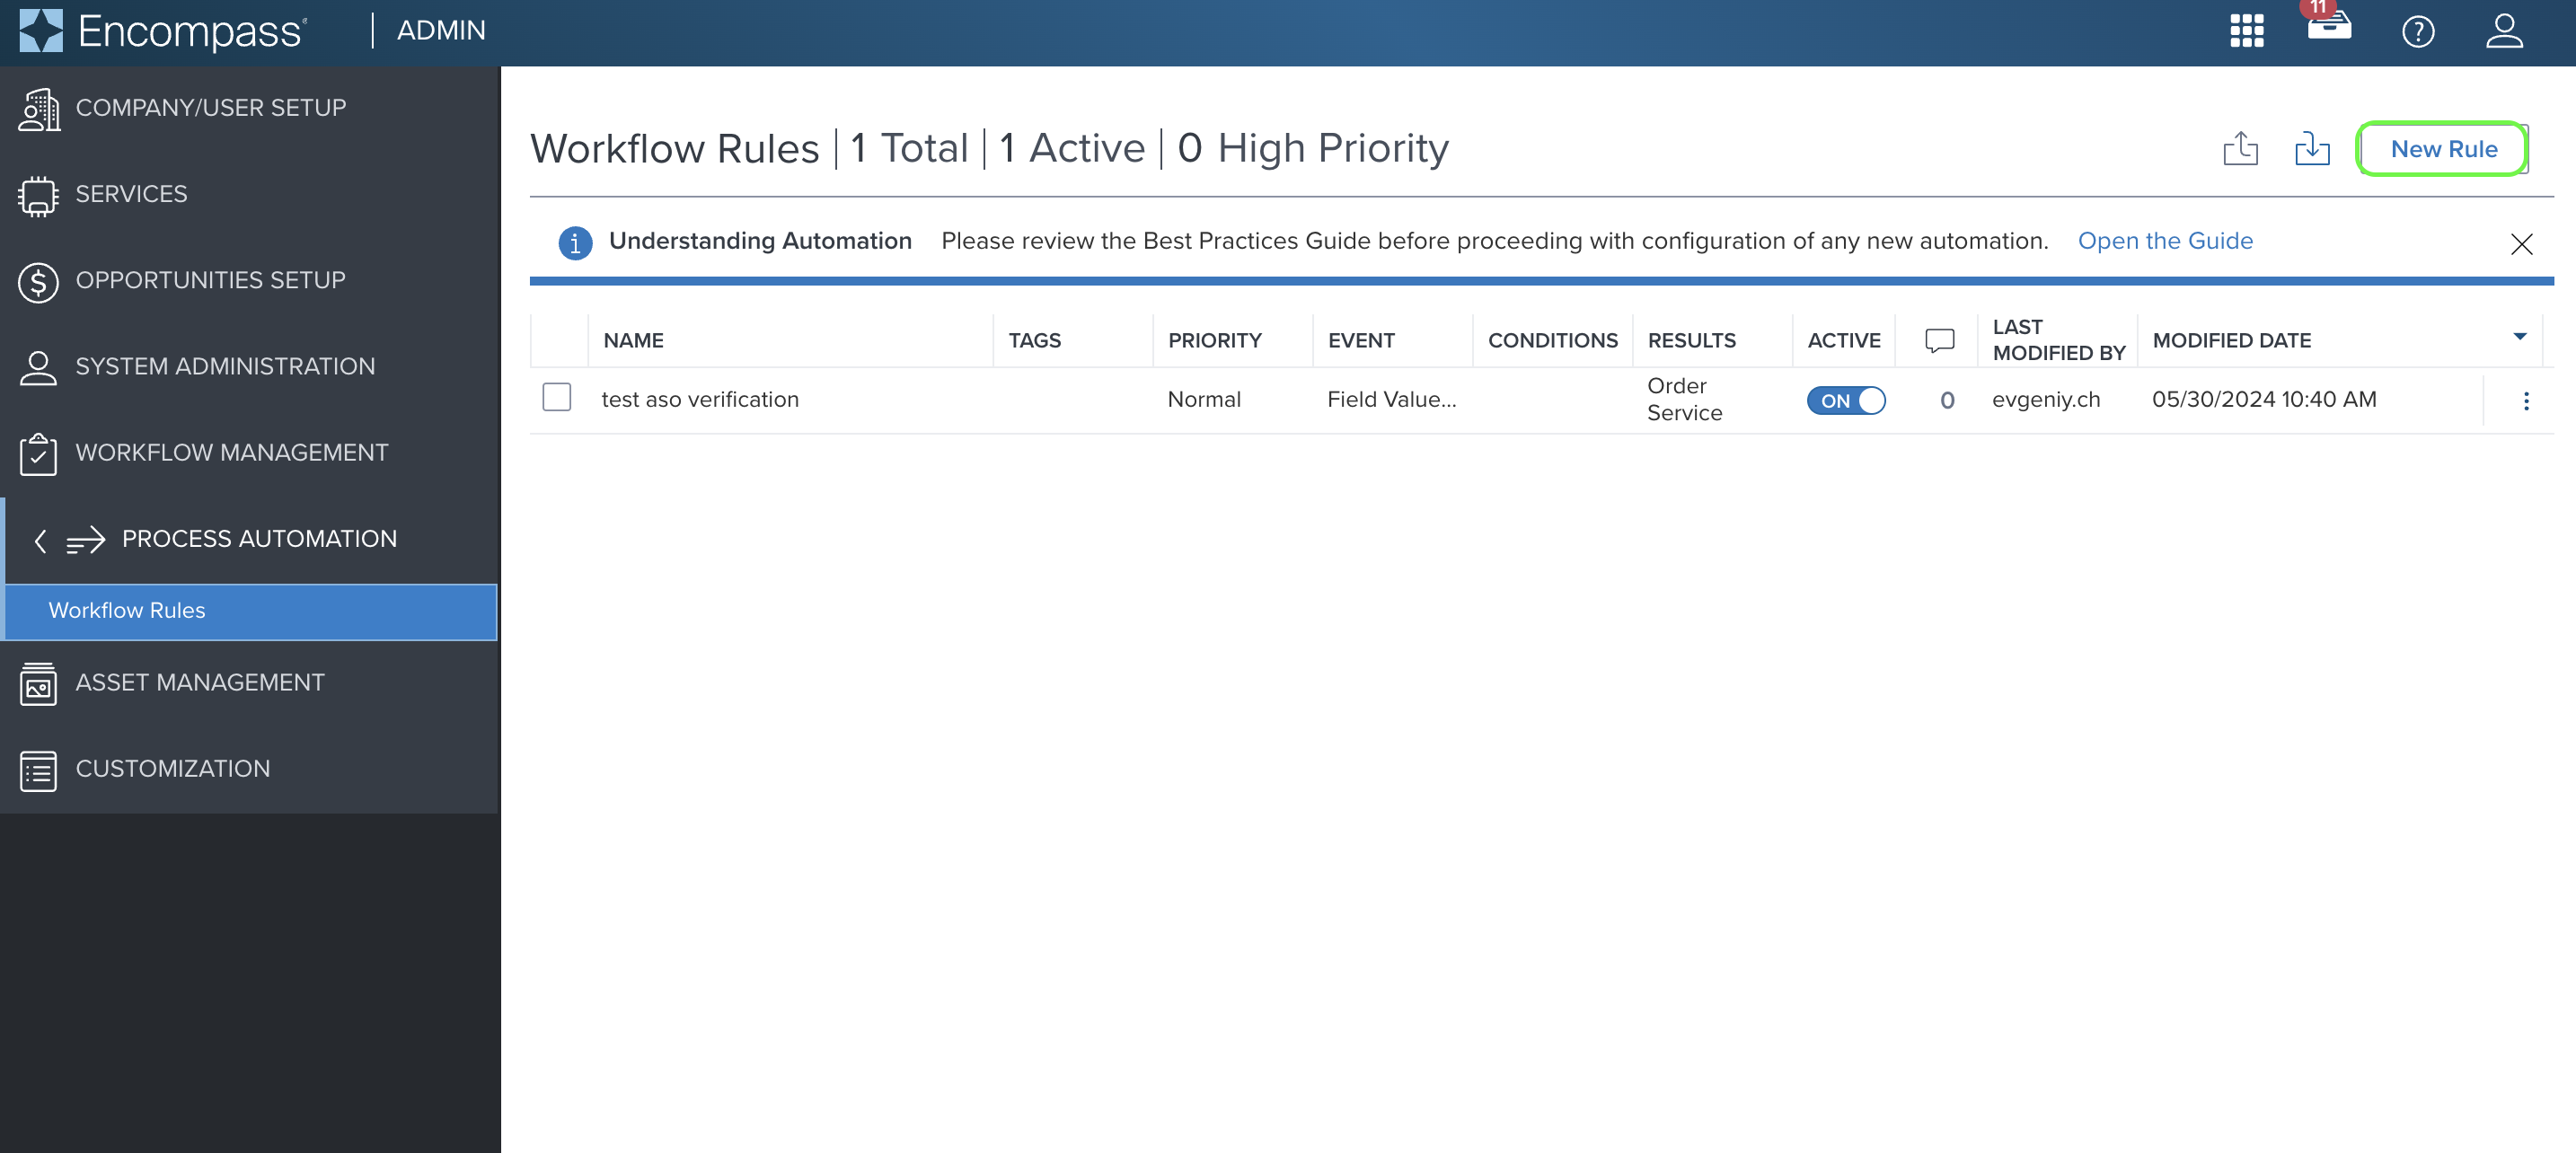
Create a Workflow Rule to set when an automated Truv order should be placed.
- Go to the Workflow Rules tab under Process Automation in Encompass Admin, then select New Rule
- Add the Rule Name, Rule Effective Date, Triggering Event, and Conditions
- The Rule Effective Date allows you to specify loan or application cutoff dates when this rule should apply
- The Triggering Event determines when this rule will run.
- For example, if Triggering Event is Loan Created, it will attempt to run the rule at Loan Creation
- For example, if Triggering Event is Field Value Modified - Field ID 317 - Any Change, it will attempt to run the rule anytime there is a change to Field 317 (LO Name)
- If there are Conditions set, it will evaluate against those to decide if it should execute or not.
- Conditions allow users to specify more granular scenarios where the rule should execute. In addition to the conditions, select any loan Channels where this rule should apply.
- By combining the right Triggering Event and Conditions, users can setup advanced scenarios for when to automatically order Truv.


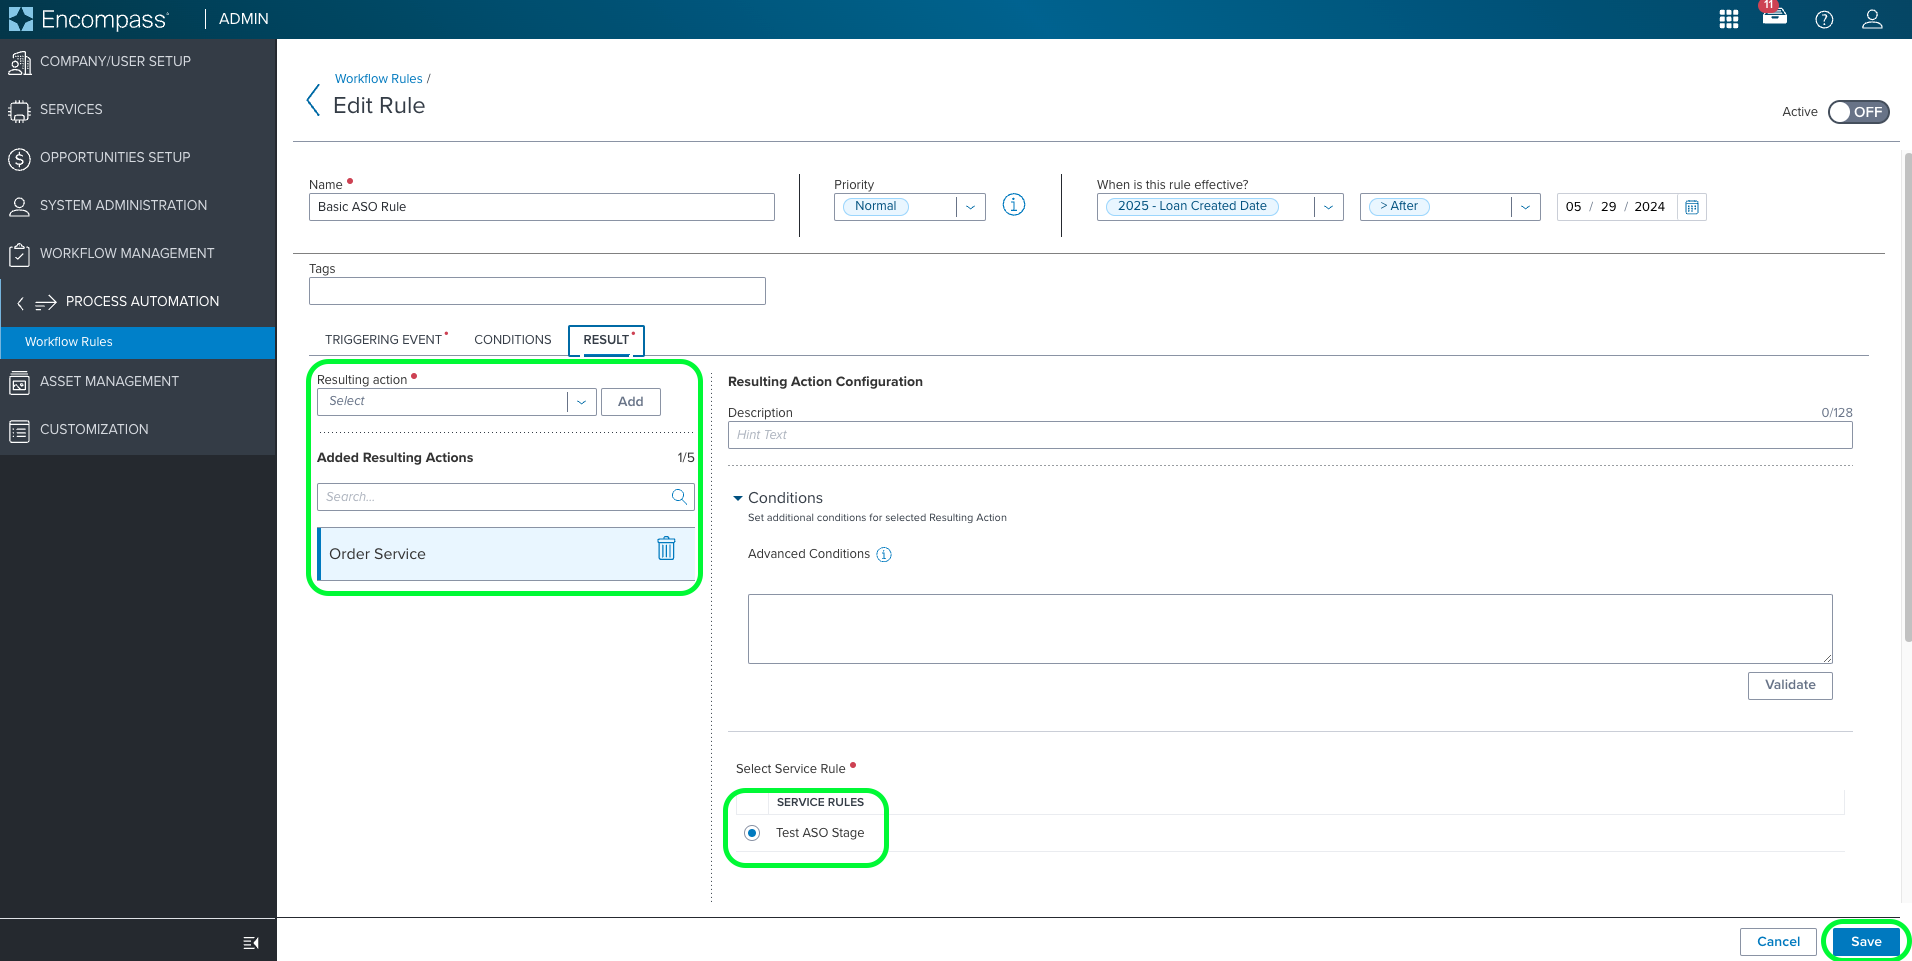
- Set the Result action
- Under Resulting action search and select Order Service
- Select the Service Order we setup earlier in the guide and Save
- Ensure your rule has Active mode switched ON
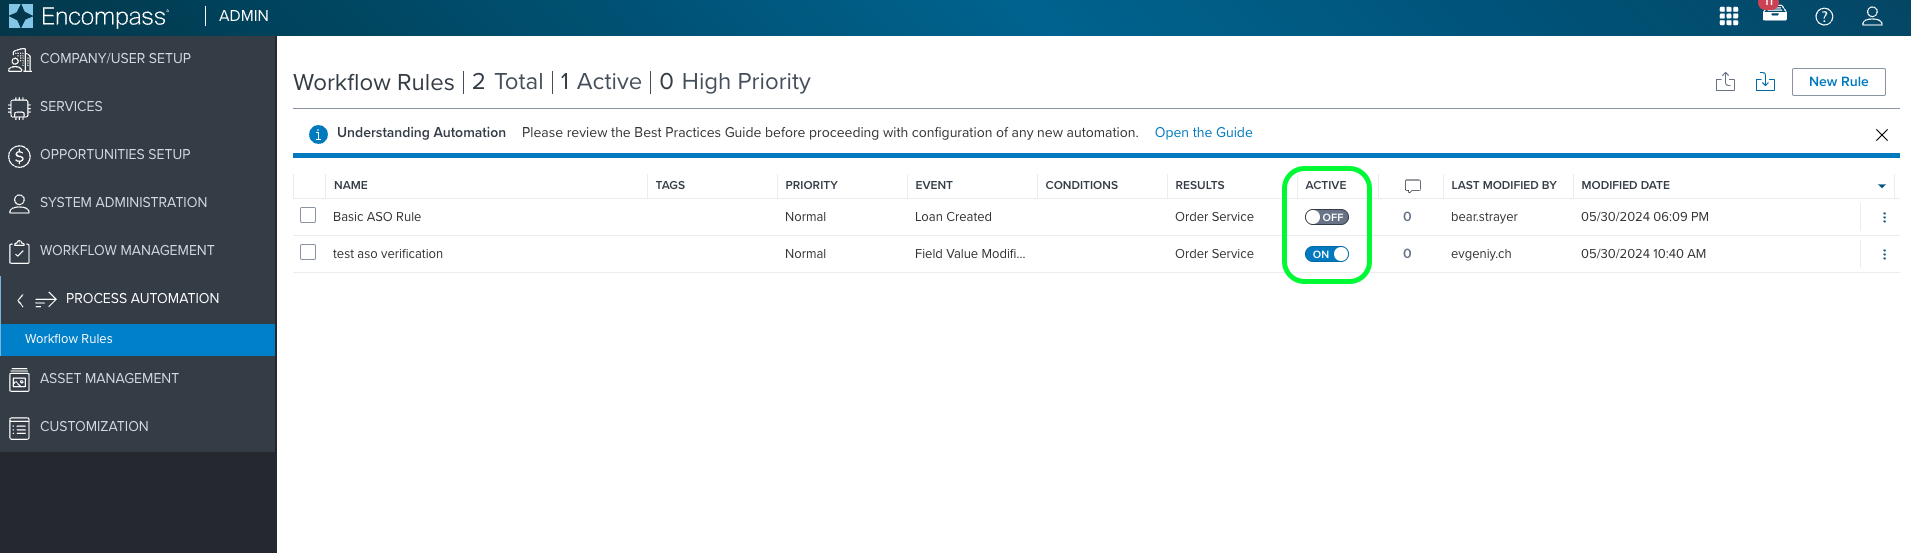
NotePlease ensure that each Rule is enabled by setting the Active mode to ON.
If you are using Encompass SmartClient, please ensure to get out of the loan for ASO to work. If you are in the loan while trying to automatically trigger Truv, the order creation fails and has to be manually created.
Conclusion
The automatic triggering of Truv Orders within Encompass is a game-changer for mortgage professionals seeking to optimize their workflow. By leveraging this integration, lenders can achieve remarkable time savings, enhance borrower satisfaction, and accelerate loan processing. As the mortgage industry continues to evolve, embracing automated solutions like this not only meets current demands but also sets the stage for a more efficient and competitive future.