
TazWorks
Instantly verify employment history for US employees from within the TazWorks platform.
Overview
Truv helps Consumer Reporting Agencies (CRAs) and processors submit employment history verification requests for applicants. Now with TazWorks, customers use Truv’s verification workflow directly in TazWorks to complete employment history verification requests. The integration can also use Orders to contact users for their provider information.
Key Benefits
- Efficient Verification: Easily verify employment history details
- Reliable Data: Obtain accurate information and necessary documentation from trusted sources.
- Accelerated Process: Speed up the verification process for faster, more informed decisions.
Setup Guide for TazWorks Administrators
The steps below cover each part of setting Truv up on TazWorks using administrator privileges.
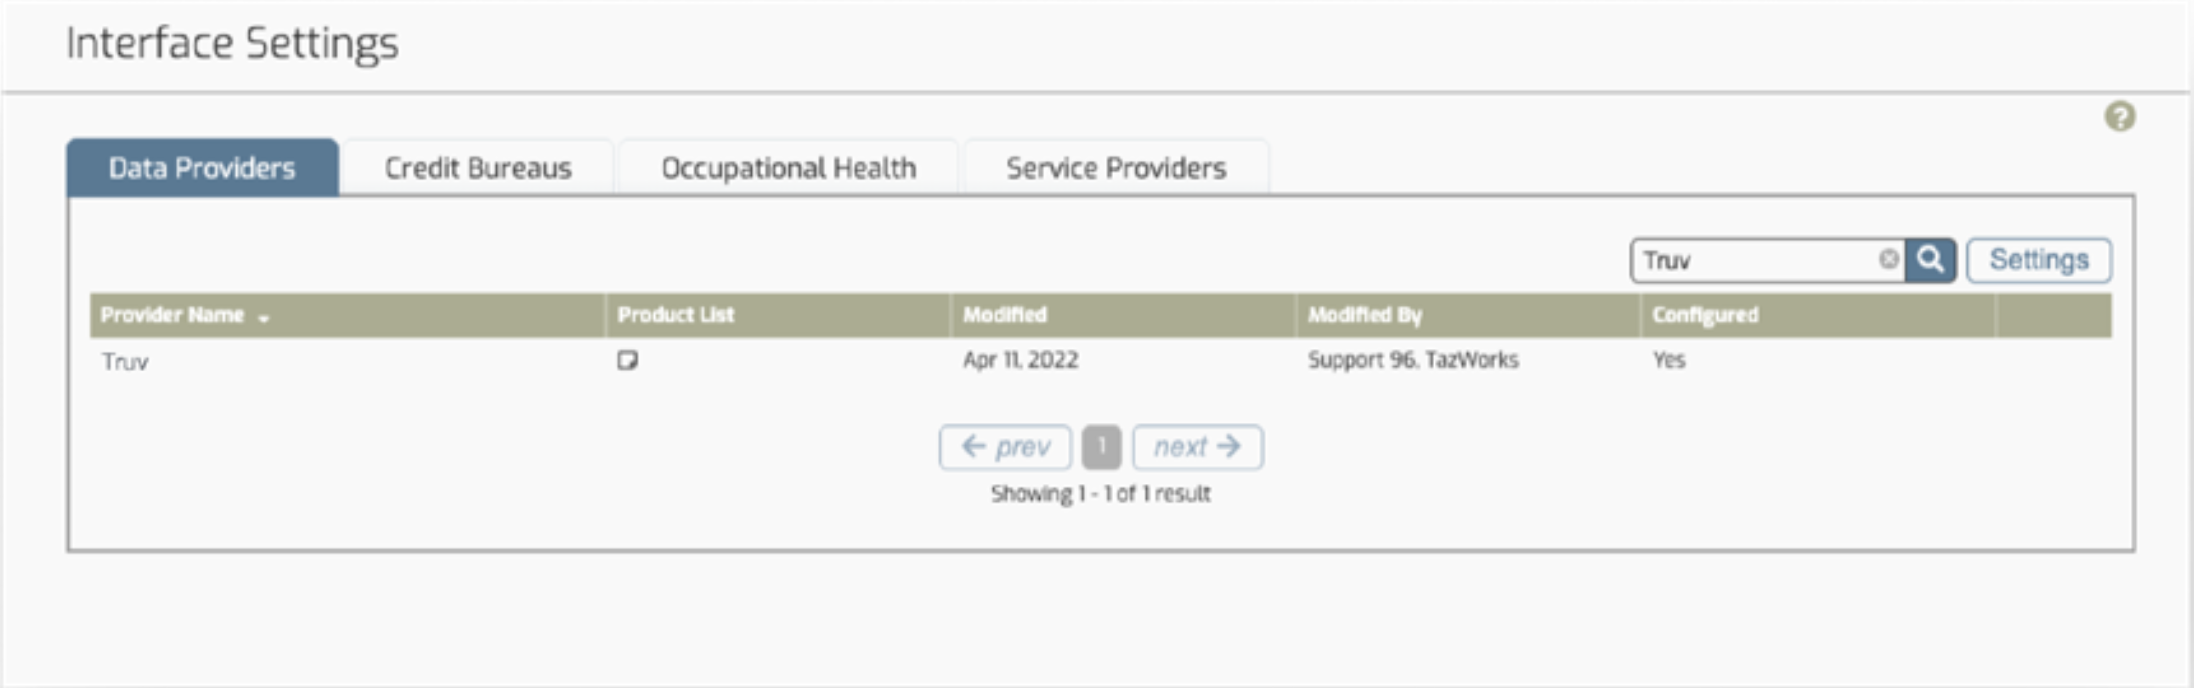
- Navigate to Admin → Vendors → Manage Interface Settings.
- Enter the Truv credentials under the Data Providers tab. Confirm the vendor is enabled on the back end with support.
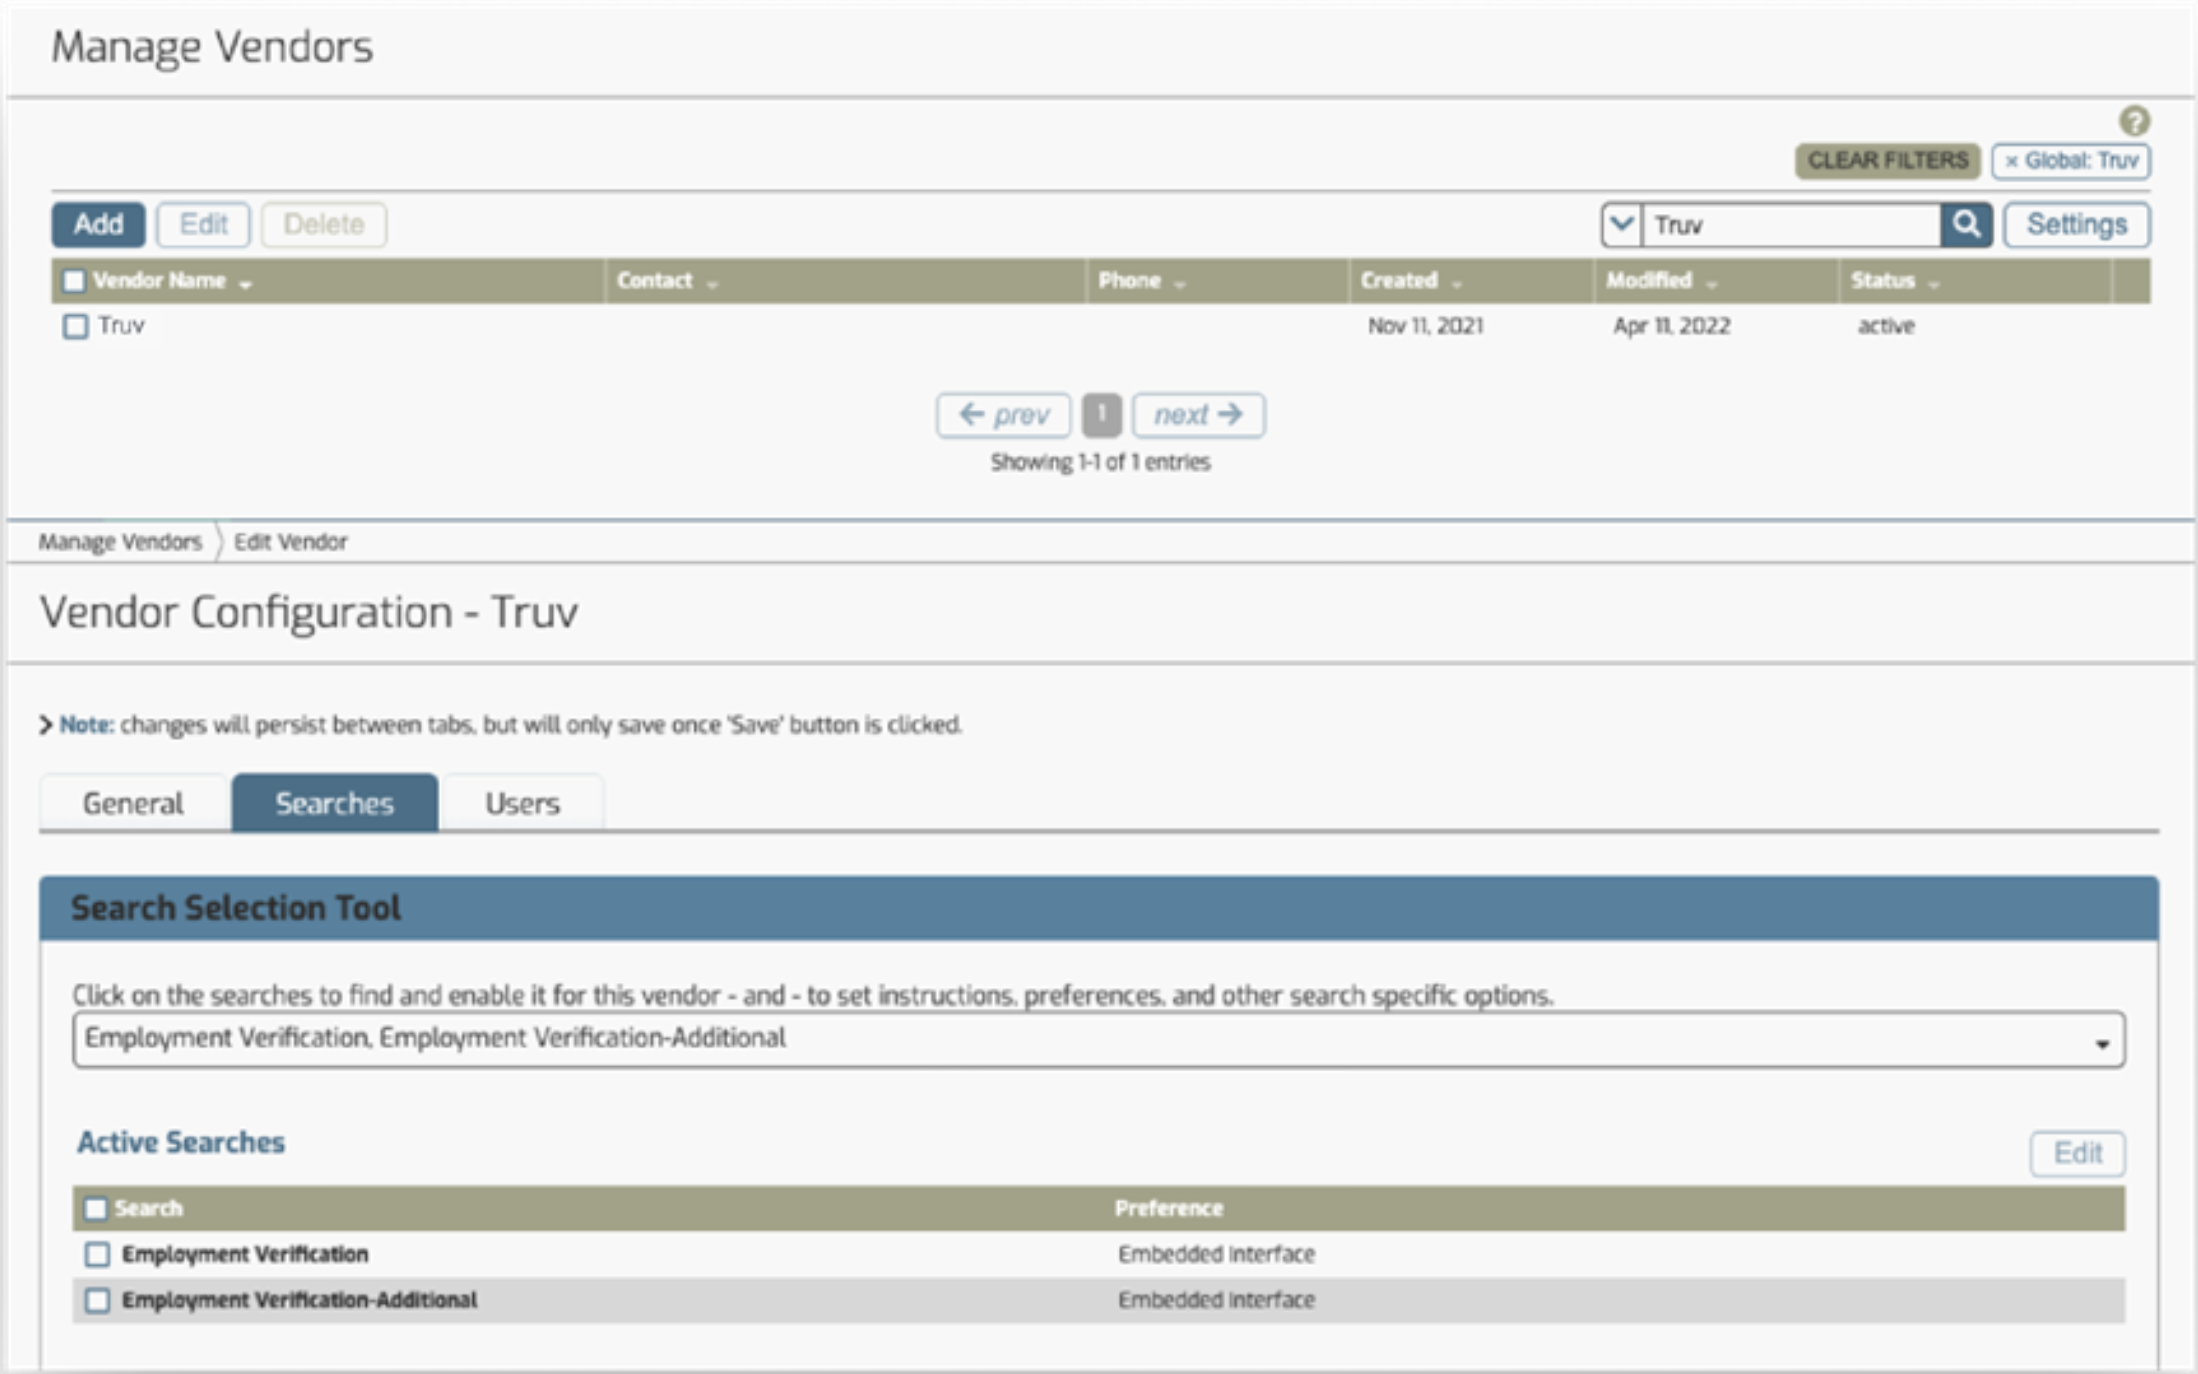
- Navigate to Admin → Vendors → Manage Vendors.
- Add a new vendor and enter the basic vendor information. Select Save.
- Select the Searches tab at the top, then select all searches that apply to the vendor.
- Navigate each search option and select Embedded Interface. Select Truv from the Data Provider dropdown and select Save.
- Navigate to Admin → Vendors → Manage Vendor Routing. Select Employment Verification, select Add and then Save.


Success!You can start placing verification orders!
Ordering verifications with Truv on TazWorks
The steps below are a walkthrough for configuring verifications with the TazWorks integration. The TazWorks integration uses Orders from Truv for contacting users to connect to their provider.
- Log into Tazworks, go to Order, then New Order, select Client and Product.
- Select Employment Verification, then select Next to proceed with the order submission.
- Complete all required fields. Including an applicant’s email and phone number to result in higher conversions. Confirm your applicant's consent before including email and phone number.
- Fill in the applicant’s current address and zip code, then select Next.
- Mark the employment status of the applicant and complete the employer details. Set May We Contact This Employer? to No, then select Next to proceed with the order submission.
- Select Complete Order.
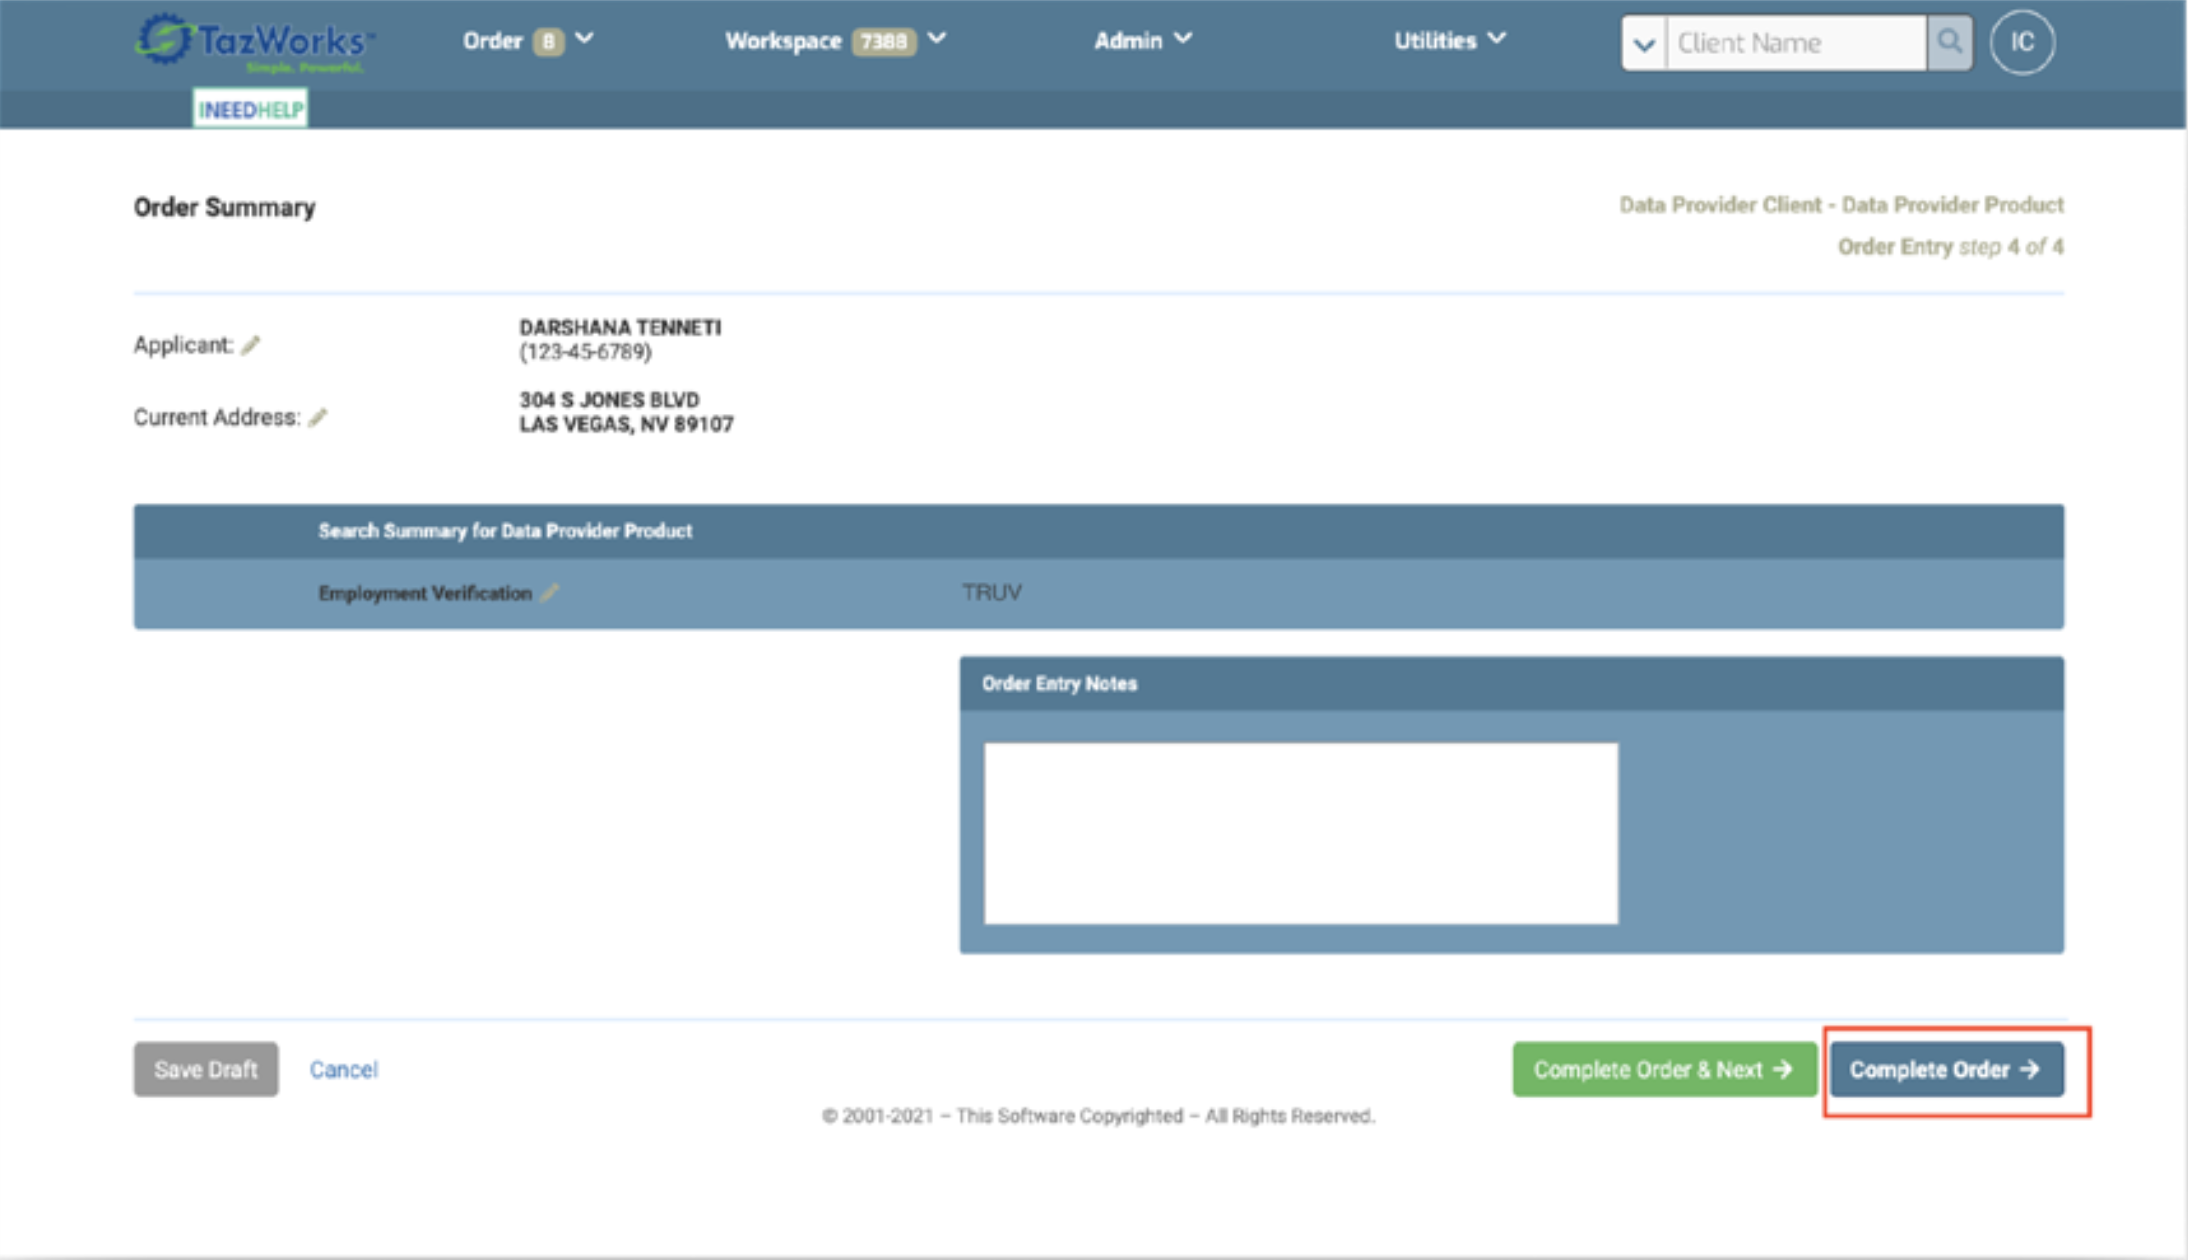
Success!Email and SMS messages guide the applicant to complete the verification using the Truv widget.
Monitoring Truv Verification Status
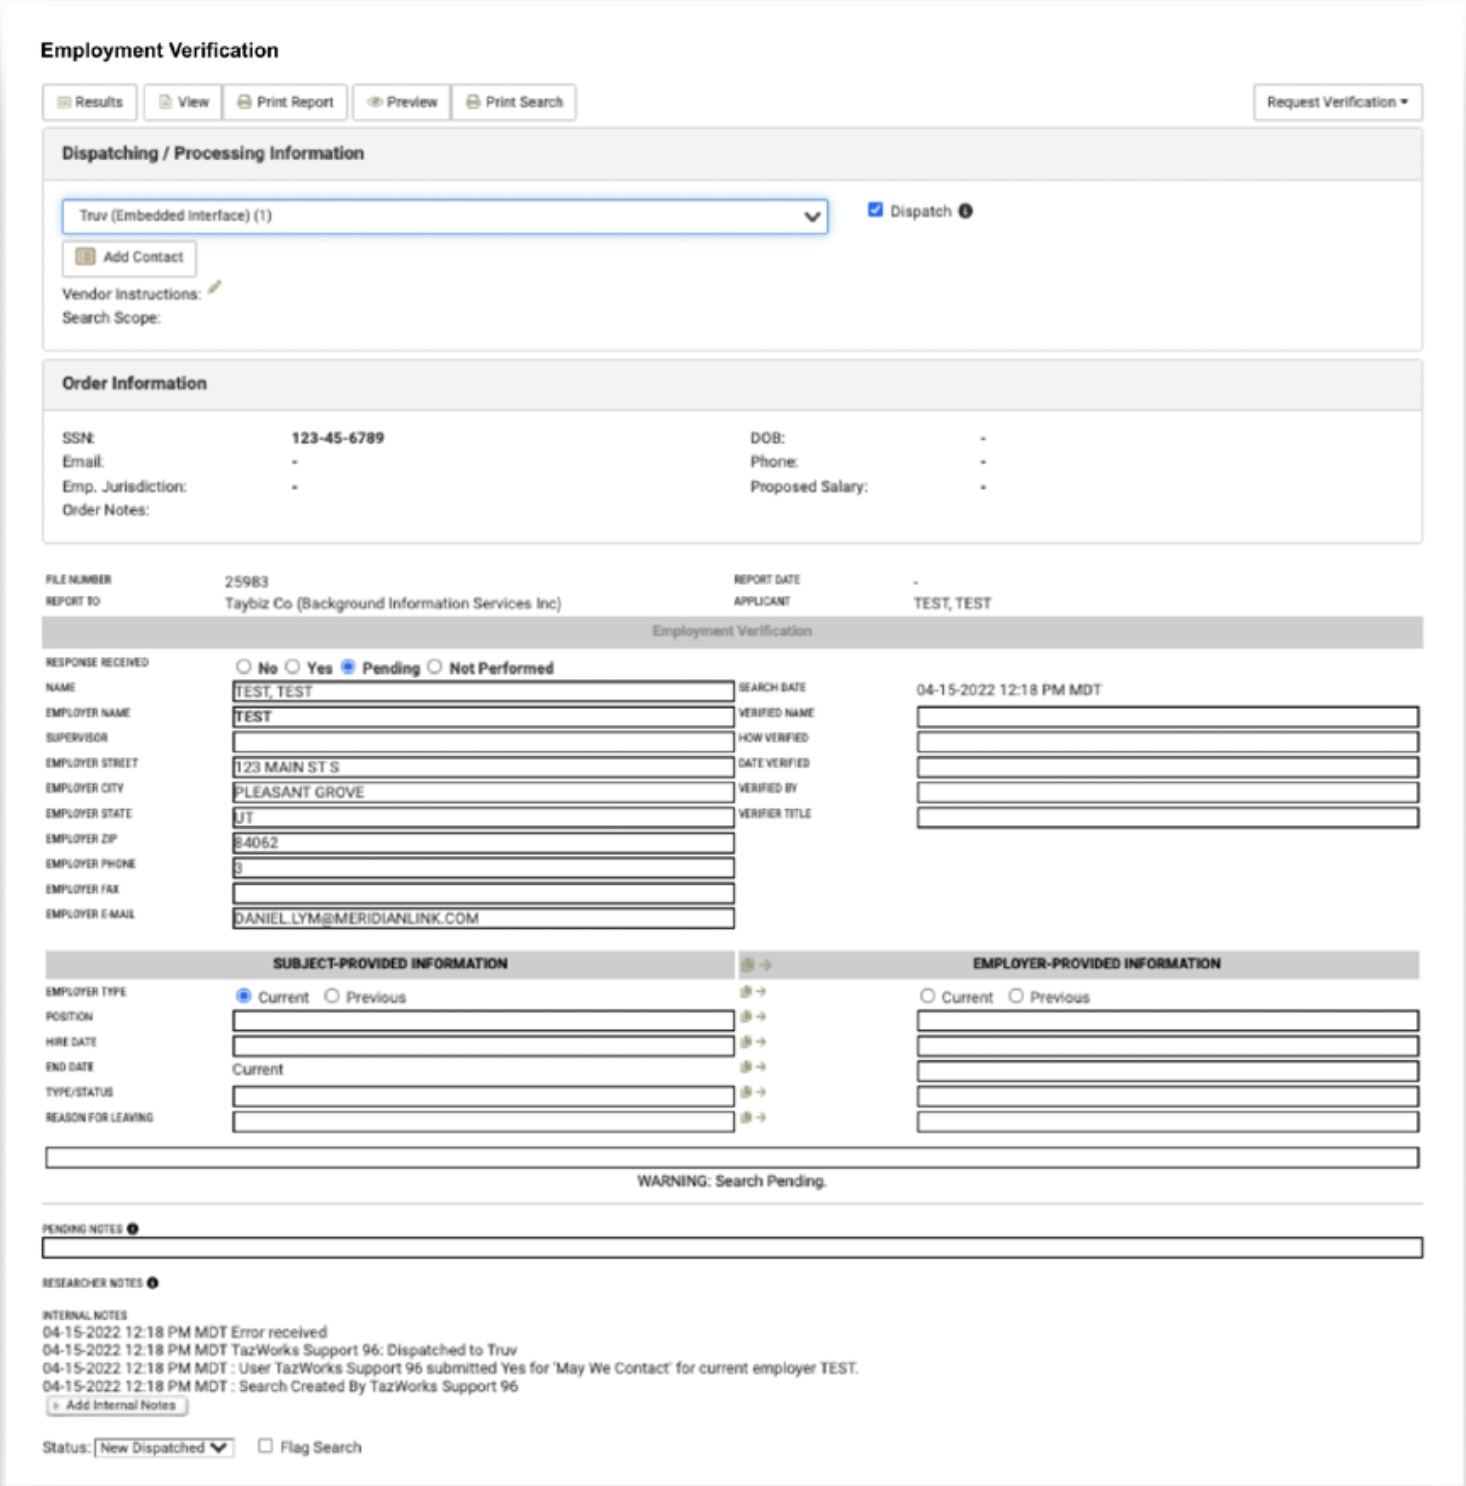
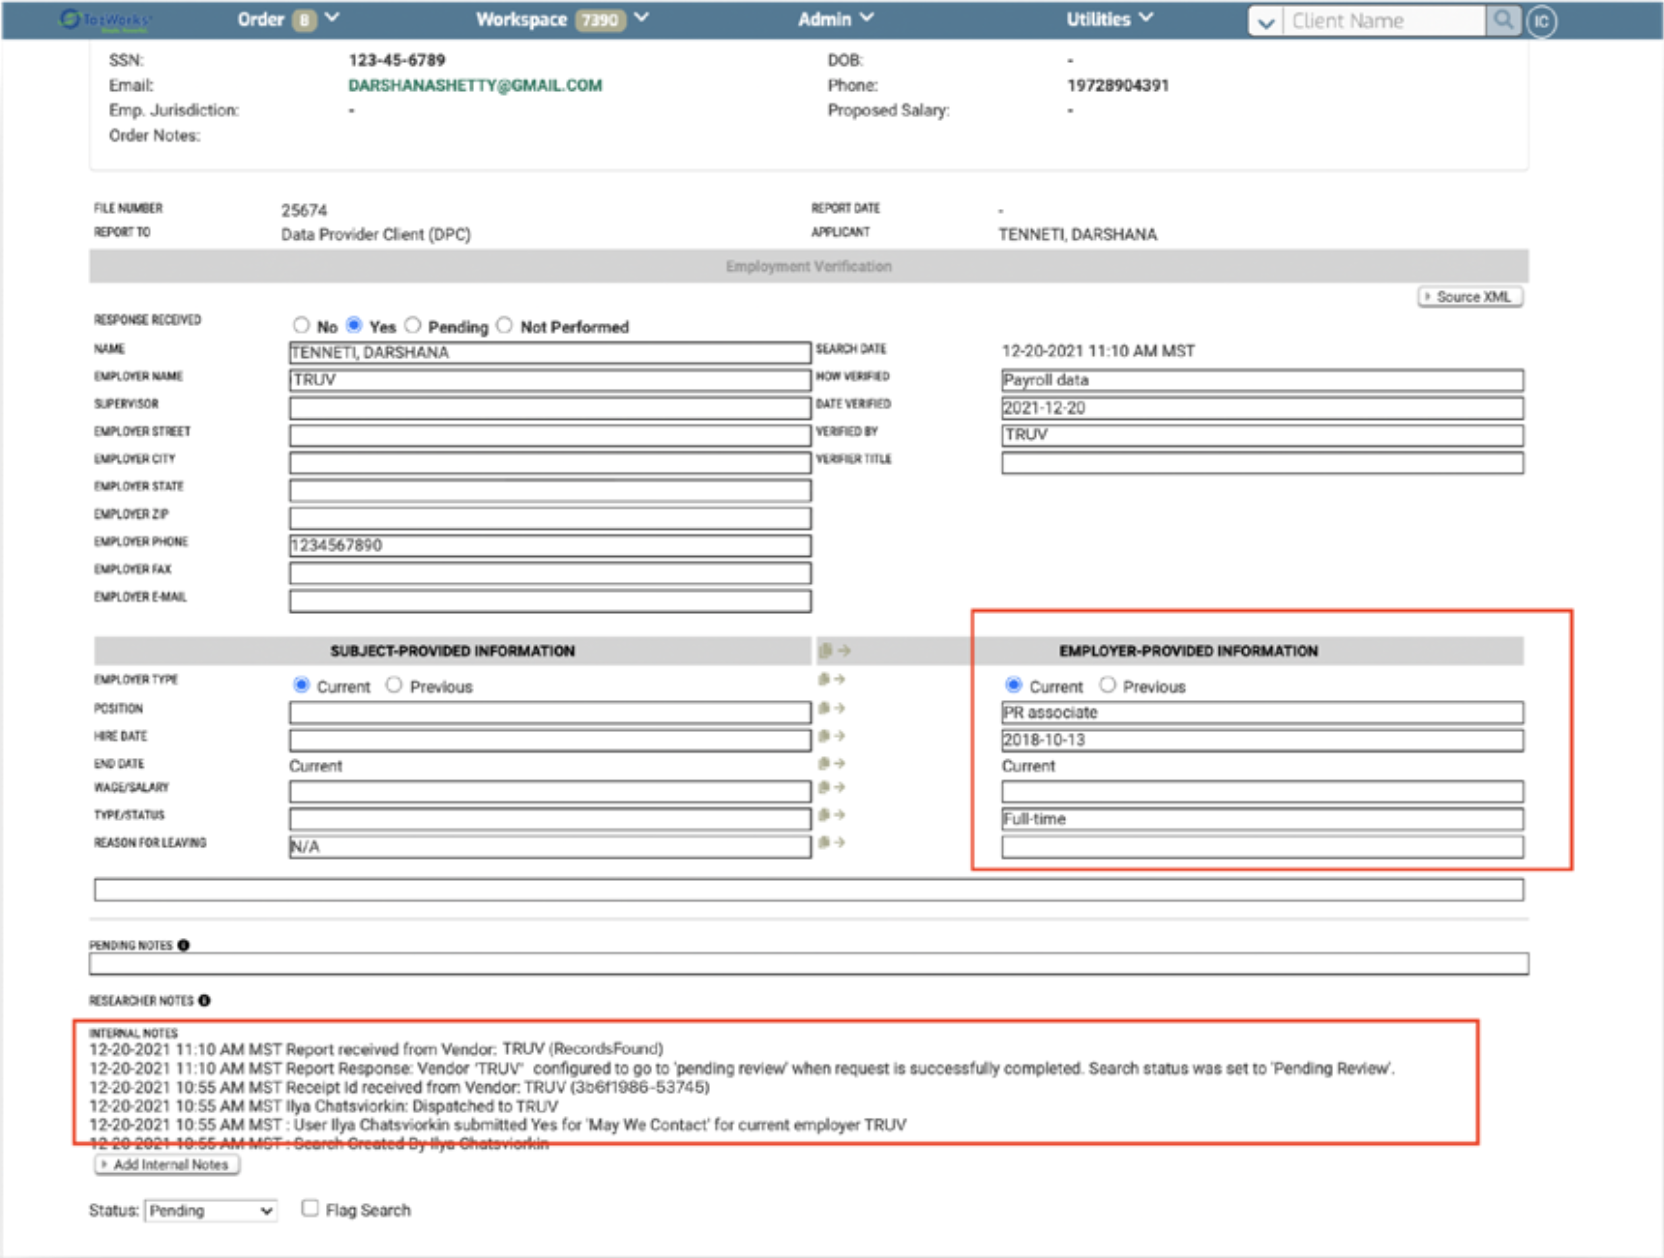
After the applicant completes the verification, go to Workspace, then Vendor summary, then search Truv. Select the link under the Vendor column. Find results under the Employer-provided information section.
Orders must be in Pending Review status for retrieval. Find verification data under Employer-Provided Information. If the applicant successfully completed the request using the Truv widget, the New Dispatched Order state changes to Pending Review.
Managing reports
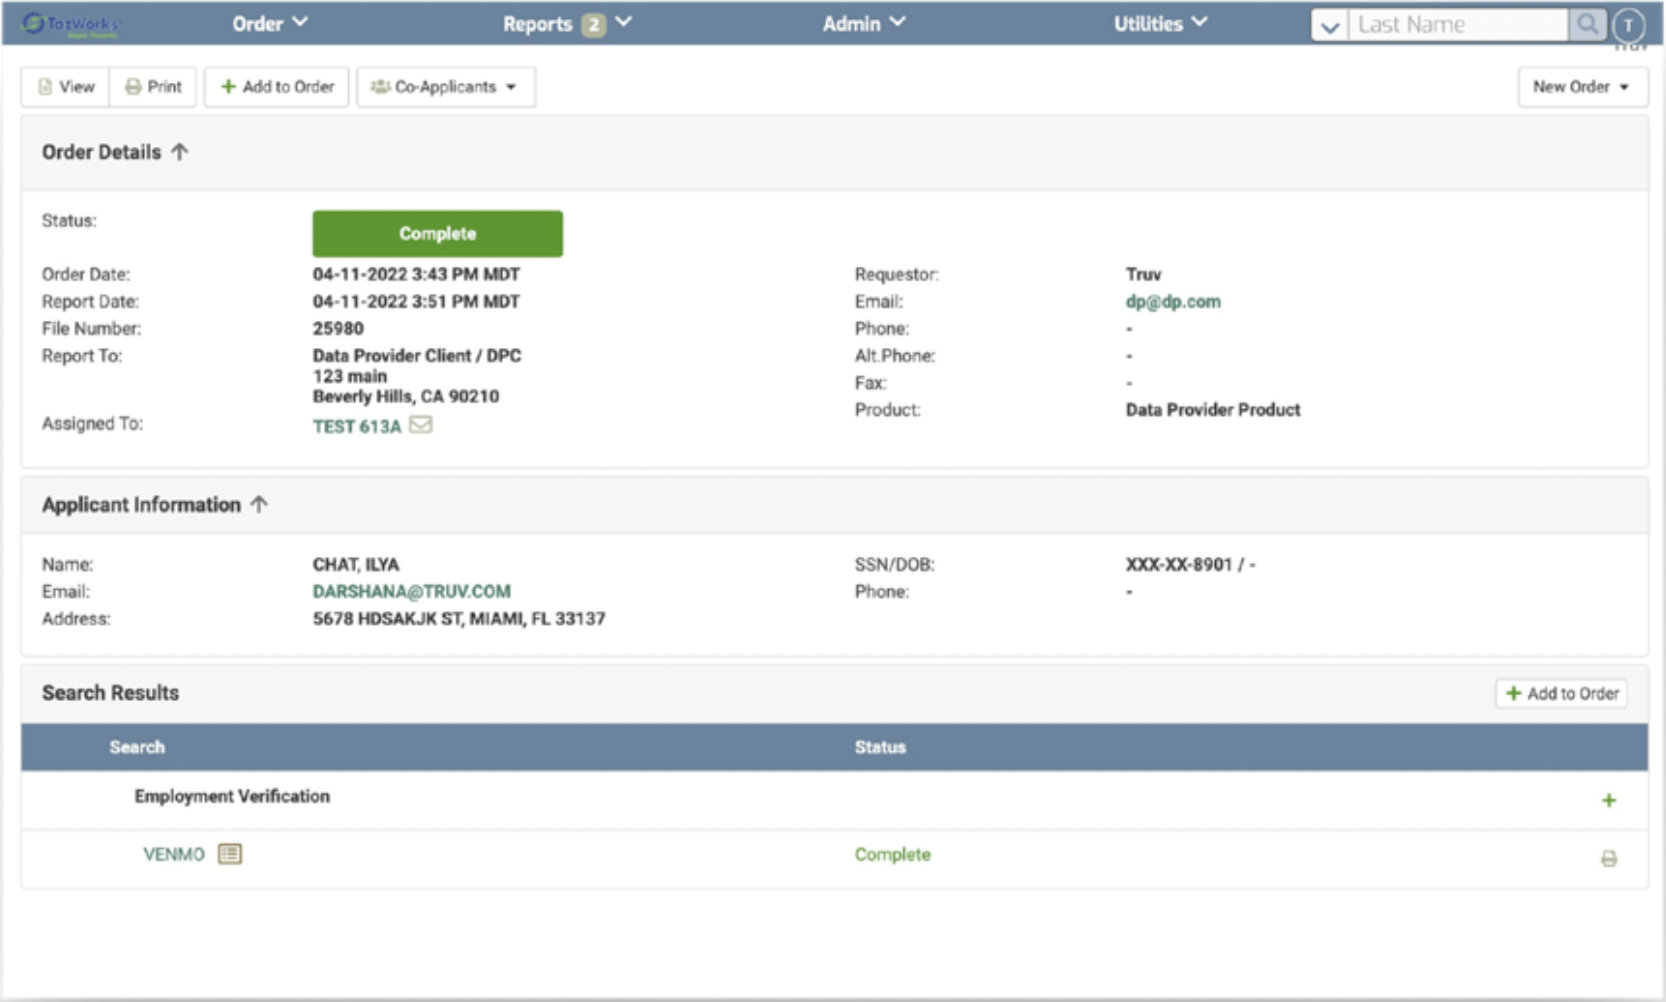
After the applicant has completed the verification, view and download results as a PDF. Navigate to Workspace, Vendor summary, then Truv. Search for the application, select the applicant name, then Results. Select View or Print to download as PDF to continue.
Managing order expirations and missing emails
Expired Orders
Expired orders have a status of Pending Review.
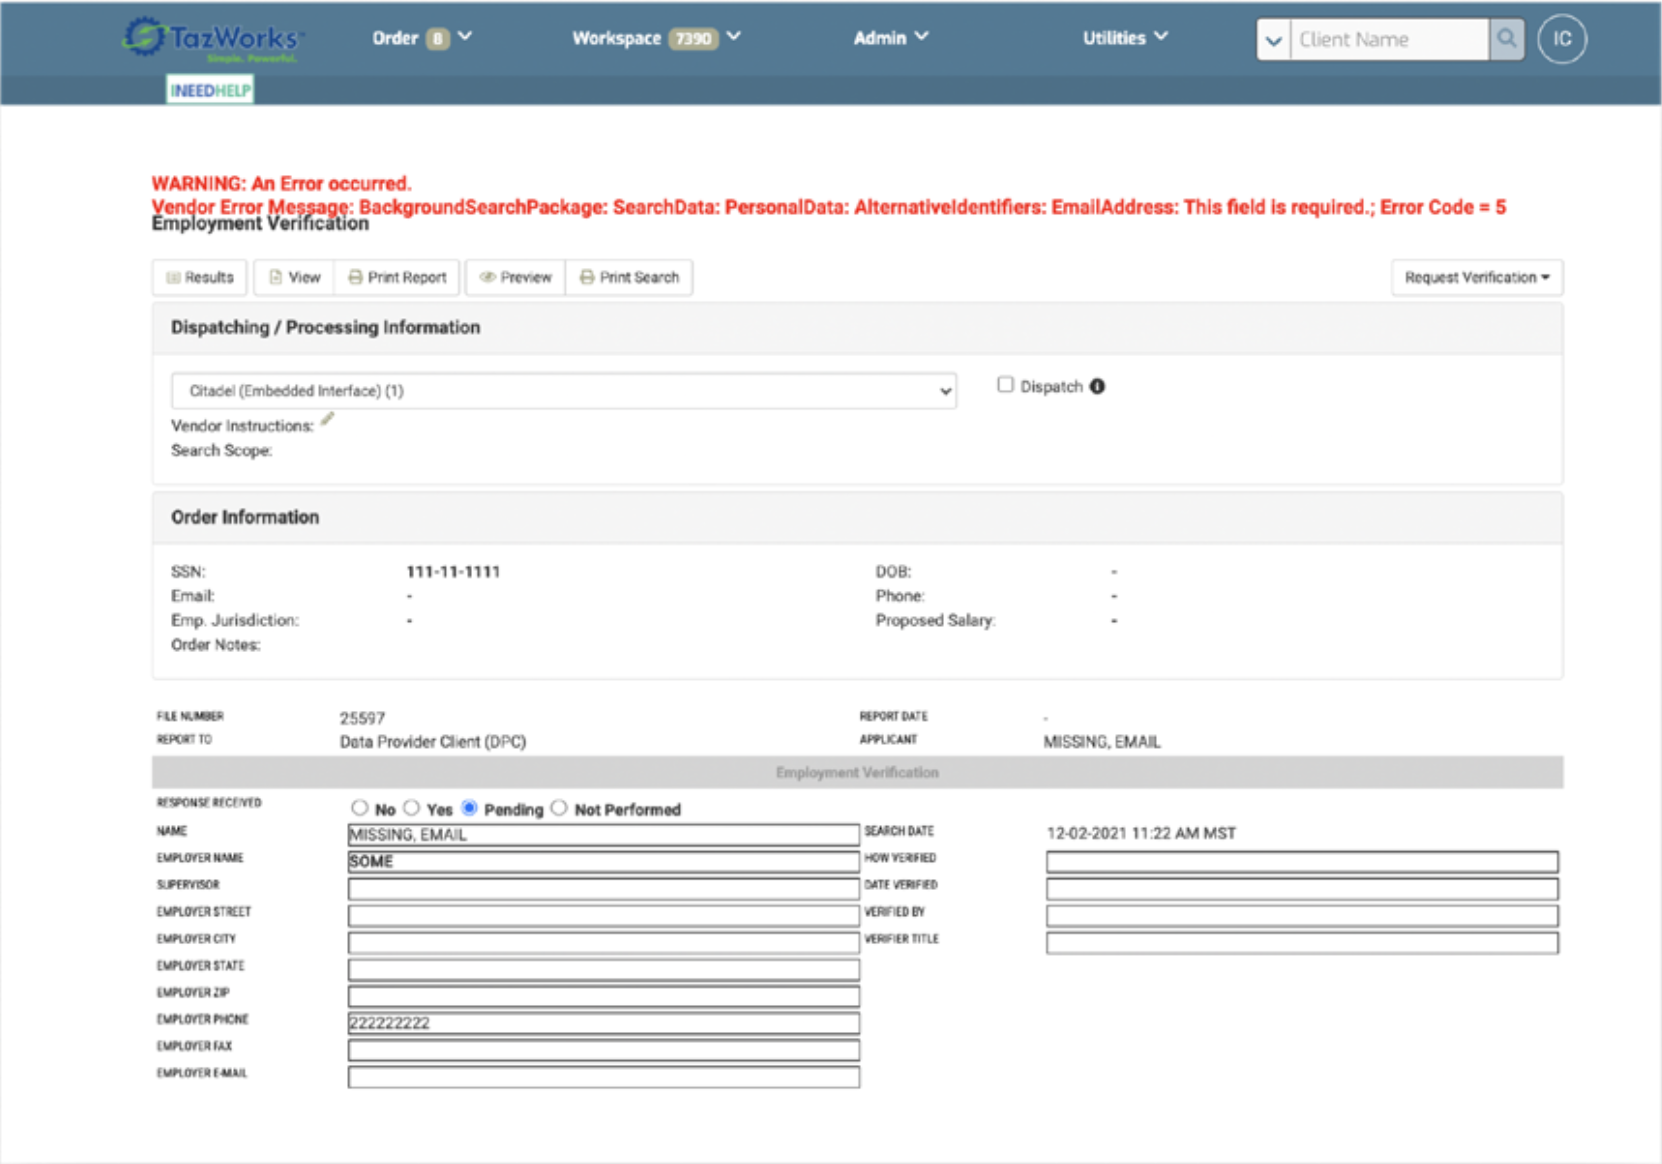
Missing Email in application
If an order is submitted without the applicant’s email, then you’ll see a status of ERROR and the Name value as EMAIL, MISSING. Select Vendor as Truv under the Workplace tab, then Vendor Summary. When you select EMAIL, MISSING, find the error message as a Warning.
Refer to the detailed step-by-step guide for a comprehensive walkthrough of launching Truv within BeSmartee.
Support
Need help? Email [email protected] or contact Truv through your dashboard.