
Custom Point-of-Sale (POS) Implementation
Integrate Truv into your custom Point-of-Sale system.
Overview
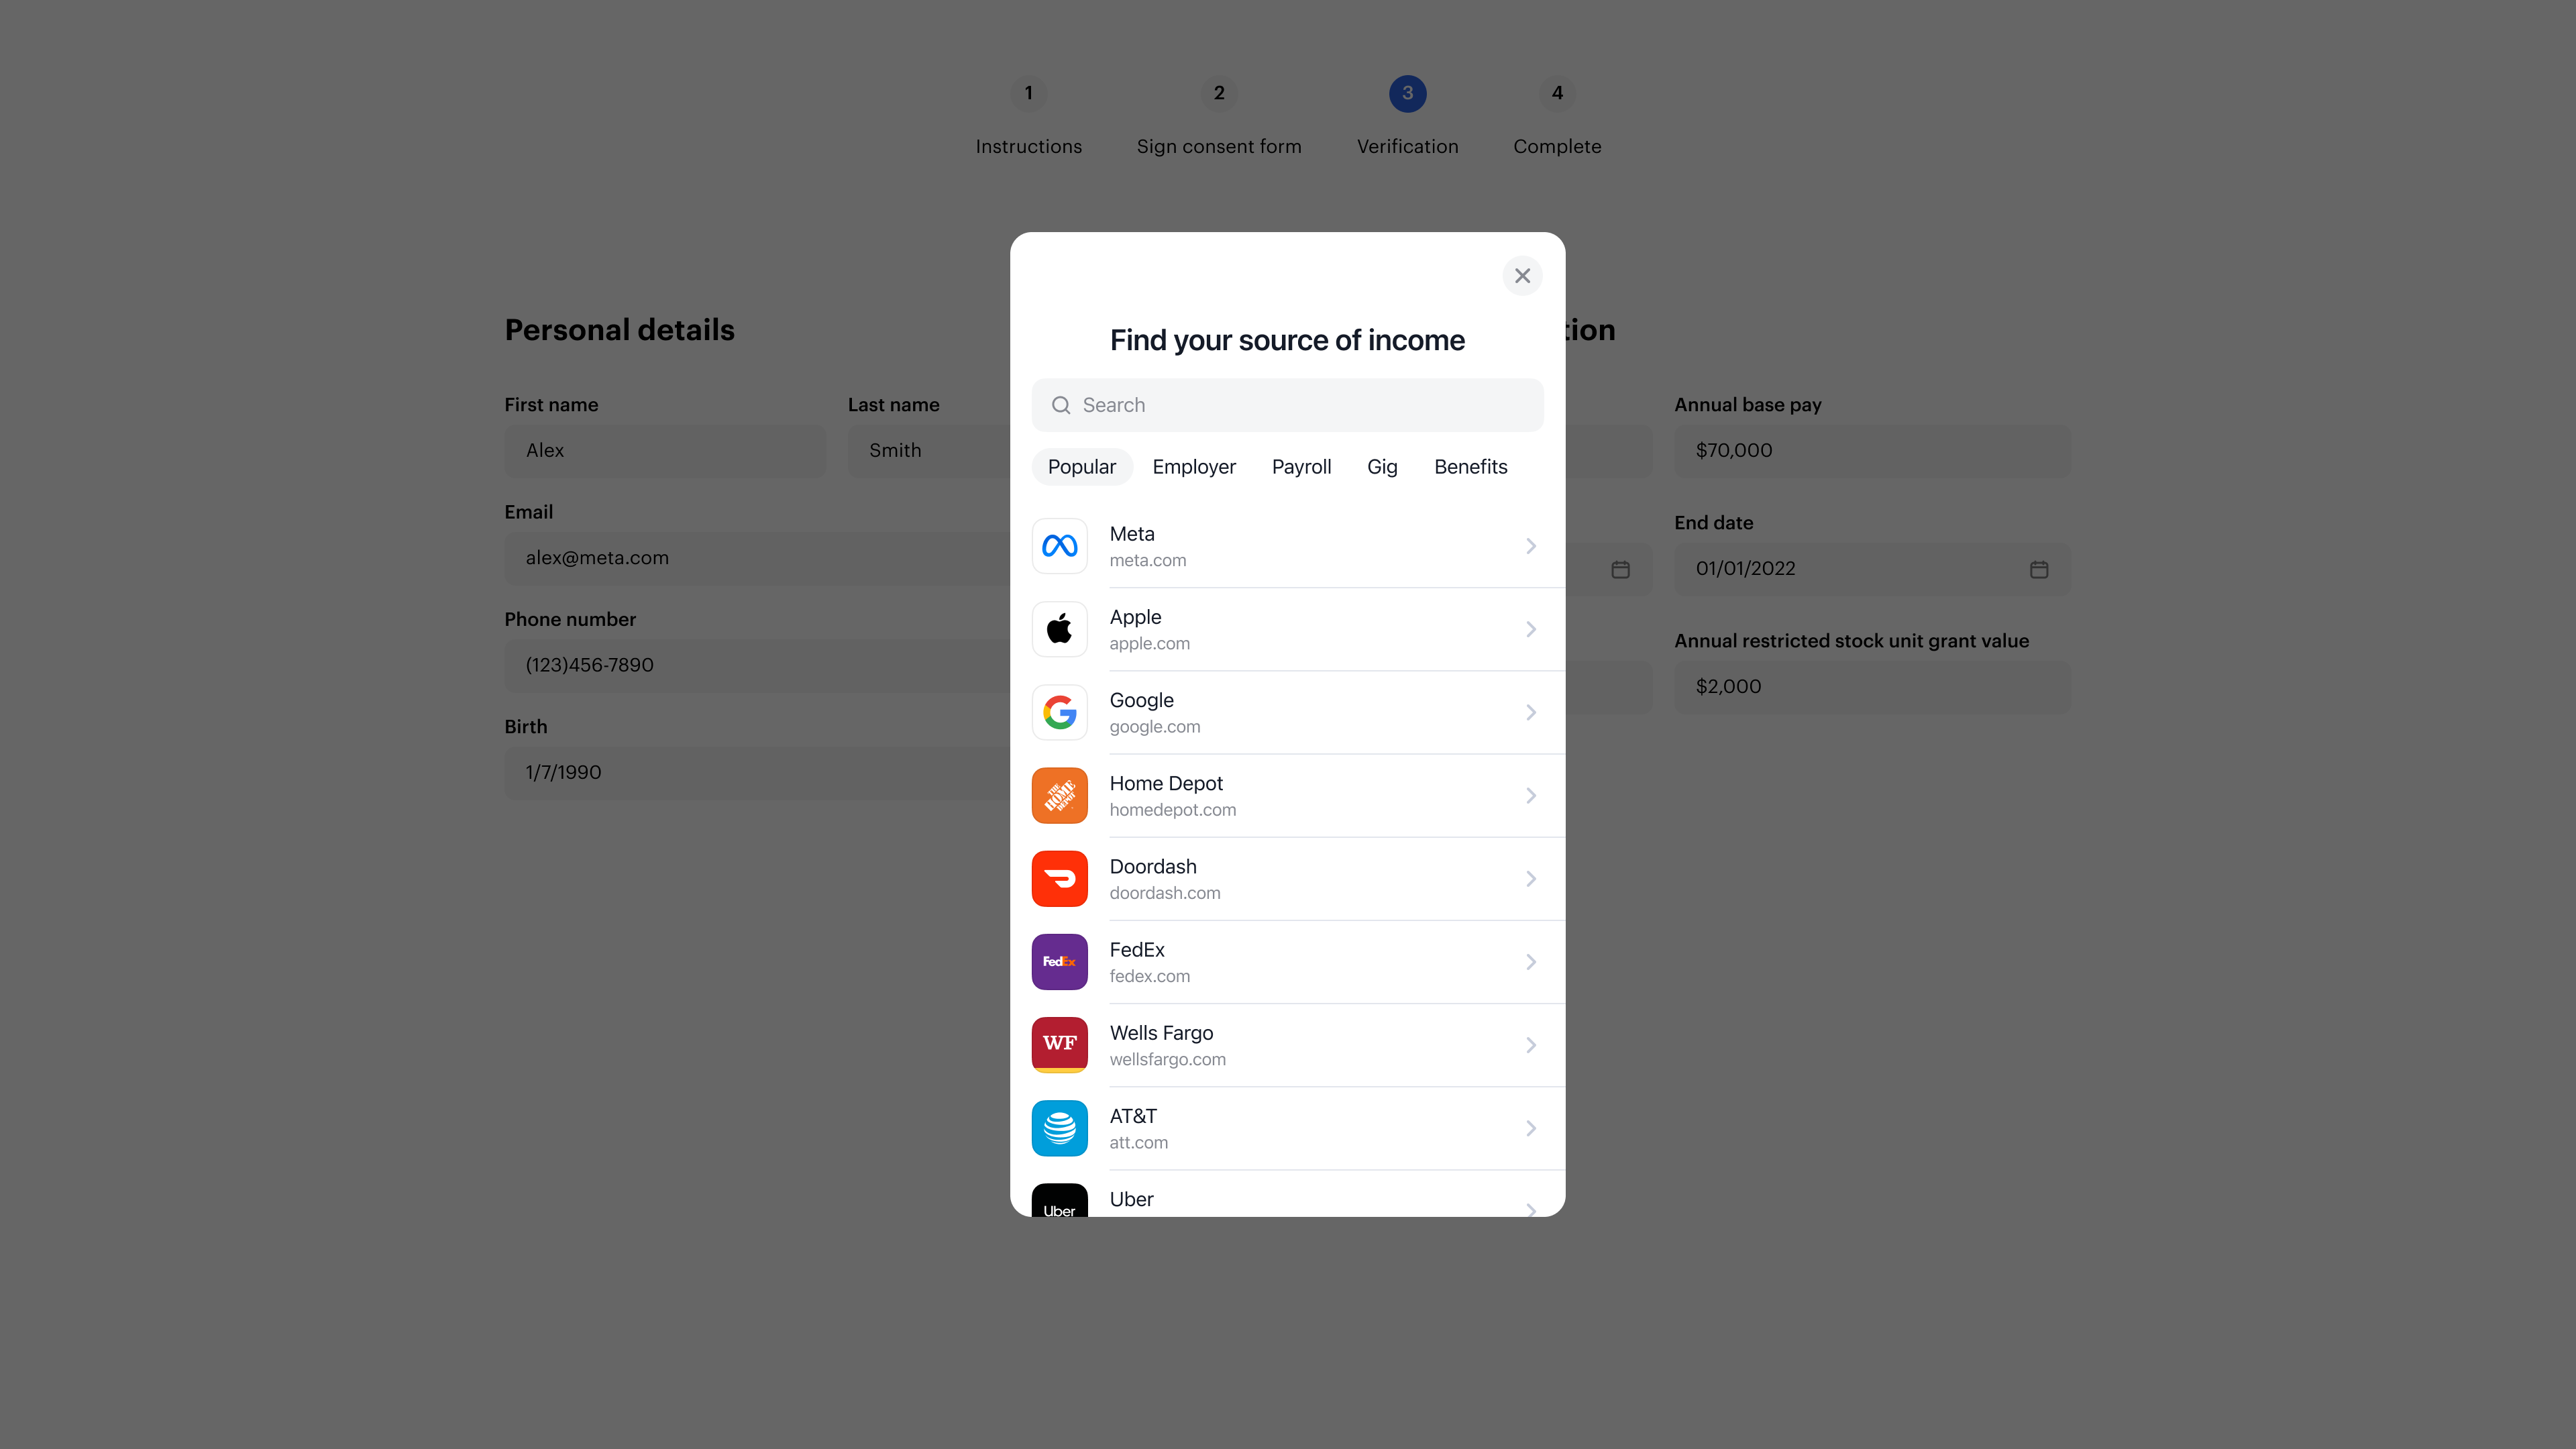
The Truv Bridge is a drop-in module for your users to connect their accounts to Truv. This allows to access their data using Truv's API. The Truv Bridge handles employer search, credentials, multi-factor authentication, and error handling.
Positioning of the Truv Bridge
Truv recommends positioning the Truv Bridge at the employment level of the loan application. It is a superior way to verify income and employment and should always be offered as a primary alternative to the manual document upload.
There are two ways to position the Truv Bridge:
i. The borrower searches for the employer within the Truv Bridge (recommended)
- Instead of letting the borrower enter the employment information manually, add a “Verify instantly” button.
- When the borrower clicks the button, the Truv Bridge opens and the borrower searches for their company manually and then connects to their corresponding payroll system.
- Add the option to “Add additional employer”, once the previous employer is verified, which should start the process again.
ii. The borrower enters employer information prior to launching the Truv Bridge
- When the borrower enters the employer, the Search companies API endpoint is triggered and lets the borrower select the appropriate company.
- Once the employer is selected, you retrieve the
company_mapping_idand insert it into thebridge_tokenand open the Truv Bridge. - If the company is mapped to the payroll system, the borrower will only see the login screen. If the company is not mapped, yet, then the borrower will select the corresponding payroll provider and login.
- Add the option to add an additional employer, once the previous employer is verified, which will start the process from 2. again.
Tip
Truv recommends letting the borrower try to verify their income and employment information through the Truv Bridge. If the Truv flow fails for any reason, you can then let the borrower go through an alternate fallback.
Embedding the Truv Bridge
Please refer to Truv’s step-by-step documentation to embed the Truv Bridge in the POS system. Some items are recommended:
- Adding the first, last name and SSN when creating the
user_idusing the Create a user API endpoint. This will allow for the Document Processing Integration option upon lender’s request. - Adding the
data_sourceswhen creating thebridge_tokenusing the Create a bridge token API endpoint. This will let you control the waterfall of thedata_sources:- Payroll: Connecting to directly to the payroll system of the corresponding employer.
- Financial_accounts: Connecting to the bank account(s) of the borrower, which allows to get the bank transactions and assets of the borrower.
- Docs: Allowing to upload income documents like paystubs and W2s through the Truv Bridge.
- Tax: Connecting to the IRS to retrieve tax returns such as 4506-T or 4506-C. This is recommended for self-employed borrowers.
Tip
Insurance: If the lender also services loans, Truv recommends adding this data source for the verification of insurance.
- Adding the
company_mapping_idusing the Companies and Data Providers API endpoint when creating thebridge_token, which allows for the Truv Bridge to launch directly at the login screen.- You can use this option by dynamically displaying the suggested companies as the borrower starts typing the company name.
- Alternatively, you can take the hard value of what the borrower entered and if Truv returns multiple options, a pop-up can be displayed where the borrower selects the correct employer.
- Allow for the "Other" option in case the employer is not listed. If "Other" is selected, launch the Truv Bridge without the
company_mapping_idand let the borrower select for the employer within Truv.
Note
- When the borrower clicks on the “Add additional employer” button, a new Truv Bridge with a new
bridge_tokenis required. Please refer to our step-by-step documentation.- Additional borrowers require their own unique
user_idwith their corresponding first, last name and SSN - a newuser_idcan be created using the Create a user API endpoint.
Tracking successful and unsuccessful verifications
There are two ways to track the status of a verification through Truv:
- Truv Bridge Callbacks: At each point during the Truv Bridge flow, an onEvent type is generated for you to review and take actions accordingly. Errors have their corresponding codes.
- TaskData allows you to capture the
public_tokenand exchange it into alink_id, which allows you to track the Status via Truv’s VOIE Report API endpoint.
- TaskData allows you to capture the
- Webhooks: Truv’s
task-status-updatedwebhooks allow to track the status of a verification process. Please review the documentation about webhooks here.
A successful verification is fully completed, when the Task Status is set to Done as per the Connection Lifecycle documentation.
Retrieving information after successful verification
When the borrower connects successfully, the Truv Bridge creates a public_token that is passed with the onSuccess callback. The temporary public_token should then be exchanged for a permanent access_token and link_id with the Exchange Tokens API endpoint. Alternatively, the link_id and user_id can also be retrieved from the task-status-updated webhooks. Please store the access_token, link_id and user_id in your database as you need them for various use cases.
To generate a user level report with a corresponding Report ID that is accepted by GSE (Fannie Mae and Freddie Mac), please use the VOIE Report API endpoint using the user_id. Please note that only successfully completed verifications will be included in the VOIE Report.
Tip
Truv recommends taking the information from the JSON response and populating it in your POS system. Please review Truv’s Data Reference for Income and Employment documentation, which includes JSON responses and document samples, including Truv’s Income and Employment PDF Report.
This will simplify the process for the borrower as they would not need to fill out the income and employment information and the information would come directly from the source. Moreover, the lender will have access to the required income and employment information coming directly from the borrower’s payroll system.
Employment data refresh/re-verification
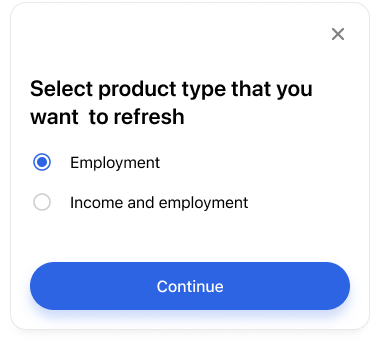
The lender may require a re-verification of employment confirming borrower’s active employment. Truv offers this option in the form of a Data Refresh. The access_token of the original verification is required to trigger Truv’s Create a data refresh task API endpoint.
Truv recommends to let the lender choose the product type for re-verification as shown in the image below. Depending on the selection, the corresponding product_type (employment or income) is selected in the data refresh task API endpoint. Most re-verifications require employment only.
Note
If the original verification was employment only, then re-verifications can not include income.
The Status of the Data Refresh can be tracked via task-status-updated webhooks or through Truv’s VOIE Report API endpoint by using the original verification’s user_id. Successful verifications will lead to an new report, which should be accessible by the lender within your system.
Note
If the Data Refresh is unsuccessful, you would need implement a flow that would notify the borrower to go through the verification process via the Truv Bridge again.
Adding Truv to Tasks
If the Truv verification process was not successful during the loan application process, the Truv experience can be added to Tasks in your POS system. Some lenders would like to have the option to choose if the Truv experience is displayed at the application level and/or at the Task level after the loan application is submitted.
There are two ways to enter into the Truv experience using Tasks:
- Embedded experience: Within the POS system, under Tasks, the borrower would click on the “Verify instantly” button. This will load the Truv Bridge and allow the borrower to log into their payroll system. Each employment would trigger its unique Truv Bridge experience, i.e. if the borrower has two employers, the Truv Bridge would load twice.
- Truv Orders: When the Truv experience is added to Tasks, the Truv Orders API endpoint is triggered. This is a single endpoint that allows to send a verification link to the borrower via email and/or text message without the need for them to log into the POS system. The entire notification flow can be customized using Truv’s Custom Templates and it allows for multiple employments within a single transaction.
- When a verification is complete, the lender can receive an email notification. It is also possible to track the status using the
order-status-updatedwebhooks. - The information of a completed verification can be retrieved using Truv’s Retrieve an Order API endpoint using the
order_id.
- When a verification is complete, the lender can receive an email notification. It is also possible to track the status using the
Note
A Truv Order Refresh/Re-verification uses a Create a Data Refresh Order API endpoint using the original
order_id, which is different from the embedded flow. If the refresh fails, Truv will automatically send a new notification to the borrower requesting them to go through the Truv experience again.
Testing
Truv provides Testing Credentials to test for different scenarios by using the Sandbox API keys that can be retrieved from the API keys section of the Truv Dashboard. The Sandbox environment does not connect to real payroll providers but is designed to test the implementation with various use cases. When testing for failed Refreshes/Re-verifications, please use the MFA password for the original verification. Webhooks can be configured in the Truv Dashboard under Webhooks and can be separated between Sandbox and Production environments.
Updated 3 months ago