

Create an Order
Step 1: Open the loan file and select Truv in Order Verifications.- Select Order under Verifications. Choose Truv - Verification of Income/Employment/Assets and select Next.
- Ensure the first name, last name, email address and/or phone number have been added for each borrower.
- If requesting specific employers or financial institutions to be verified, ensure those are added into the Employer or Business Name or Financial Institution fields in the corresponding sections of the 1003 URLA.
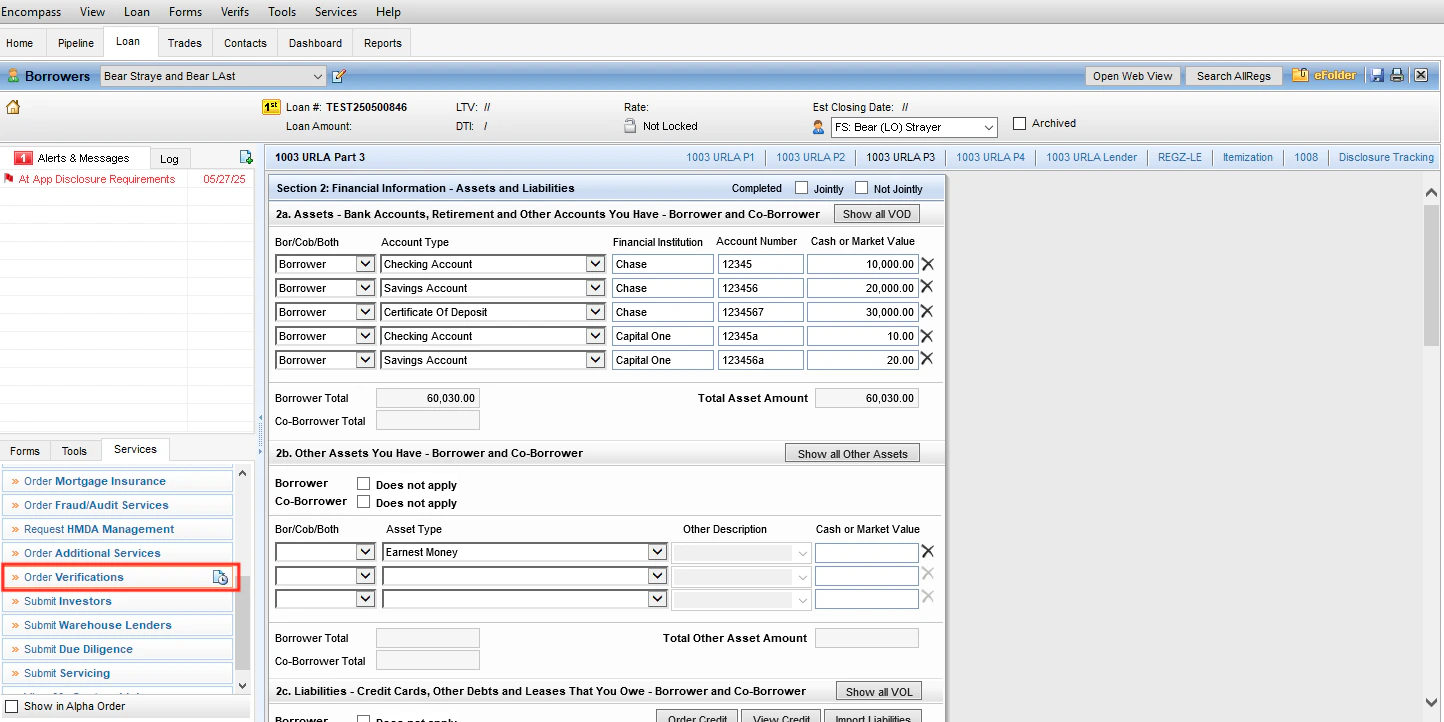
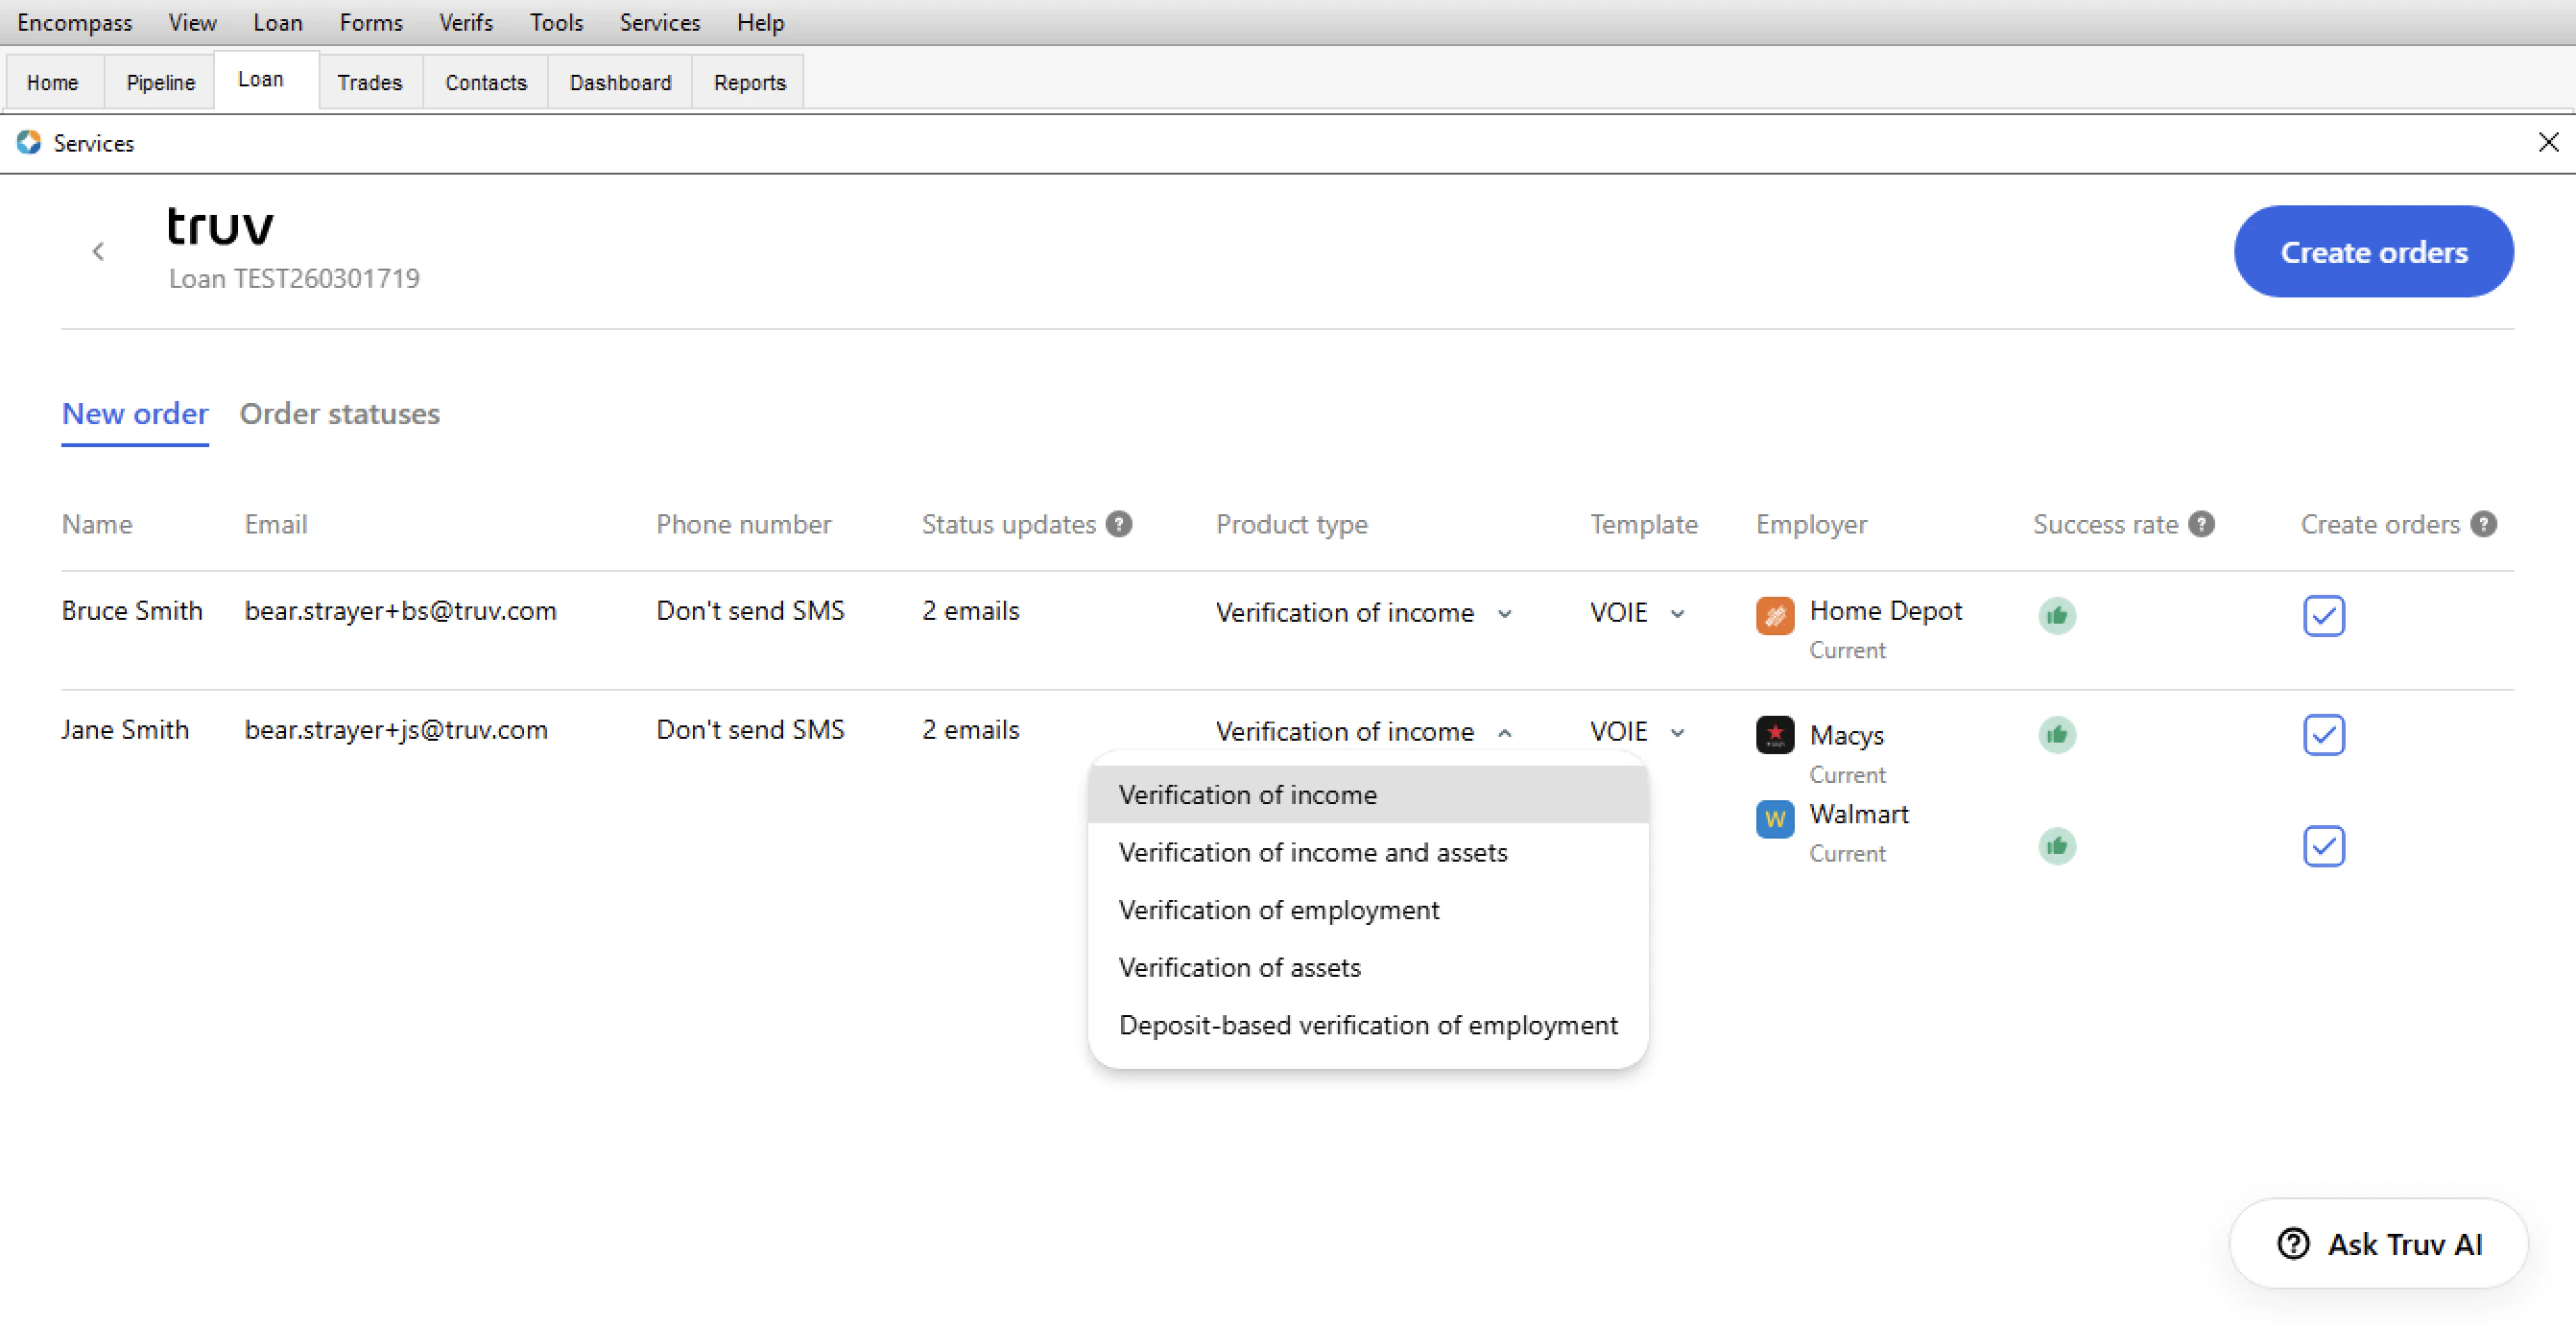
Including a borrower’s email and phone number results in higher completion rates. Confirm borrower consent before adding their contact details.
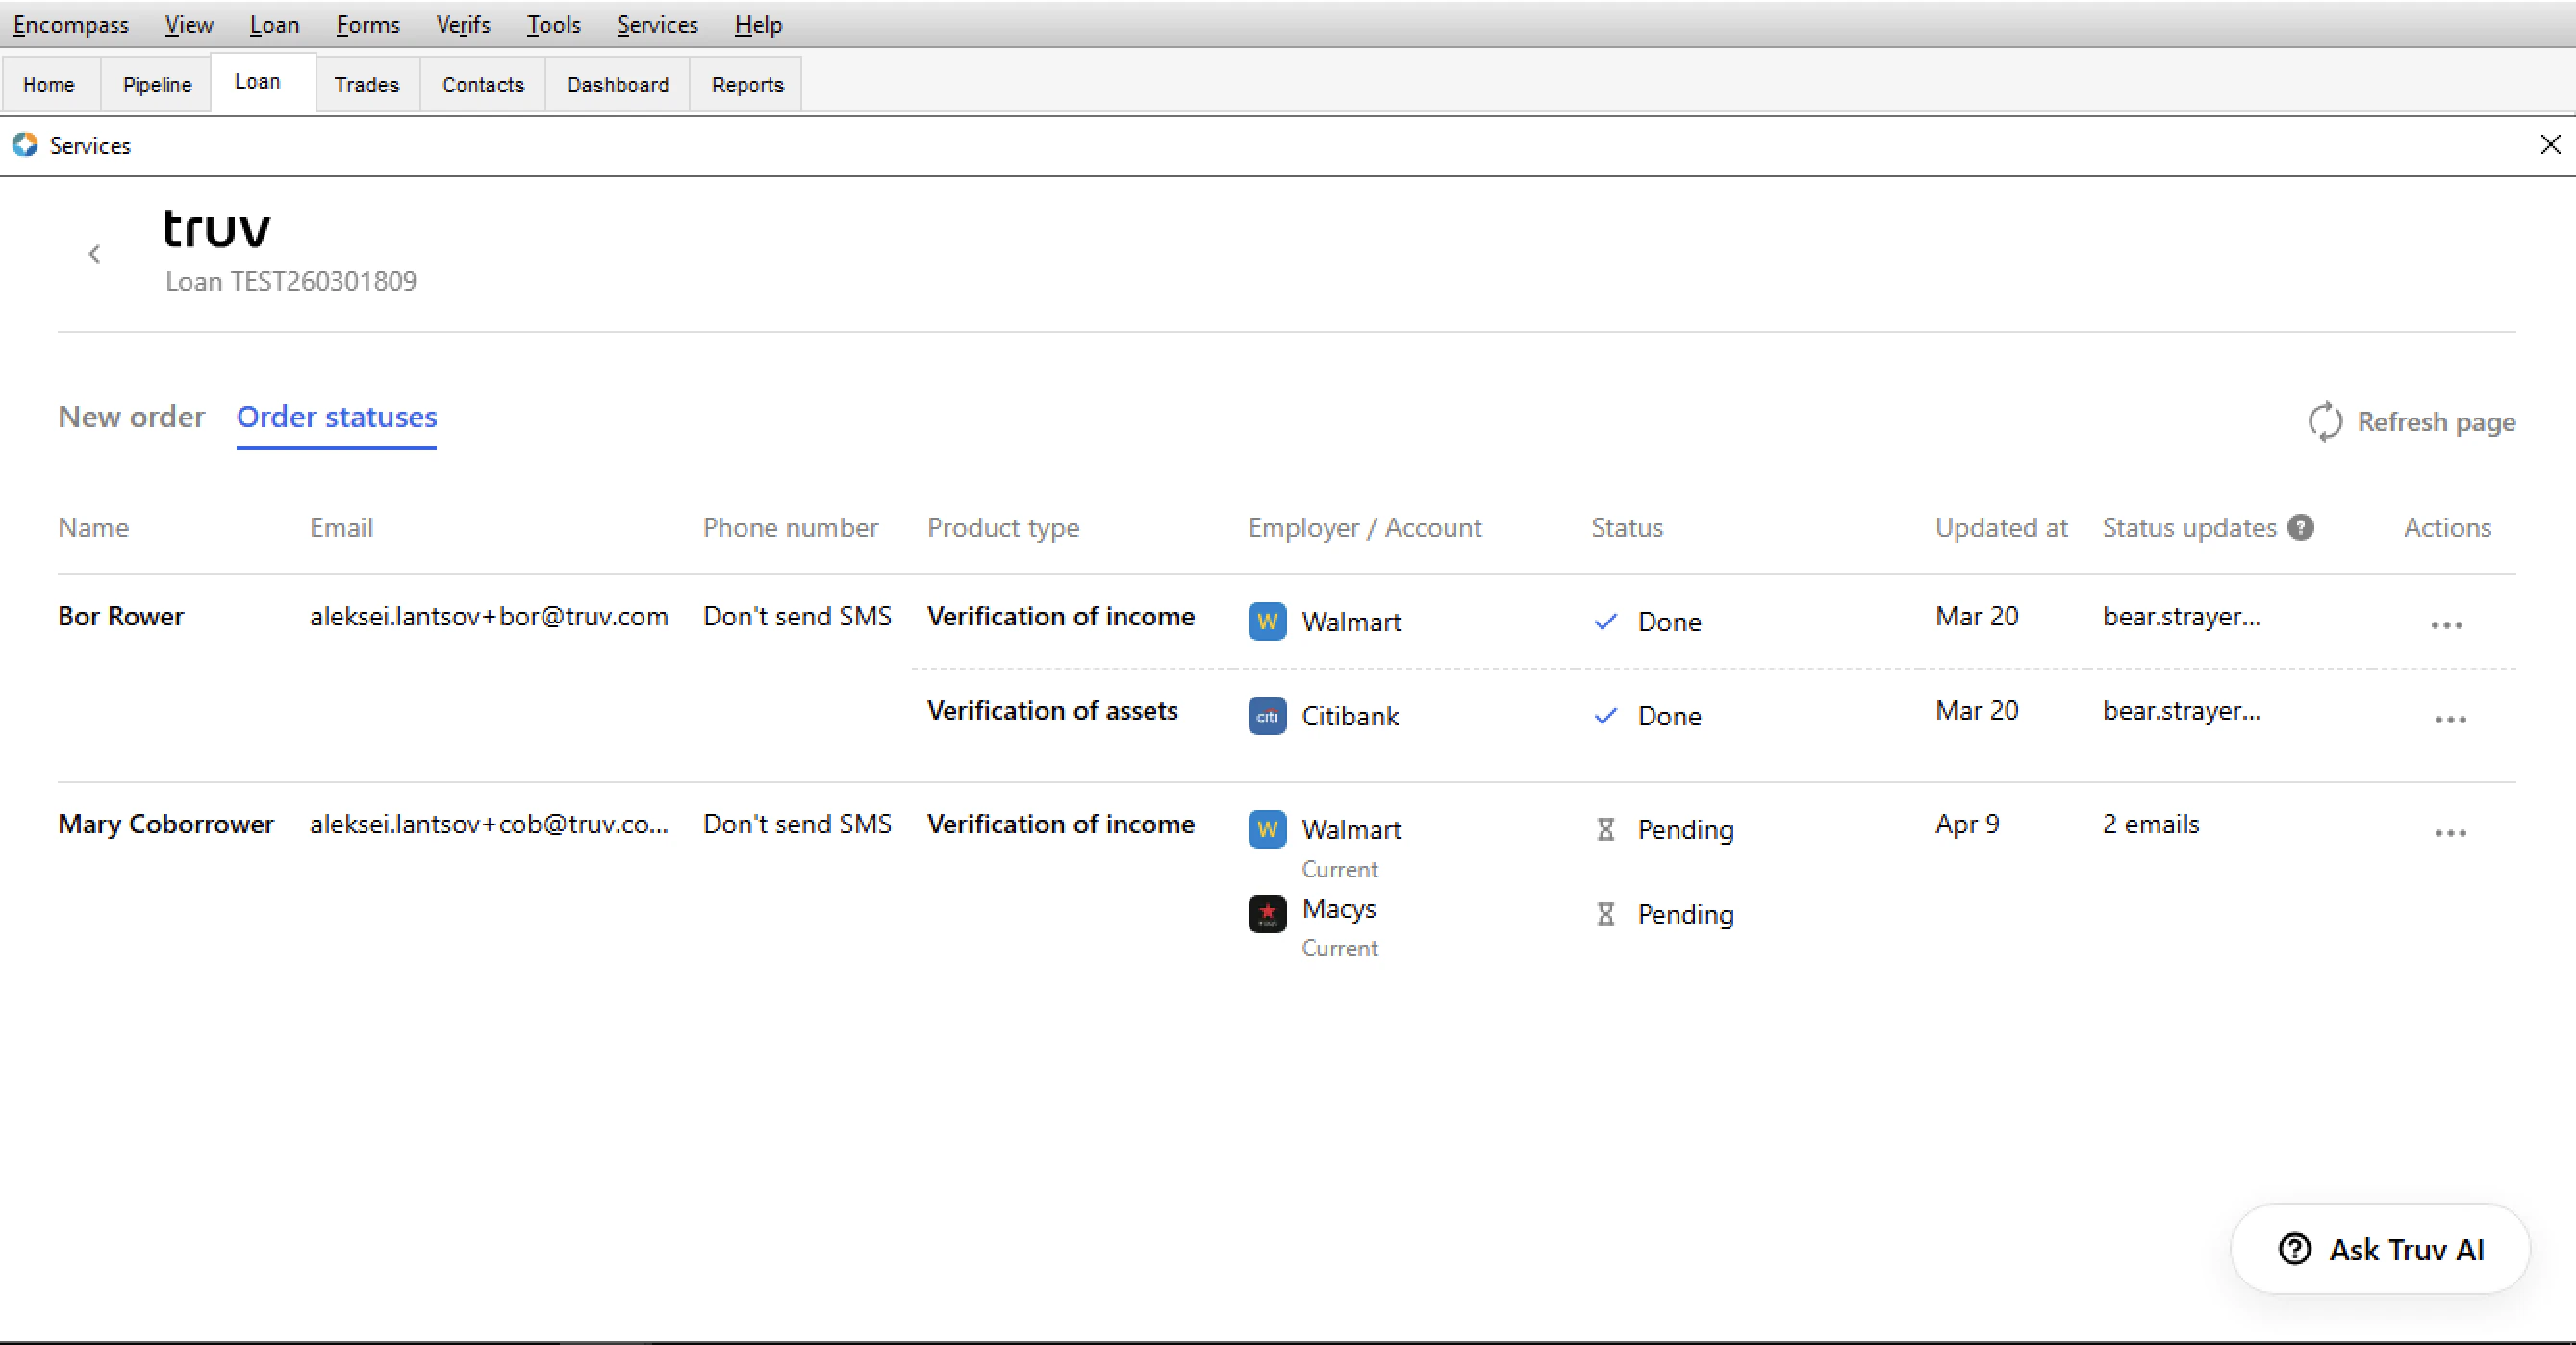
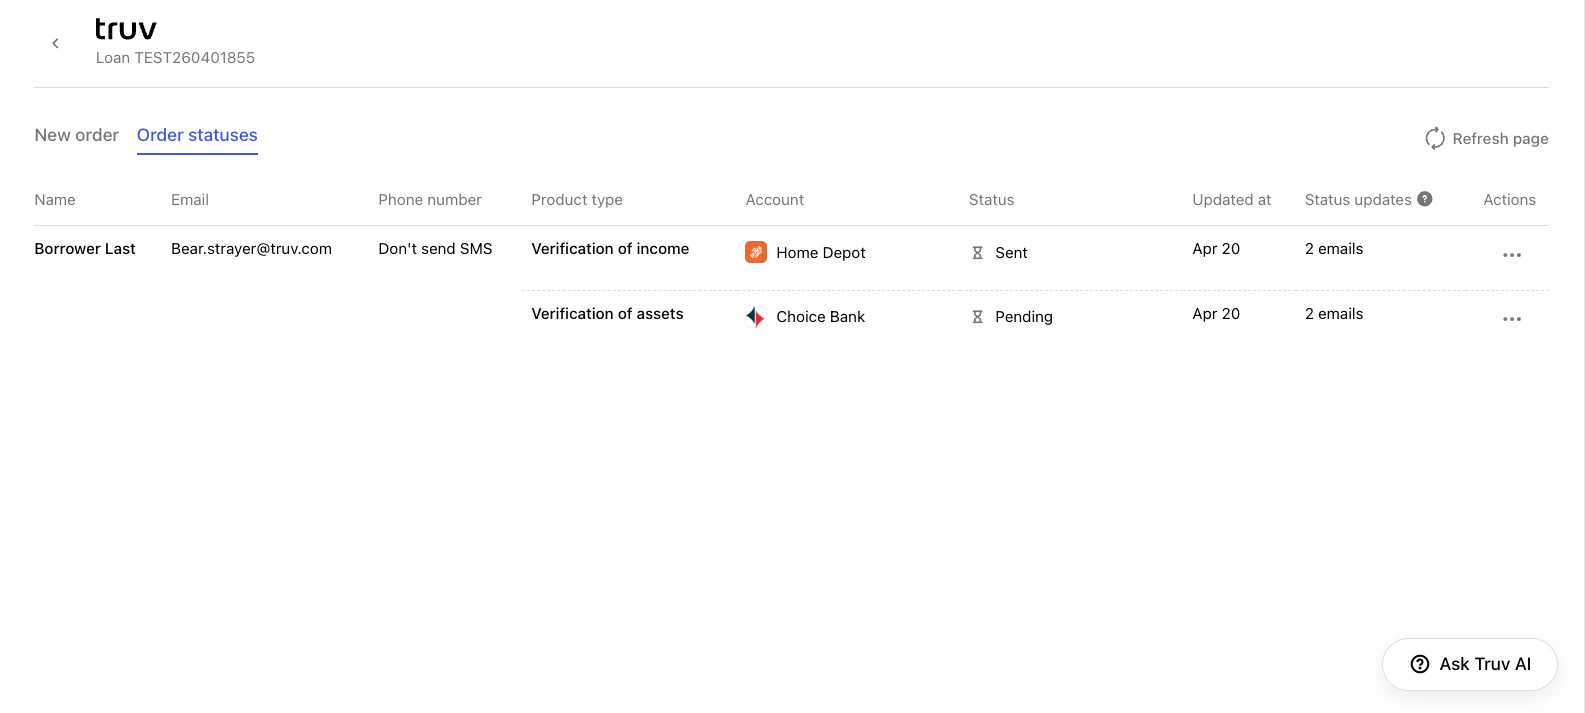
- You will be redirected to the Order statuses tab where you can review and manage all orders placed on this loan file.
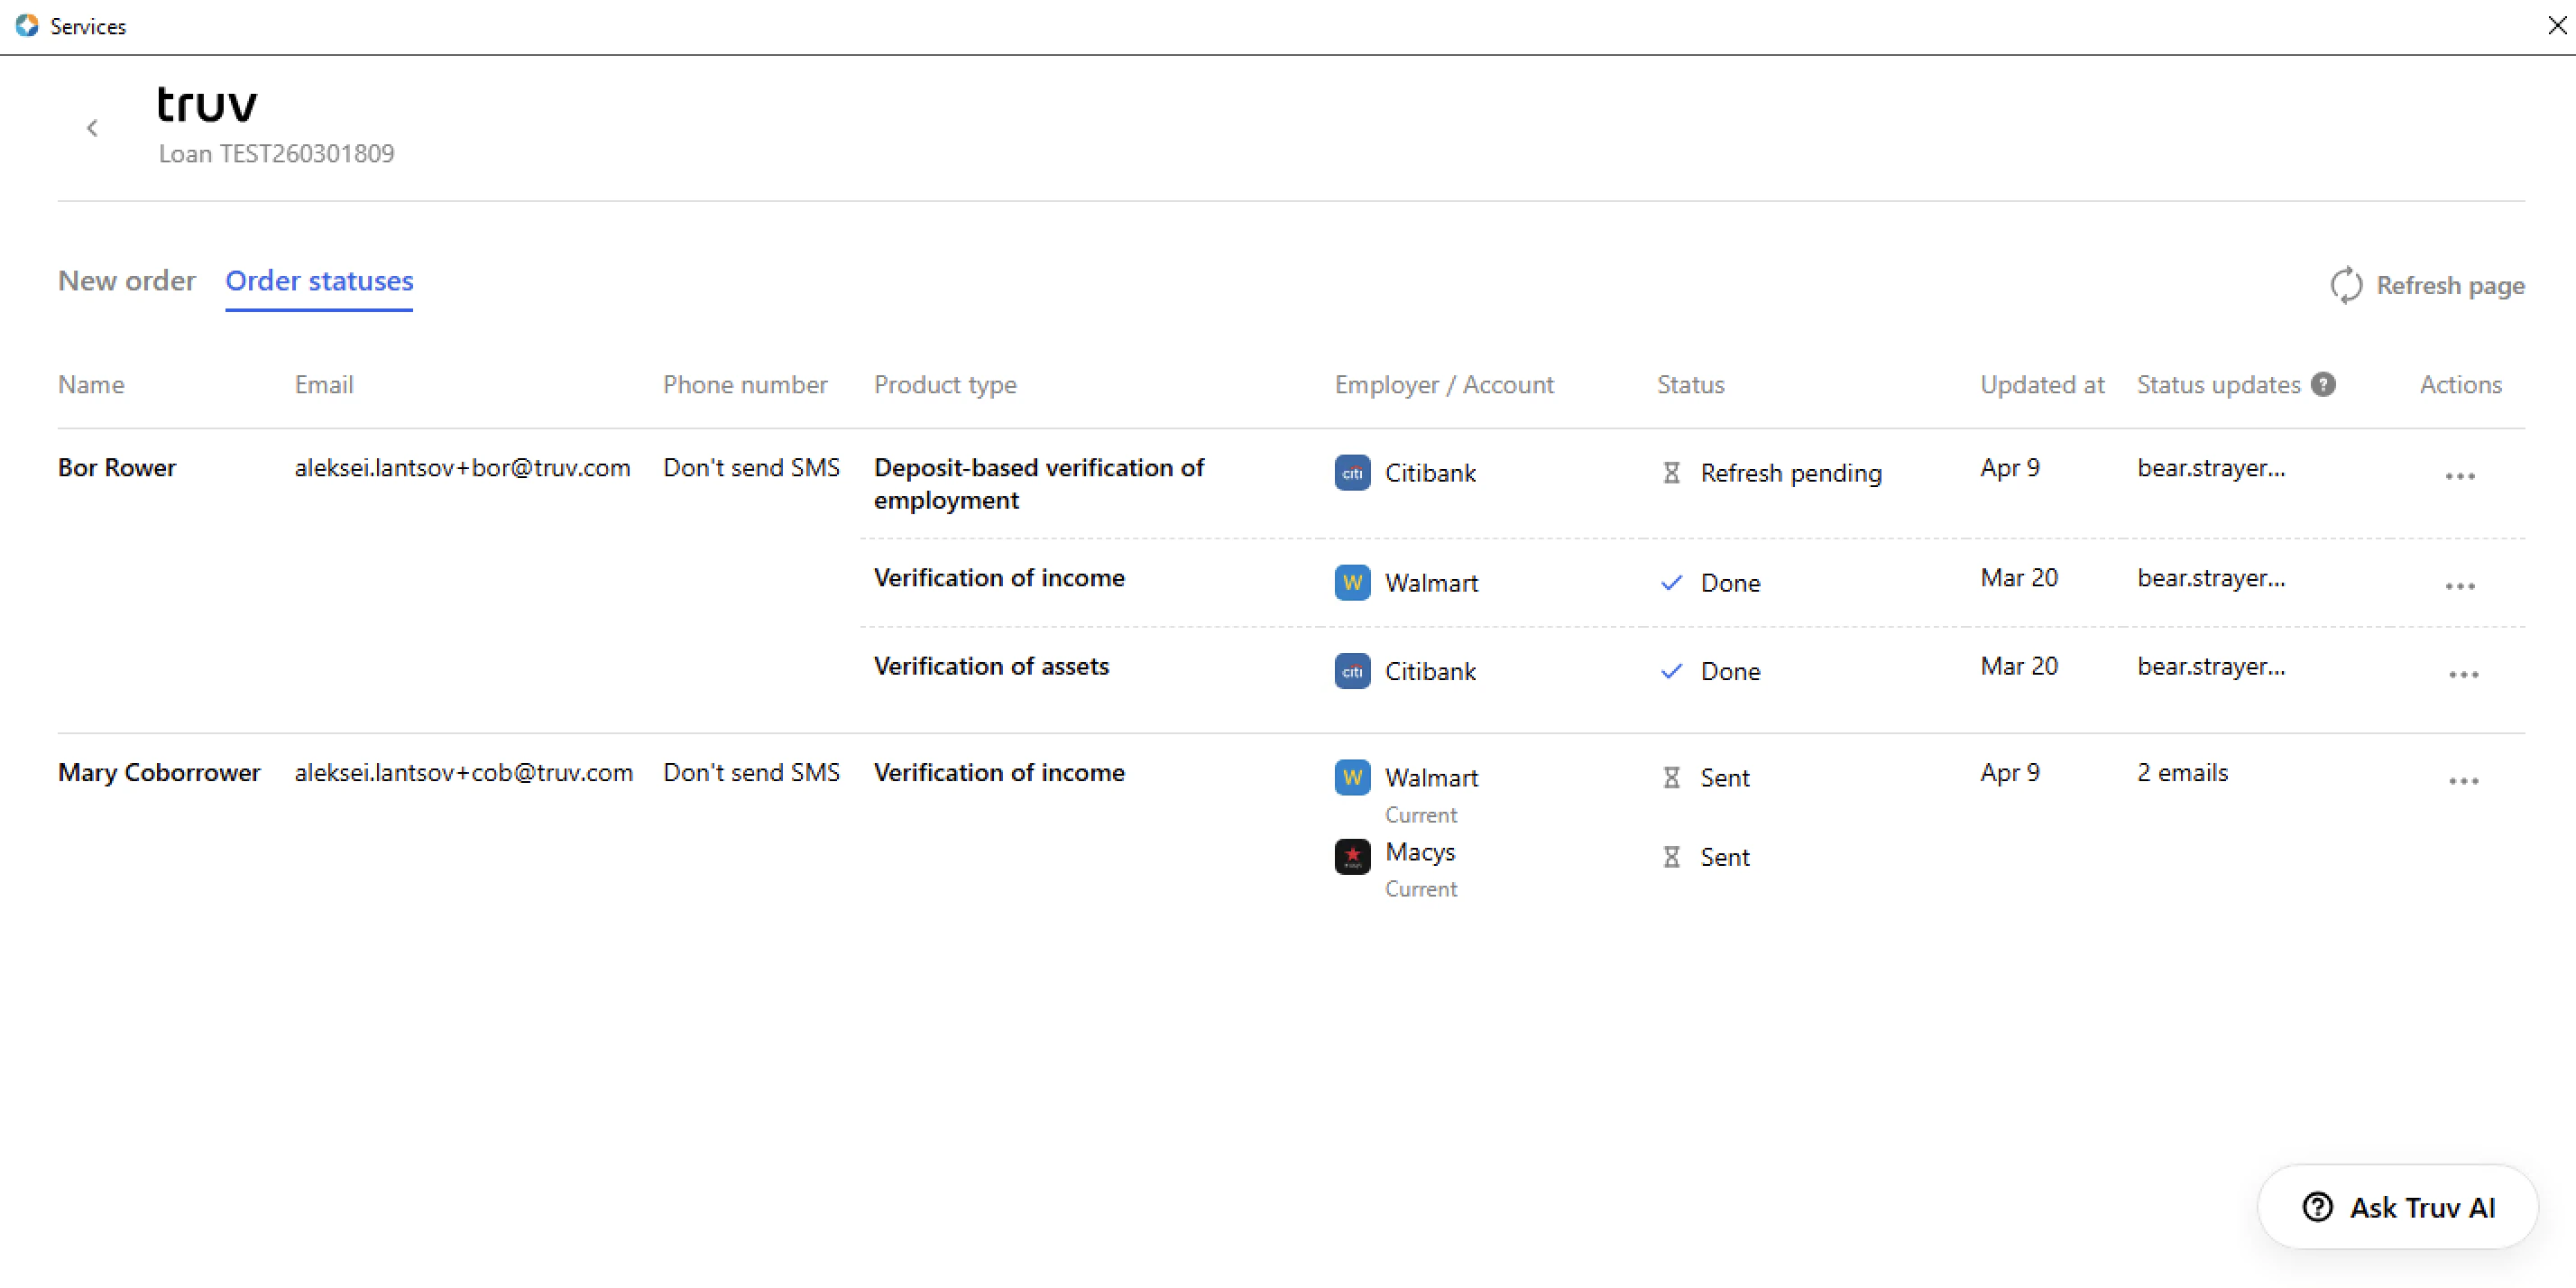
- Check the Status column to see the connection status of each account in the order. Clicking on an order row will open a sidebar with more order details and an order timeline.
Customize Requested Employers or Accounts
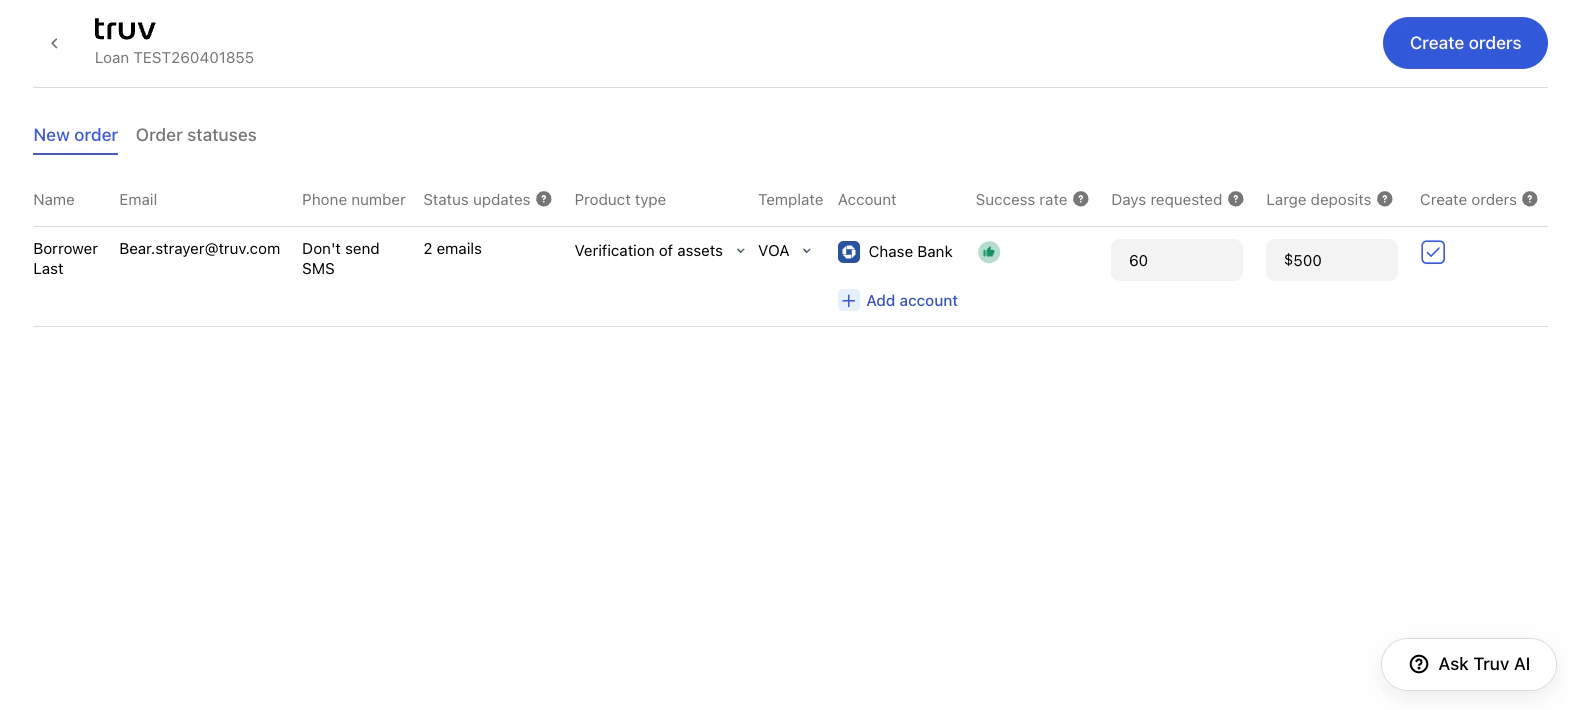
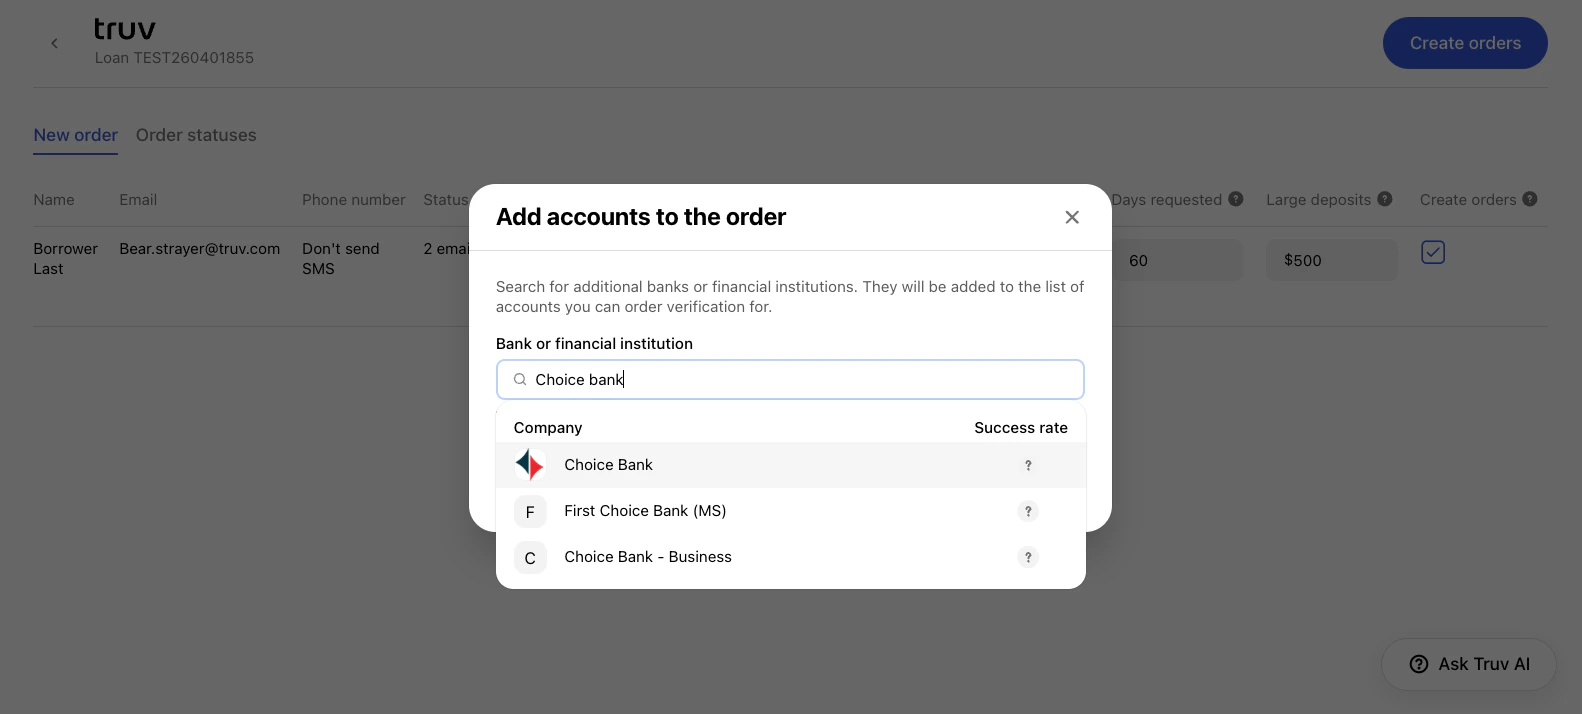
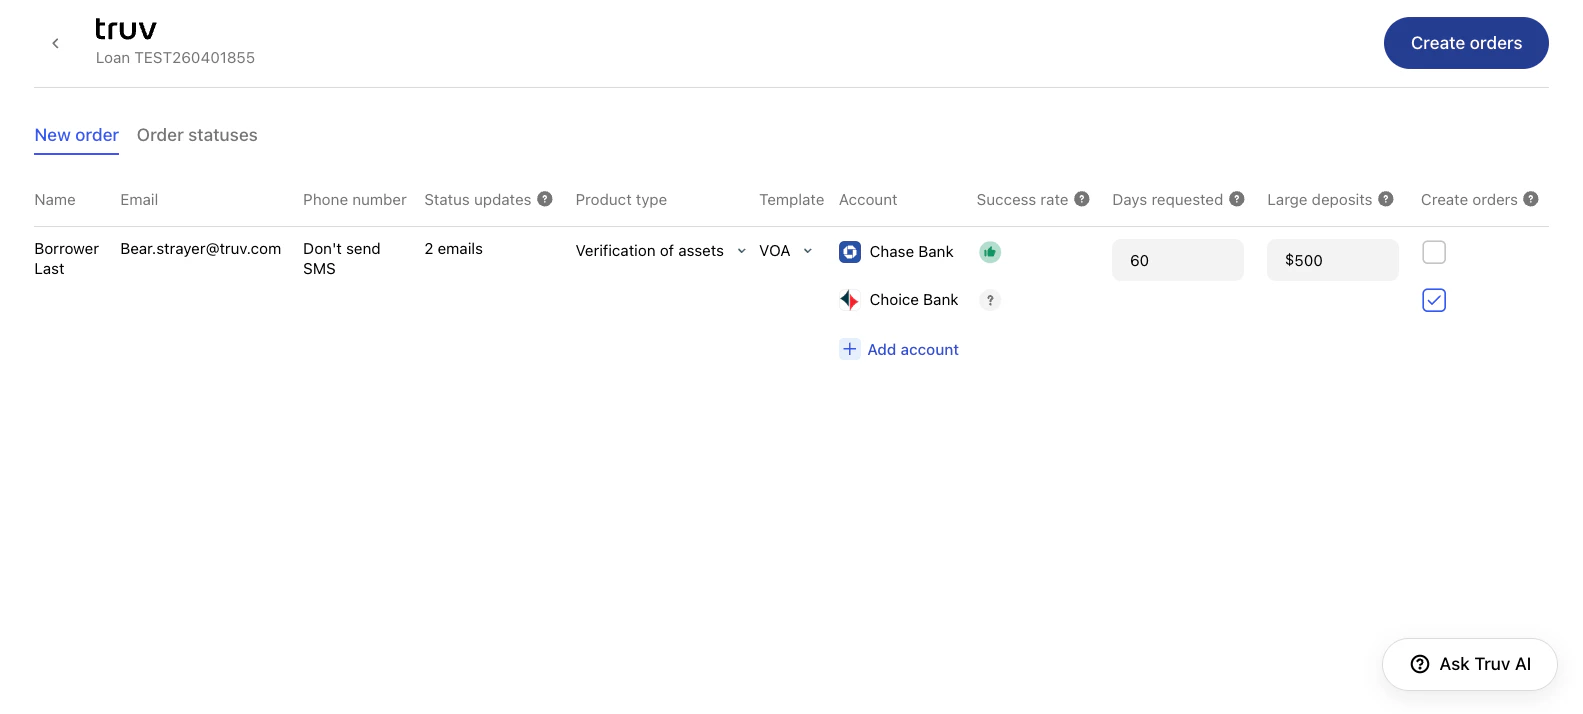
By default, the Employers / Accounts column is populated from the borrower’s 1003 URLA. You can add employers or financial institutions beyond what is listed in the 1003 — no form update required.- For VOIE and VOE orders, an + Add employer button appears under the Employers column.
- For VOA orders, an + Add account button appears under the Account column.
Create a Refresh Data Order
As the loan nears closing, lenders can refresh previously connected data and select specific accounts or product types. Truv will attempt to use the existing connection to refresh data without notifying the borrower. If borrower re-authentication is needed, for example in cases where credentials have changed or MFA is present, Truv will send a re-authentication request to the borrower using Email / Phone numbers and notify the lender that the request was sent. Step 1: Select the loan file and open Truv. On the Order statuses tab, find the order with accounts you want to refresh. Then click the three dots in the Actions column and select the Refresh data button.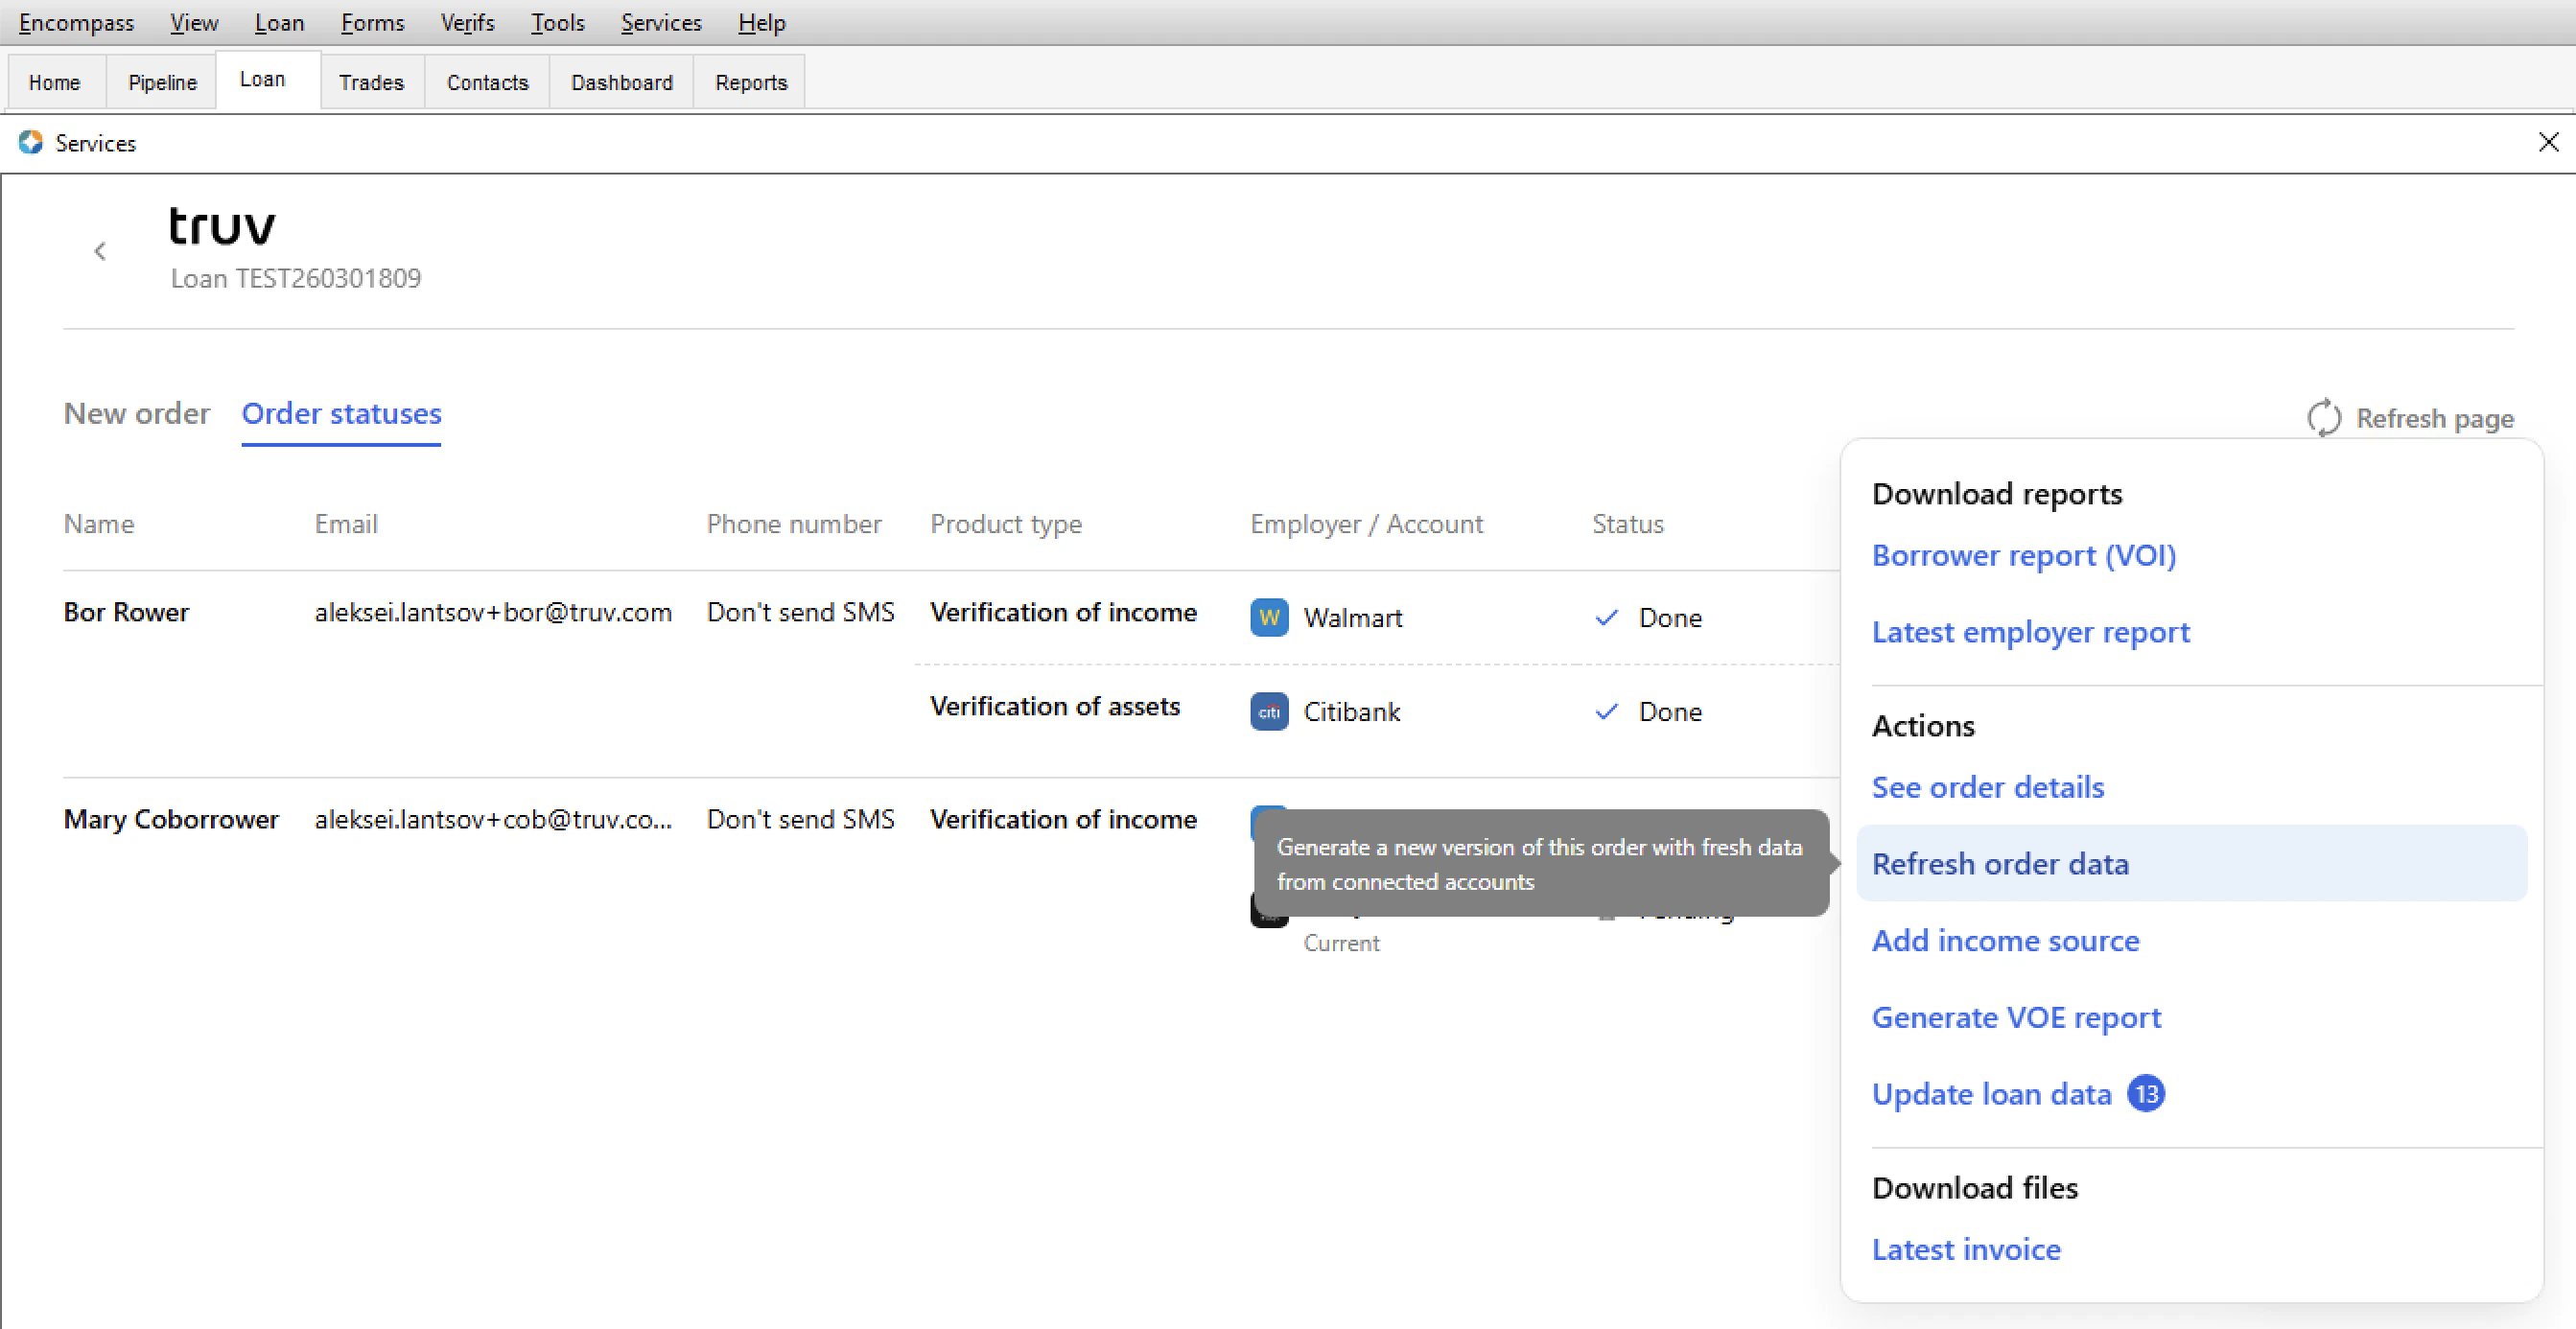
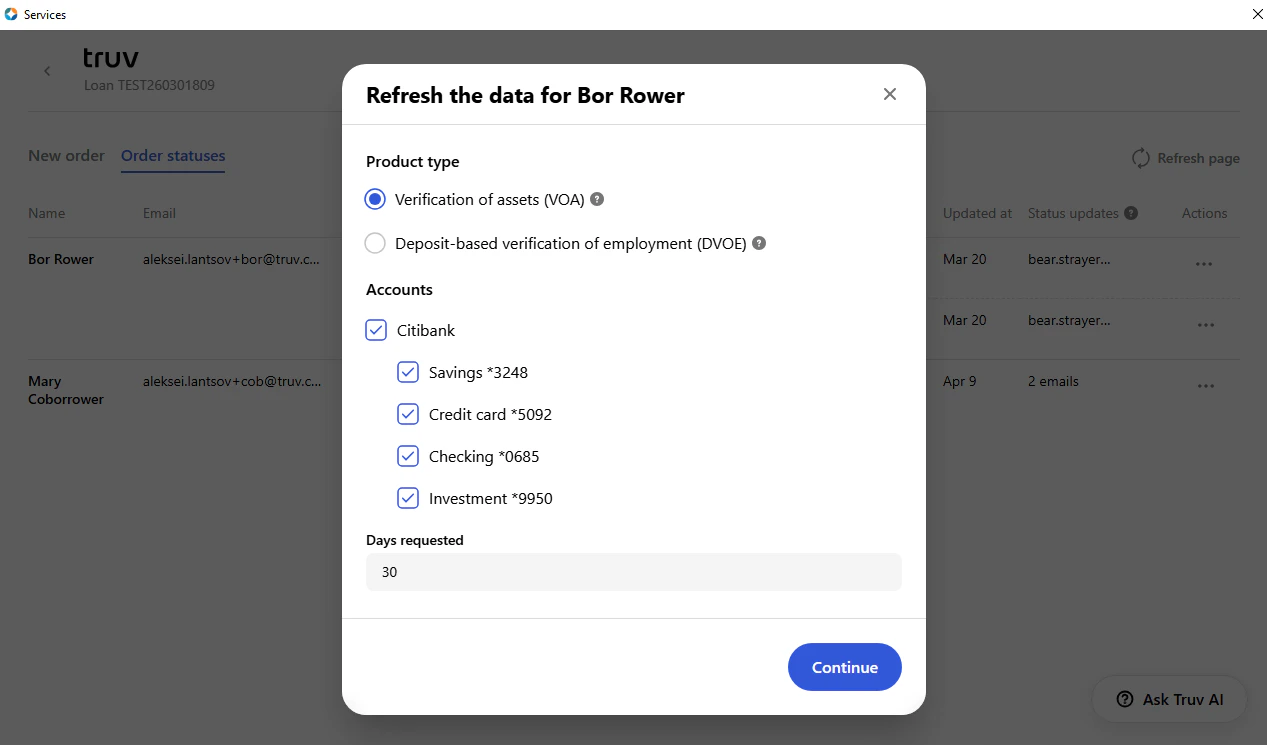
- Product type: Choose Verification of assets (VOA) for a full report with account summaries, large deposits, and transactions, or Deposit-based VOE (DVOE) for a simplified report with deposit transactions only, without balances.
- Accounts: Select which financial institutions to include from the borrower or co-borrower’s connected accounts.
- Days requested: Number of days of account history to include (default: 30 days).
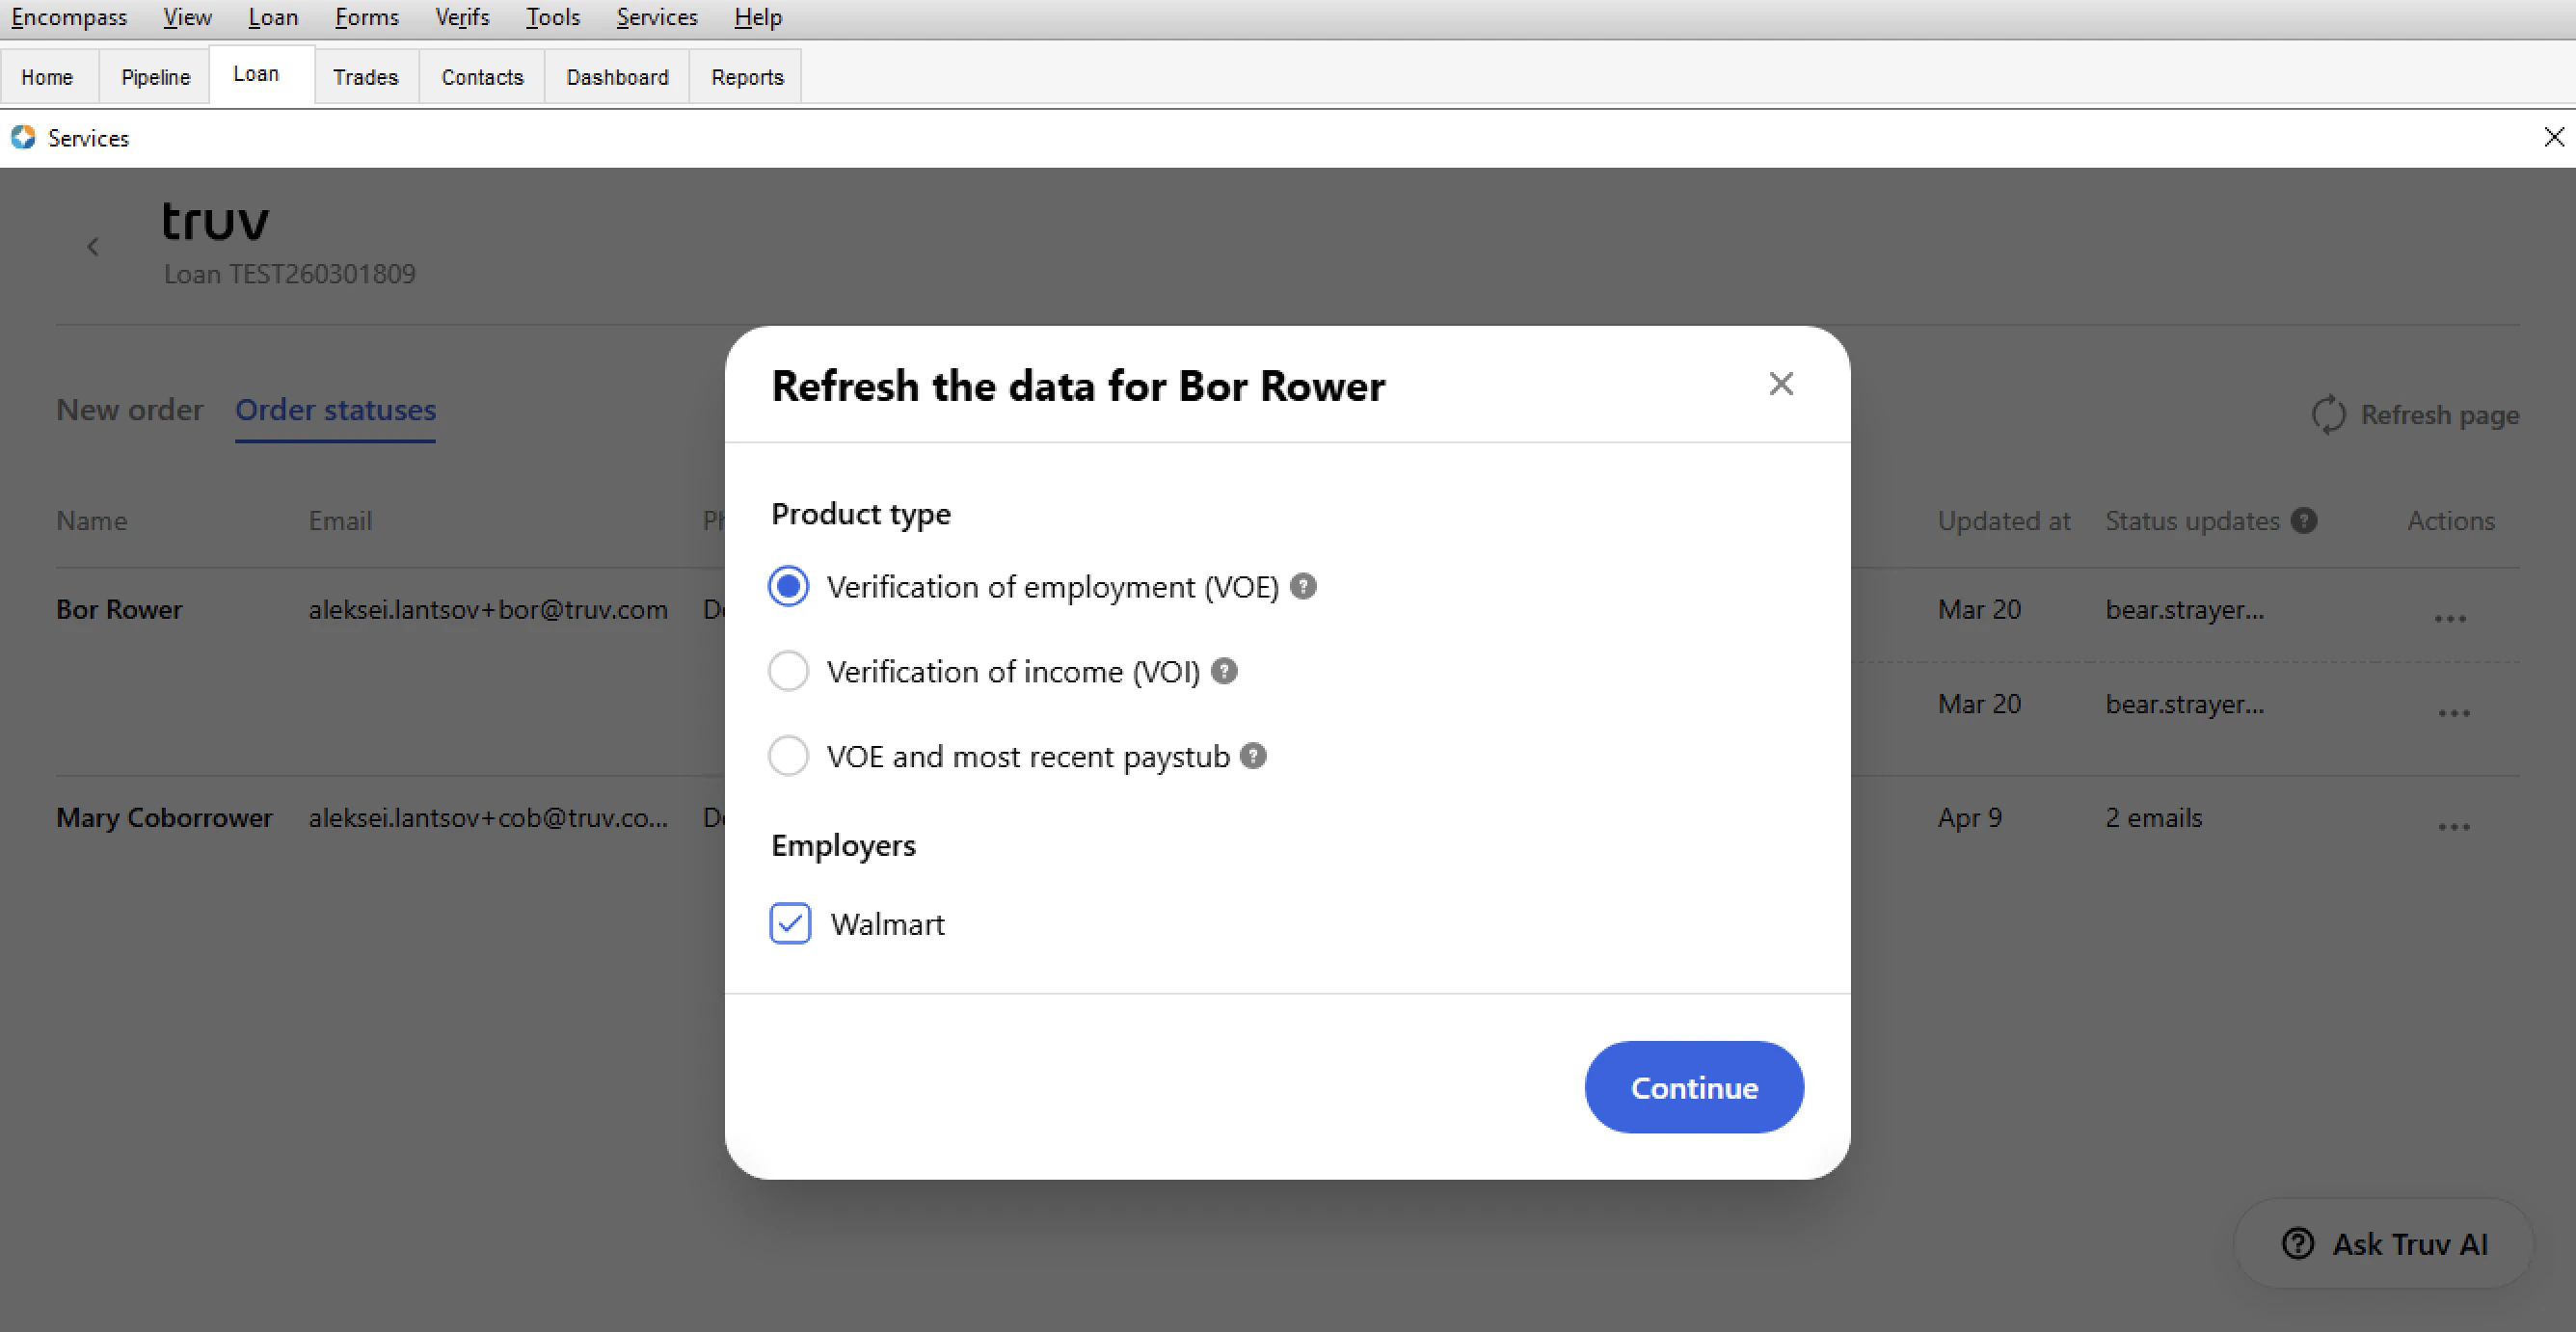
- Verification of employment (VOE) — refreshes employment data only, used for 10-day PCV.
- Verification of income (VOI) — refreshes the full income and employment report.
- VOE and most recent paystub — refreshes employment verification and retrieves the borrower’s most recent paystub.
- A new order row will appear with Refresh pending status.
- Truv will attempt to refresh the data without any borrower action by using the existing provided credentials. If this refresh fails, a request to re-authenticate will be emailed to the borrower, similar to the new order workflow.
- Once the order is complete, the Status updates recipients will receive a status update email and the new report will be uploaded to the eFolder.
Accessing Completed Orders and Reports
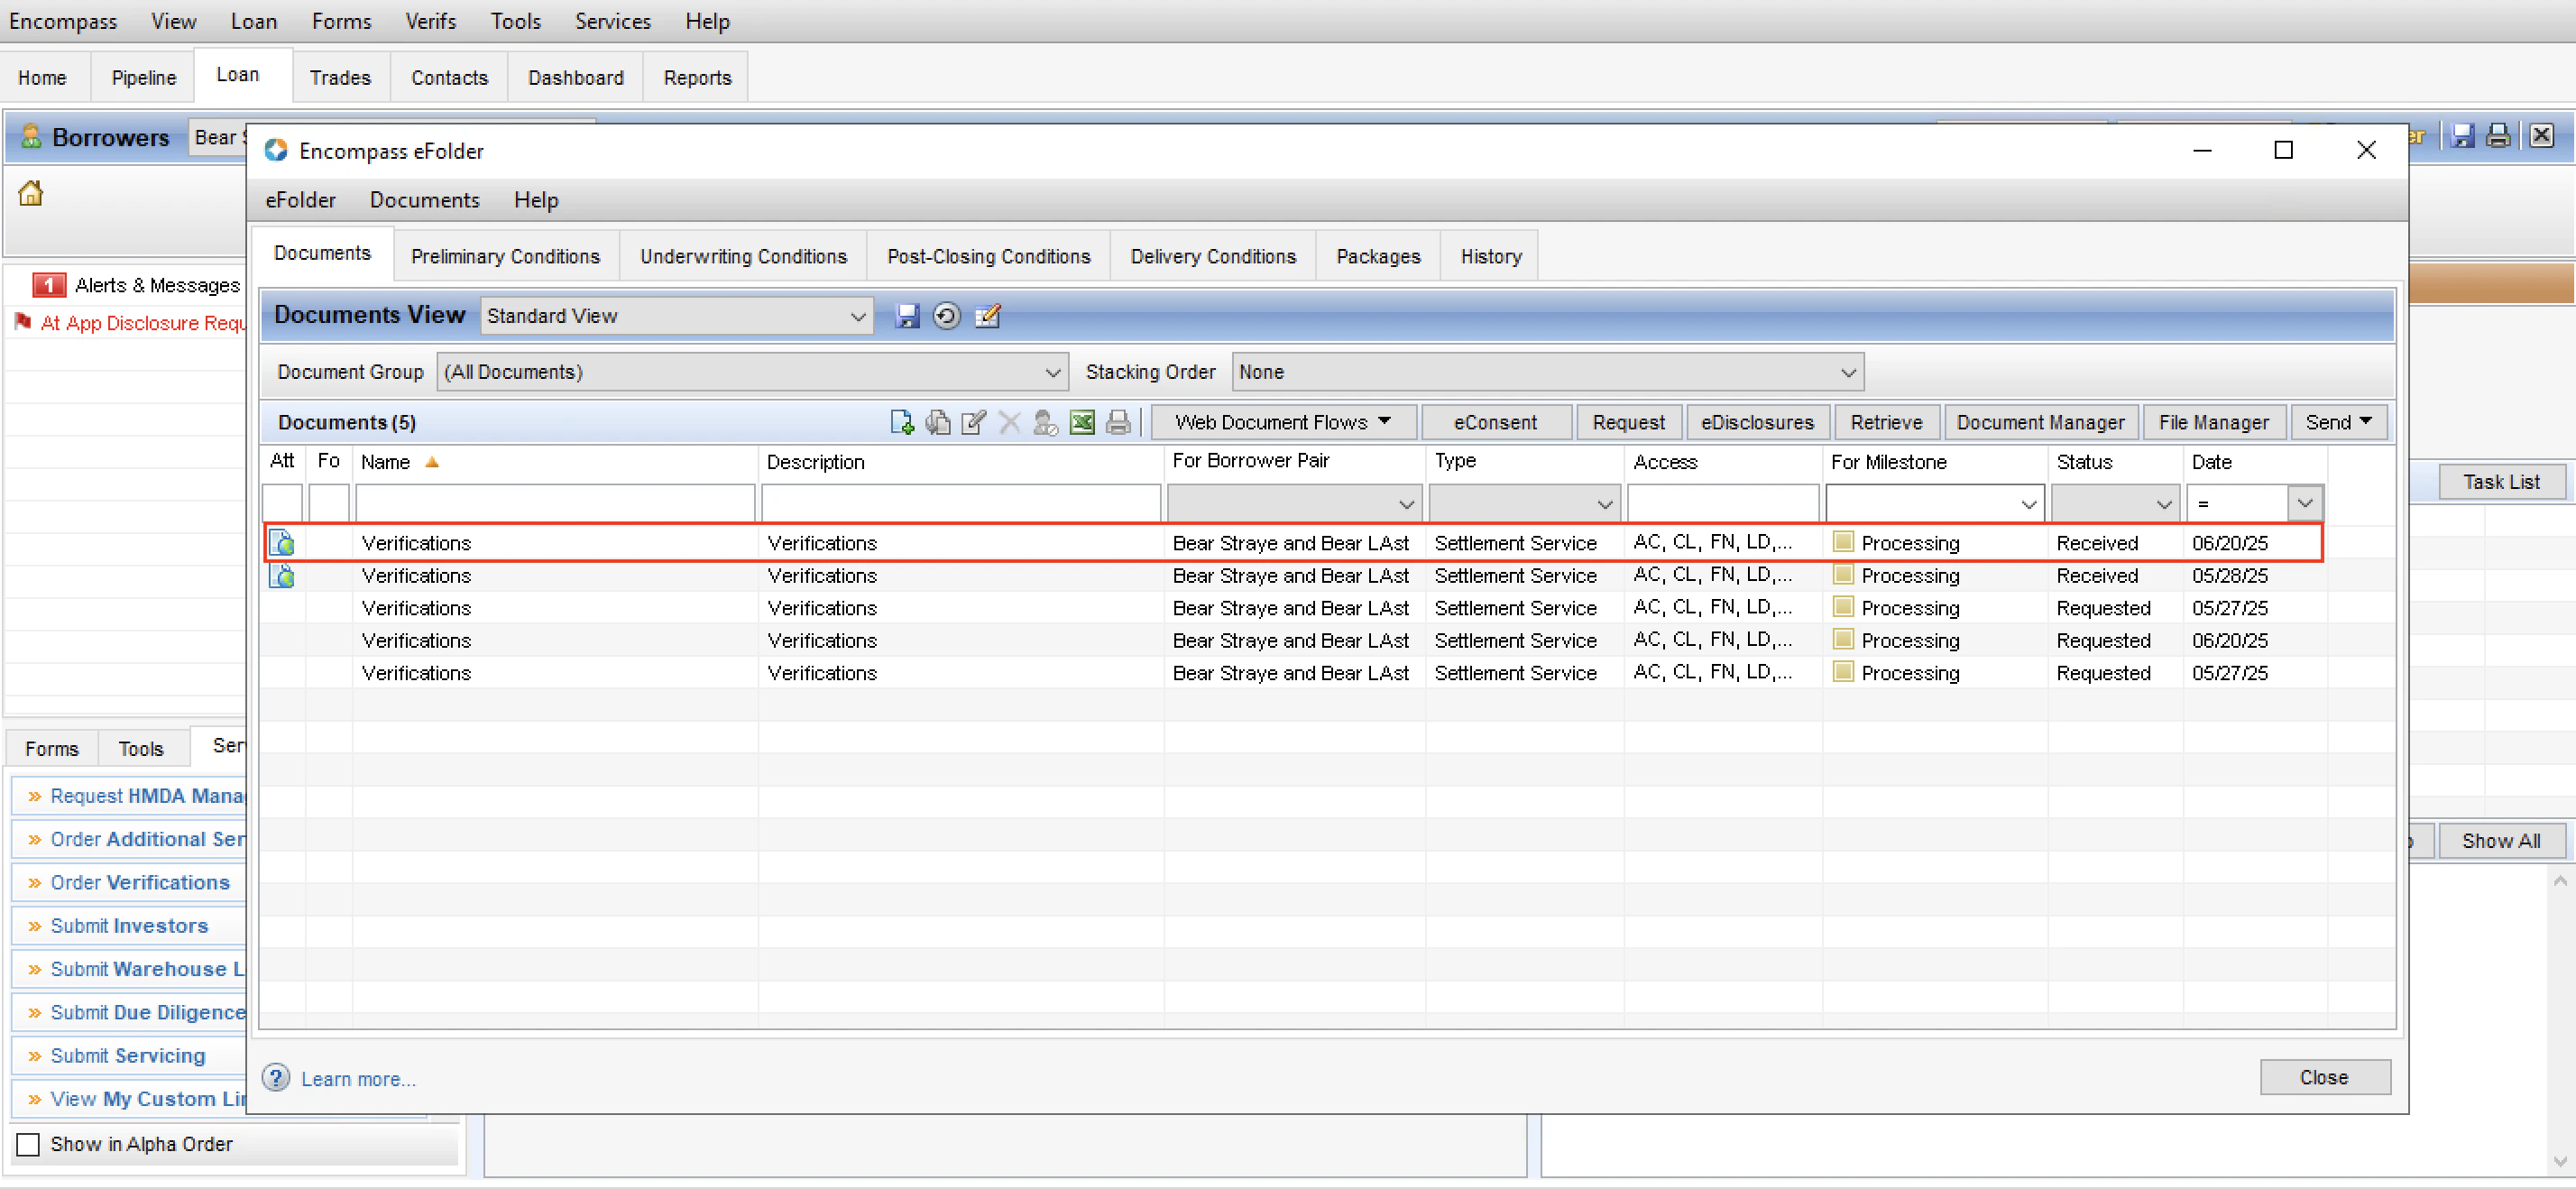
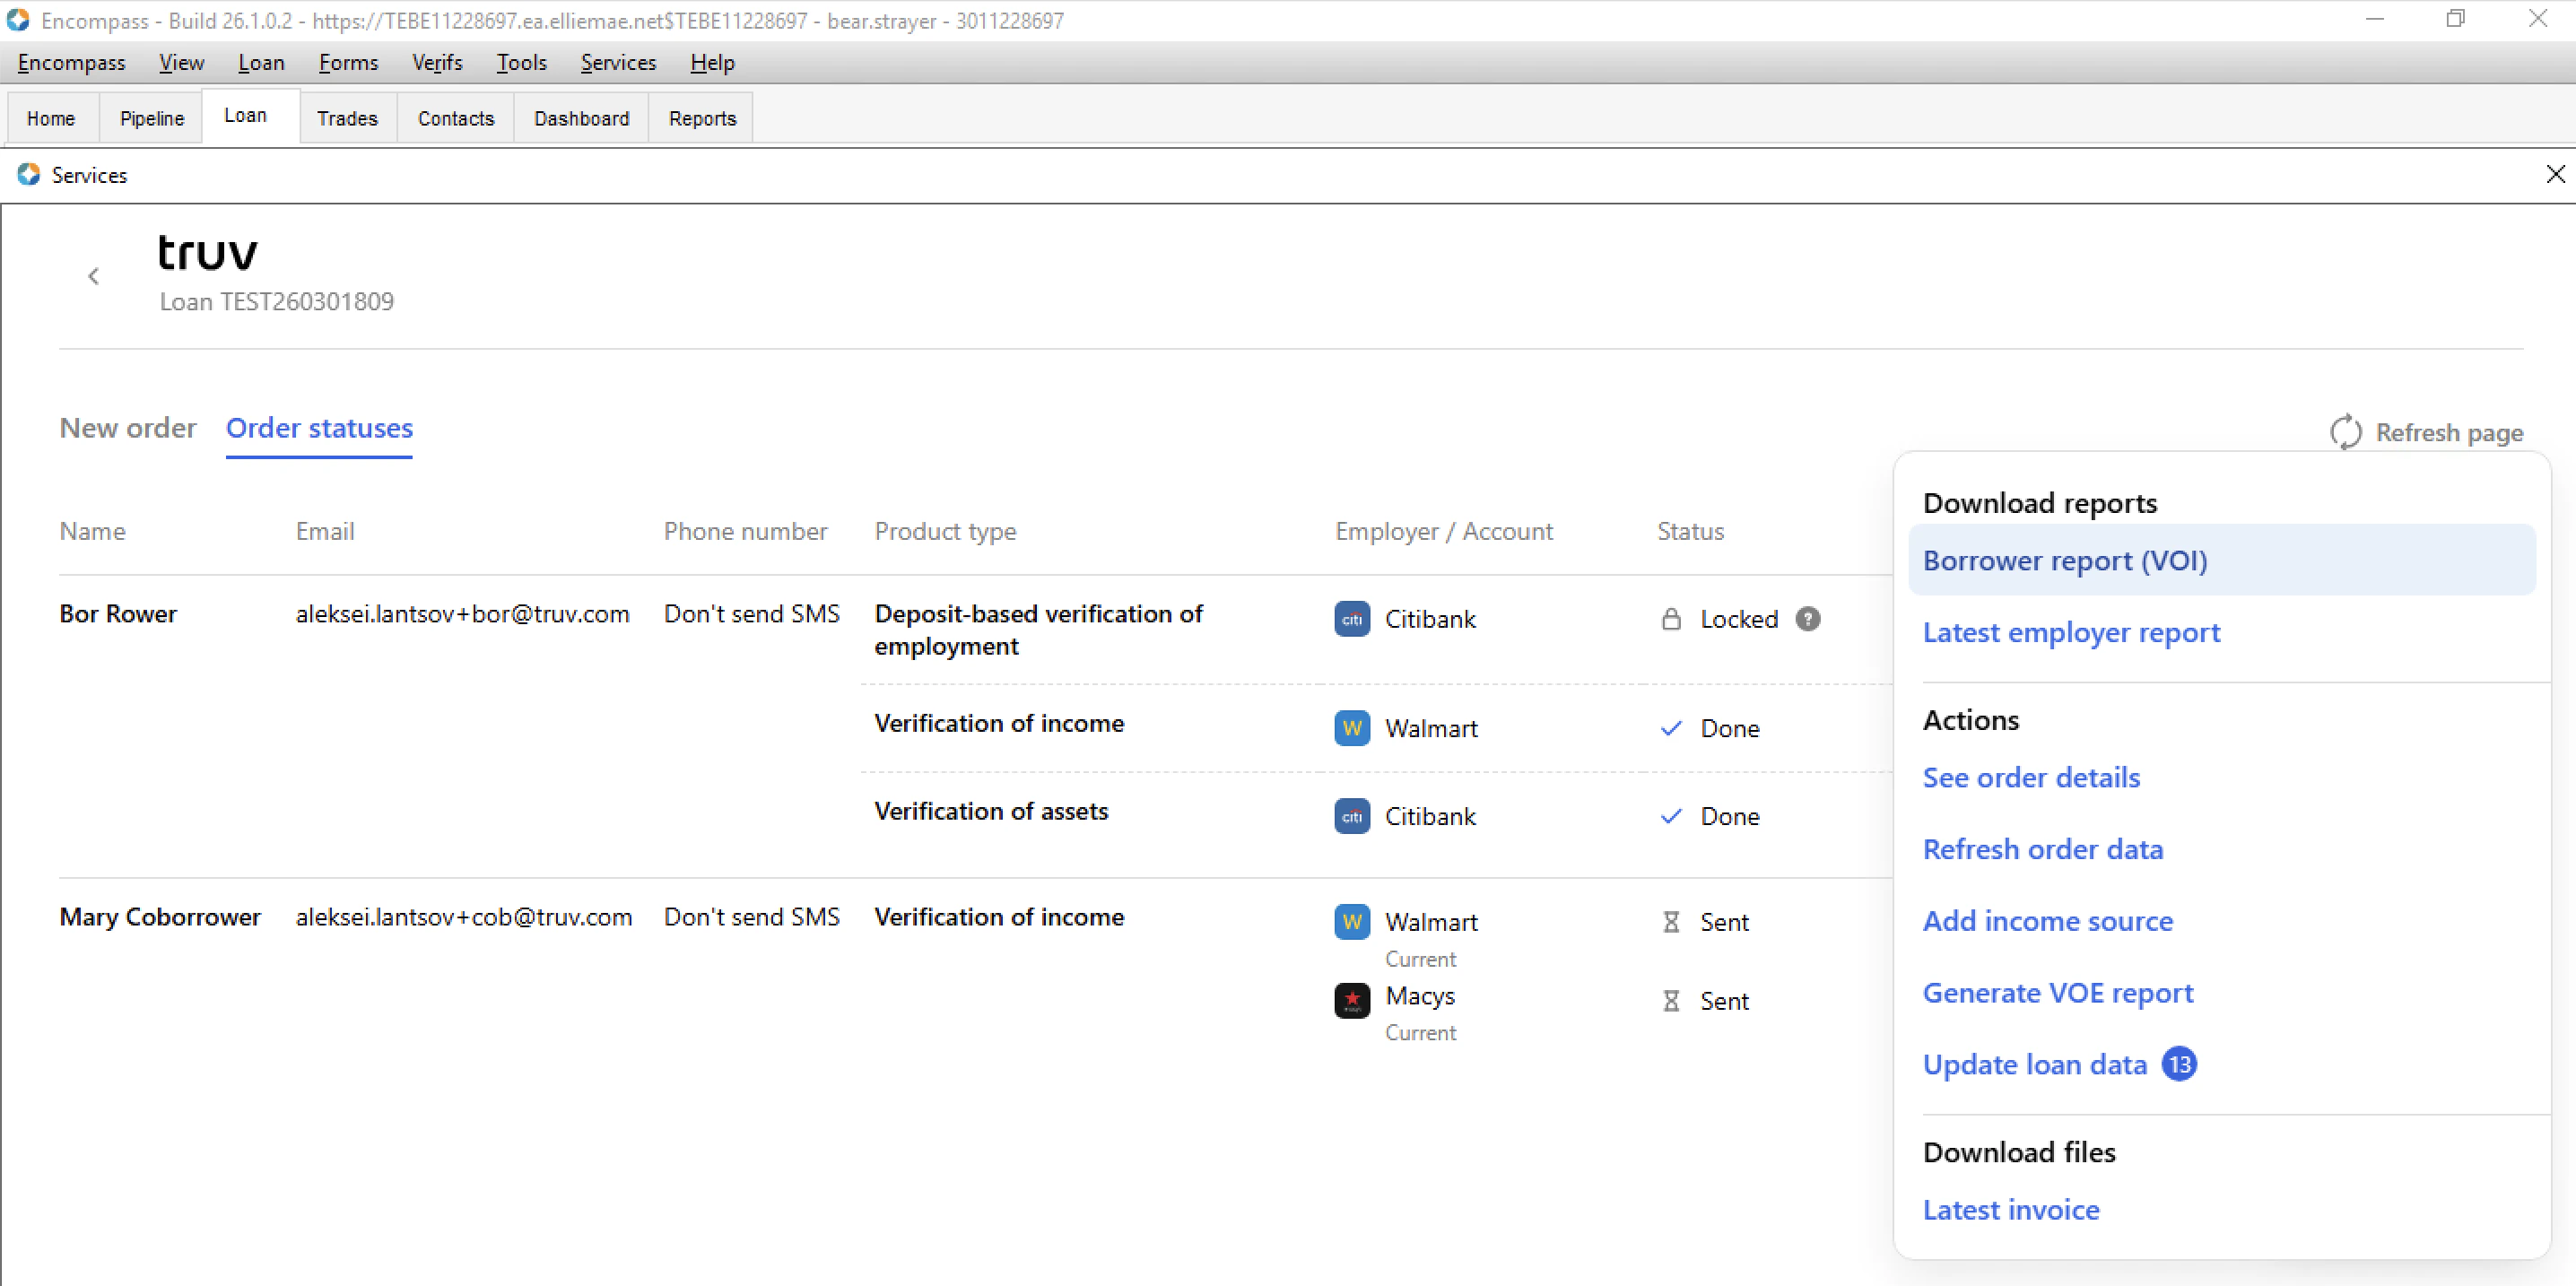
Once an order is complete (initial or refresh) the below happens:- The loan team email addresses in the Status updates column will receive an email saying the order is complete.
- All returned documents (paystubs, W-2s, Truv Reports, etc.) will be uploaded to the Verifications eFolder.
- The Truv Report IDs will be added to the corresponding GSE Vendor fields in the loan file.
GSE Submissions
A new Report ID is generated on every verification and overwrites the previous entry. If the Report ID is not auto-populated, copy the Report ID from the Truv Report and paste it into the corresponding field using the format specified below. When a lender runs AUS (DU / LP), the GSE will automatically request the report data from Truv that matches the Report ID entered into the field. These providers automatically cache each report data set retrieved, so if different reports are run, they will have access to this data even if the Report ID is removed from the field. Income and Employment
Assets
The Report ID in the asset fields must include the correct case-sensitive Truv prefix:
Truv: for Fannie Mae (GSEVENDOR.X37/X38) and TRUV: for Freddie Mac (GSEVENDOR.X43/X44).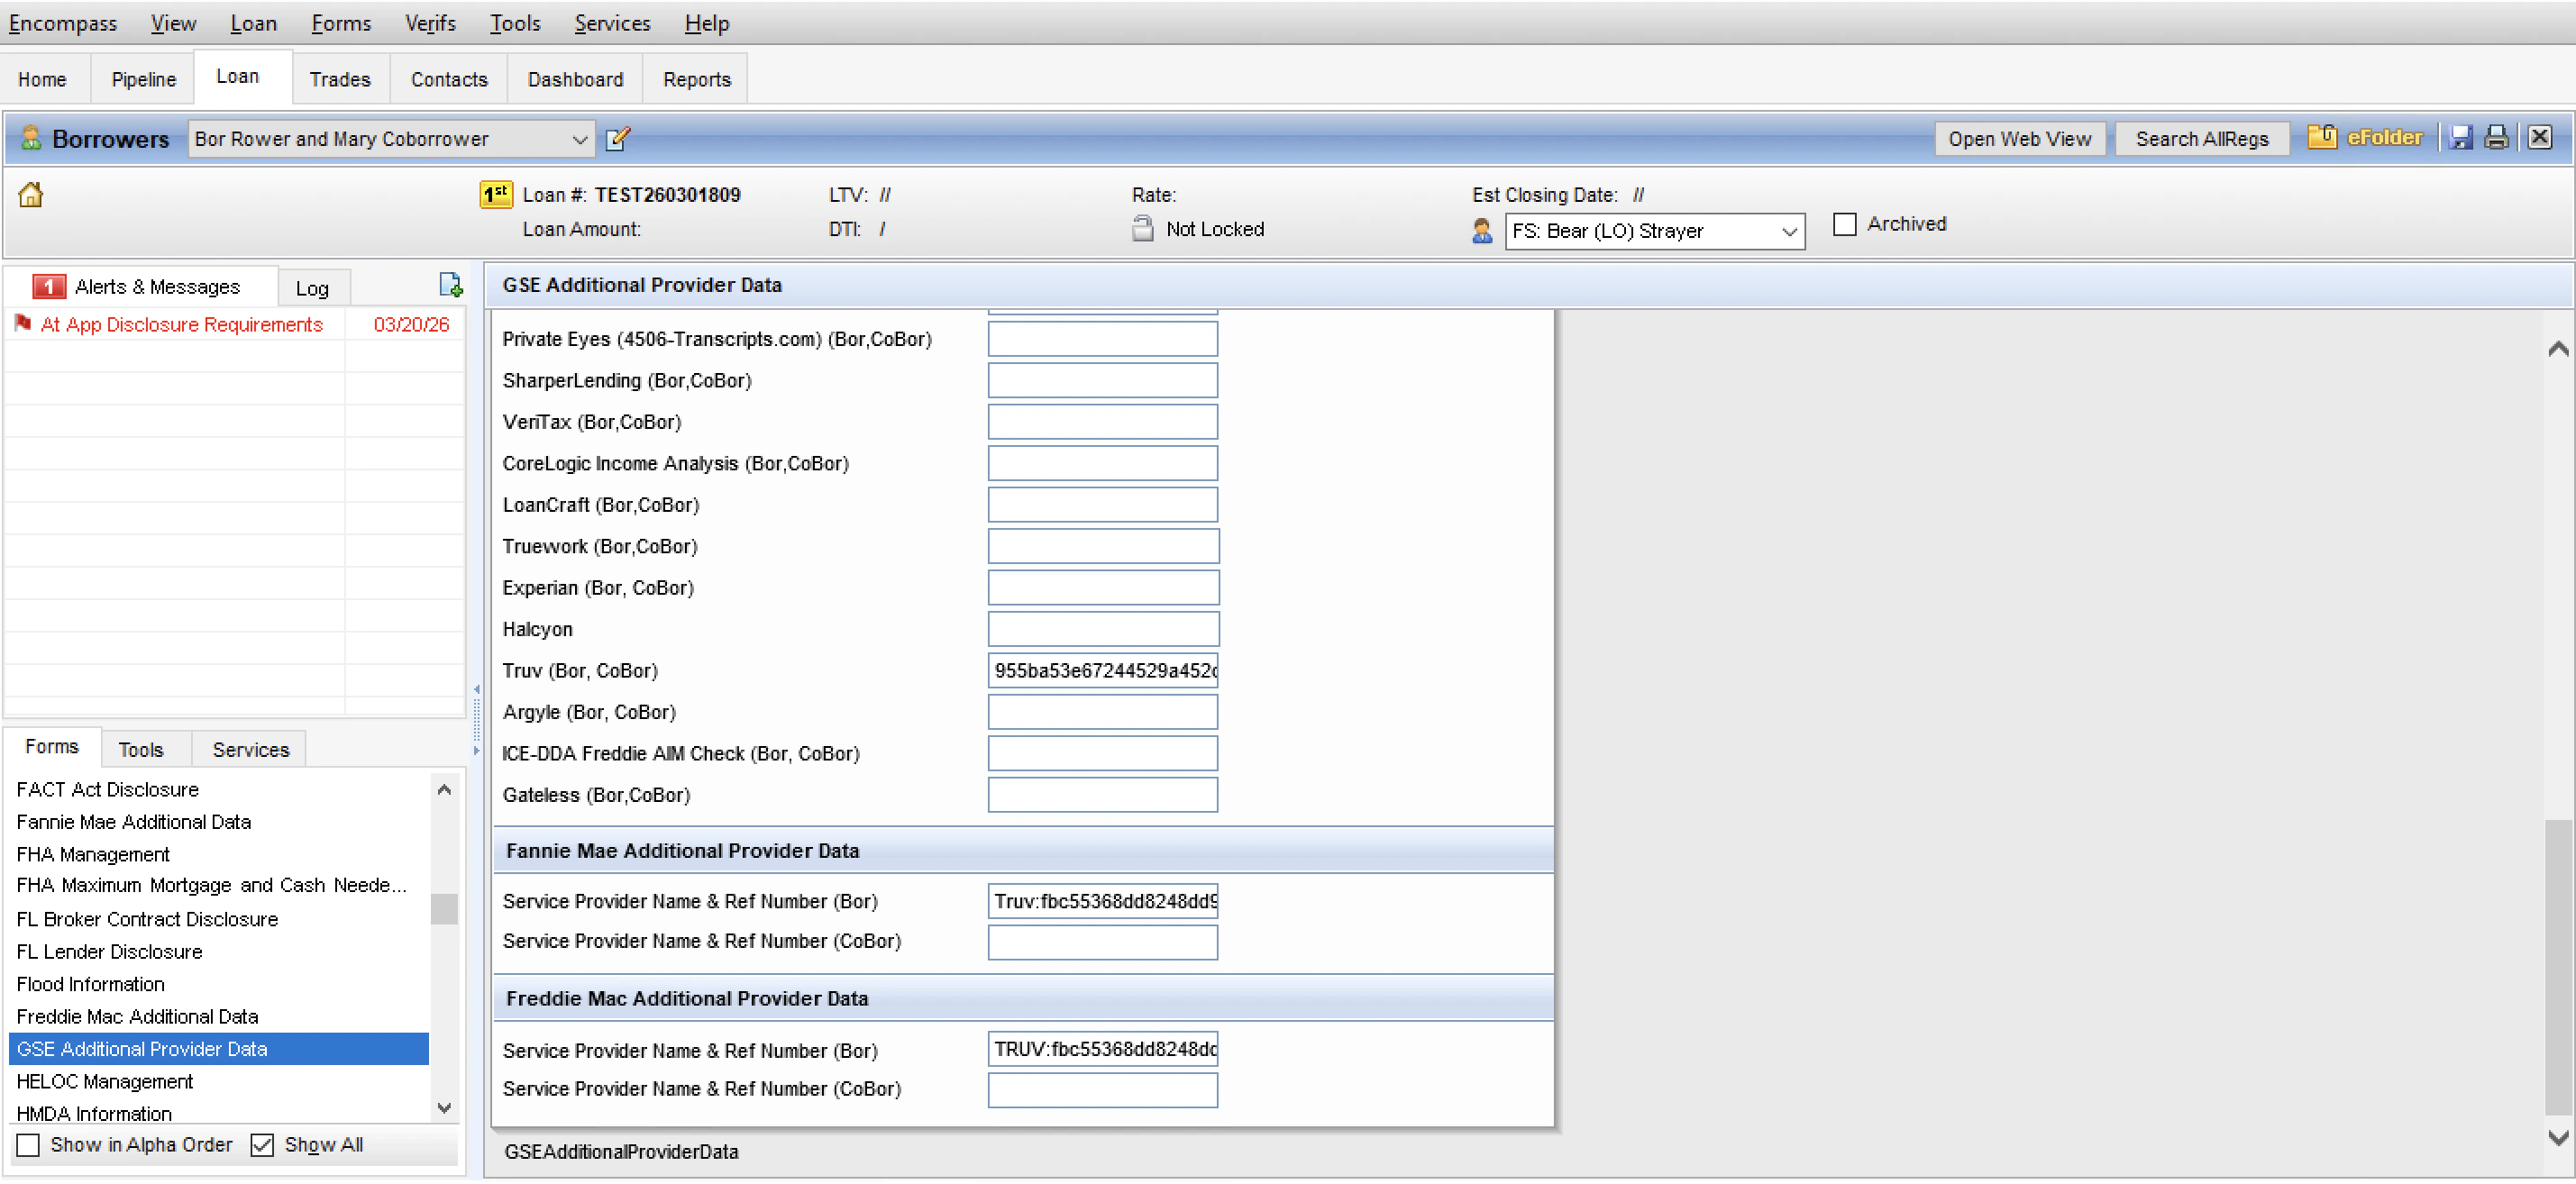
Additional Actions
On the Order statuses tab there are additional actions available for completed orders that are summarized below.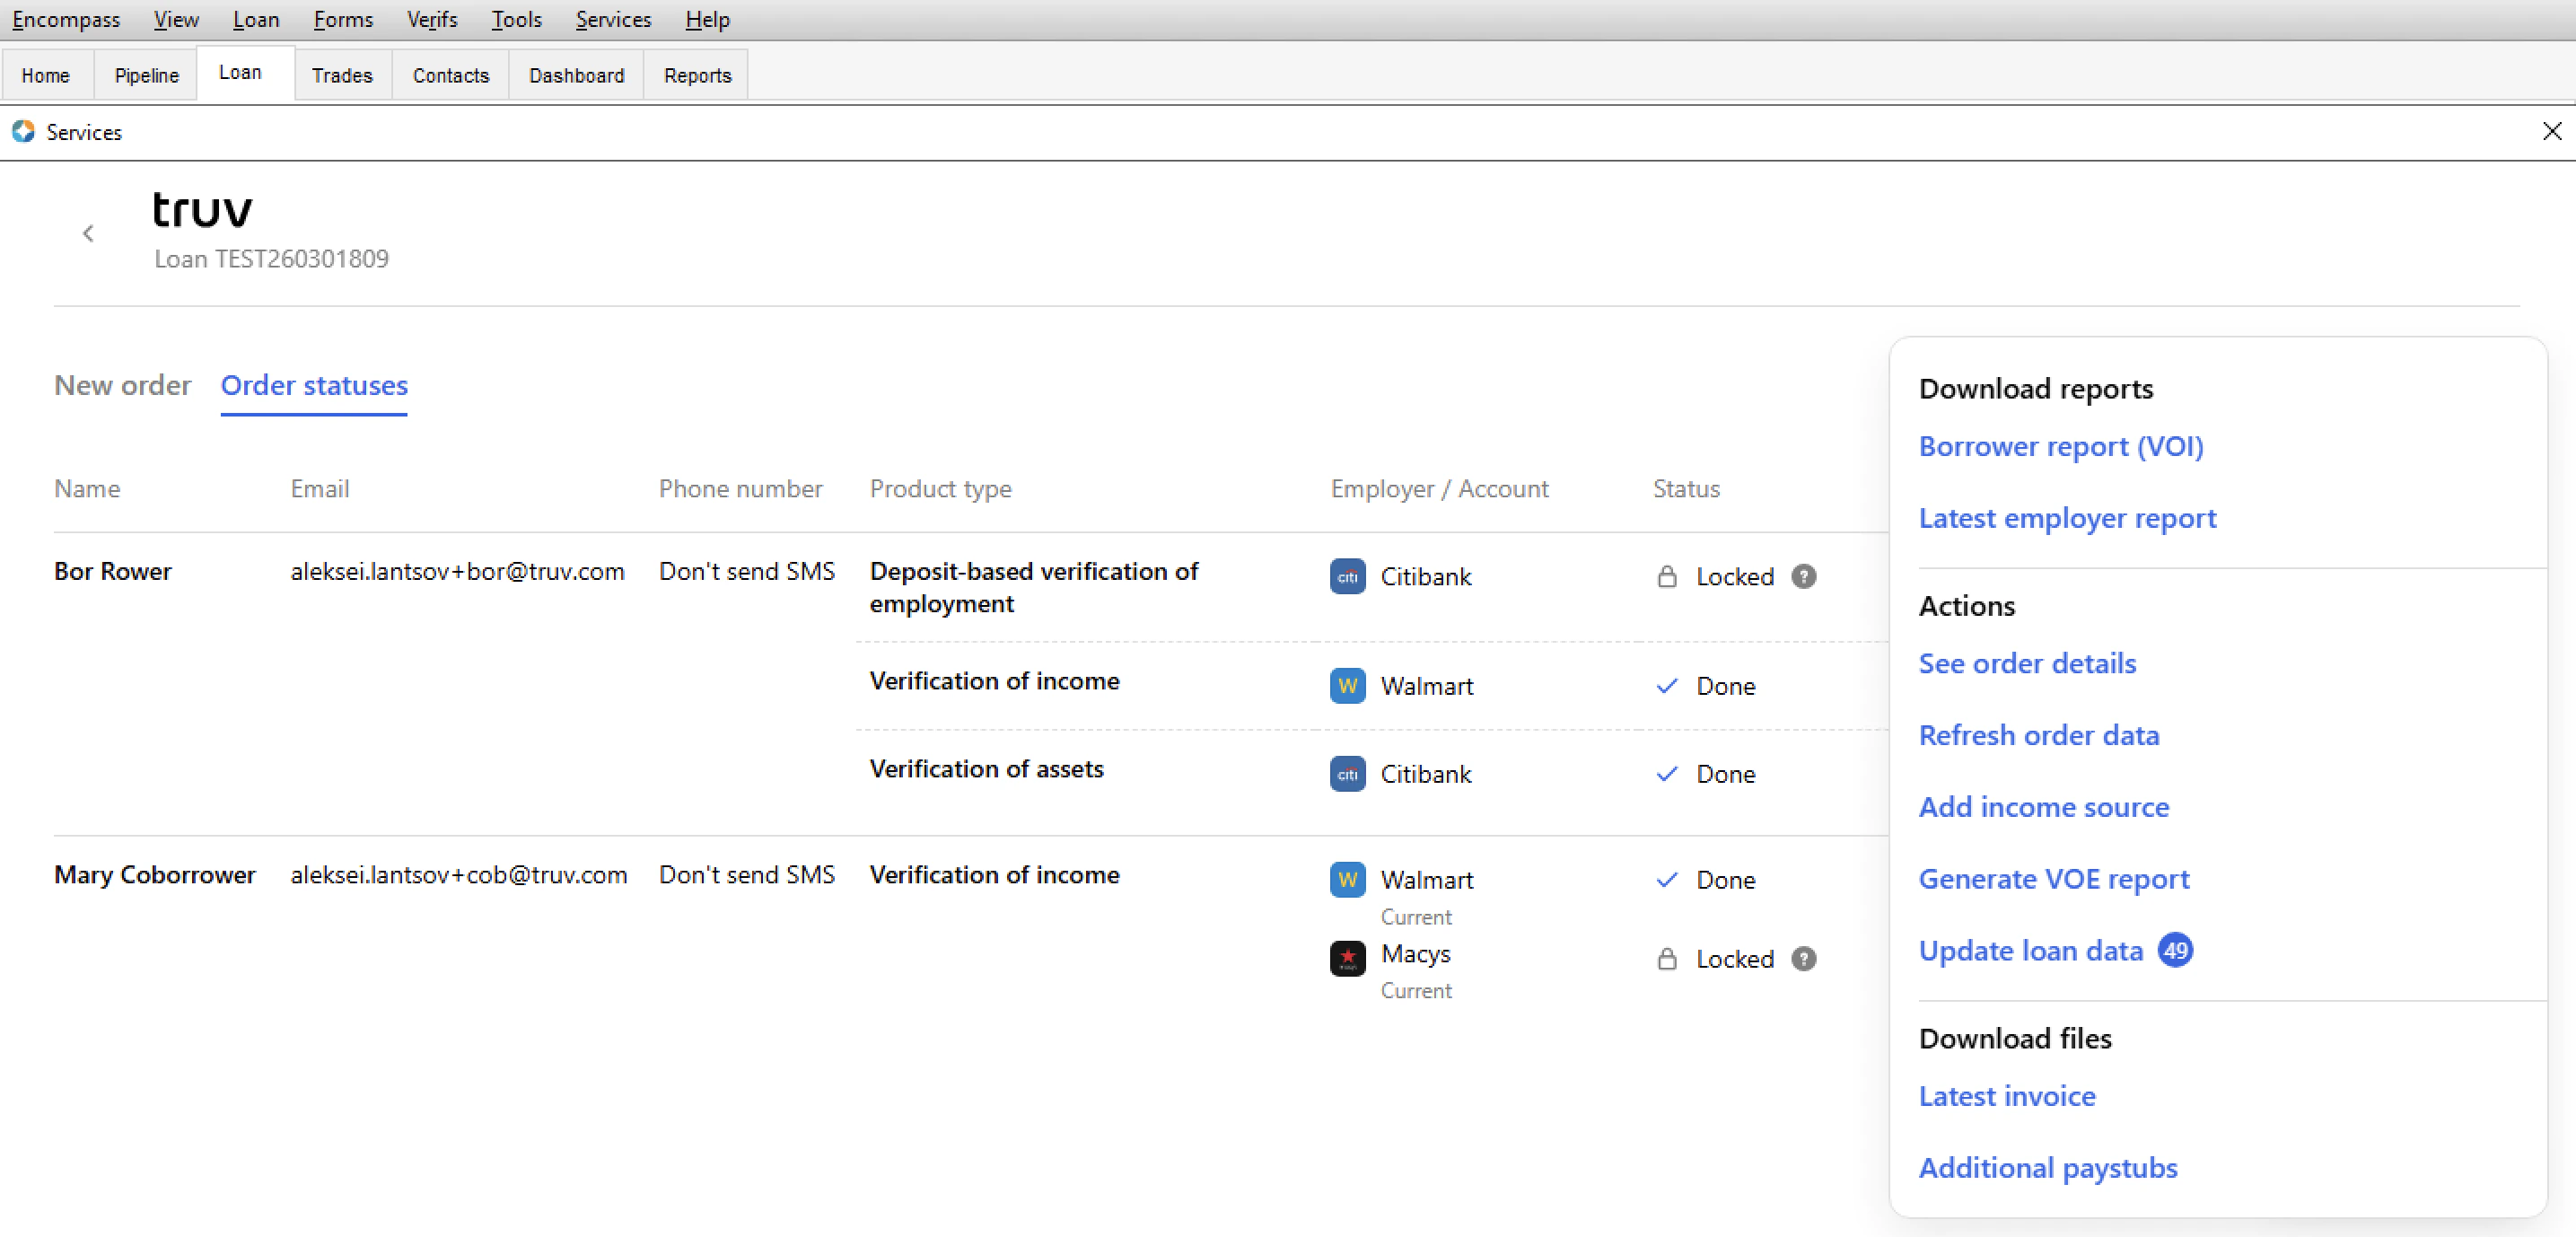
See Order Details
Applies to all product types. Clicking on an order row in the Order statuses tab opens a details sidebar showing:- Borrower and co-borrower names
- Product type and order date
- Individual employer or institution statuses
- Timeline of order events and status changes
- Links to download the generated report
Generate New Report
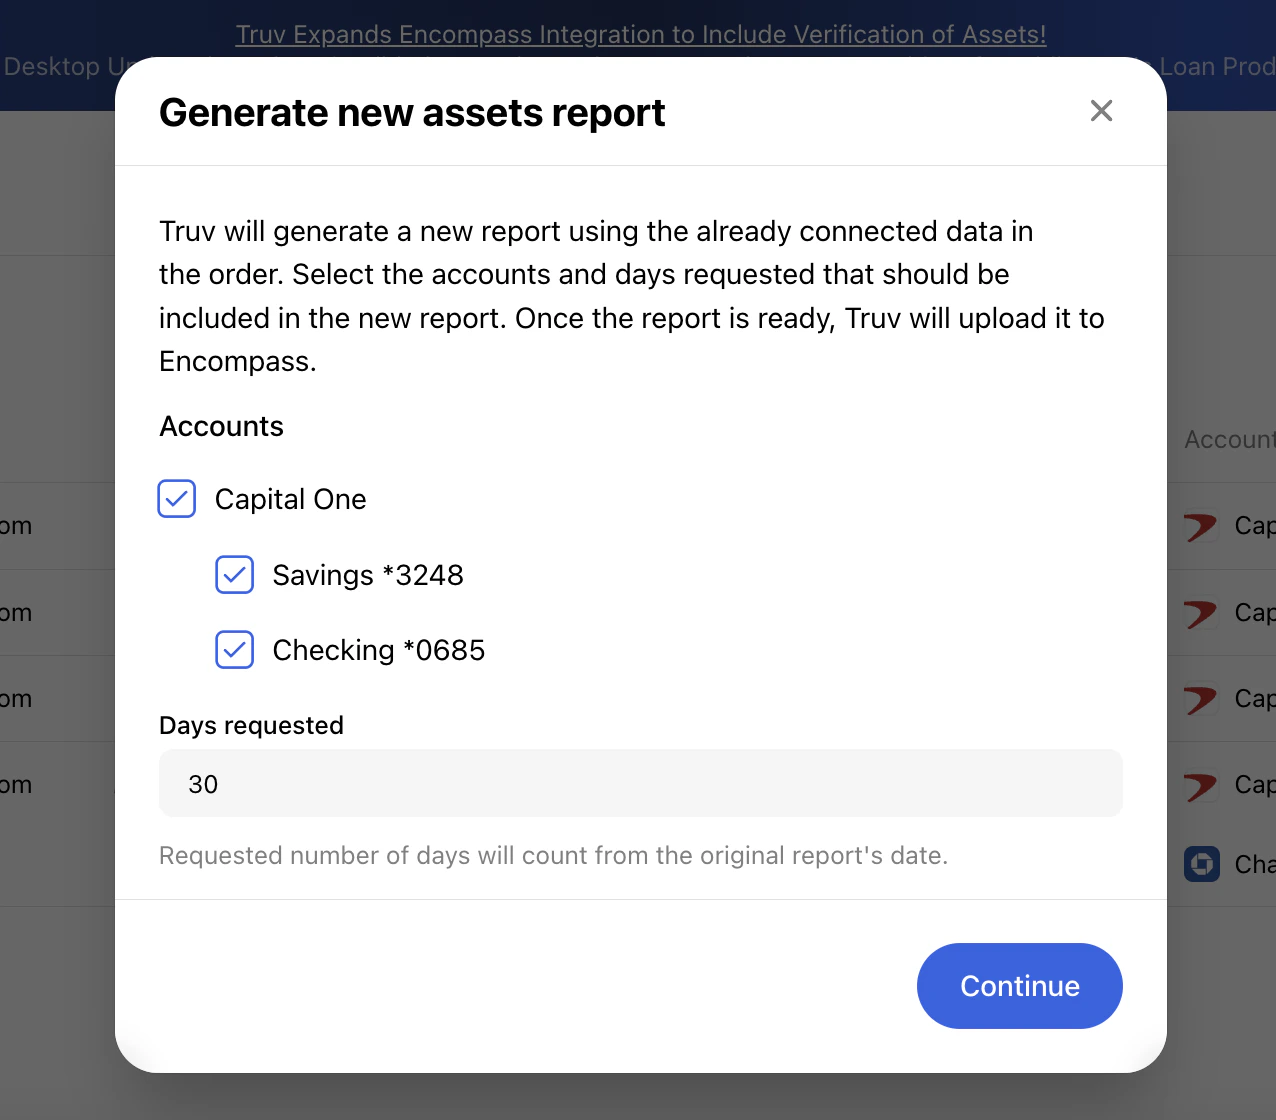
For VOA orders, lenders can generate a new report from existing connected account data — no borrower action required and at no additional charge. Available within 30 days of the initial report. For VOIE orders, lenders can generate an on-demand VOE report from a completed VOIE order for 10-day pre-closing verification — no borrower reconnection required. The VOE report receives its own GSE Report ID. Click … on a completed order row and select Generate new report. In the pop-up, select the accounts to include and set the Days requested for account history (default: 30 days, counted from when data was originally pulled). Click Continue — the order shows a Pending generation status until the new report is uploaded to the eFolder.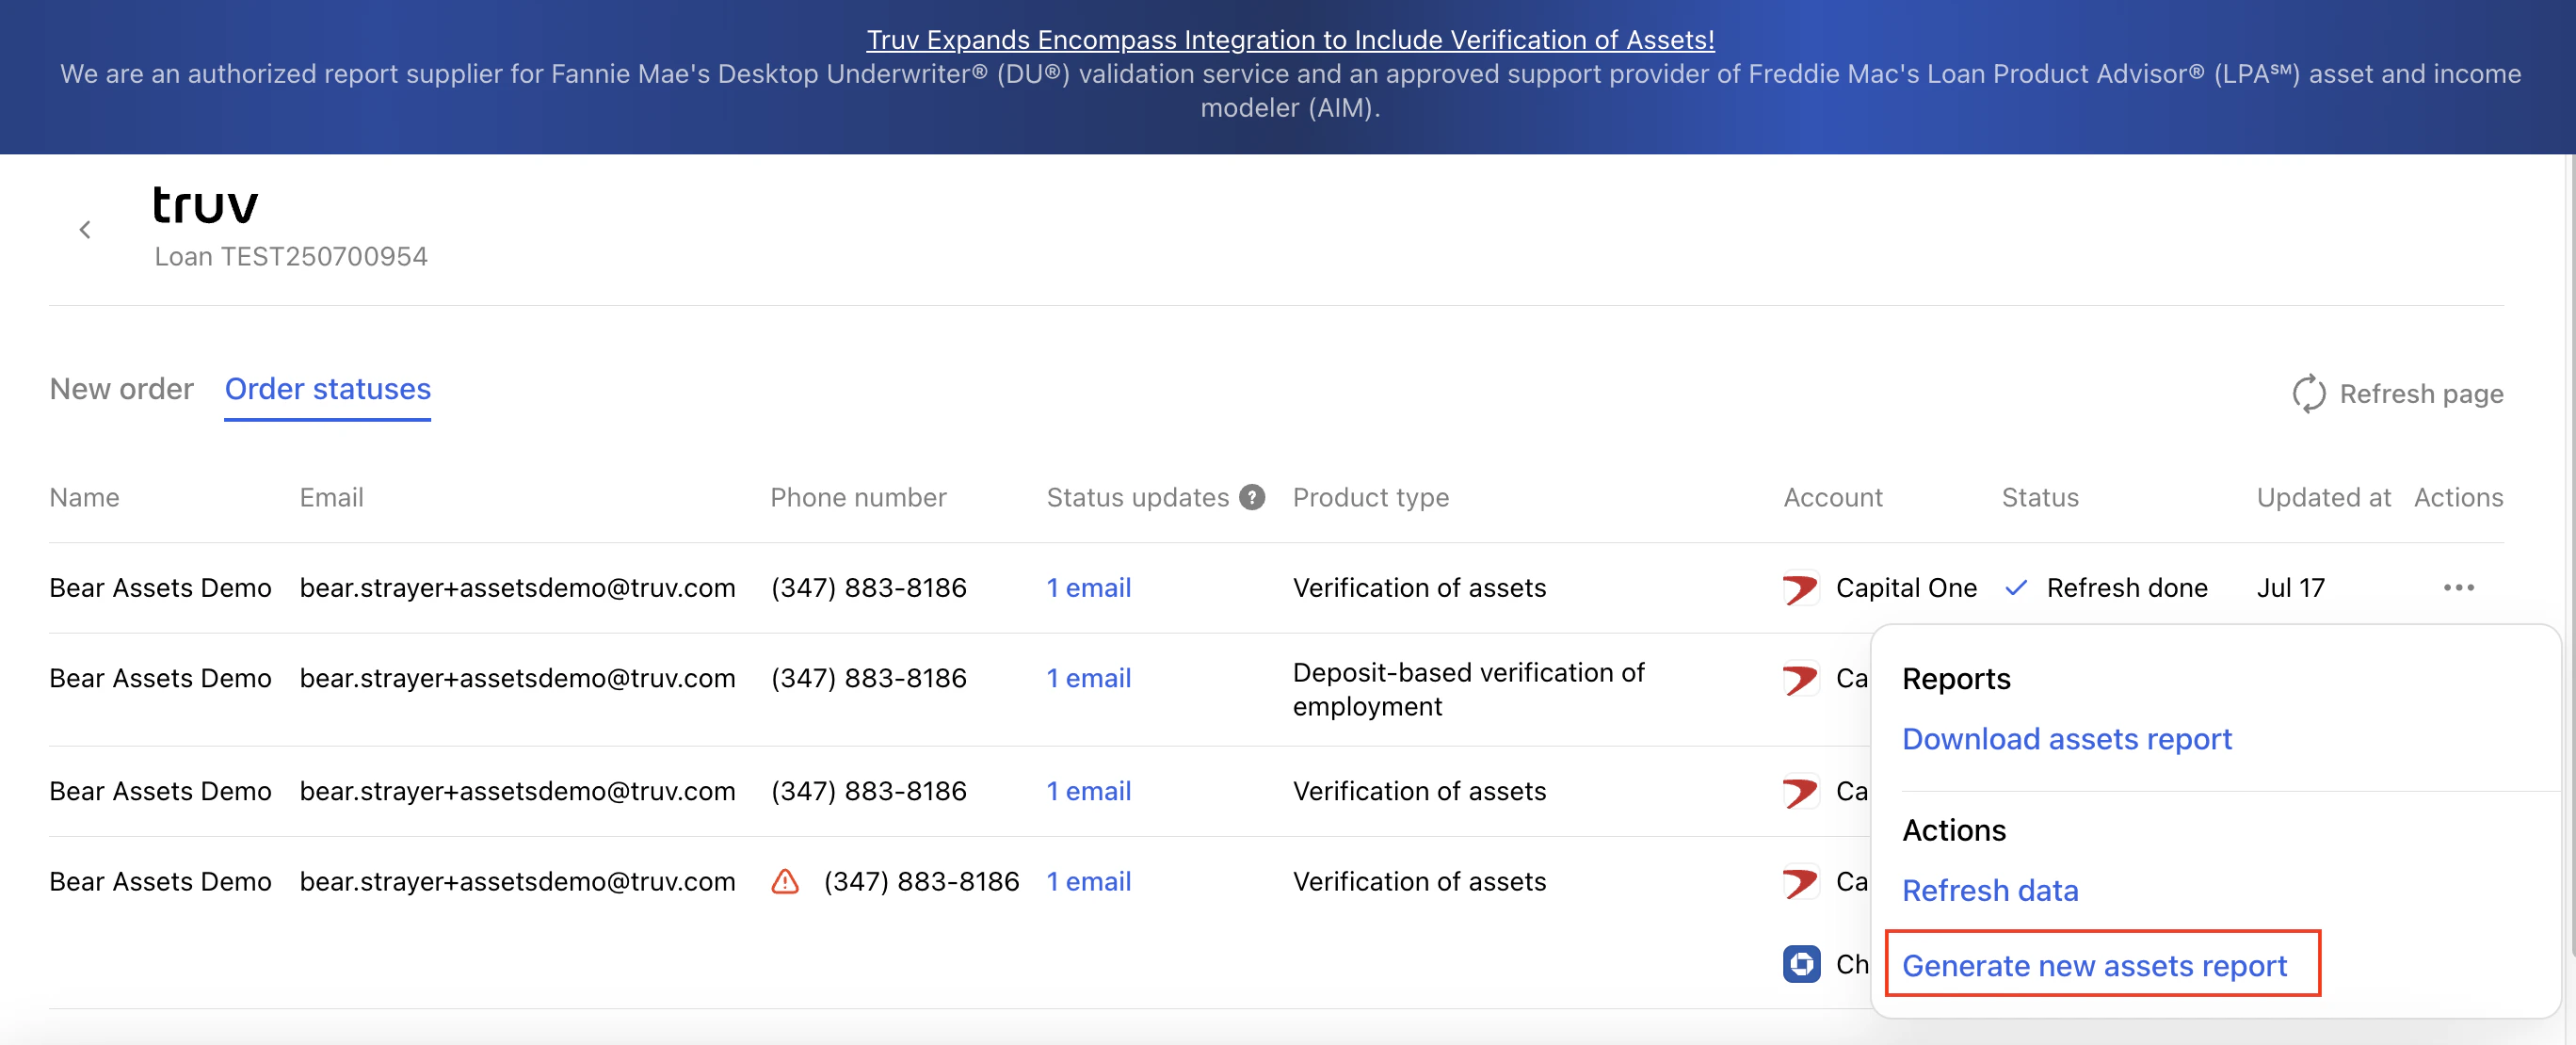
Update Loan Data
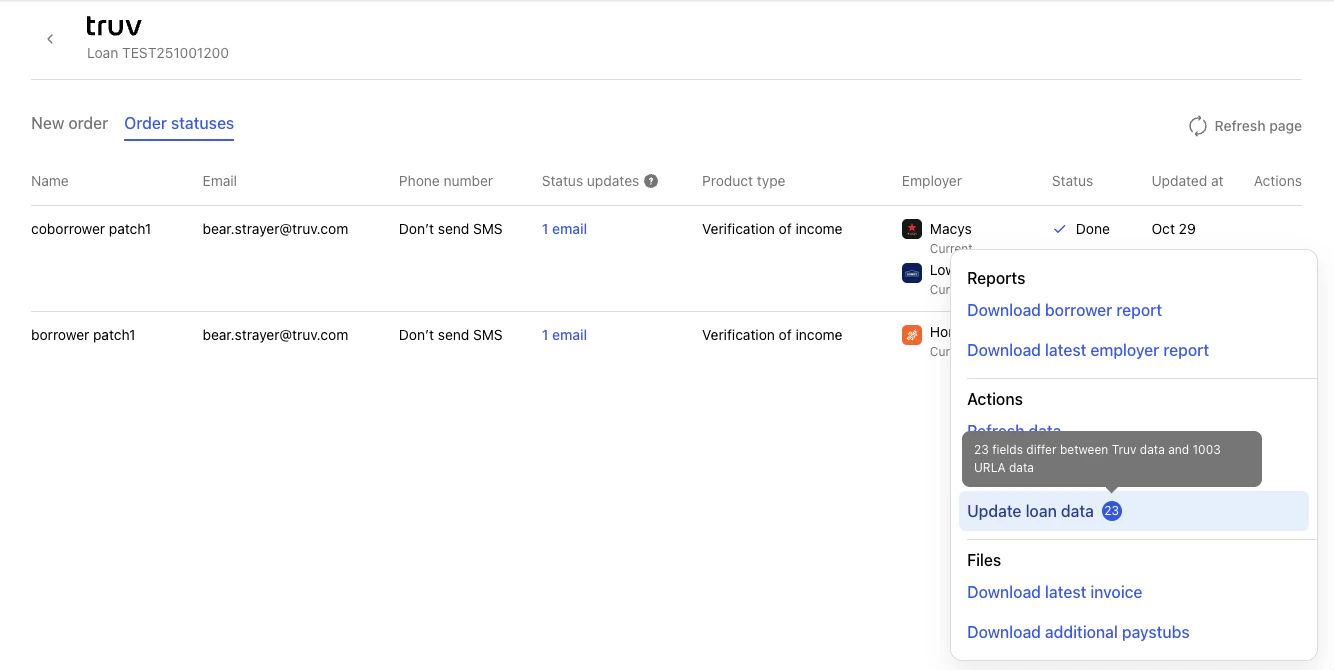
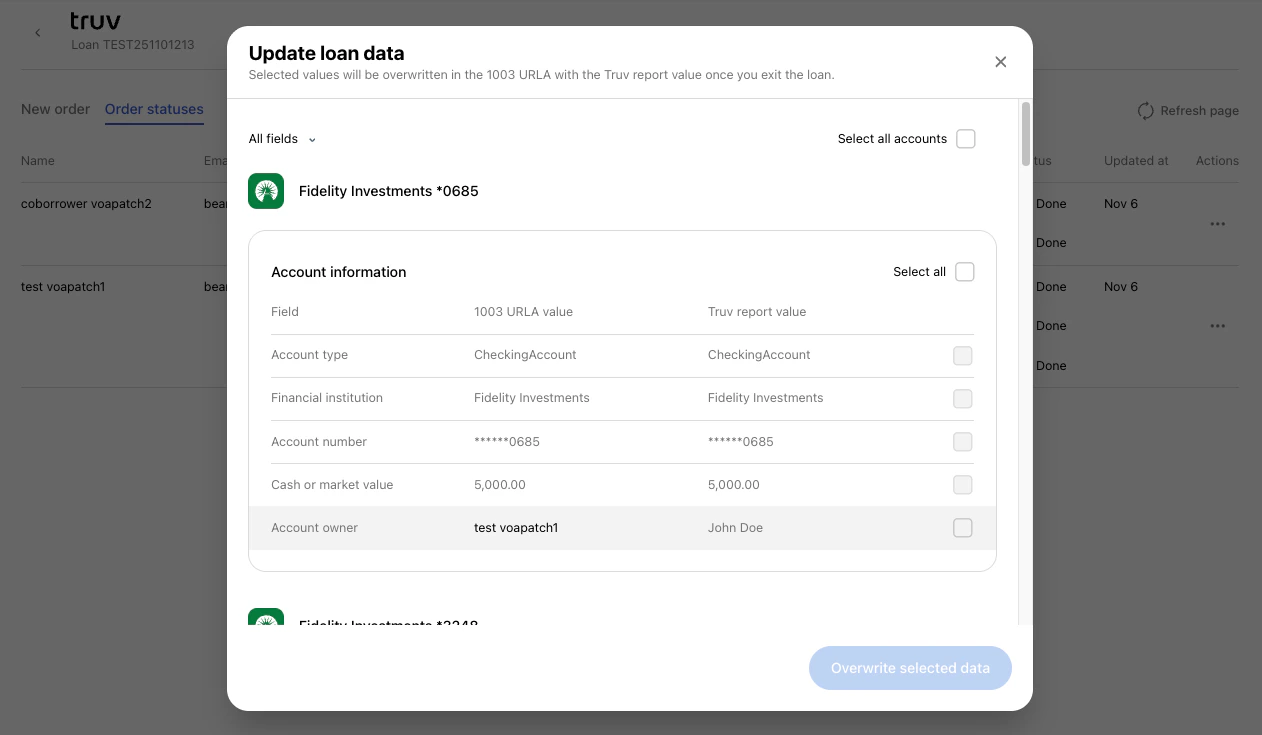
Applies to VOI, VOE, and VOA orders. Allows lenders to compare Truv verification data against the 1003 URLA field-by-field and selectively overwrite Encompass loan fields with Truv data. The button displays the number of mismatched fields. Available for orders completed within the last 30 days. Contact your Truv Customer Success Manager to enable this feature. Click … on a completed order row and select Update loan data. A comparison table opens showing Truv data alongside current loan file values. Select the fields or employers you want to overwrite and click Overwrite selected data.- Income / Employment: Matches by employer name. If no match is found, a new employment entry is created in the loan file.
- Assets: Matches by account number. Only updates accounts that Truv originally created — manual or third-party entries are not affected.
Due to a limitation in Encompass, Truv can only update asset data entries it has created. If asset data was entered manually or by another provider, Truv will be unable to update it.
Latest Invoice
Applies to all product types. Once an order is complete, a Download latest invoice button becomes available in the order’s action menu. The invoice itemizes the costs for Truv services used on that order. Allow approximately 1 minute after order completion for the invoice to generate. Invoices can be automatically routed to a specific eFolder location by configuring document mapping in the Truv Encompass admin settings.Additional Paystubs
Applies to VOIE orders only. Allows lenders to access and download specific historical paystubs directly within the Truv interface — beyond the default number included in the initial report. No borrower contact required; Truv pulls from data already collected during the initial connection. Truv can typically access over two years of paystub history. Contact your Truv Customer Success Manager to enable this feature. By default, Truv uploads paystubs and W-2s according to the settings in the Template used for the order. These defaults can be modified in the Truv Dashboard under Customization > Templates. For completed VOIE orders, if additional paystubs have been retrieved but not yet uploaded to Encompass, a Download additional paystubs option appears in the Actions menu. Click it to view the full list of available paystubs organized by year, showing pay date, period, net pay, gross pay, and a See paystub link to preview each file. Select the paystubs needed and click Download paystubs — files upload directly to the Encompass eFolder, respecting any configured eFolder mapping for paystubs.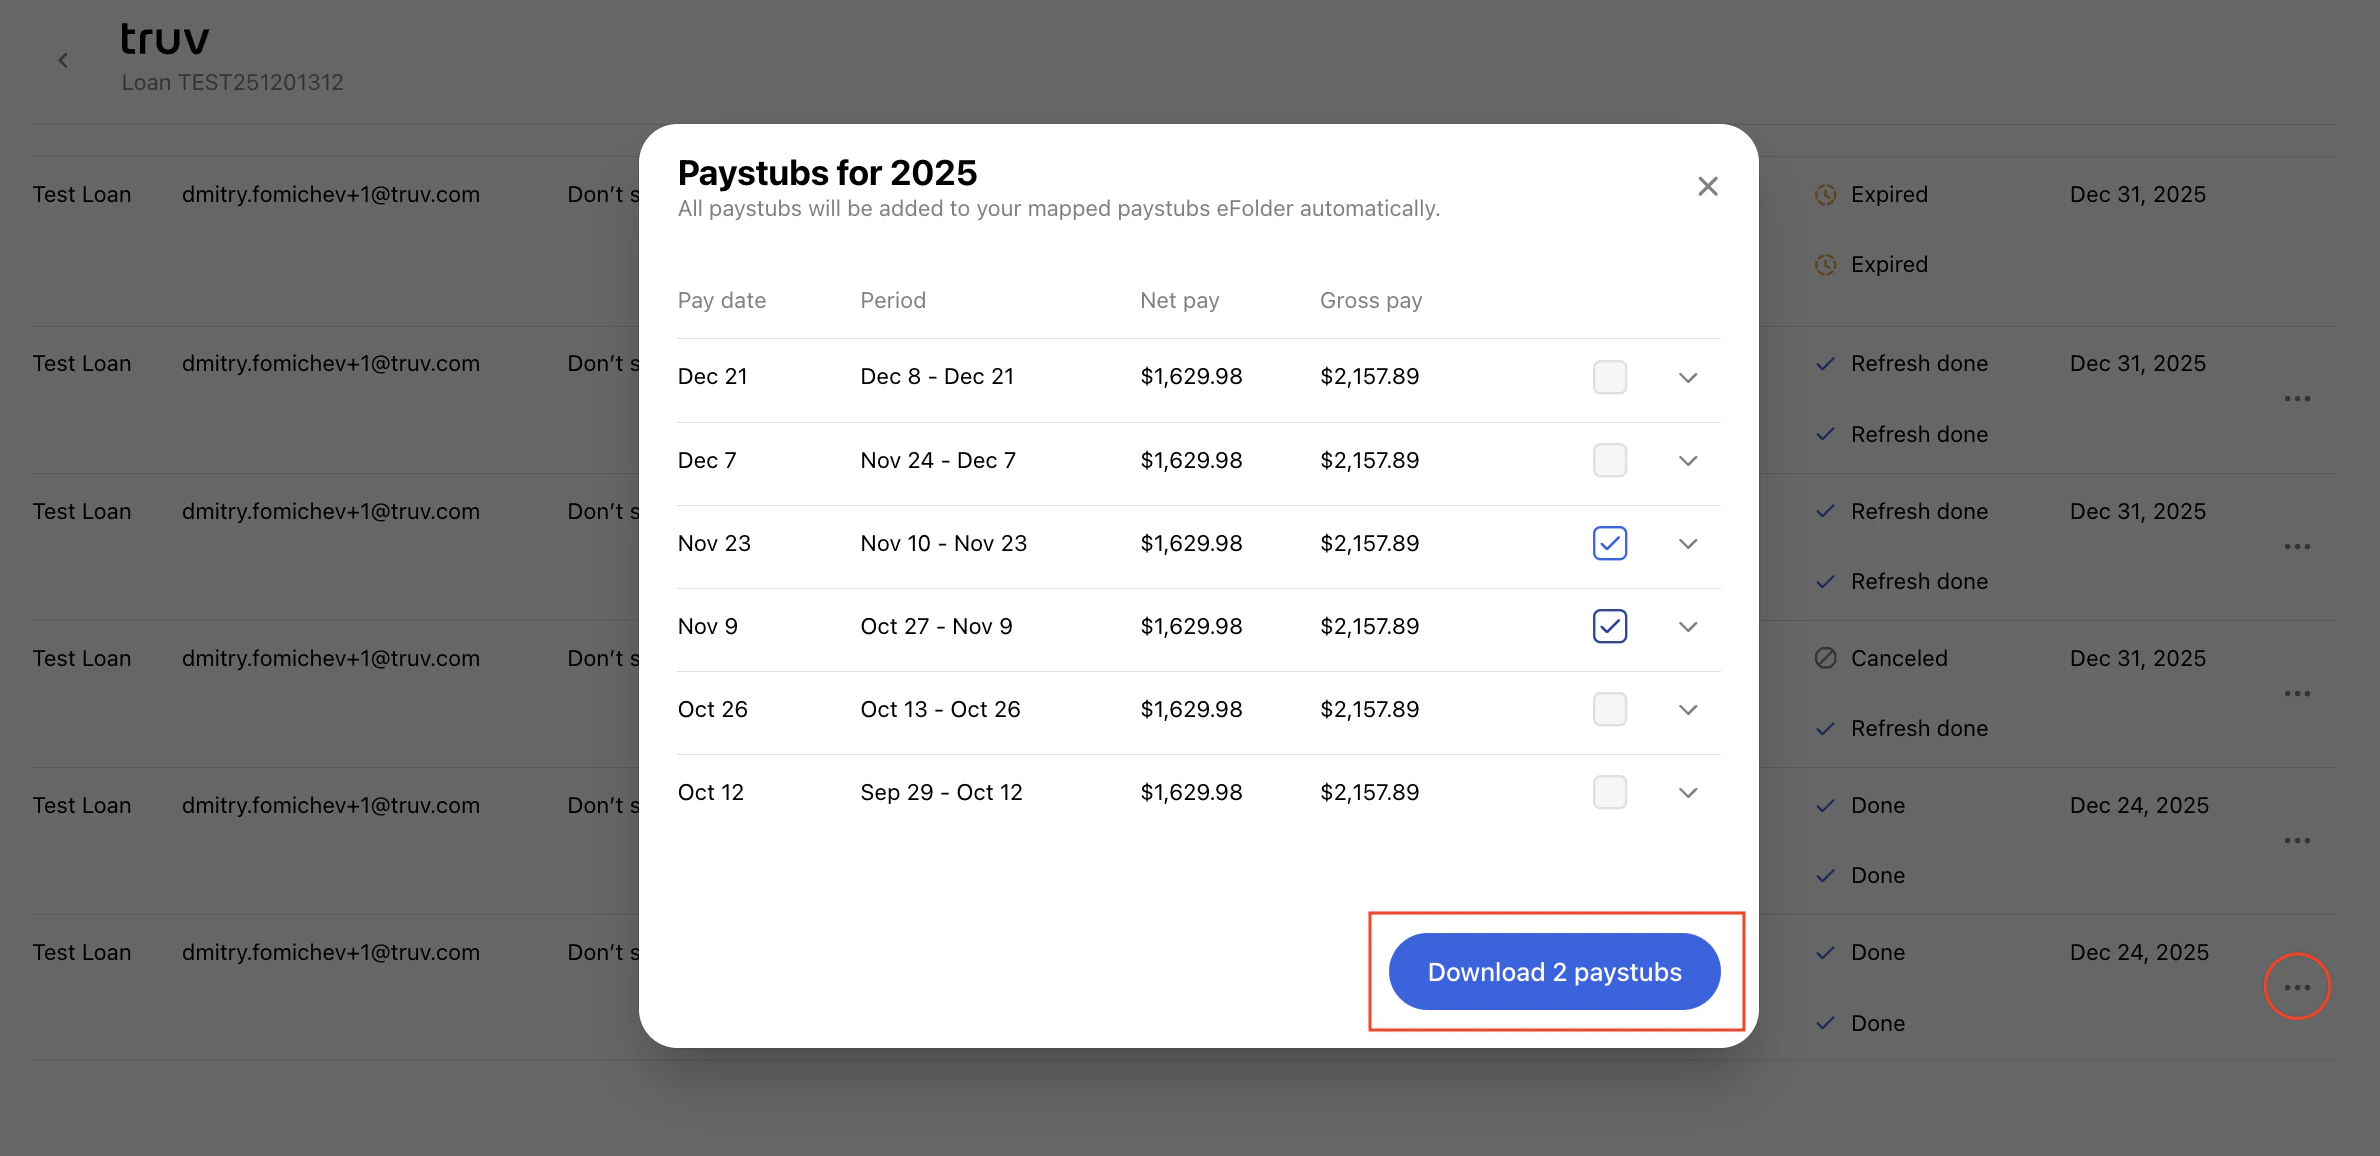
Loan Officer and Processor Experience
Encompass SmartClient
Encompass Web / LO Connect
Next steps
Customization
Templates, eFolder mapping, and notification settings