

One-Time Setup
1
Add Truv as a Service
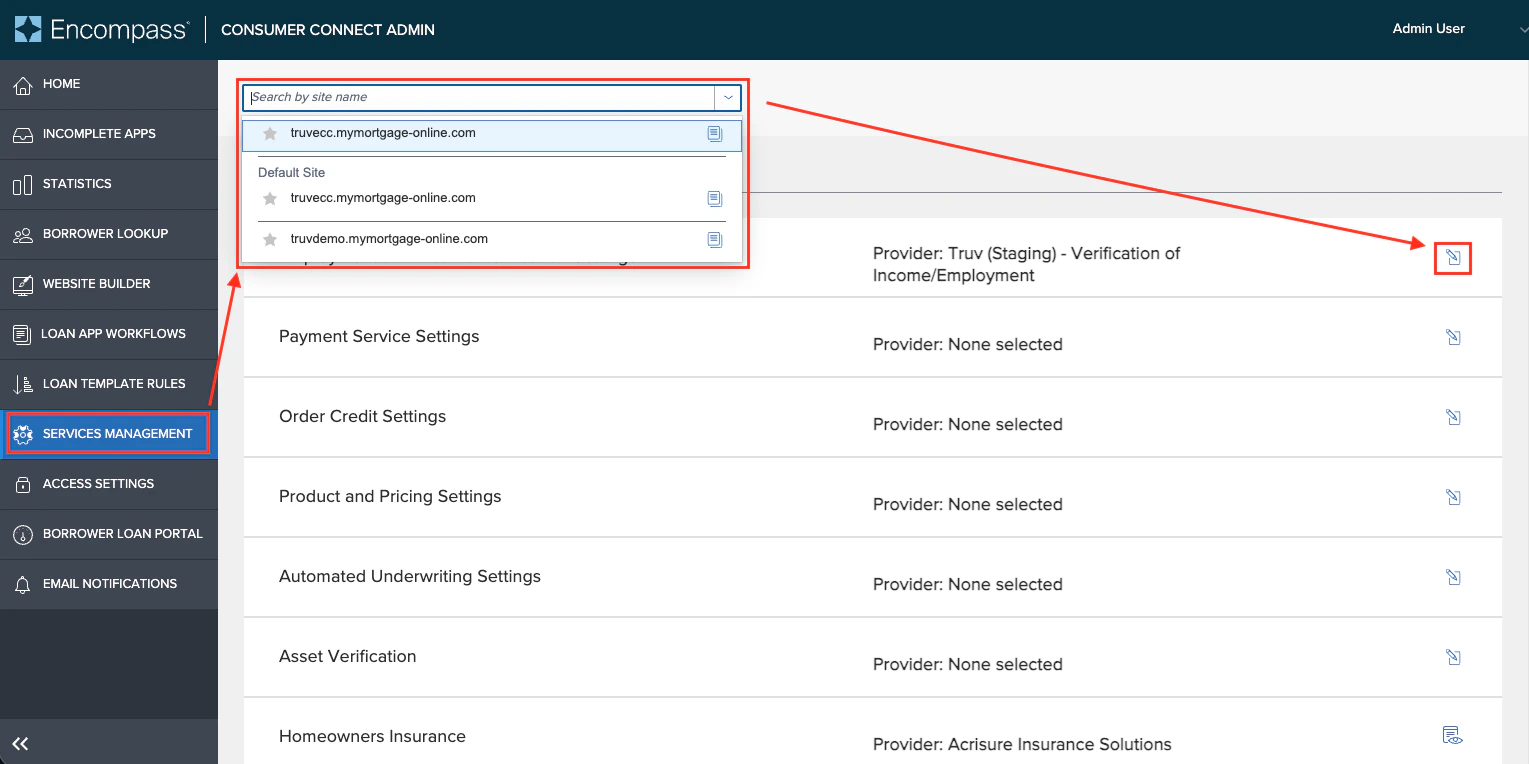
Open the ECC Admin site, enter your Instance ID and log in as an administrator.
- Click Services Management from the left sidebar
- Select the correct site name in the dropdown
-
Check the box in the Employment and Income Verification Settings row
2
Enter Truv credentials
Select Truv - Verification of Income/Employment/Assets from the Provider dropdown.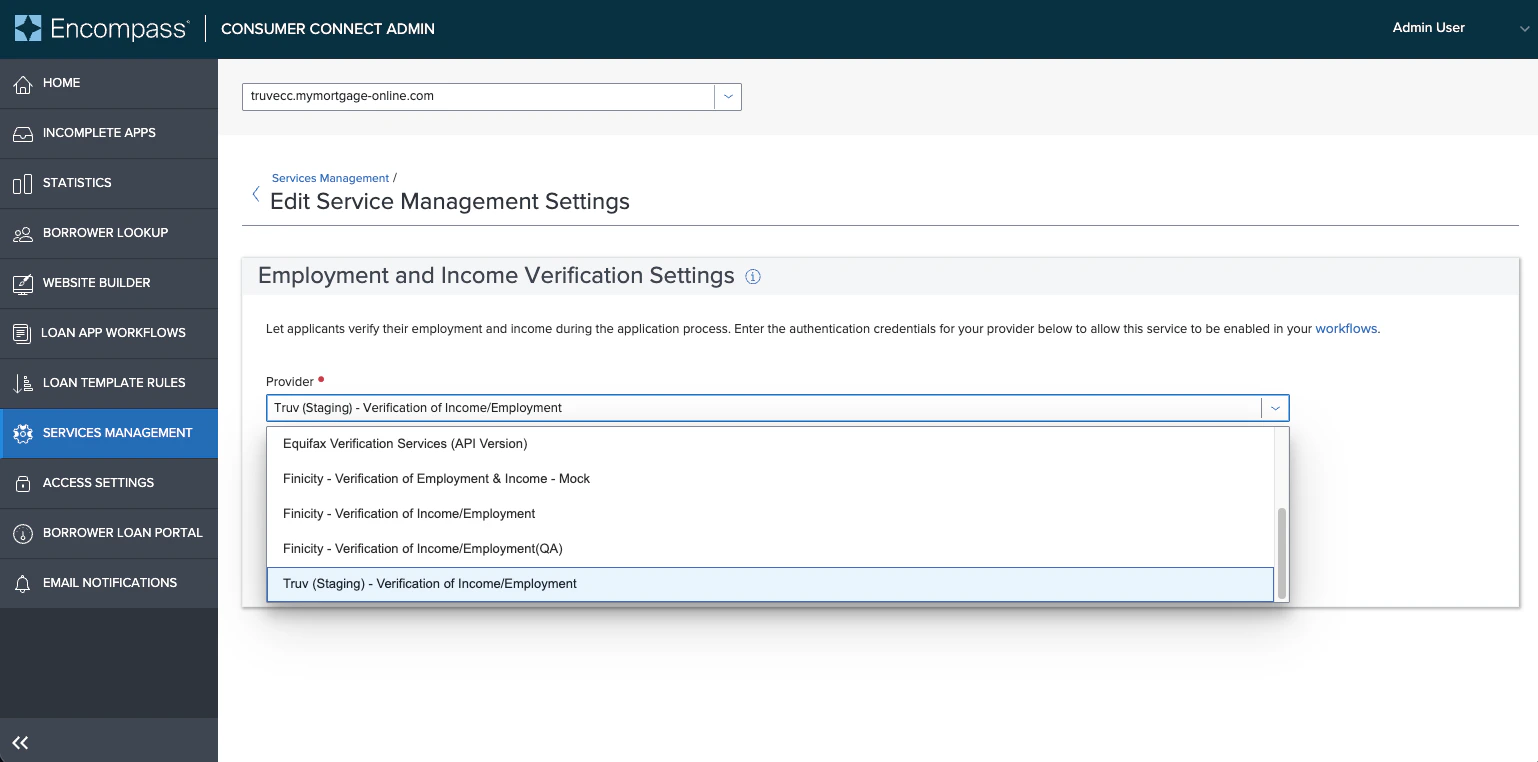
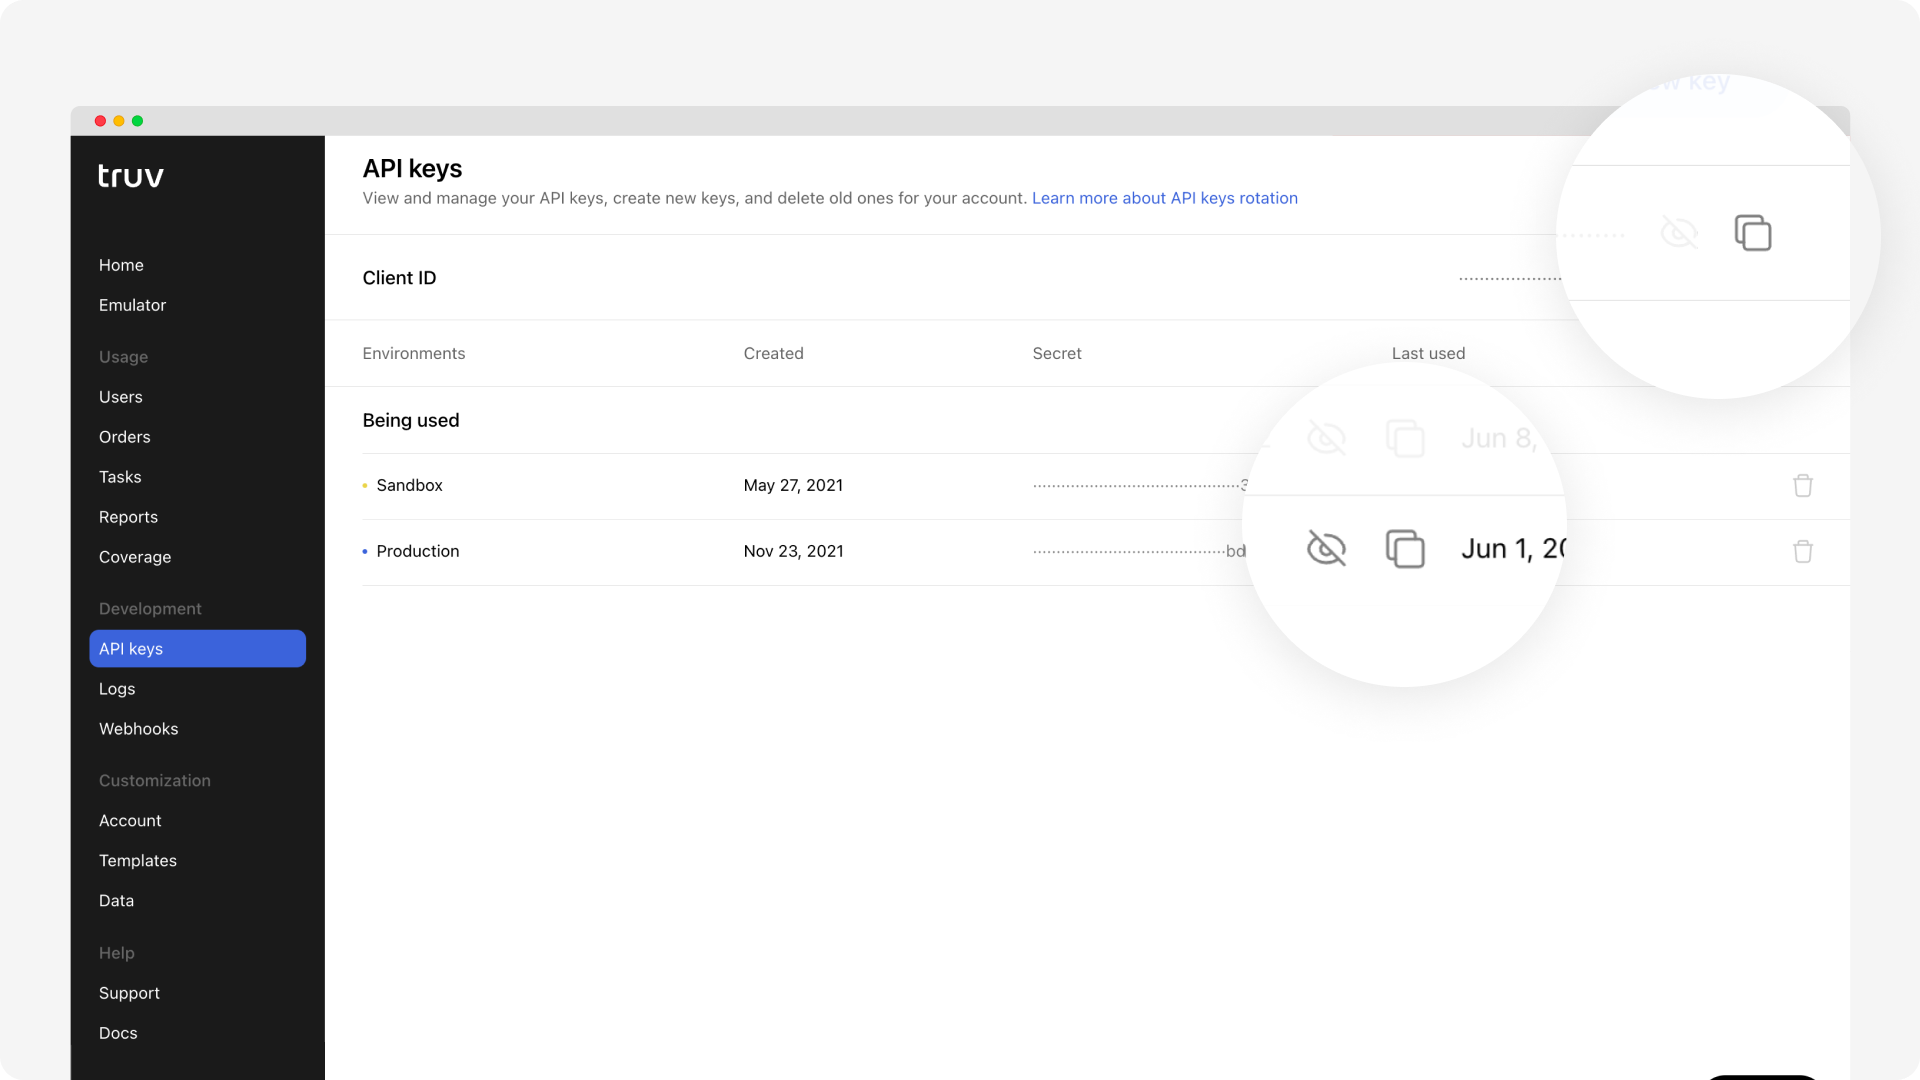
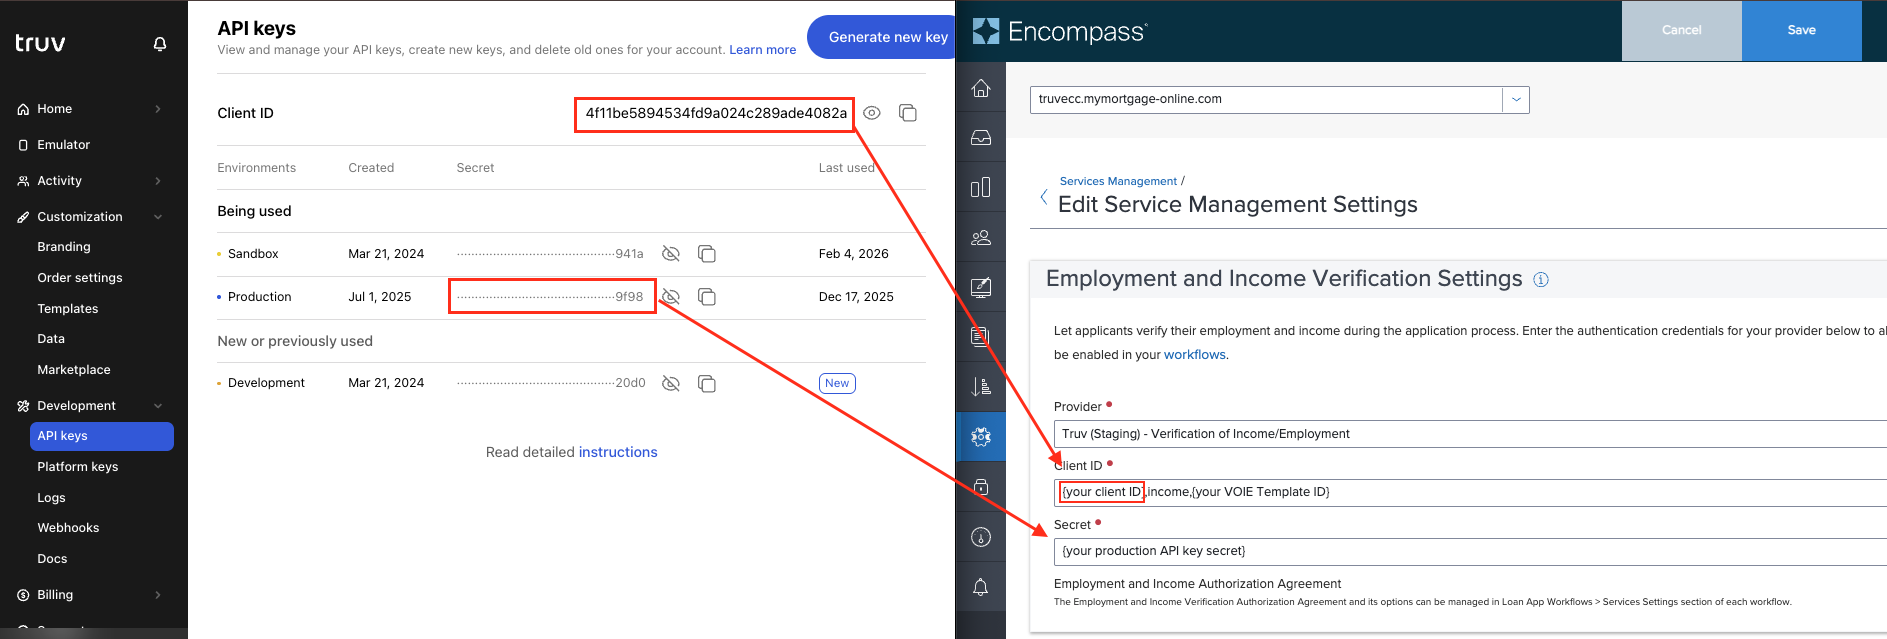
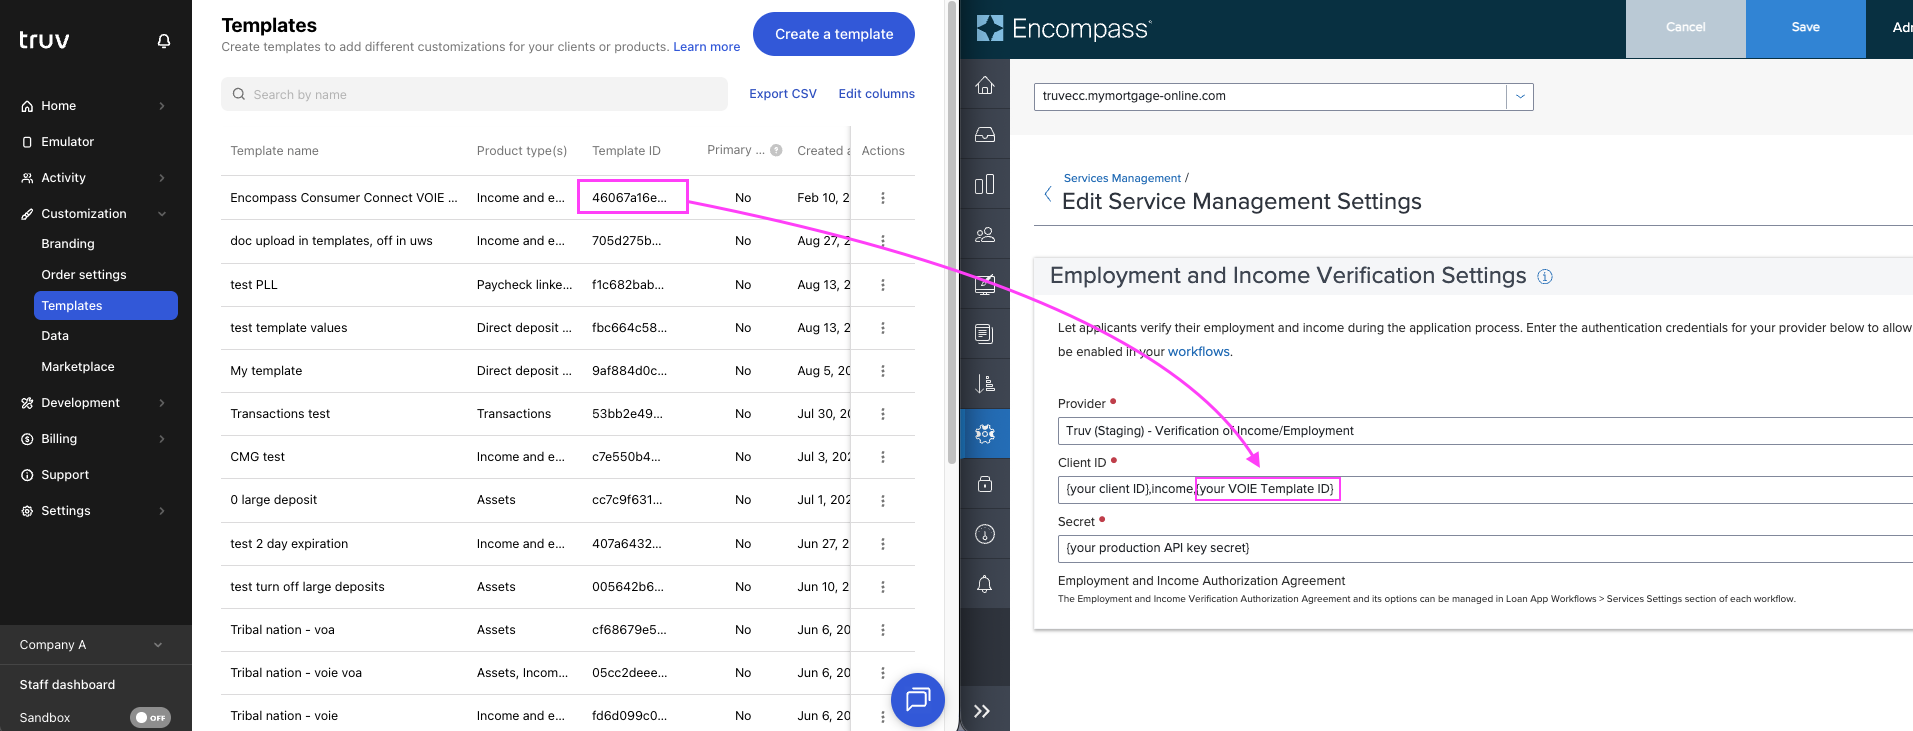
- Client ID from the Truv Dashboard API Keys page
- The word
income(to distinguish the product type) - A Template ID from Customization → Templates in the Truv Dashboard
4f11be5894534fd9a024c289ade4082a,income,46067a16e38b4b8c8c83b7fbe911b23aThe Secret can be copied directly from API Keys. After entering both fields, press Save.3
Add to active Loan App Workflow
-
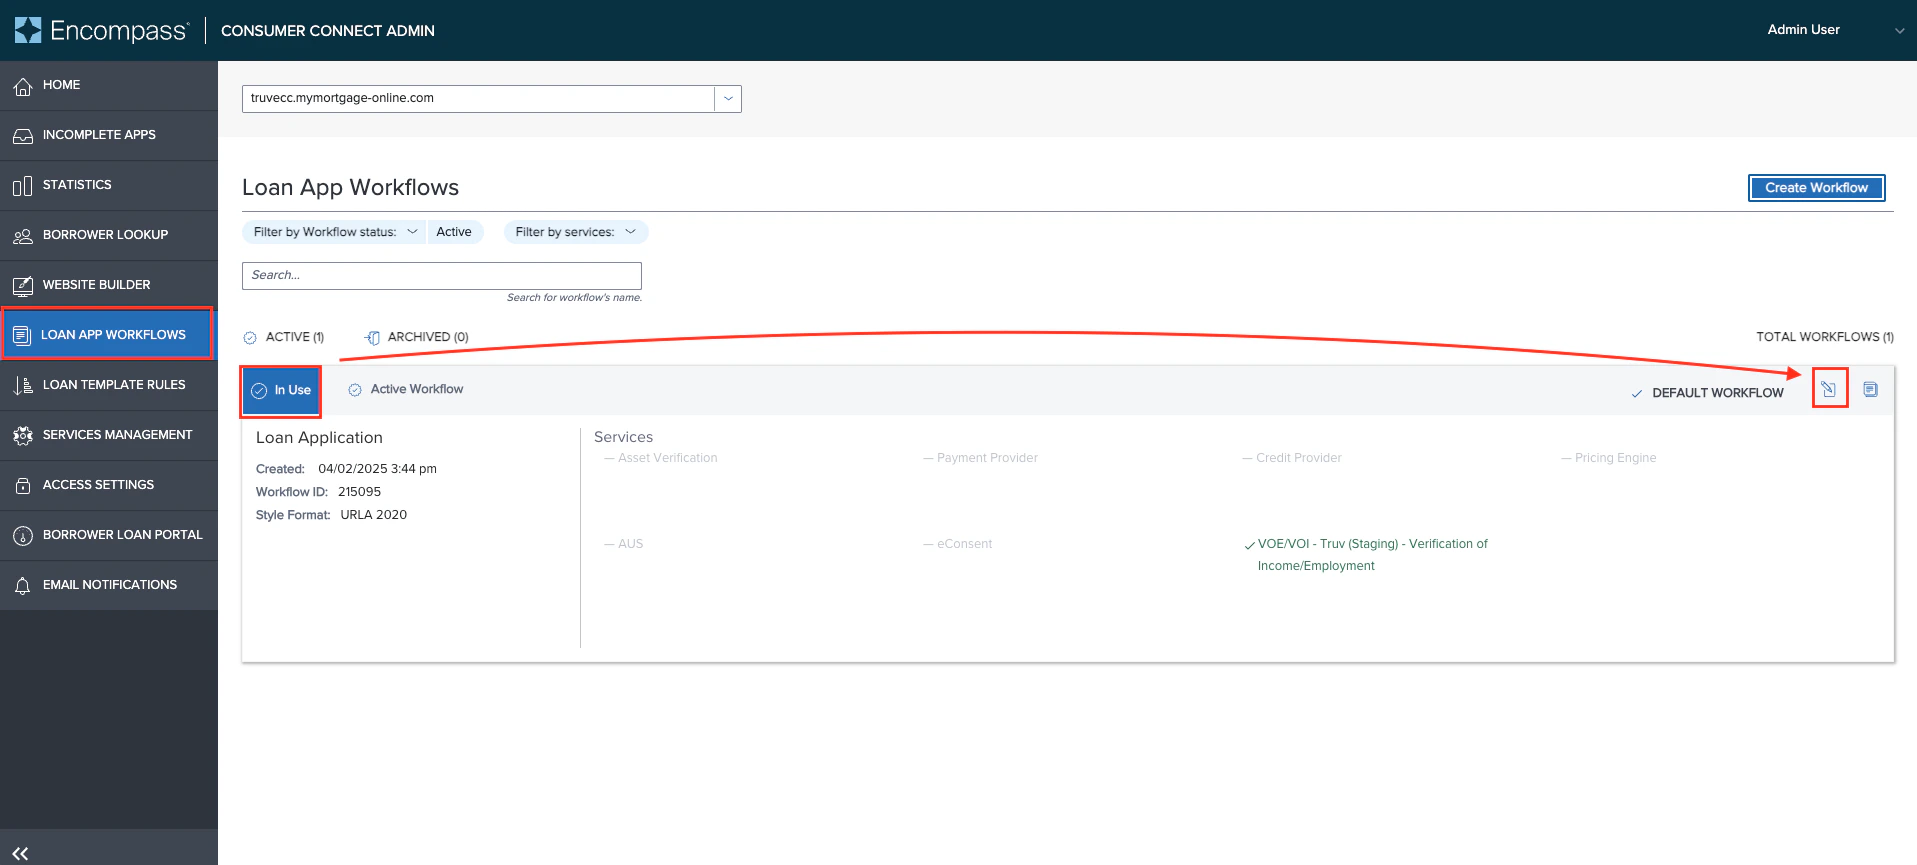
Navigate to the Loan App Workflows tab. Find the In Use workflow and click the edit icon.
-
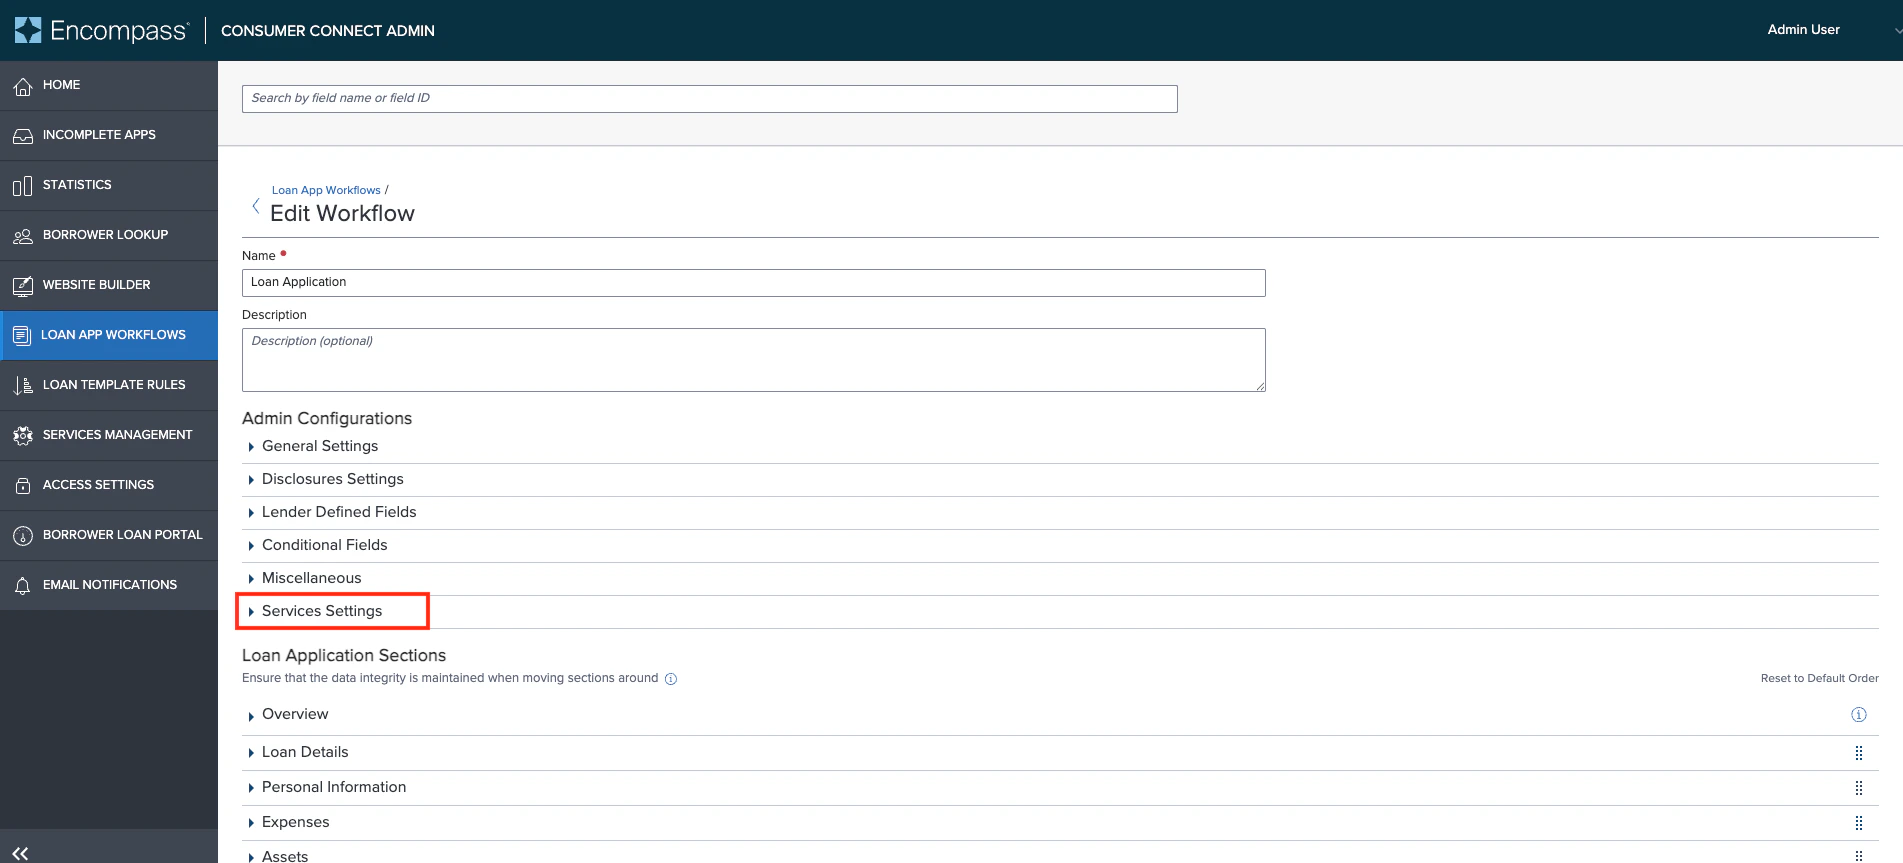
Scroll to Services Settings, expand it, and enable VOE/VOI.
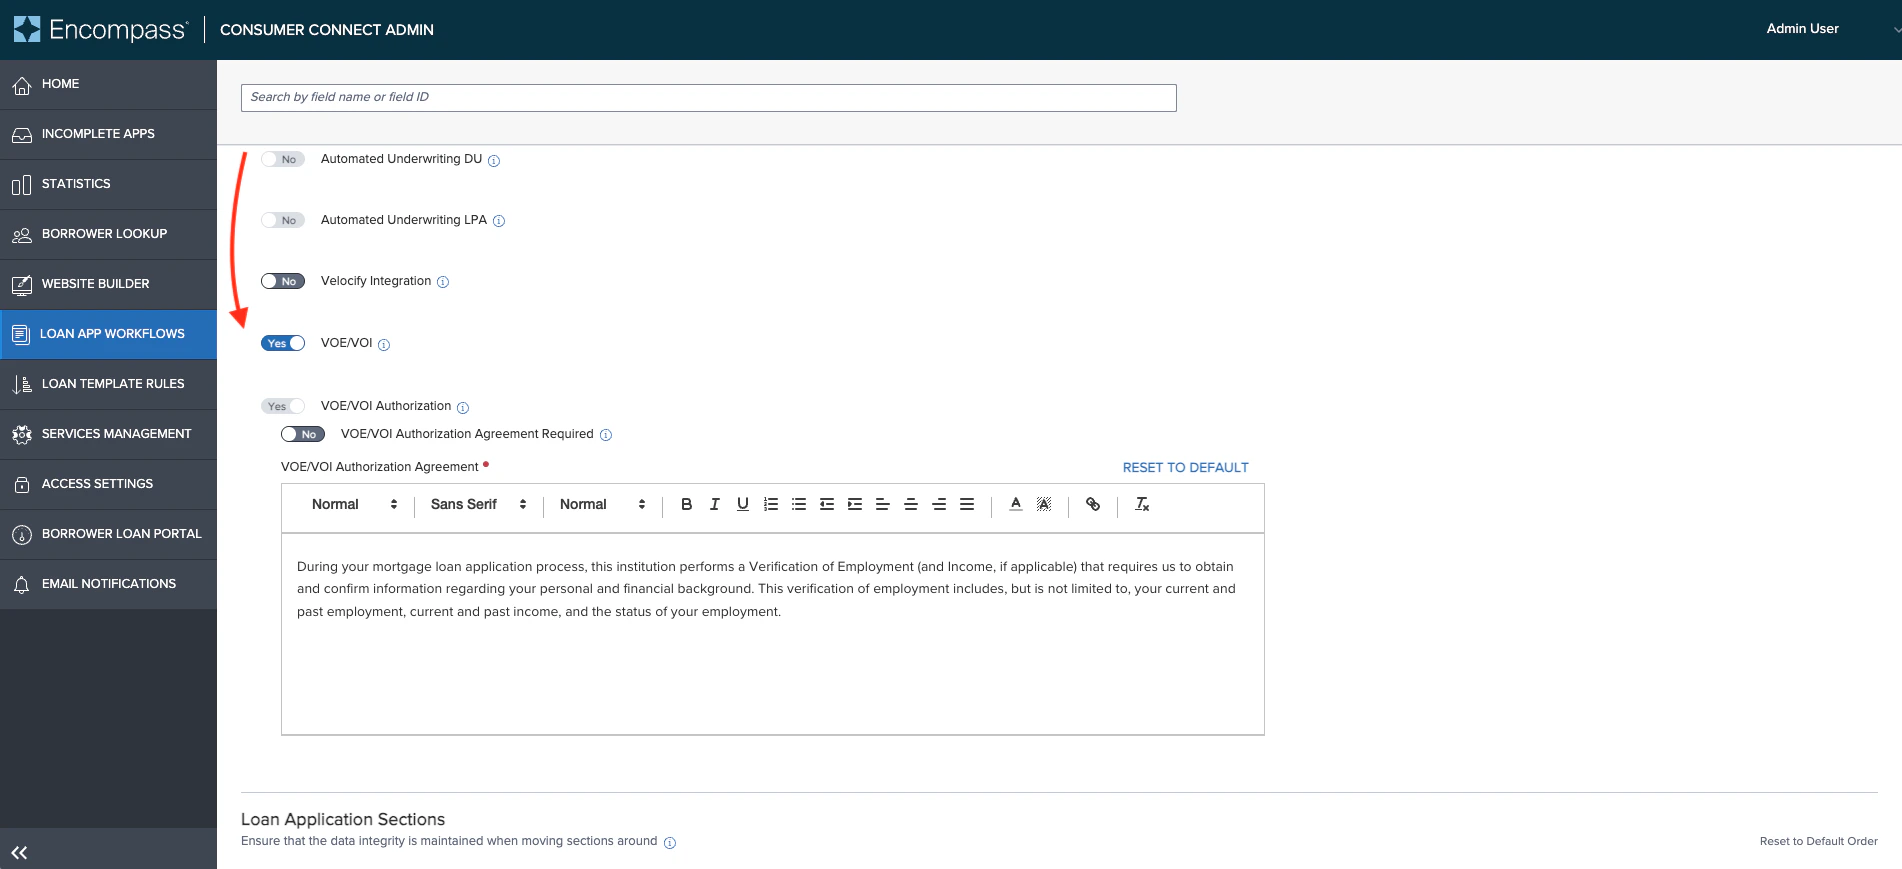
- The VOE/VOI Authorization setting is mandatory when enabled. The Authorization Agreement Required setting is optional.
-
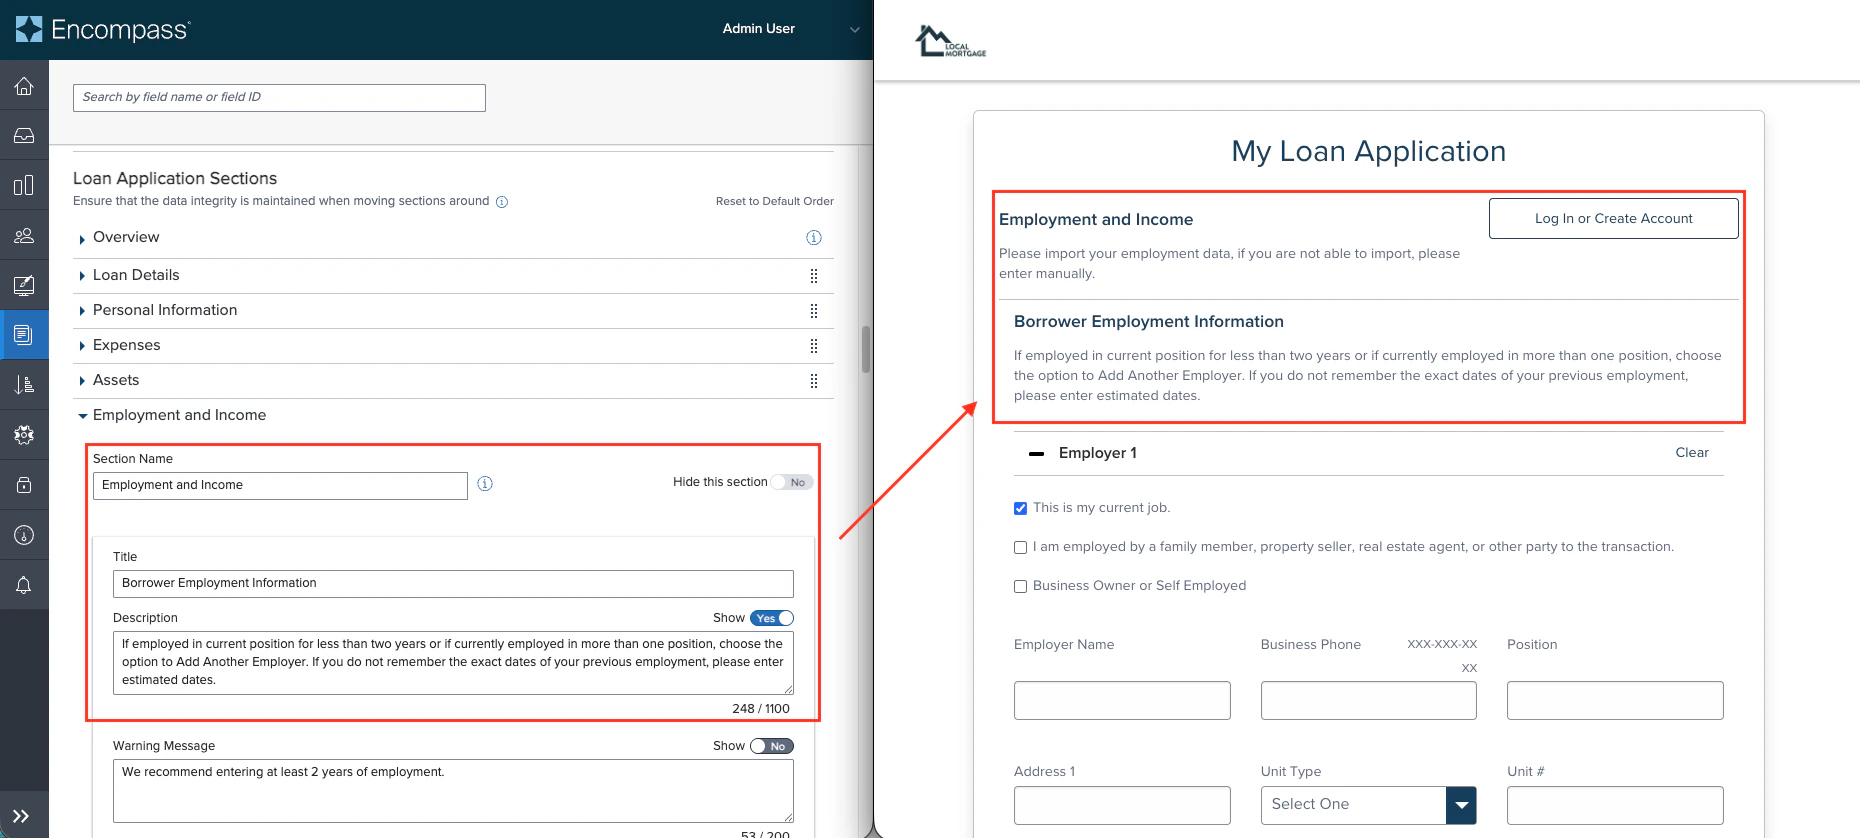
Optionally update the header and body copy on the Employment and Income application page so borrowers understand when to use Truv versus manual entry.
4
Customize the Truv Template
In the Truv Dashboard, open the template configured in Step 2.Settings tab:
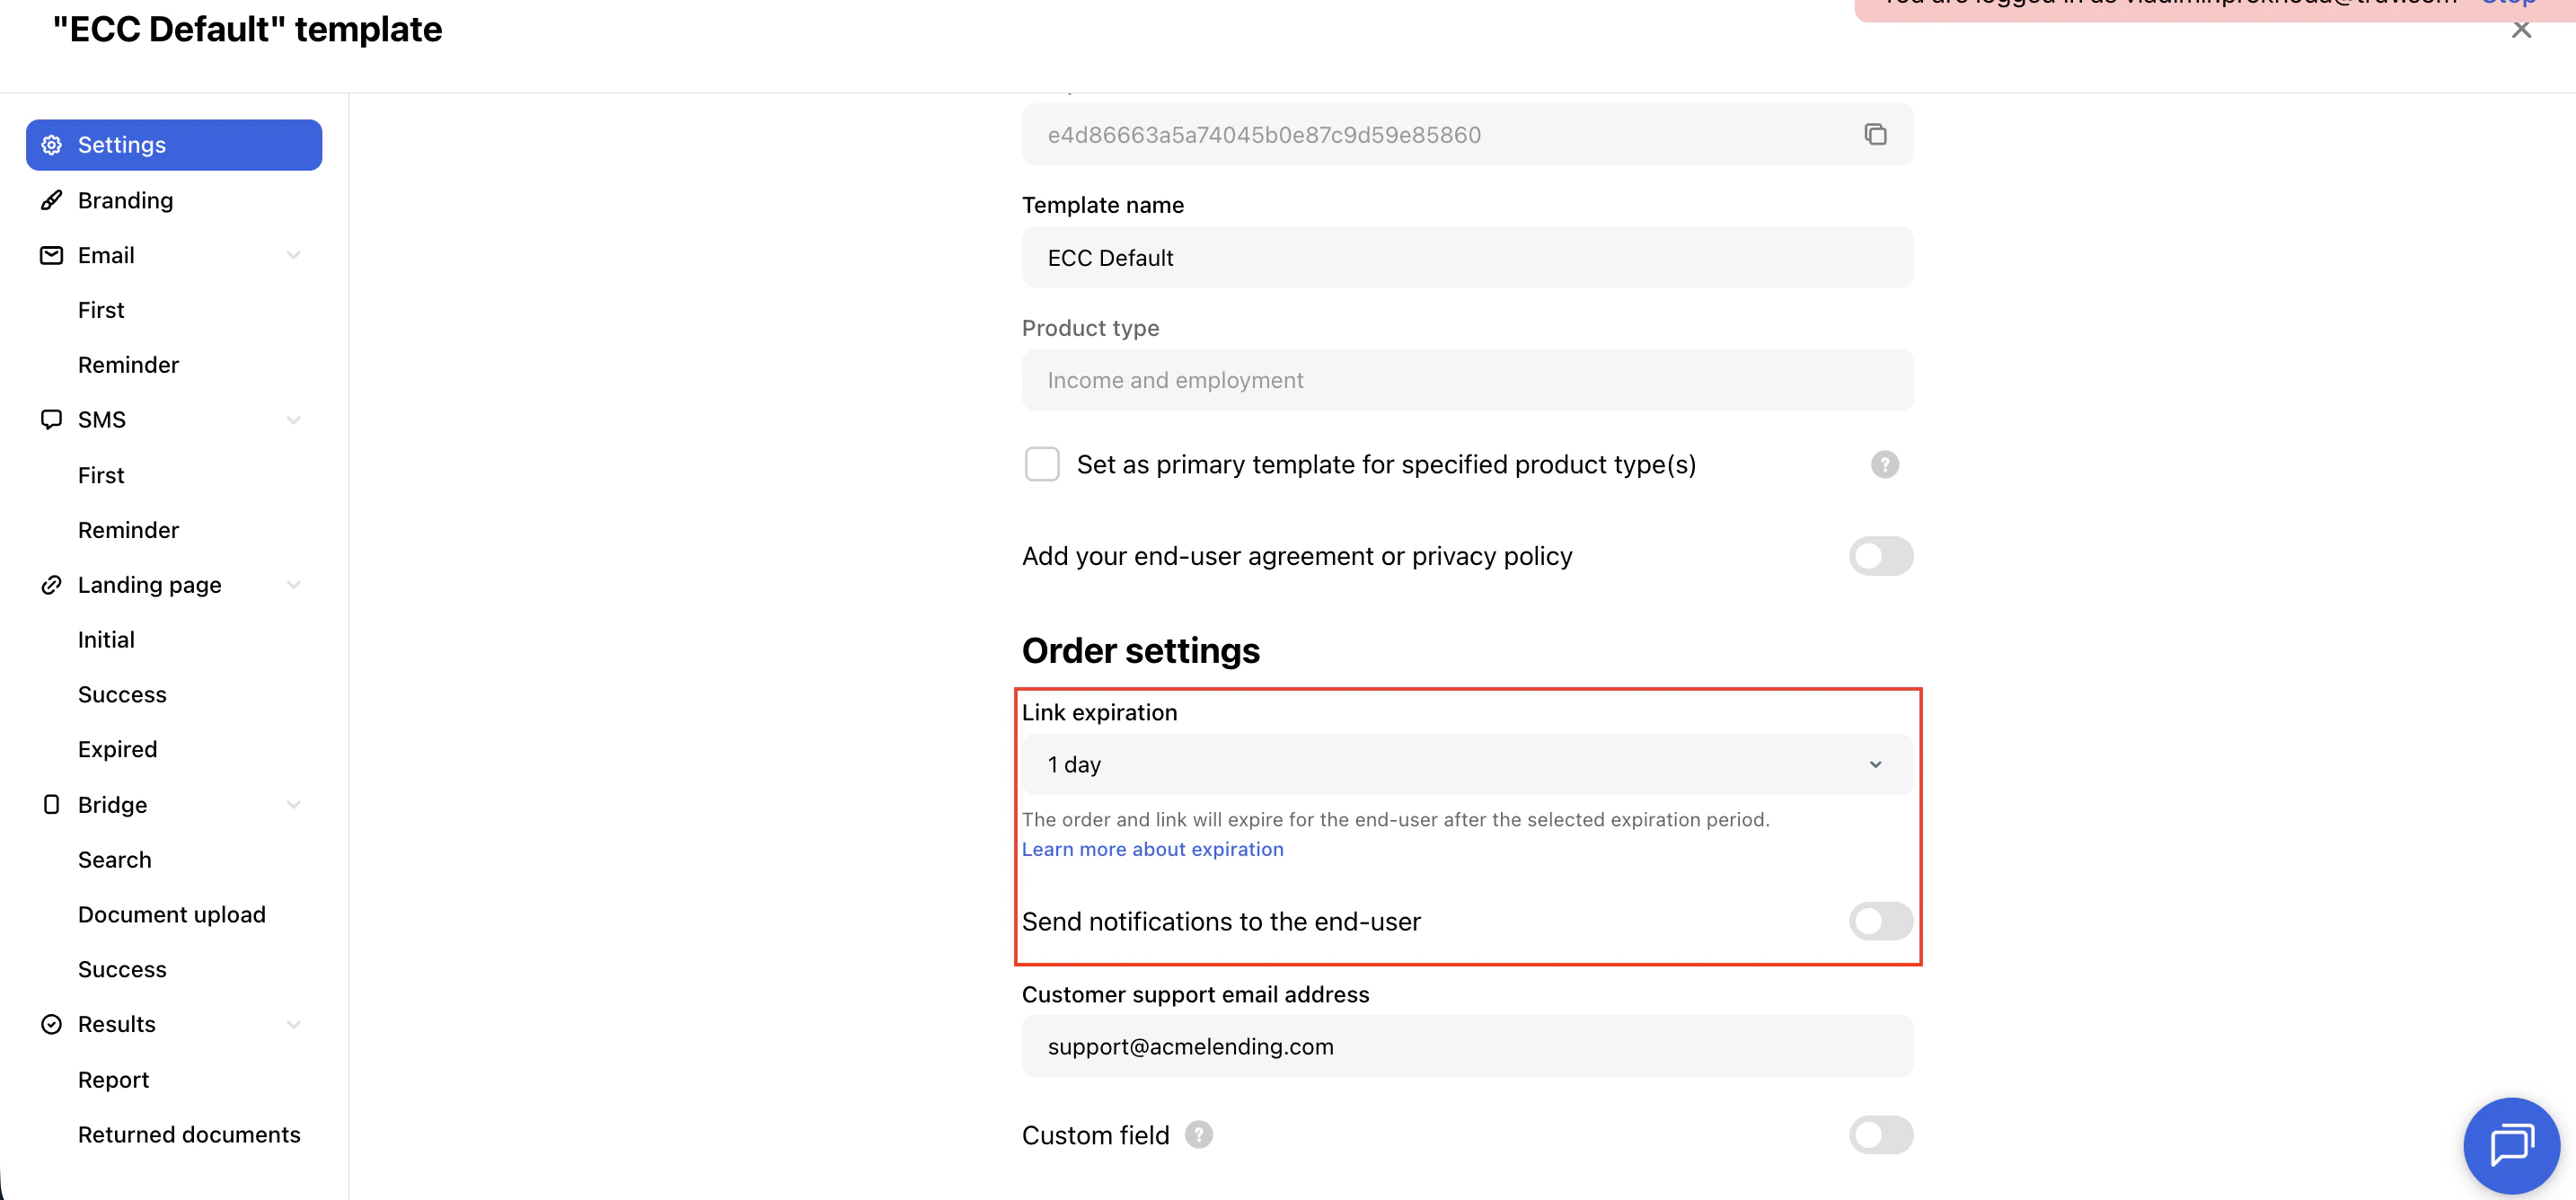
- Set Link expiration to 1 day
-
Set Send notifications to the end-user to disabled
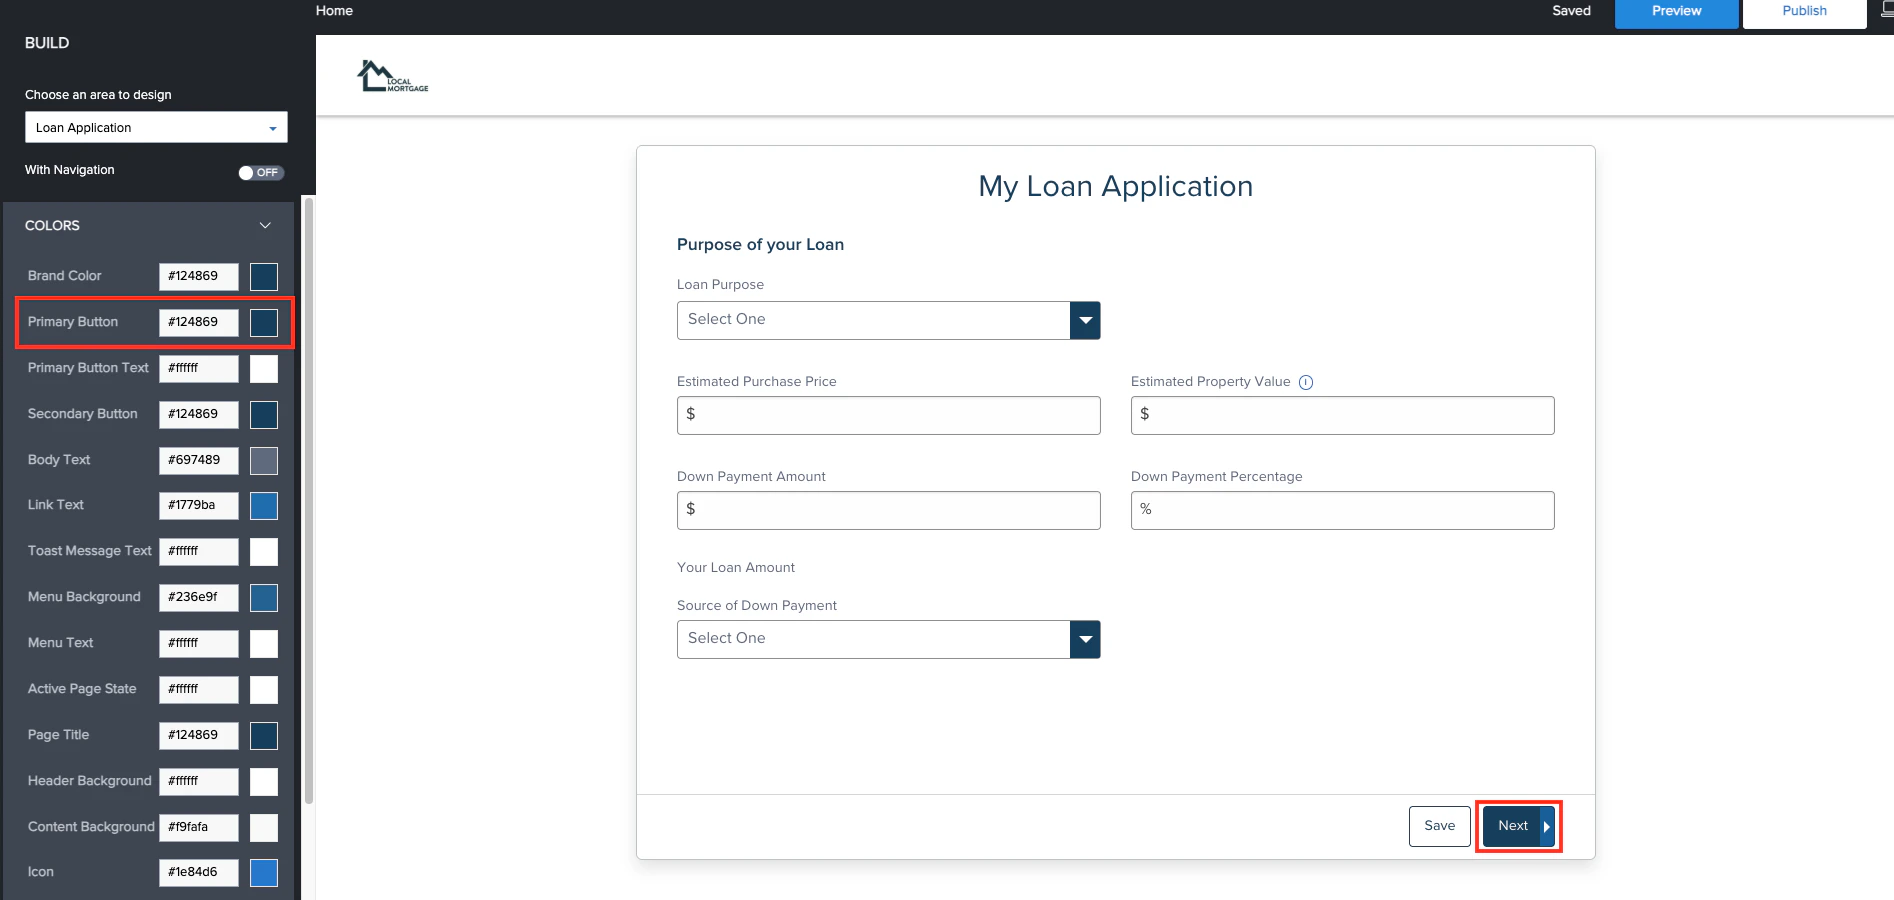
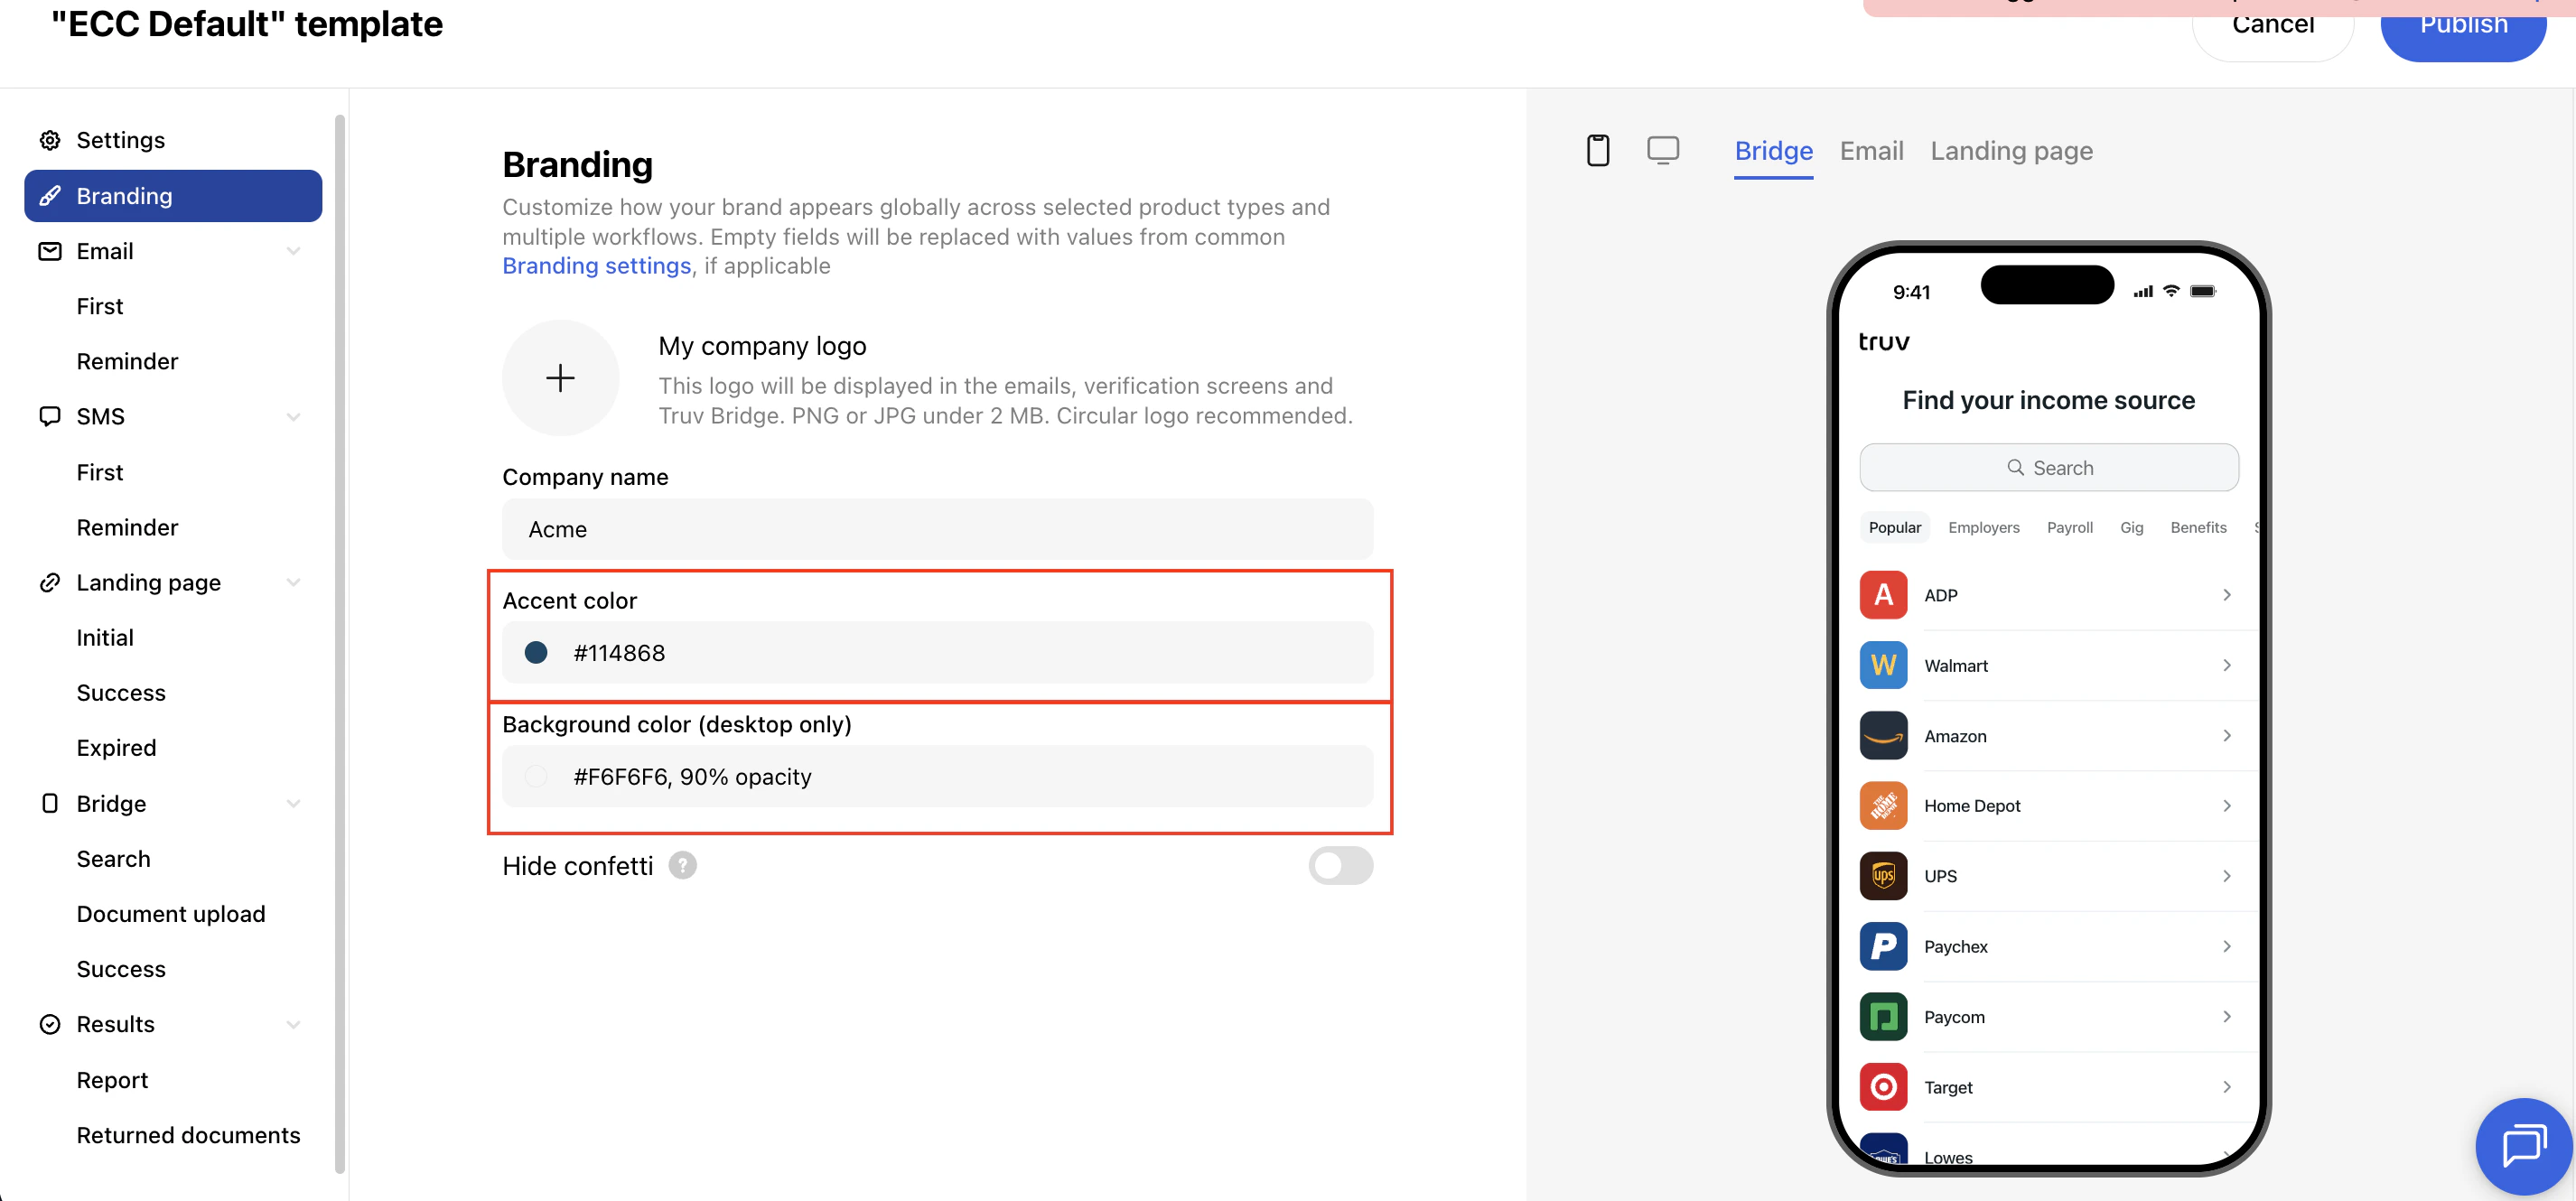
- Set the Accent color to match your ECC primary button color (found in Website Builder)
-
Set the Background color to white with opacity 0.9 (R: 246, G: 246, B: 246, A: 0.9)
Borrower Experience Demo
Next steps
Encompass Overview
Back to Encompass integration overview
Sandbox Testing
Test your integration