

For more information on Freddie Mac AIM Check, see the Freddie Mac AIM4IUED Tutorial.
Setup Guide
1
Contact Truv to Enable AIM Check
Notify your Truv implementation contact to enable the AIM Check solution in your Encompass instance before proceeding with the steps below.
2
Configure a Custom Field
In Encompass SmartClient, navigate to Settings > Loan Setup > Loan Custom Fields. Select an unused field — 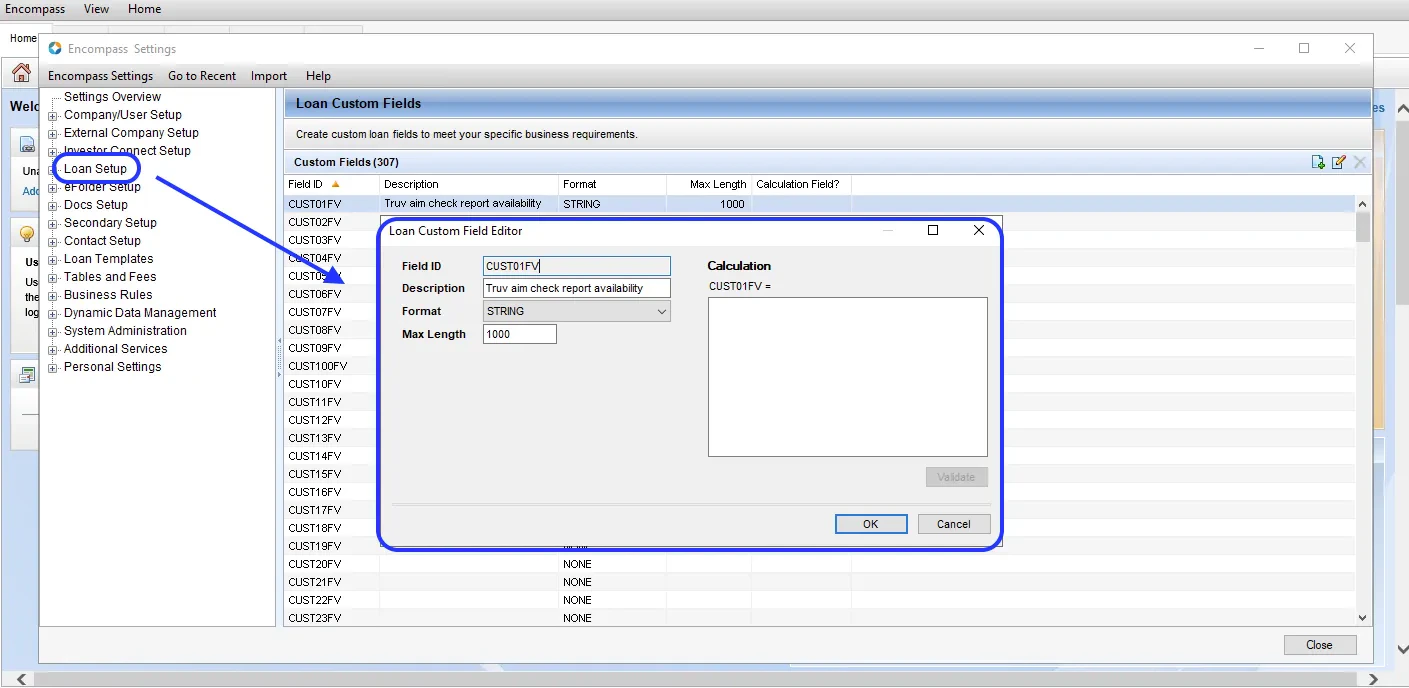
CUST01FV is used as an example throughout this guide — and configure it with the following settings:If you use a custom field other than
CUST01FV, replace it consistently in all subsequent steps.3
Map the AIM Check Indicator to the Custom Field
Navigate to the Encompass admin portal and go to Services > Services Management. Find Truv - Verification of Income/Employment, click the three dots, and select Field Mapping. Add a new mapping with the following values: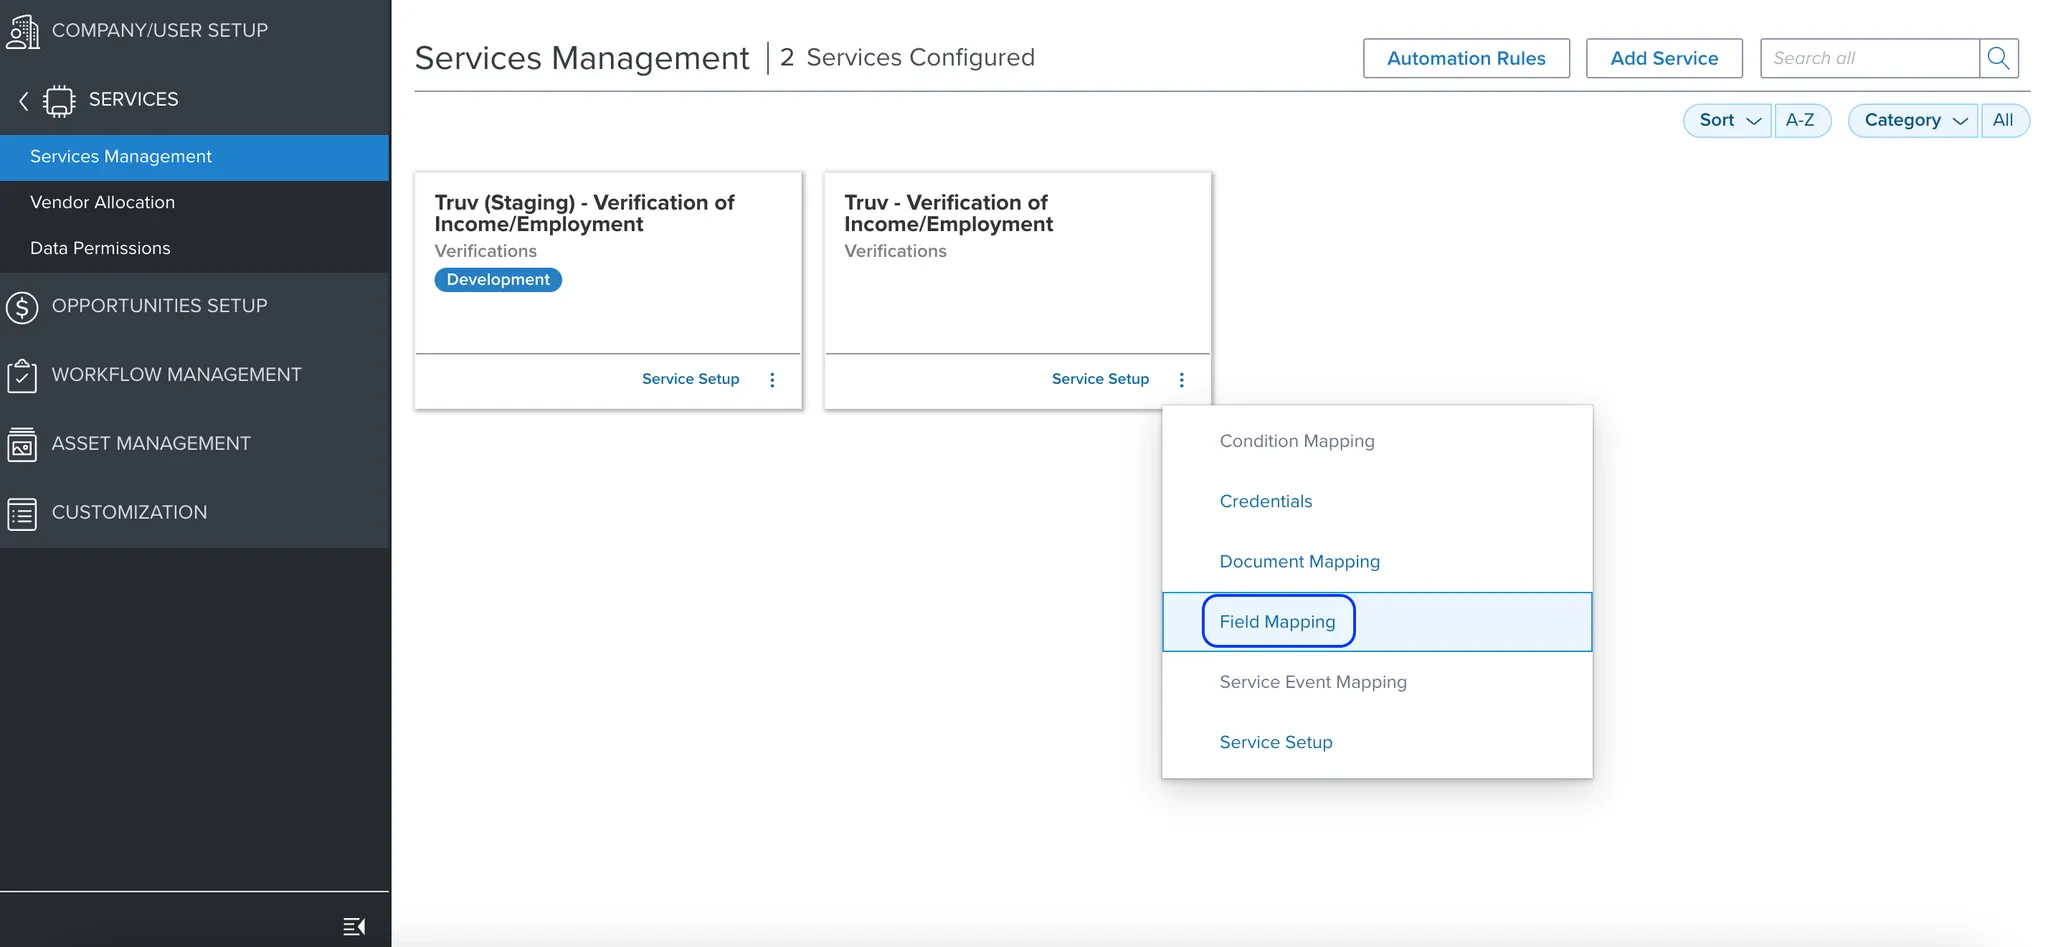
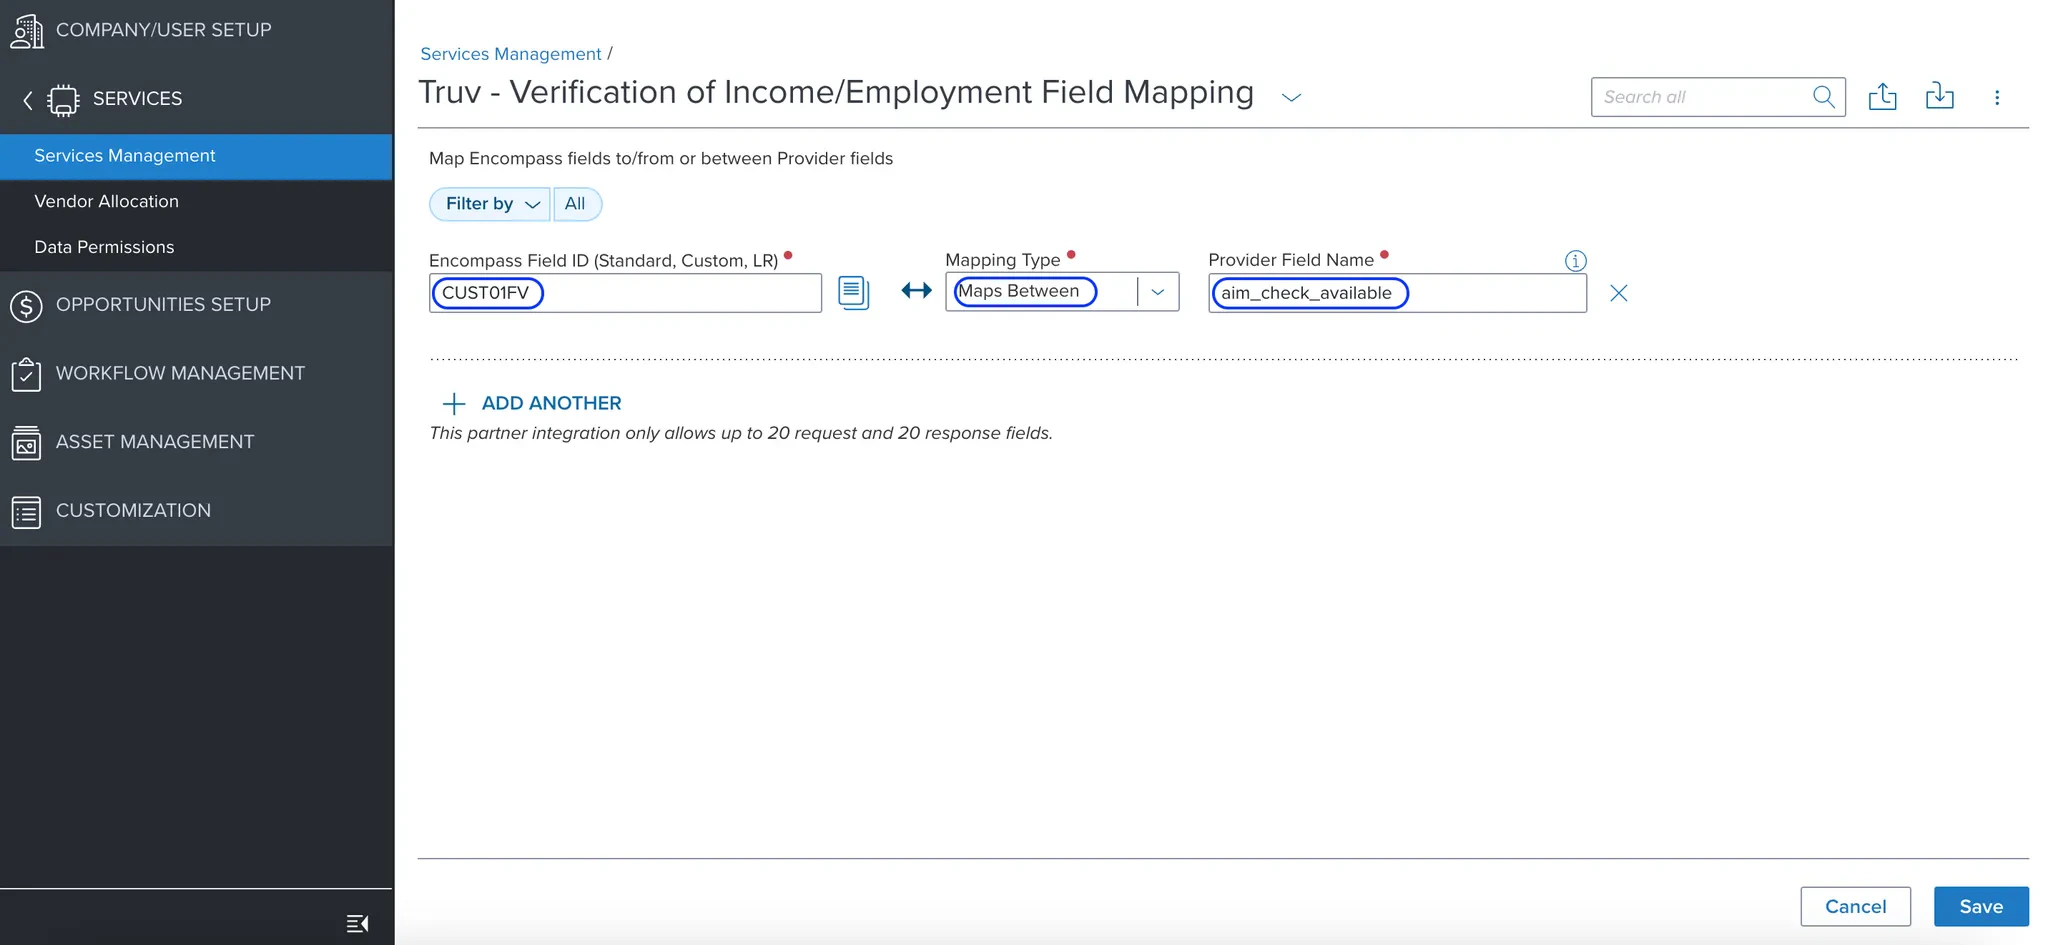
4
Configure Automation Rules
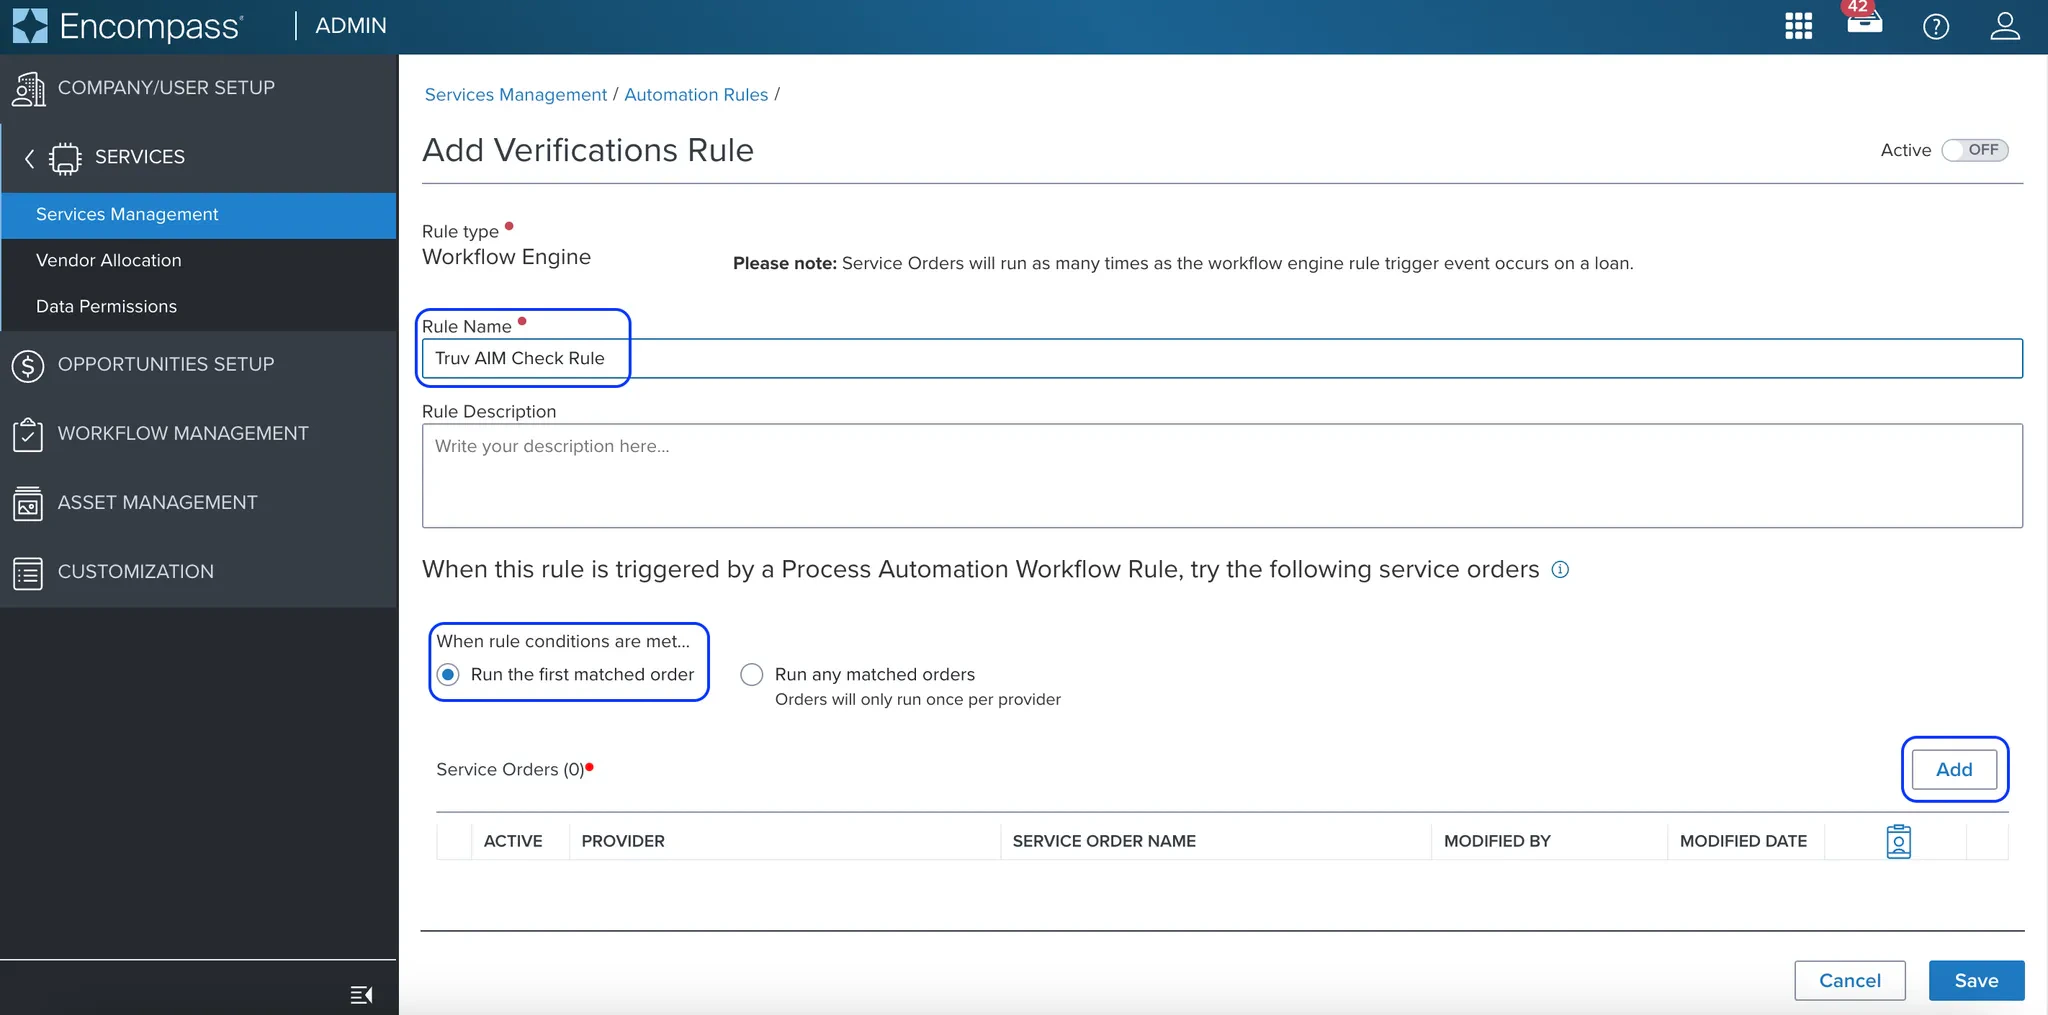
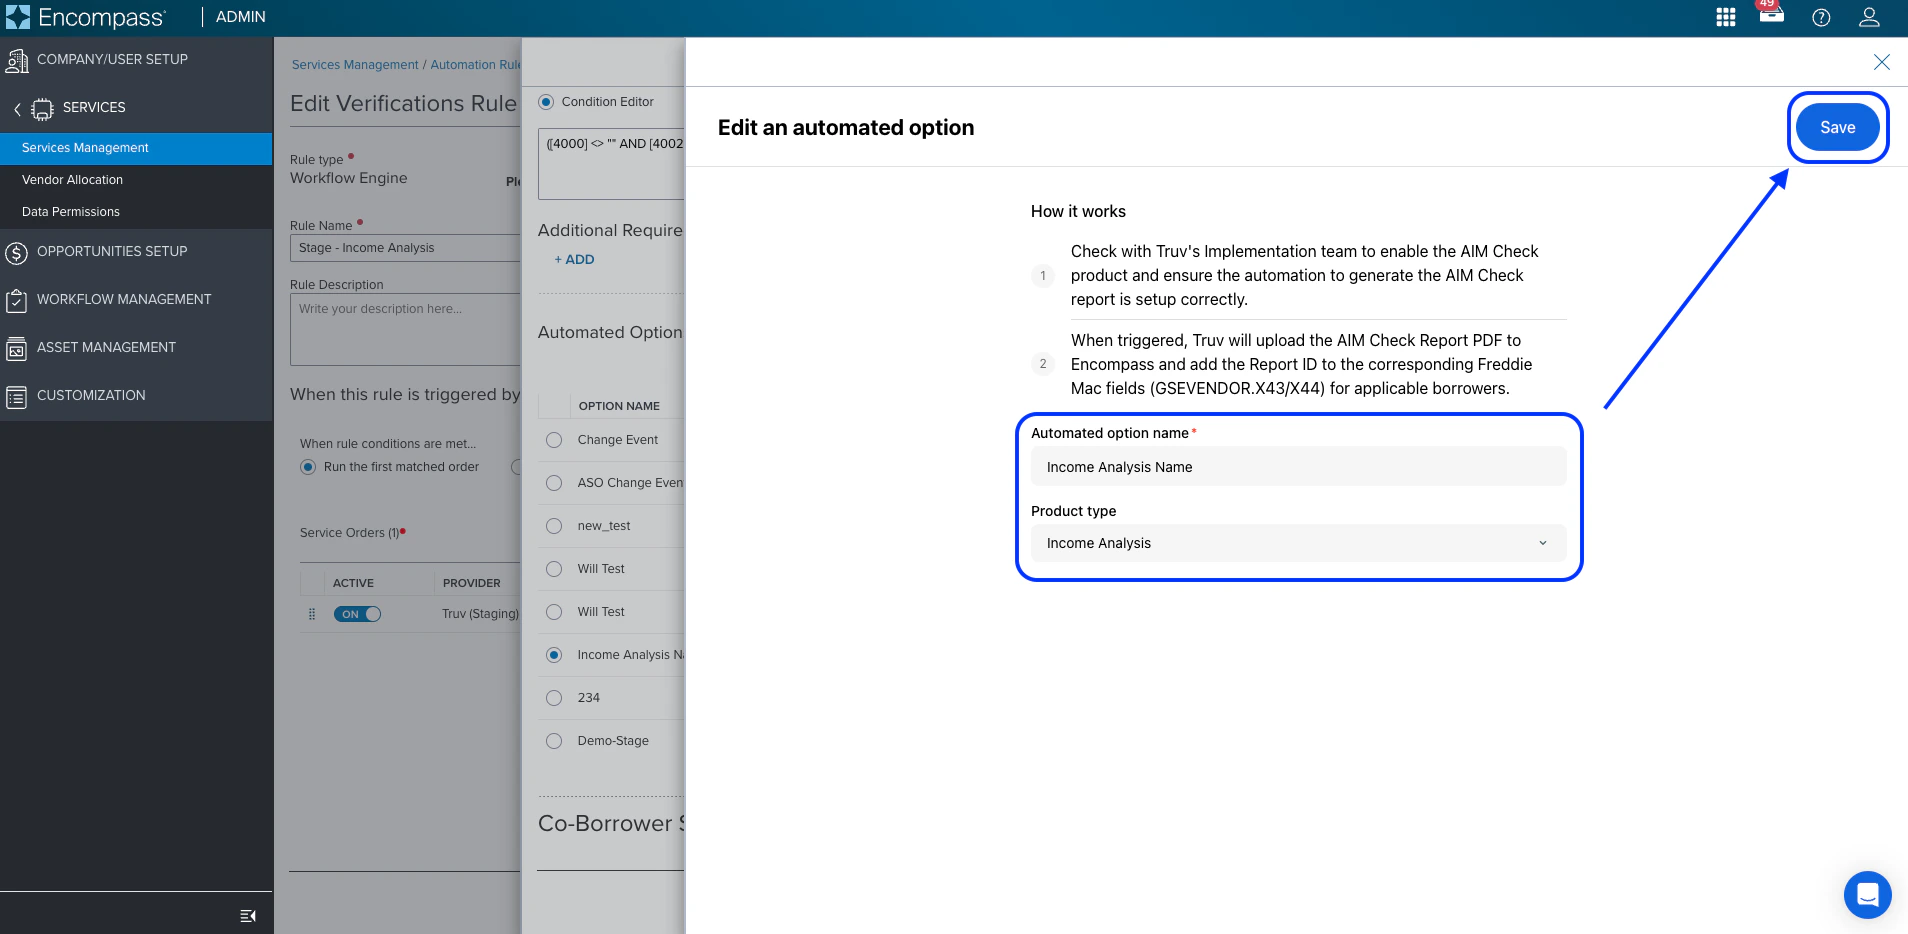
In Services Management, navigate to Automation Rules > Verifications and click Add. Create a Service Order and configure the automated readiness conditions for borrower and co-borrower.Borrower:Co-Borrower:Create an Automated Option with Product Type: Income Analysis. Assign it to both the borrower and co-borrower settings, then set the Service Order to Active.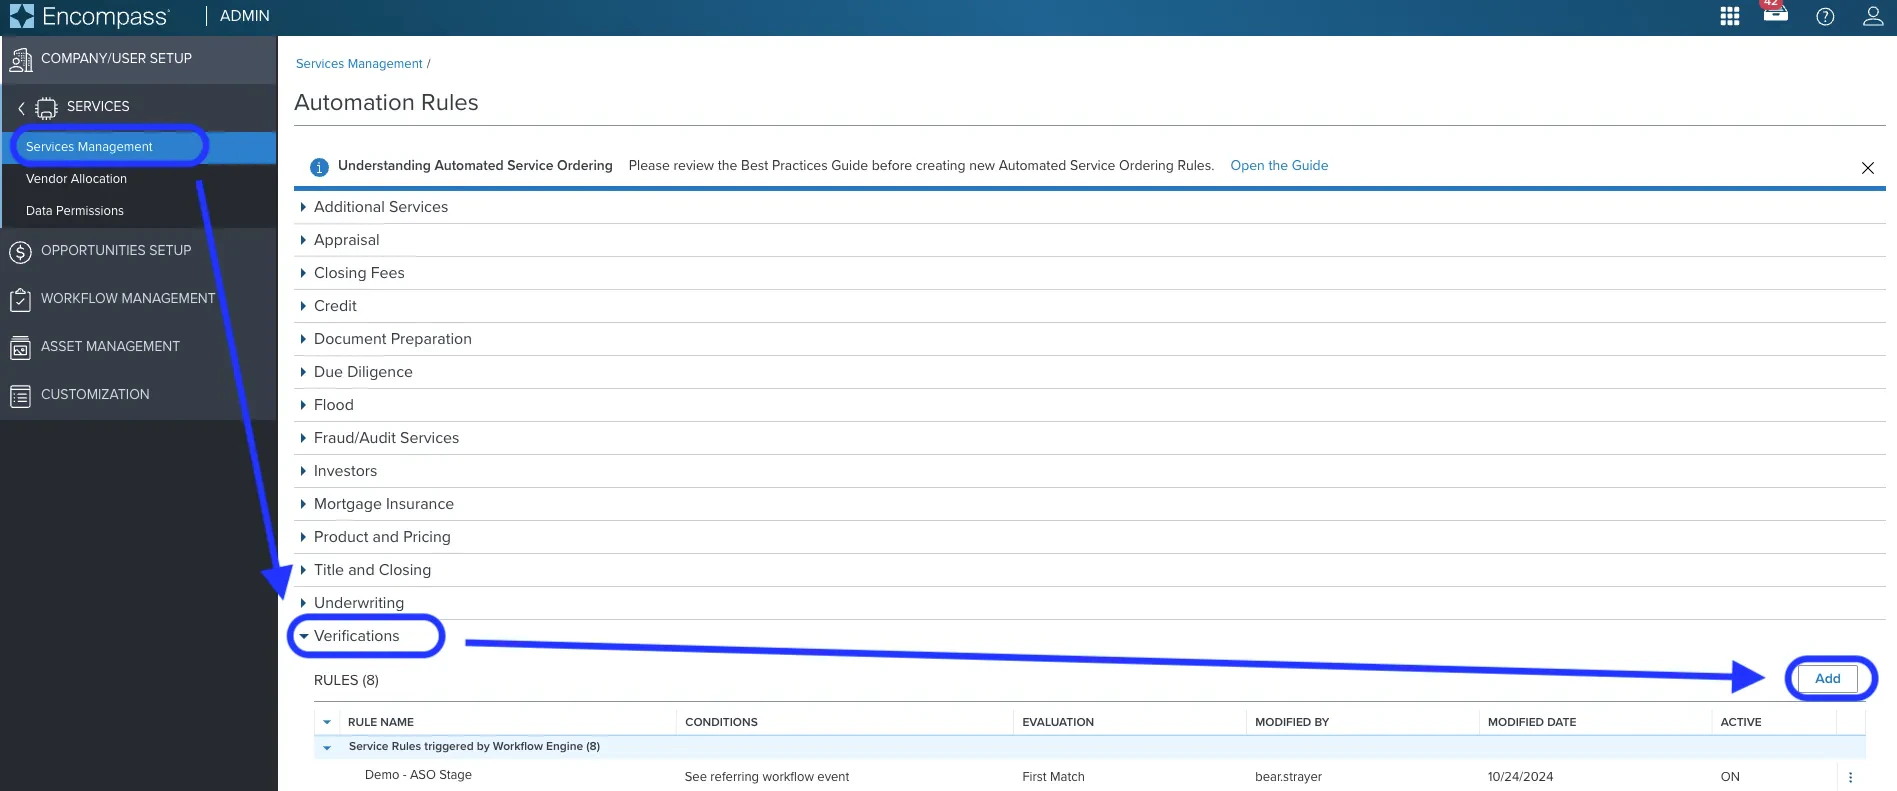
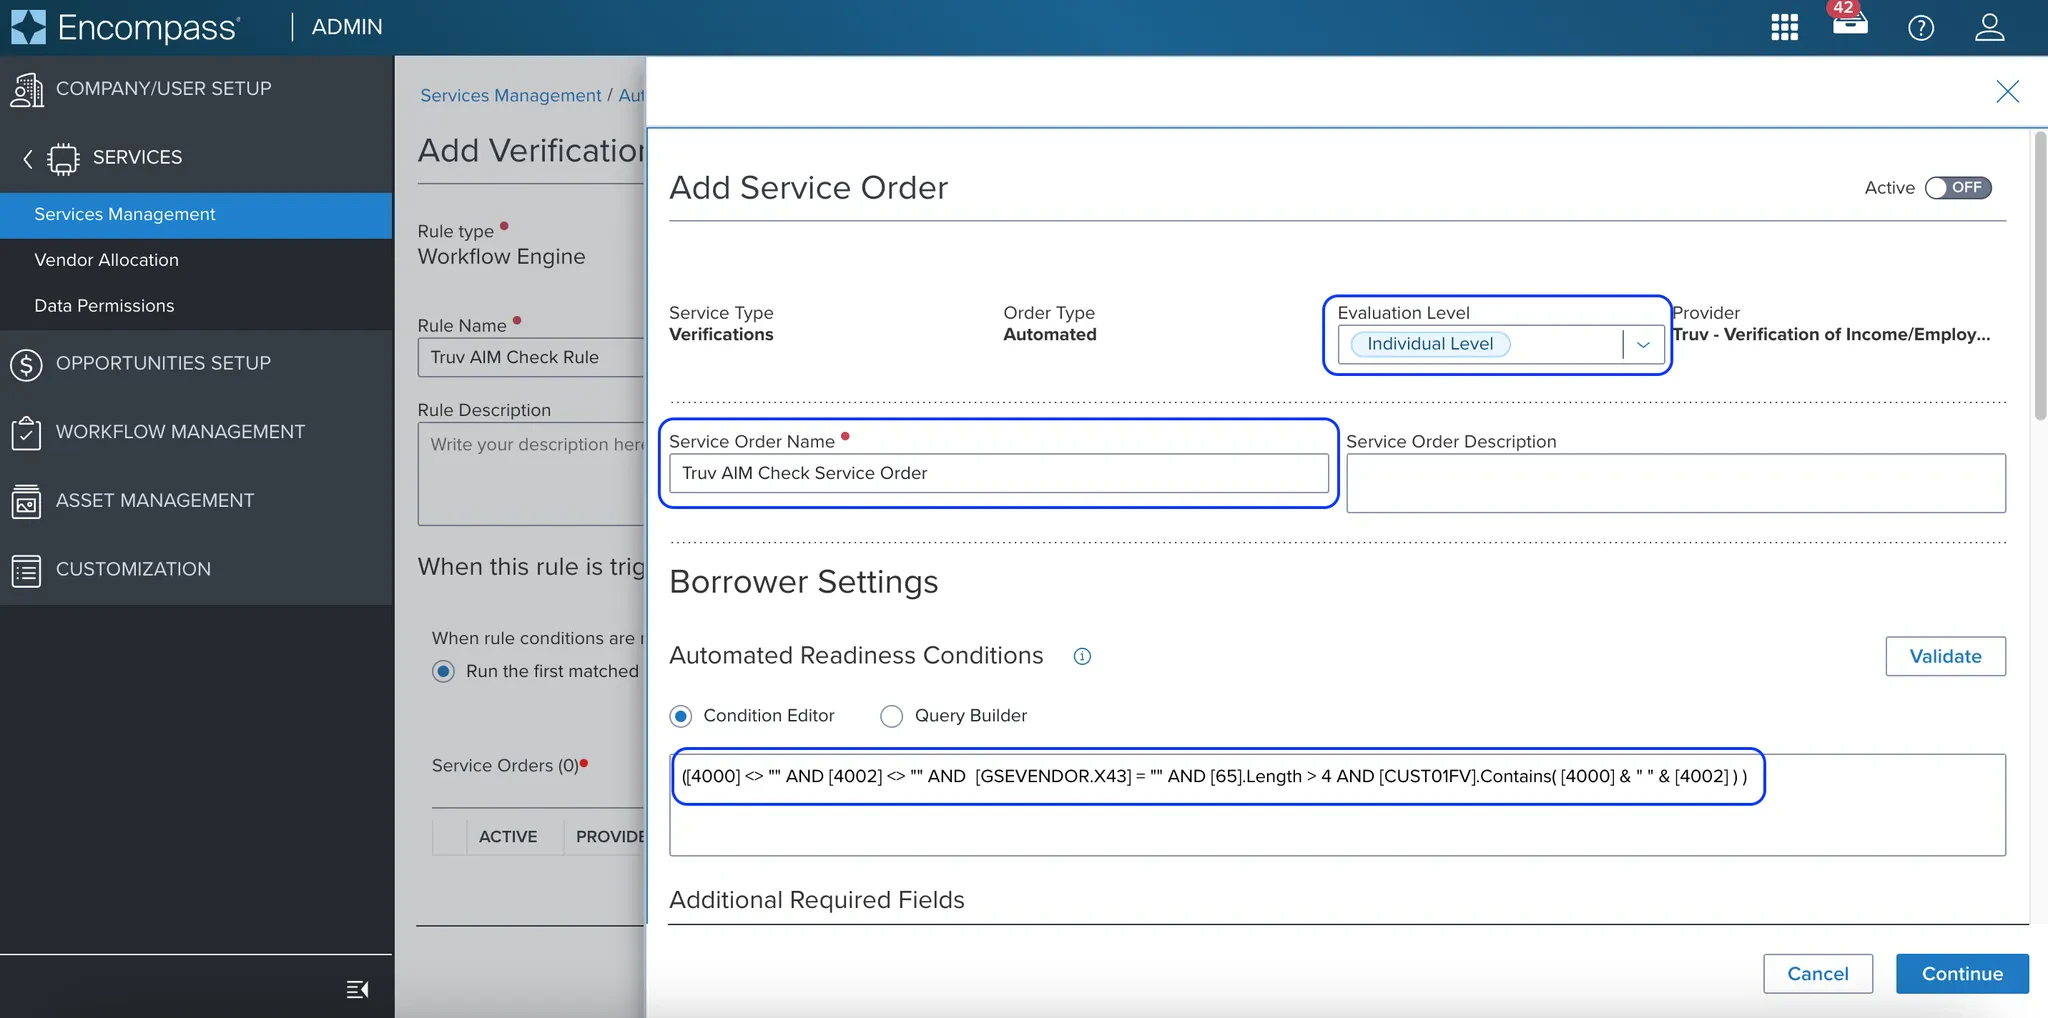
If you used a different custom field than
CUST01FV in Step 2, replace it in both conditions above.5
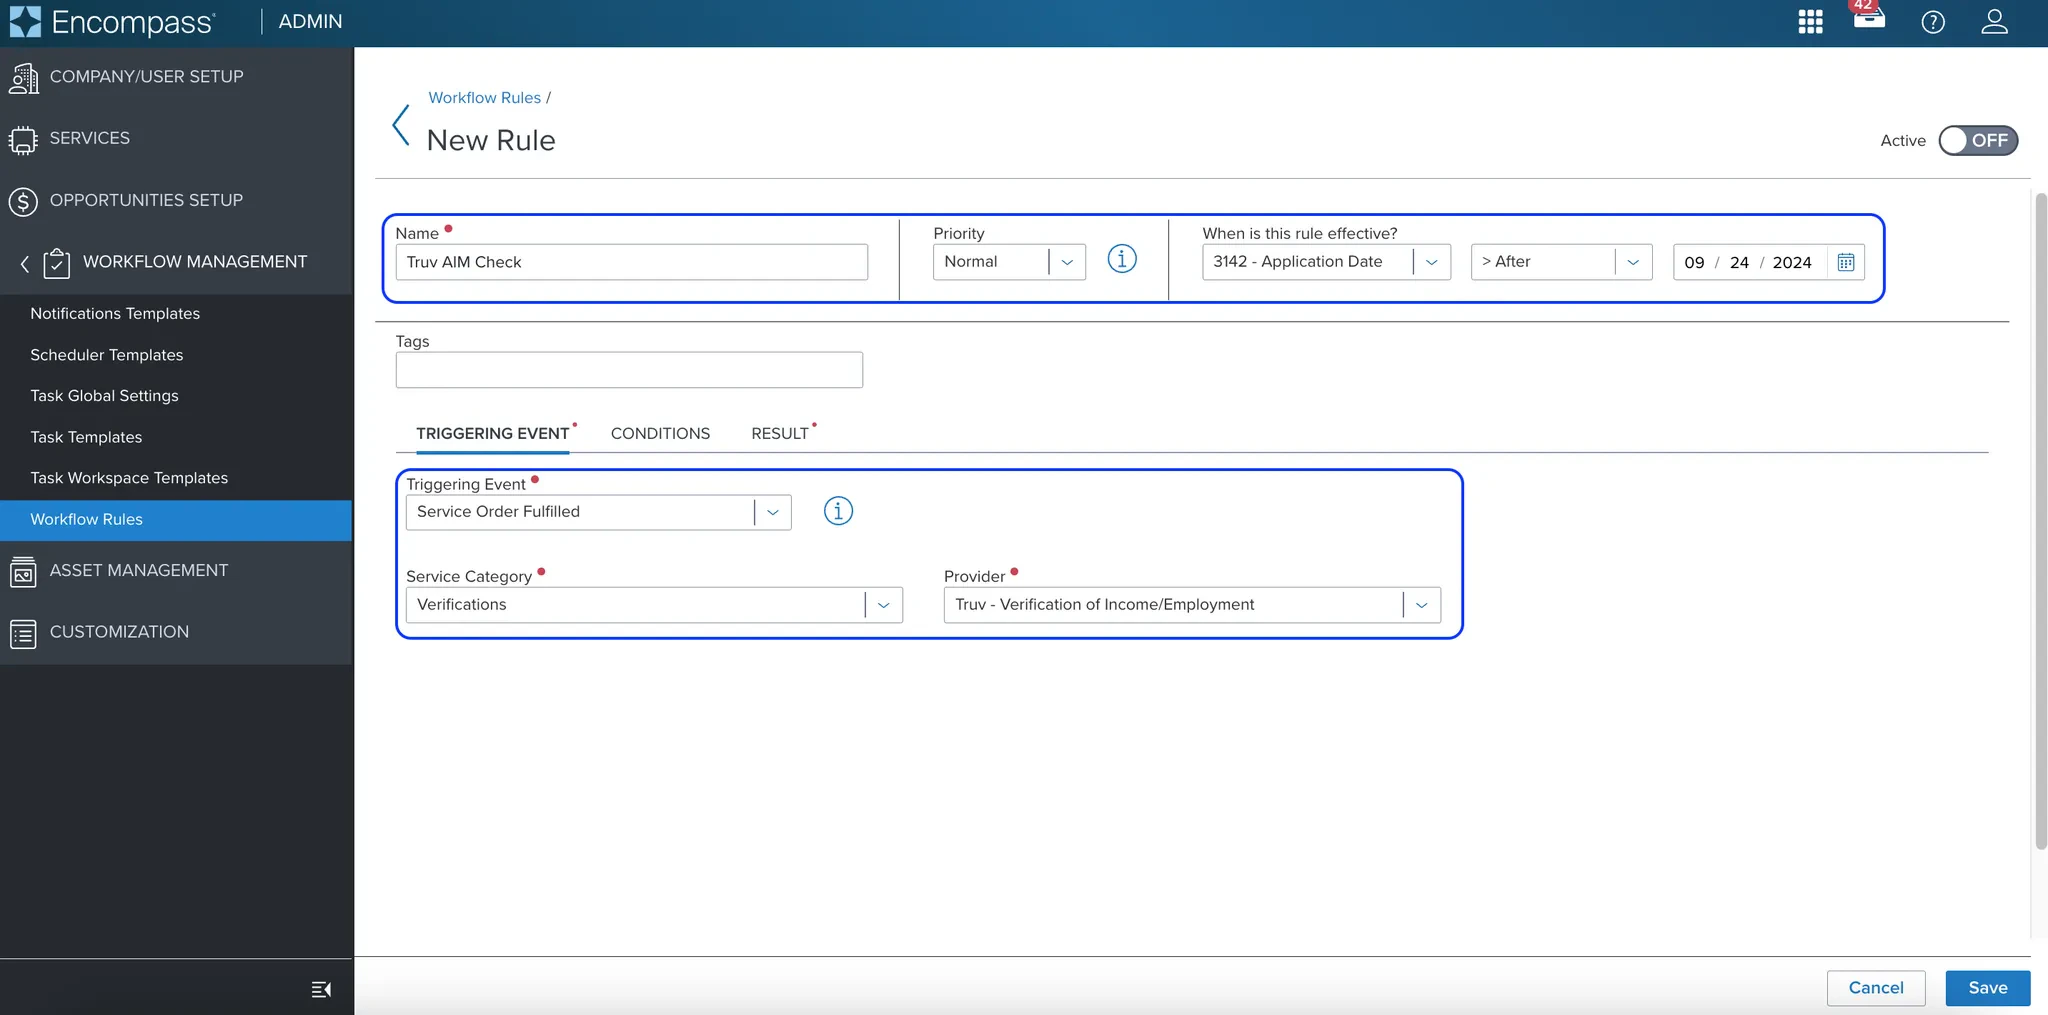
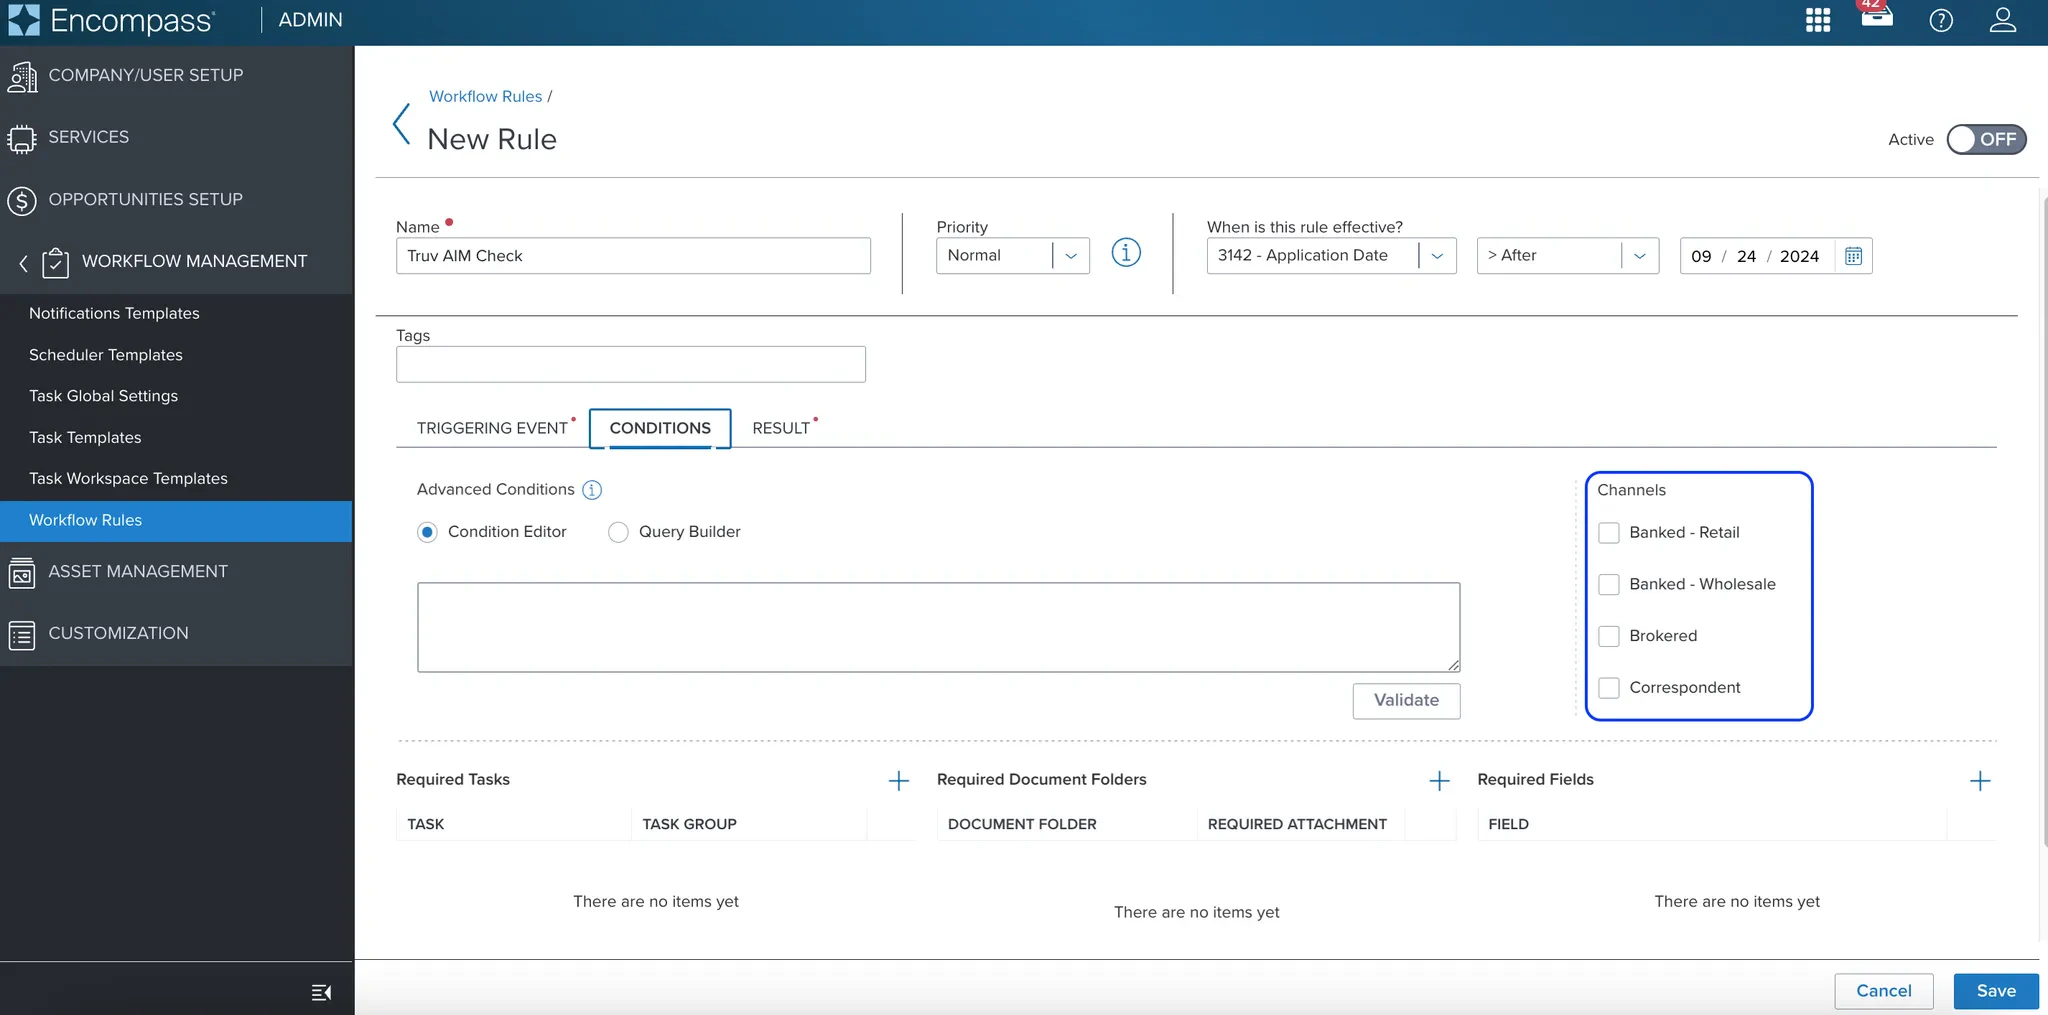
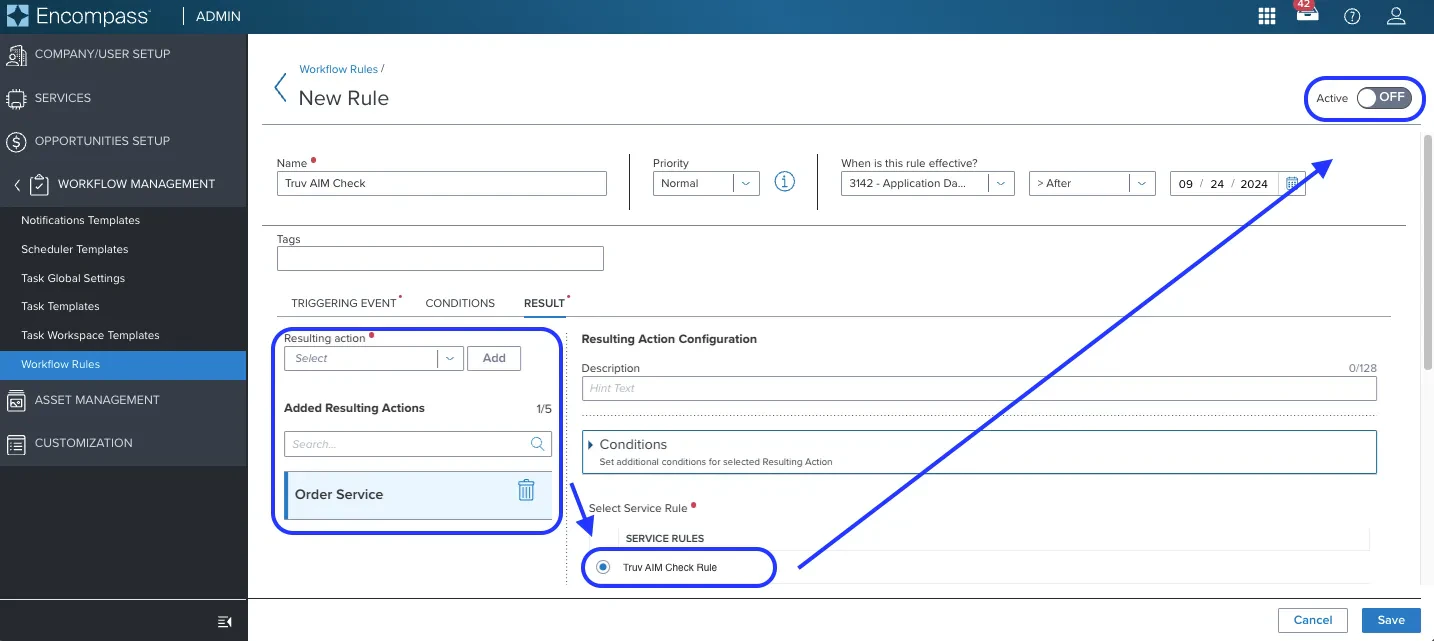
Configure Workflow Rules
Navigate to the Workflow Rules setup in the Encompass admin and click New Rule.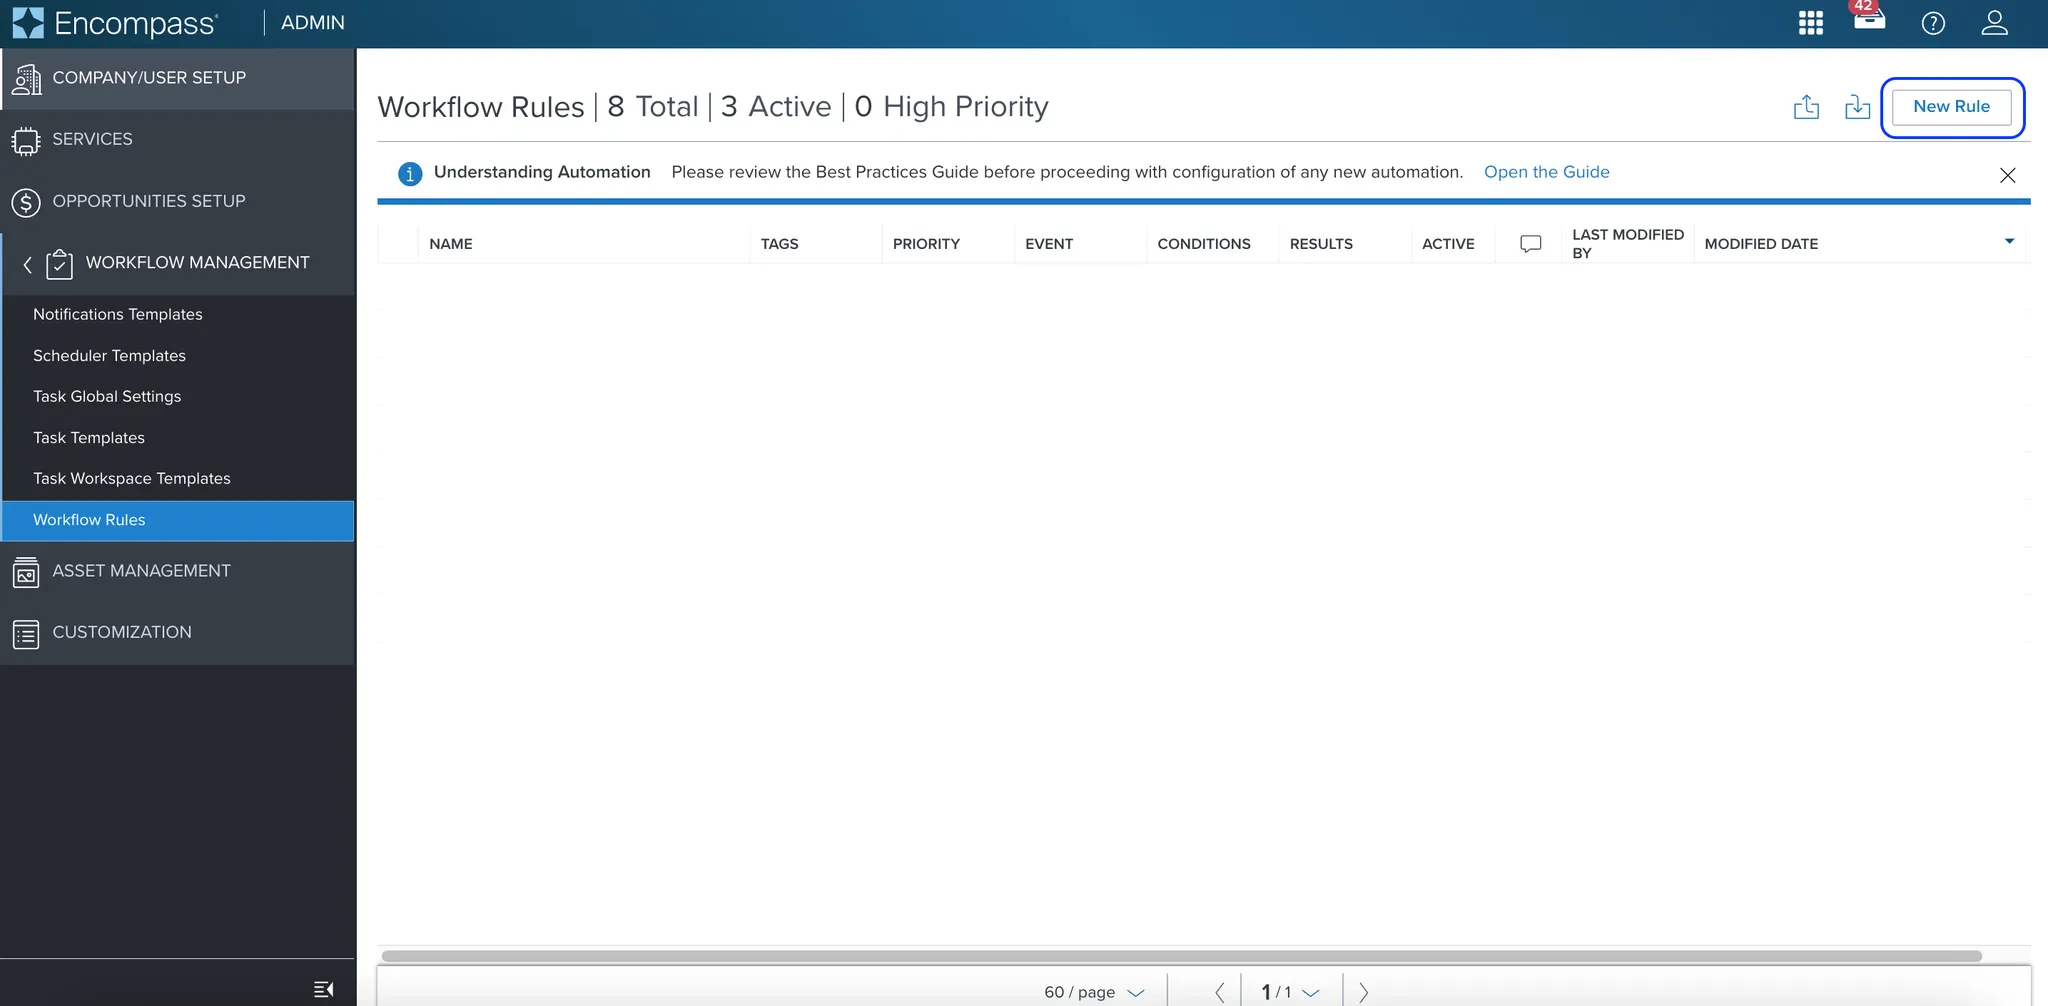
Next steps
Automated Service Ordering (ASO)
Set up initial and refresh ASO rules in Encompass
Create and Manage Orders
Manual ordering for VOIE, VOE, VOA, and Income and Assets
Customization
Templates, eFolder mapping, and notification settings