

For more information on Freddie Mac AIM Check, see the Freddie Mac AIM4IUED Tutorial.
This is a document-driven alternative to AIM Check via ASO, which requires a fulfilled VOIE order first. Income Analysis via Documents runs directly off borrower-uploaded documents and doesn’t require a payroll connection at all.
Before You Start
- Truv must already be set up as a verification service in Encompass Services Management.
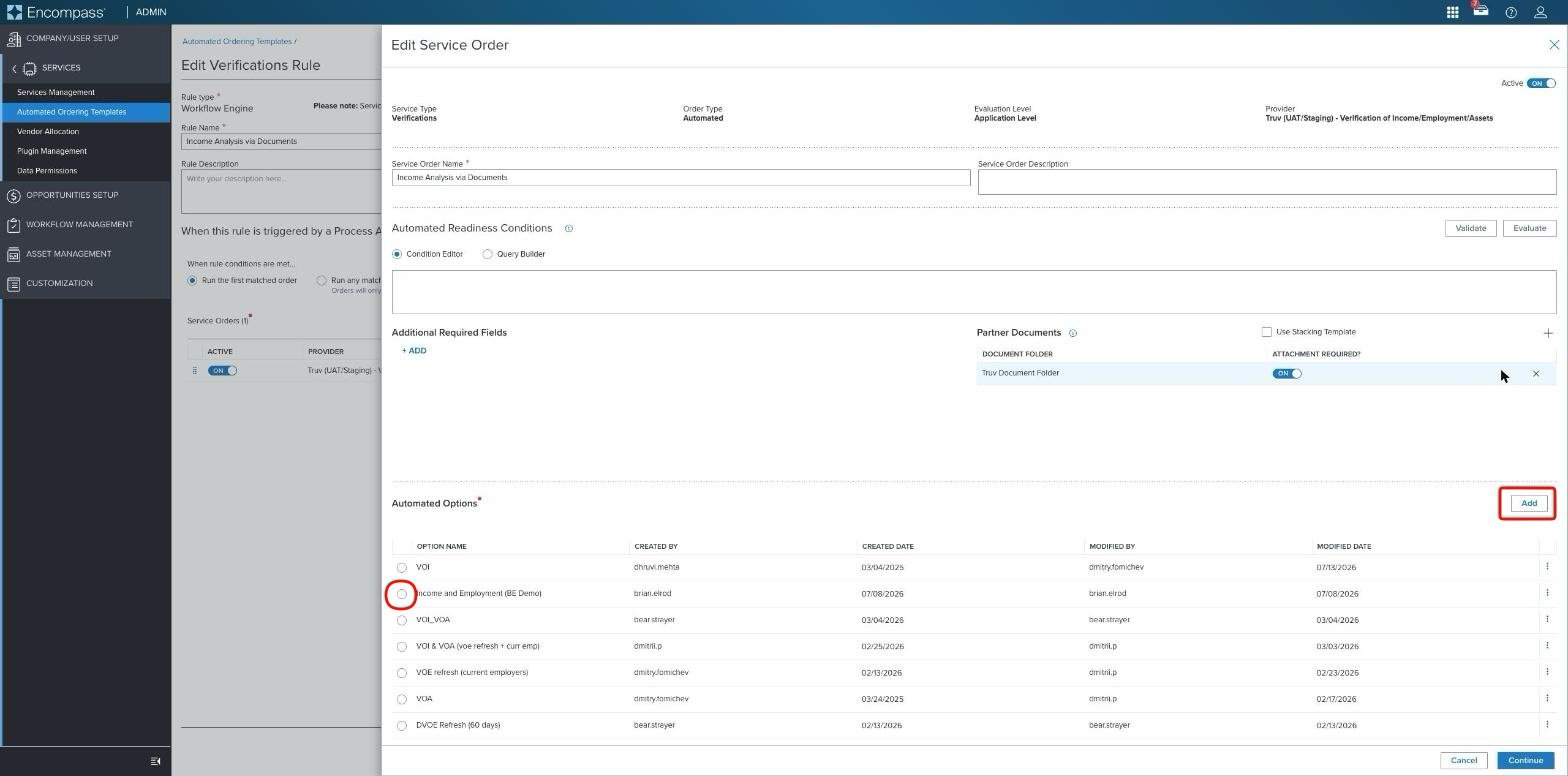
- You’ll need a designated Source eFolder (existing or new) where borrower income documents (W-2s, pay stubs, etc.) will be attached. Use whatever folder you already use for these documents, or create a dedicated one. This guide uses “Truv Document Folder” as the example.
- You’ll need a Return eFolder, configured via Document Mapping (Step 2 below), for the AIM Check PDF report Truv sends back.
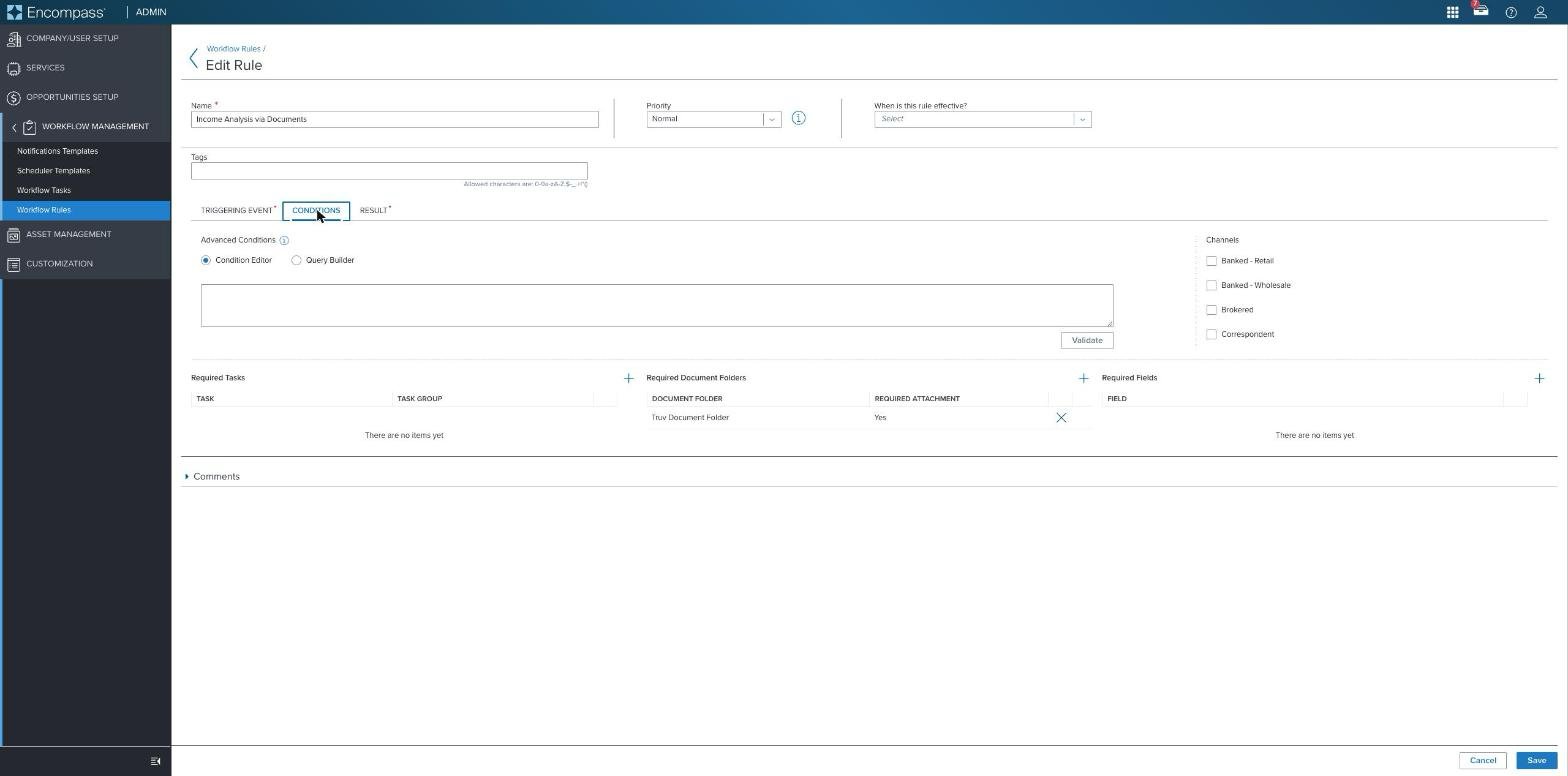
- At least one W-2 and at least one pay stub must be attached to the Source eFolder for Truv to run the analysis. Both document types are required. An upload with only one type won’t trigger a completed report.
Setup Guide
1
Confirm Truv Is Set Up for Automated Ordering
Navigate to the Encompass admin portal and go to Services > Services Management.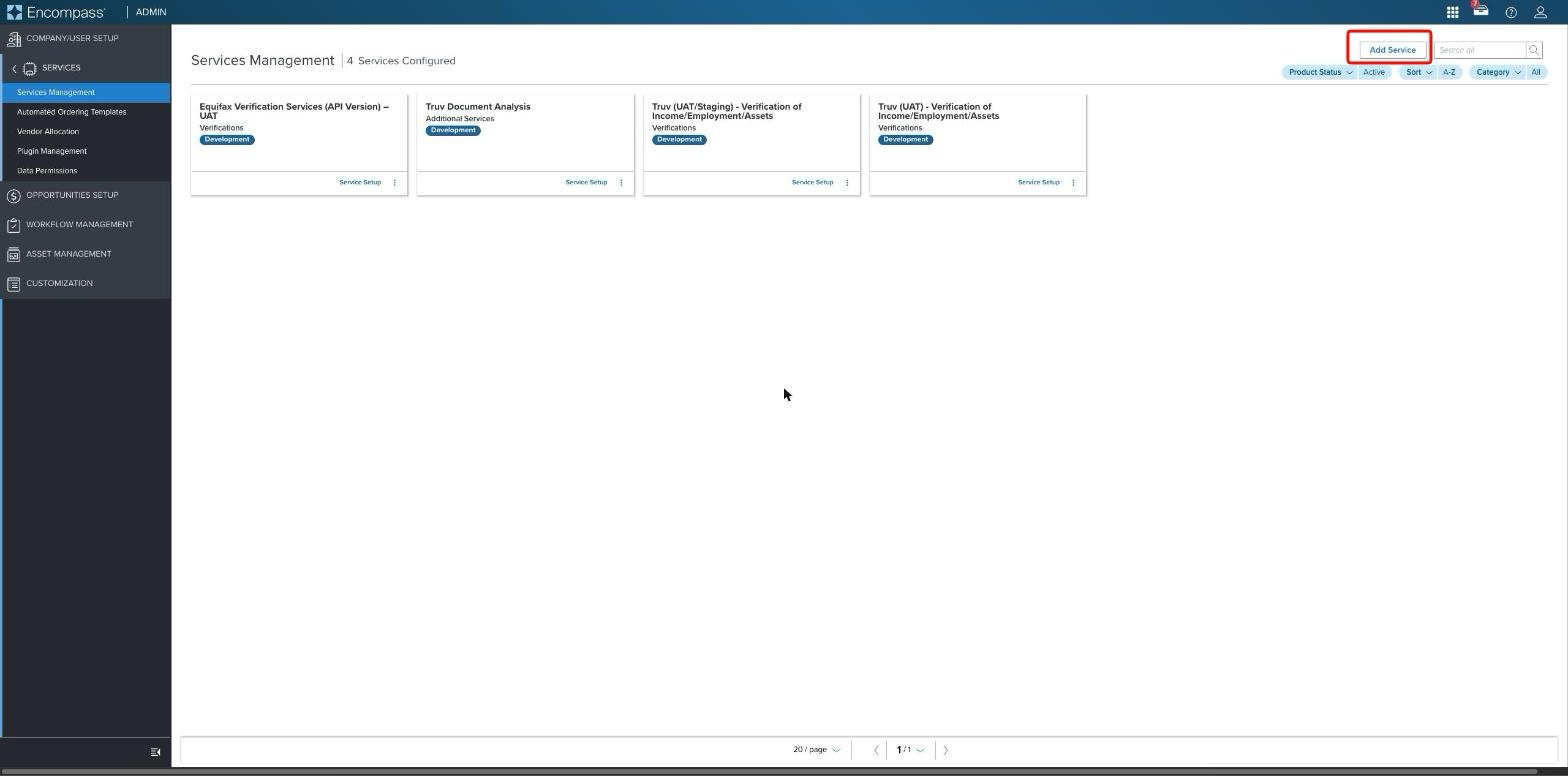
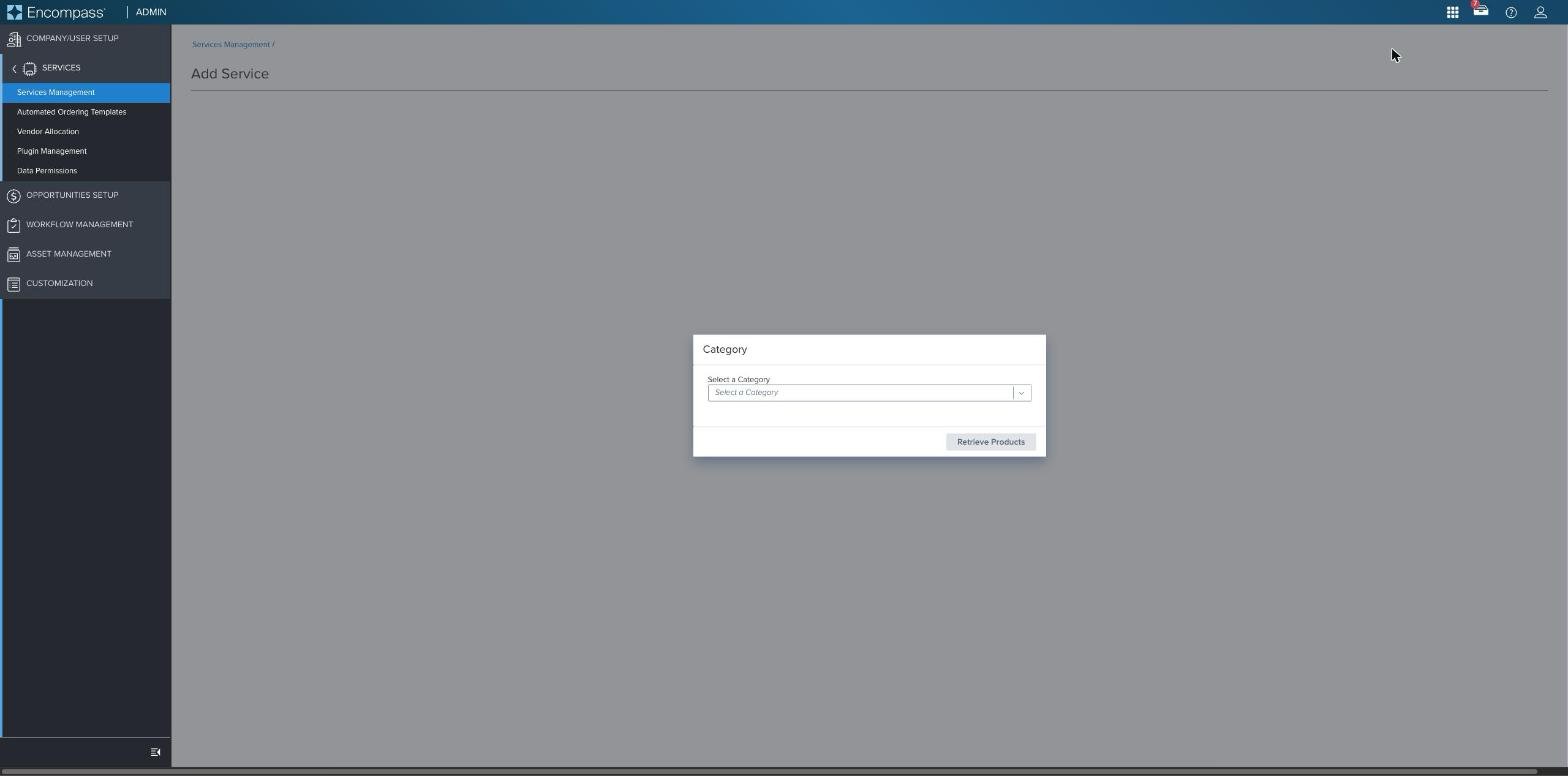
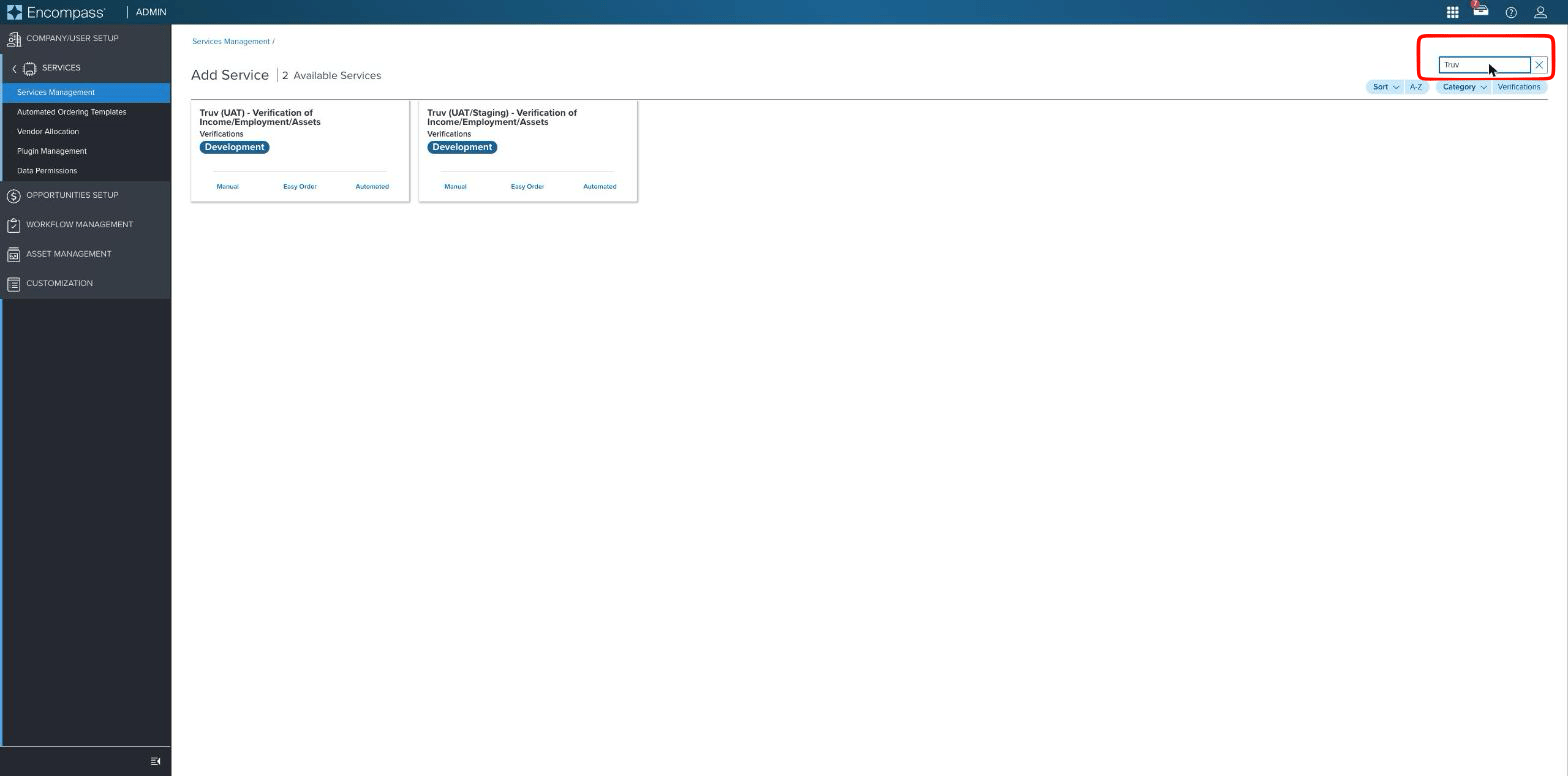
In a test/UAT instance you’ll see a “UAT” or “UAT/Staging” version of Truv. In production you’ll see the standard (non-UAT) version.
2
Configure the Return eFolder (Document Mapping)
From Services Management, click the three dots on the Truv service card and select Document Mapping.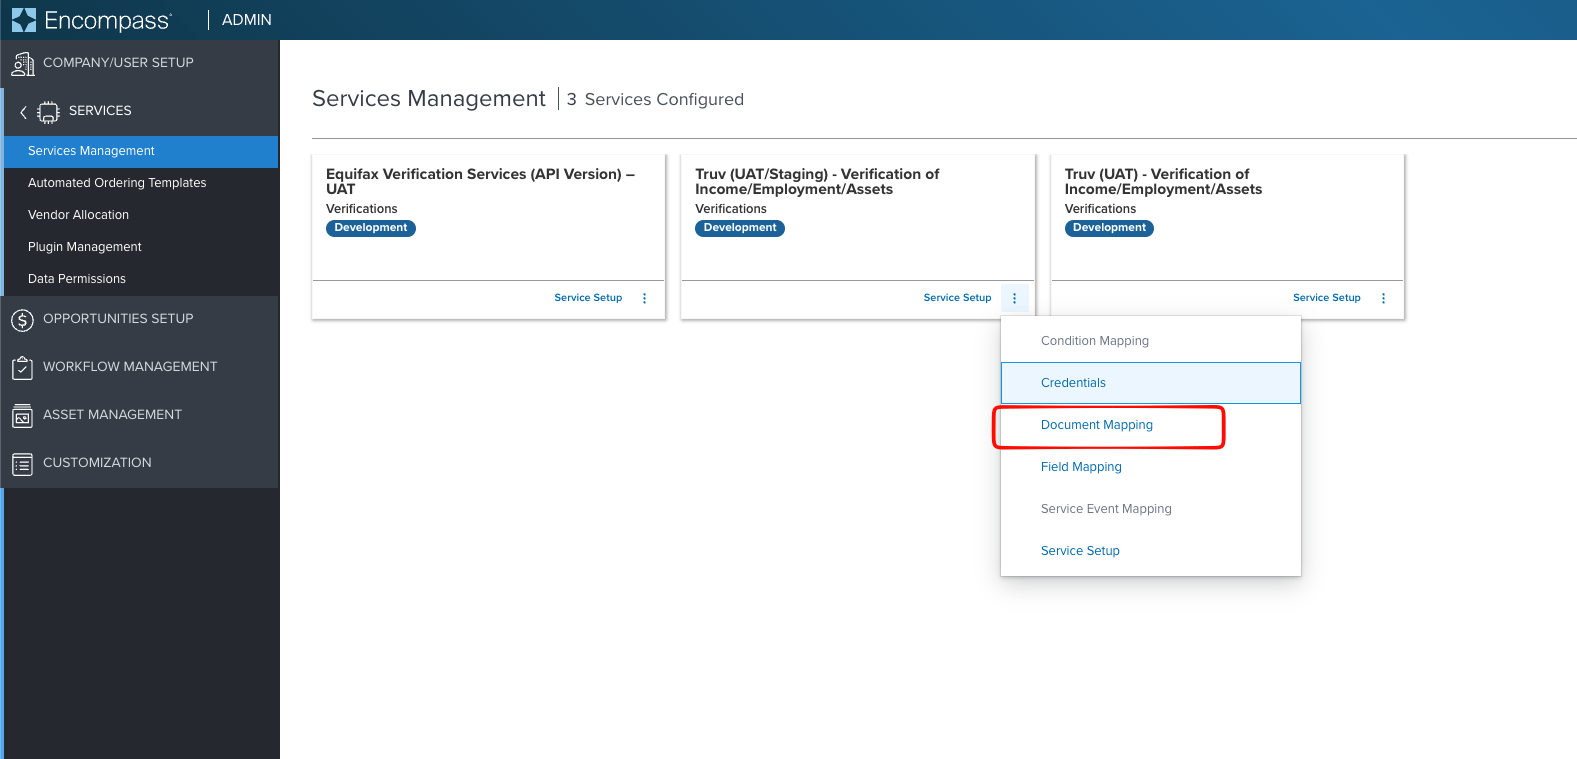
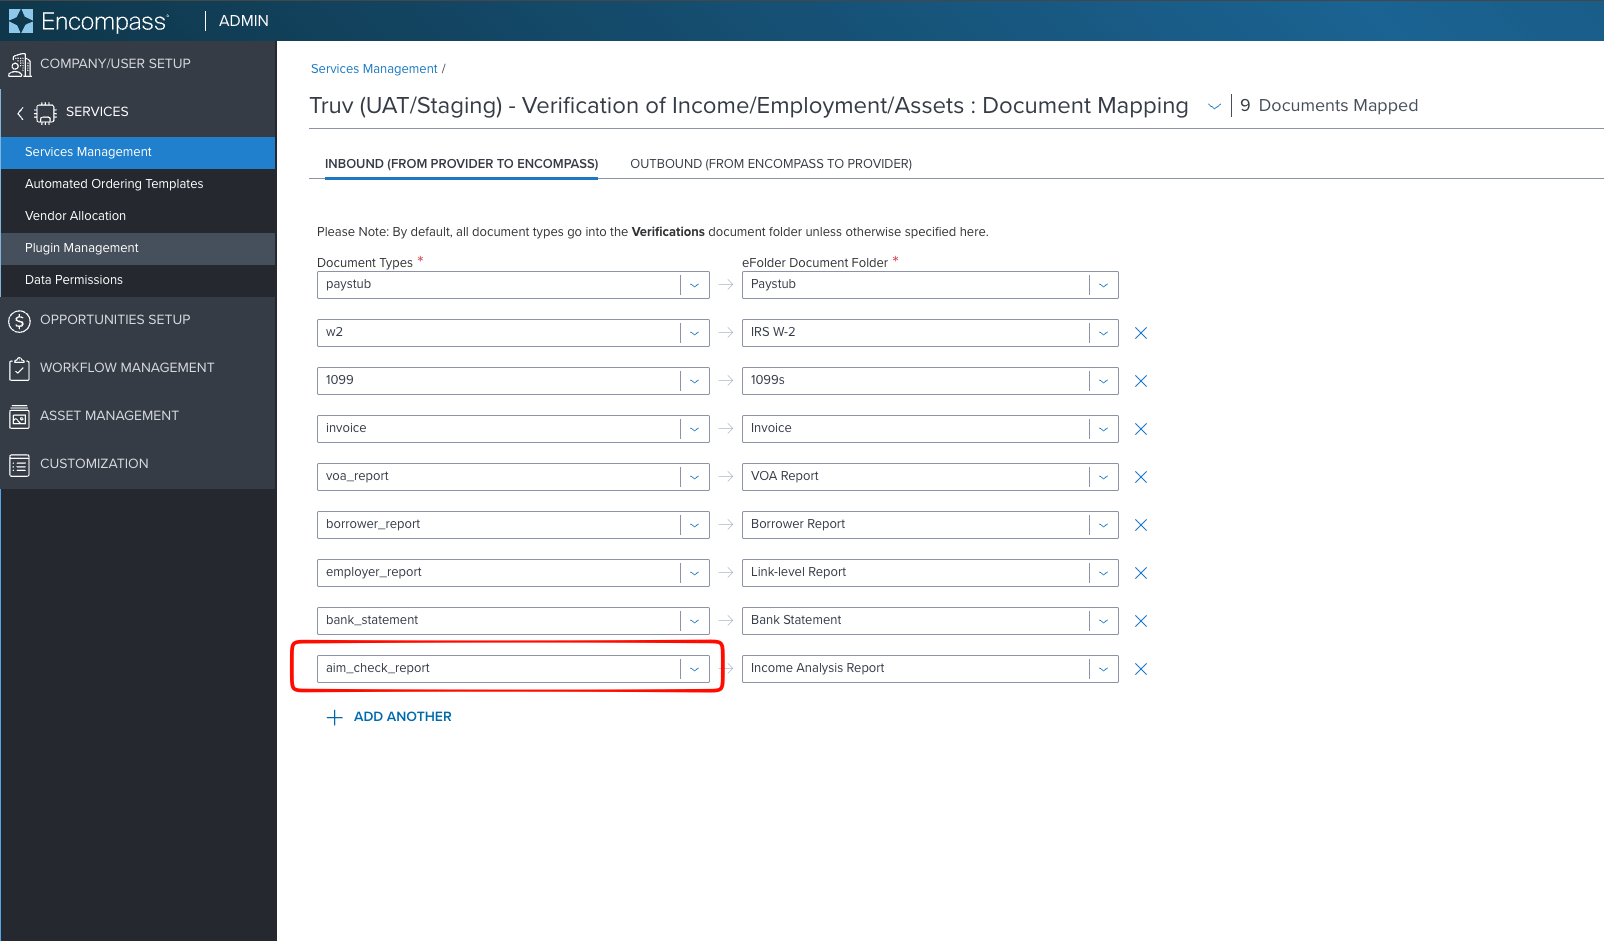
aim_check_report document type and map it to whichever eFolder Document Folder you want the AIM Check PDF delivered to (here, “Income Analysis Report”).By default, any document type without an explicit mapping lands in the Verifications folder. Confirm
aim_check_report is explicitly mapped here if you want the AIM Check report delivered somewhere else.3
Create the Automated Ordering Template
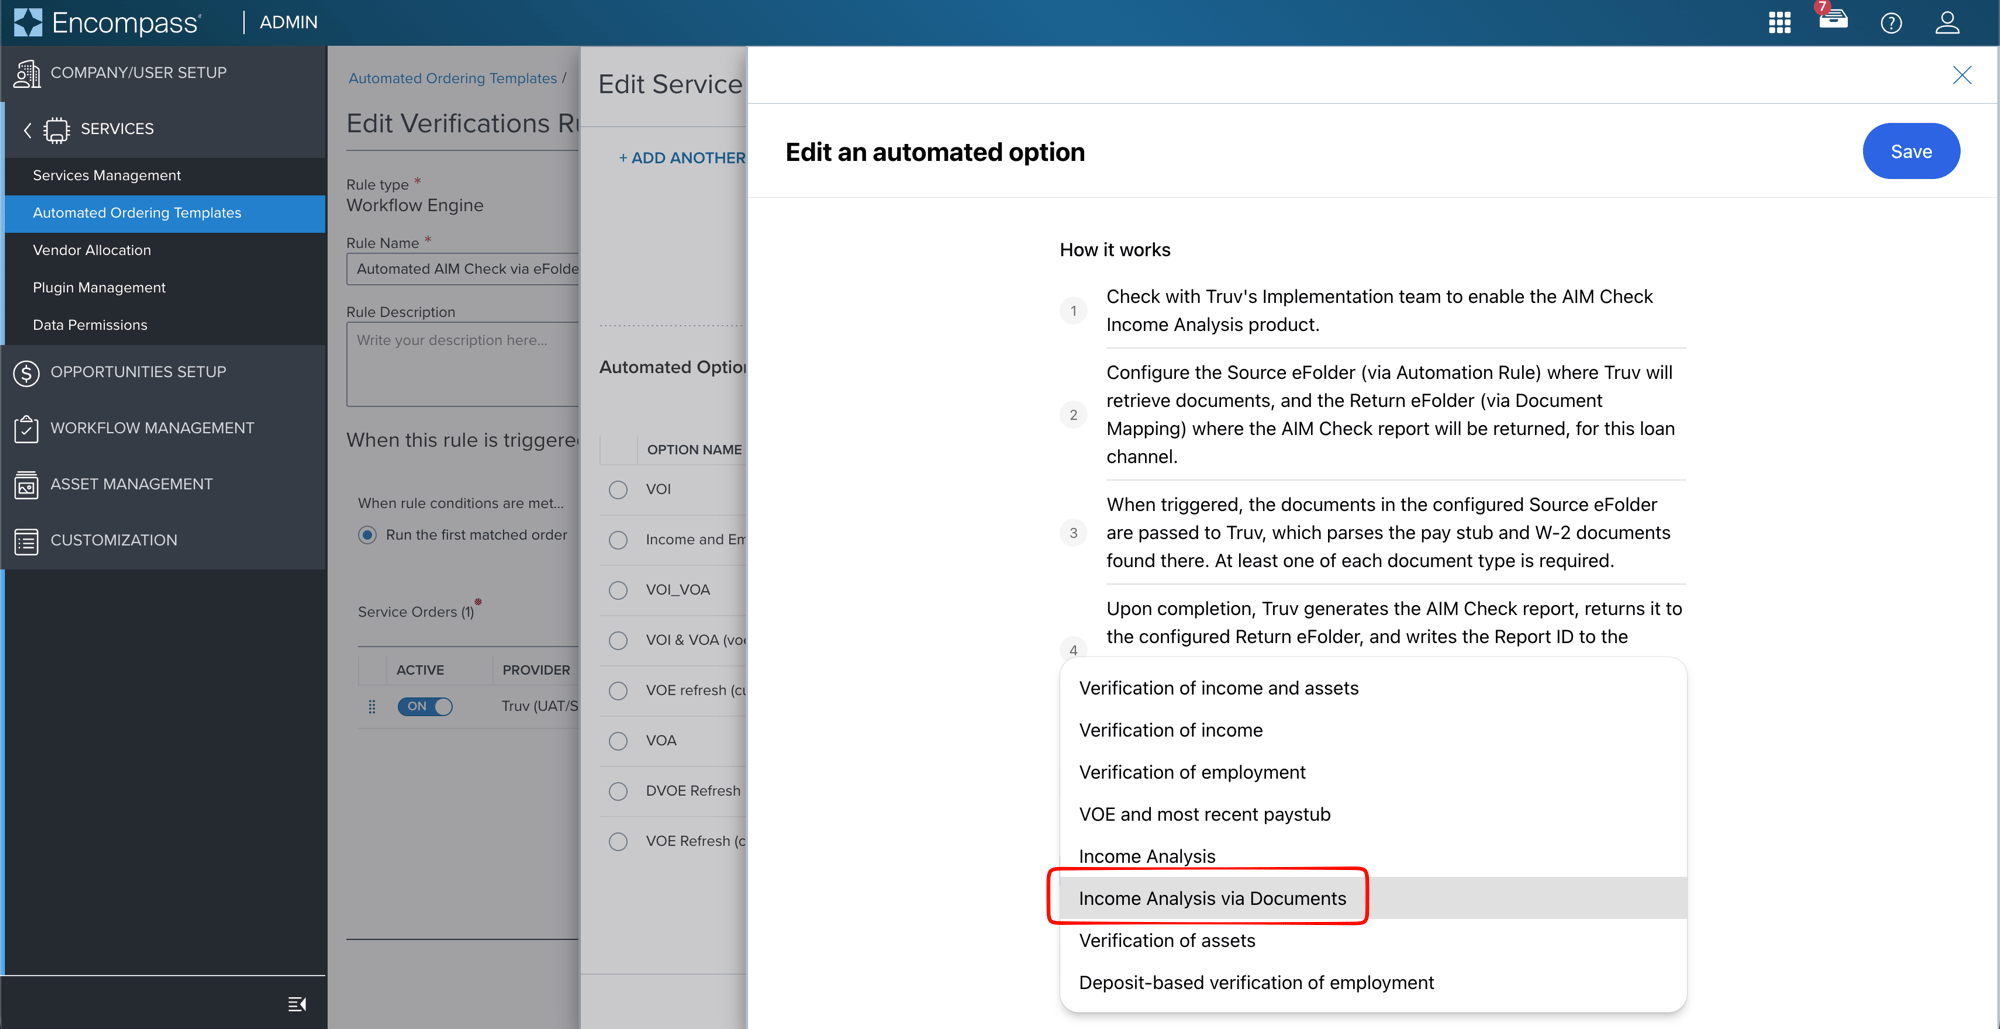
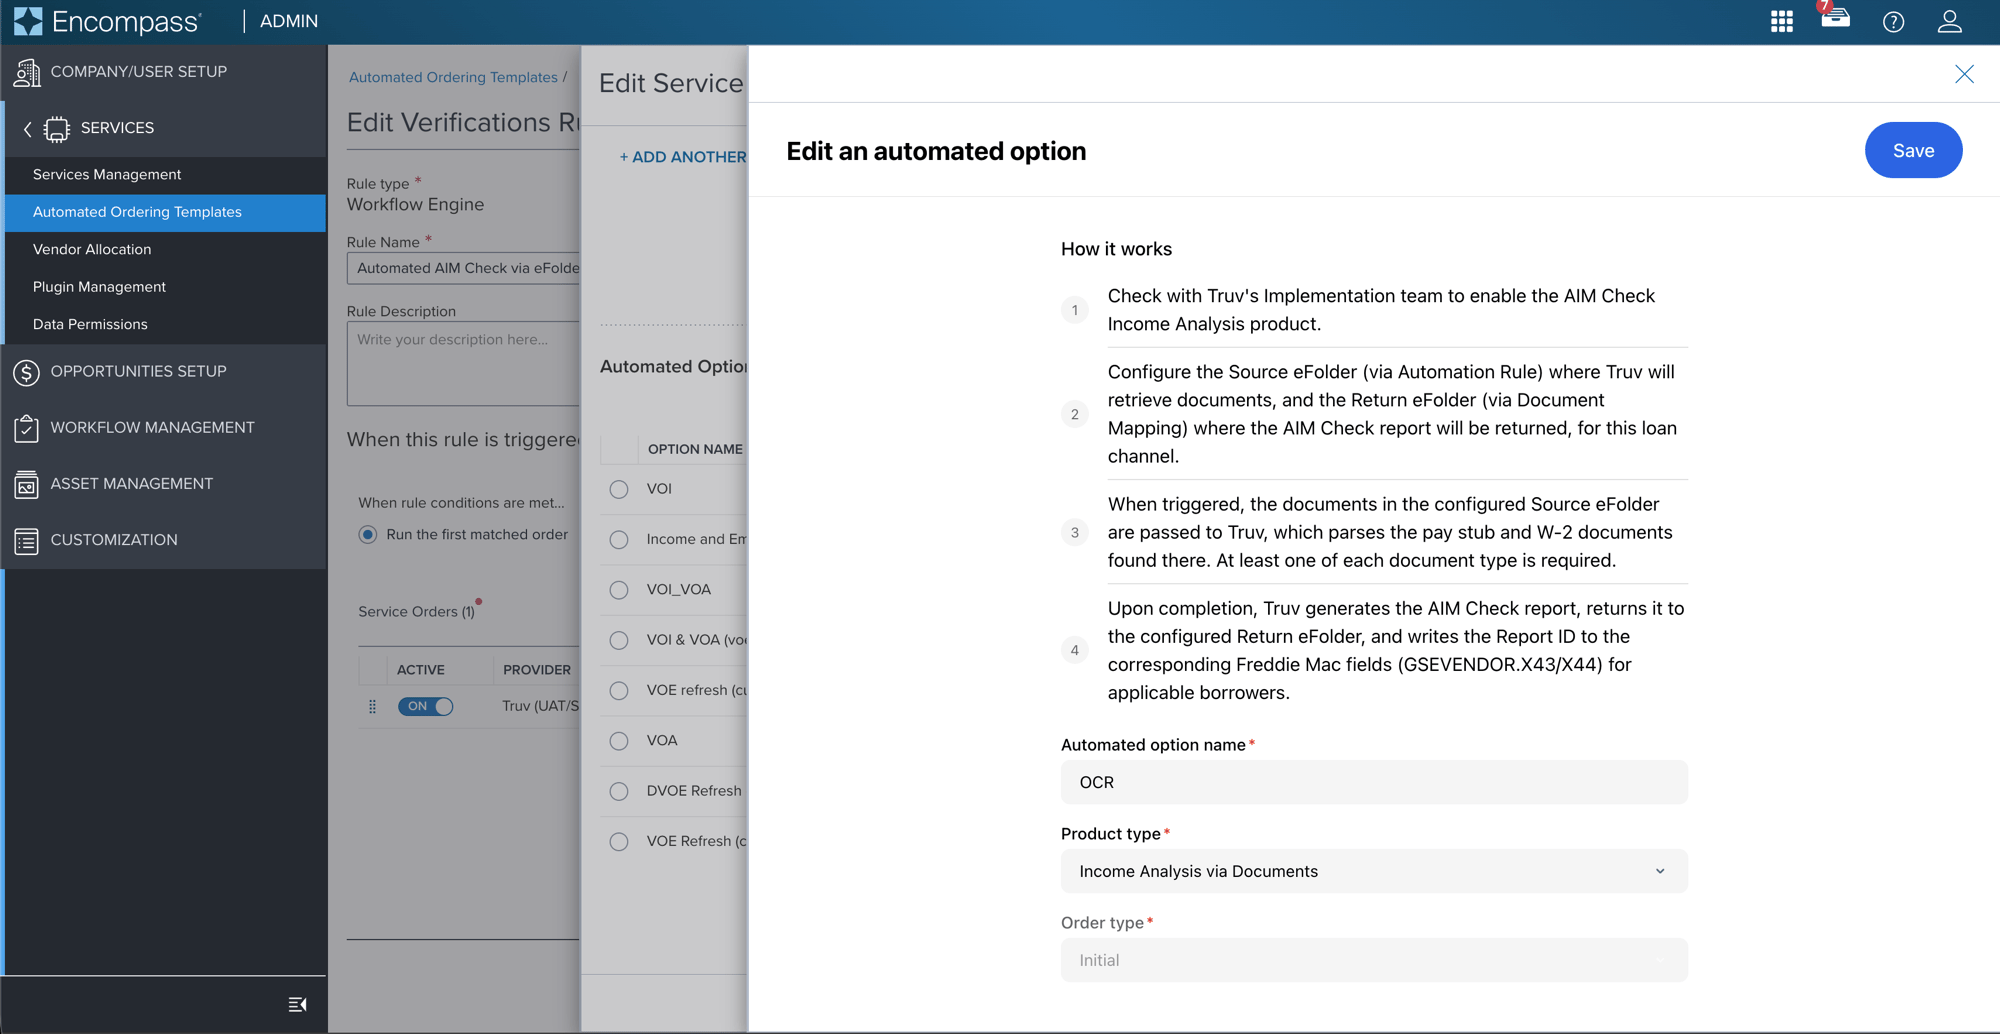
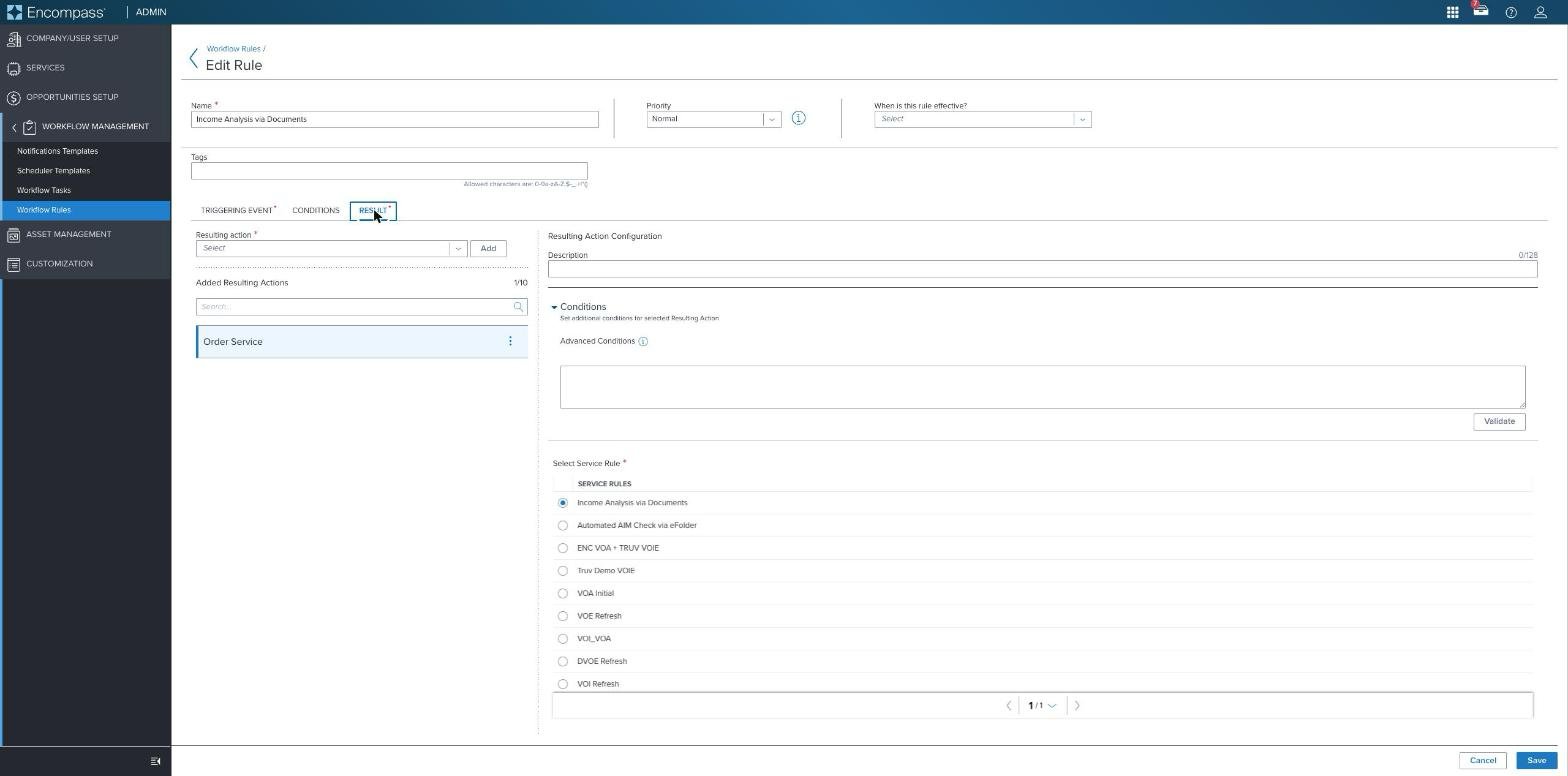
Selecting Automated in Step 1 takes you to Automated Ordering Templates. Click Add to create a new template.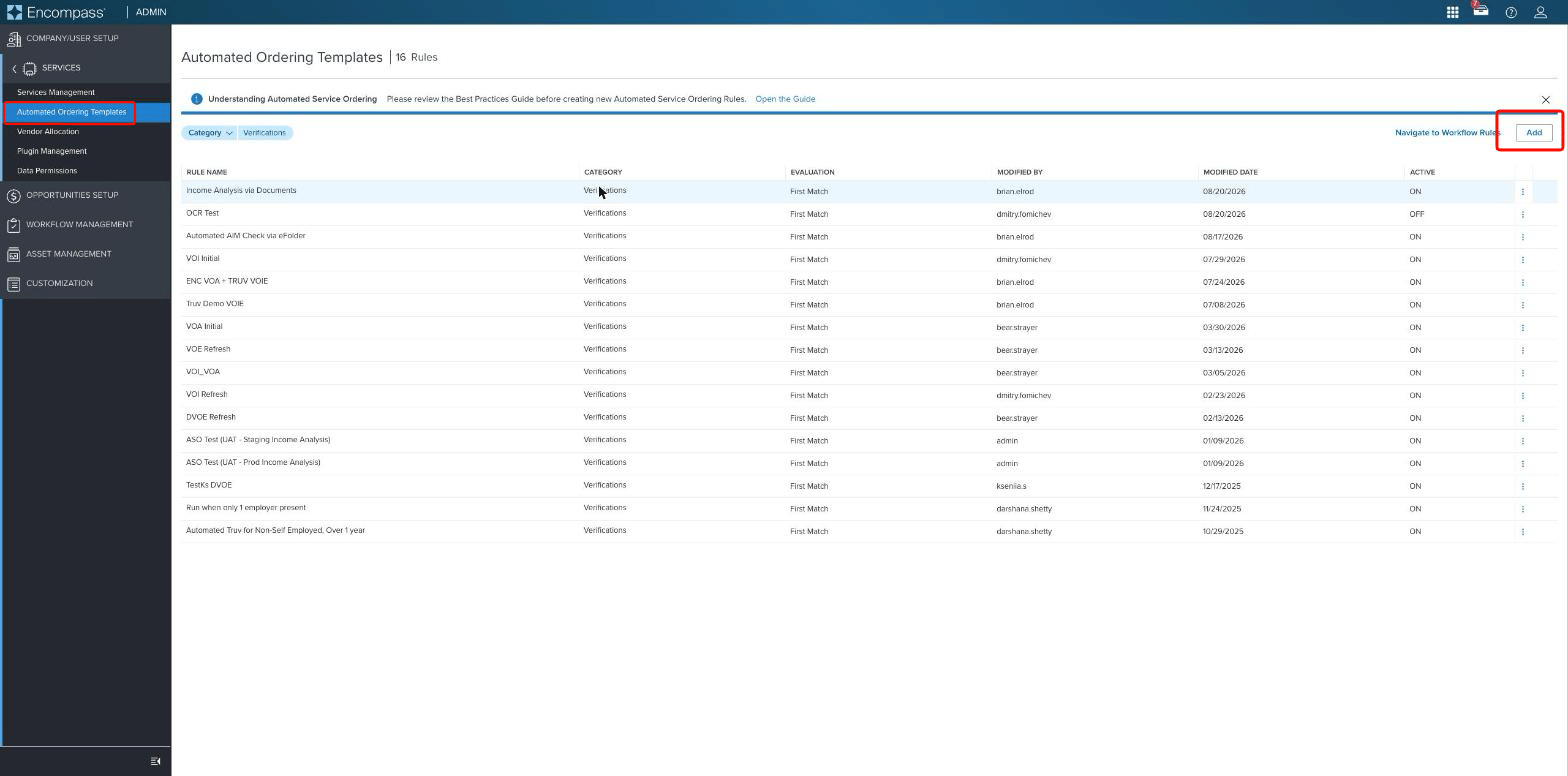
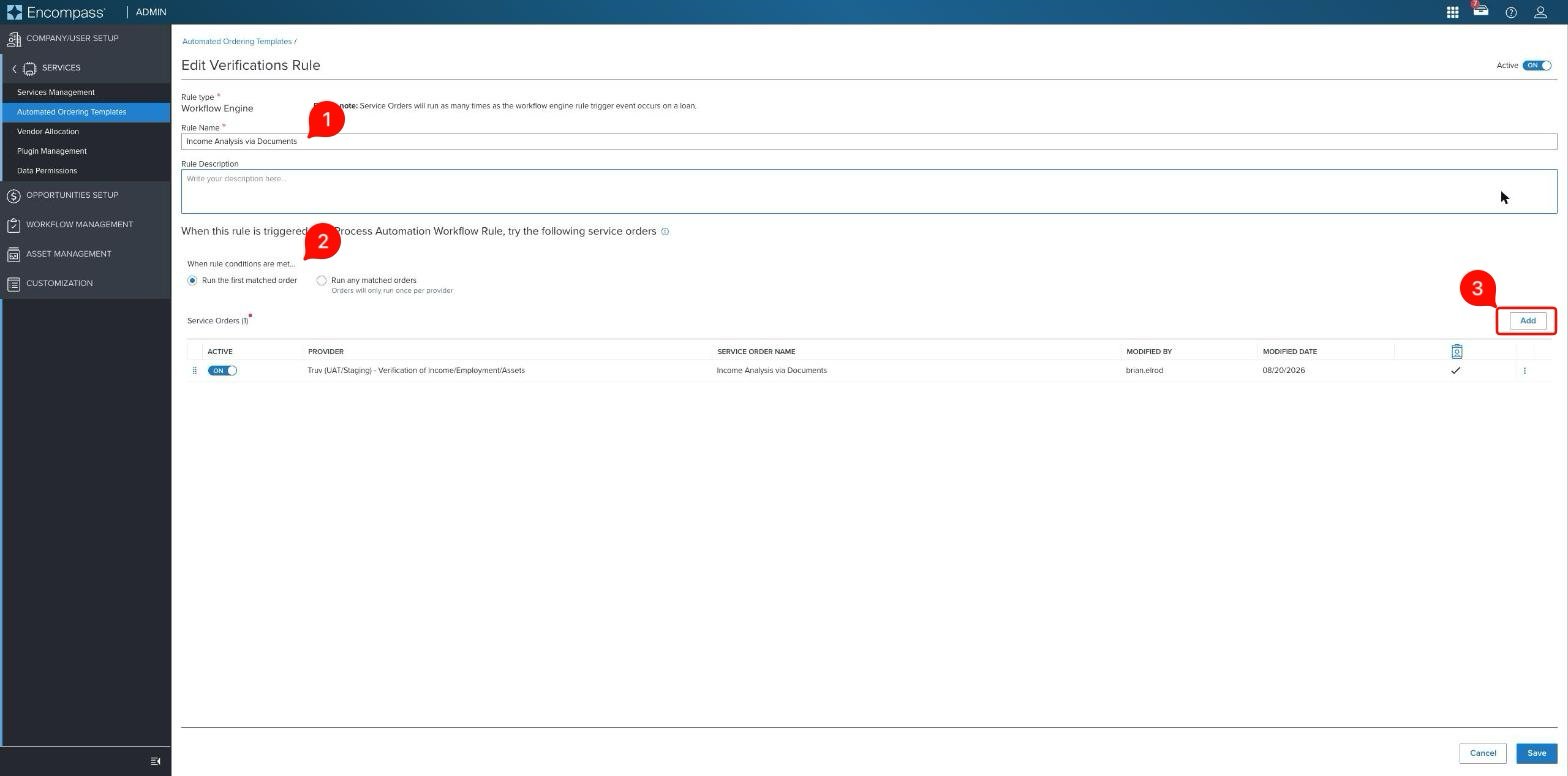
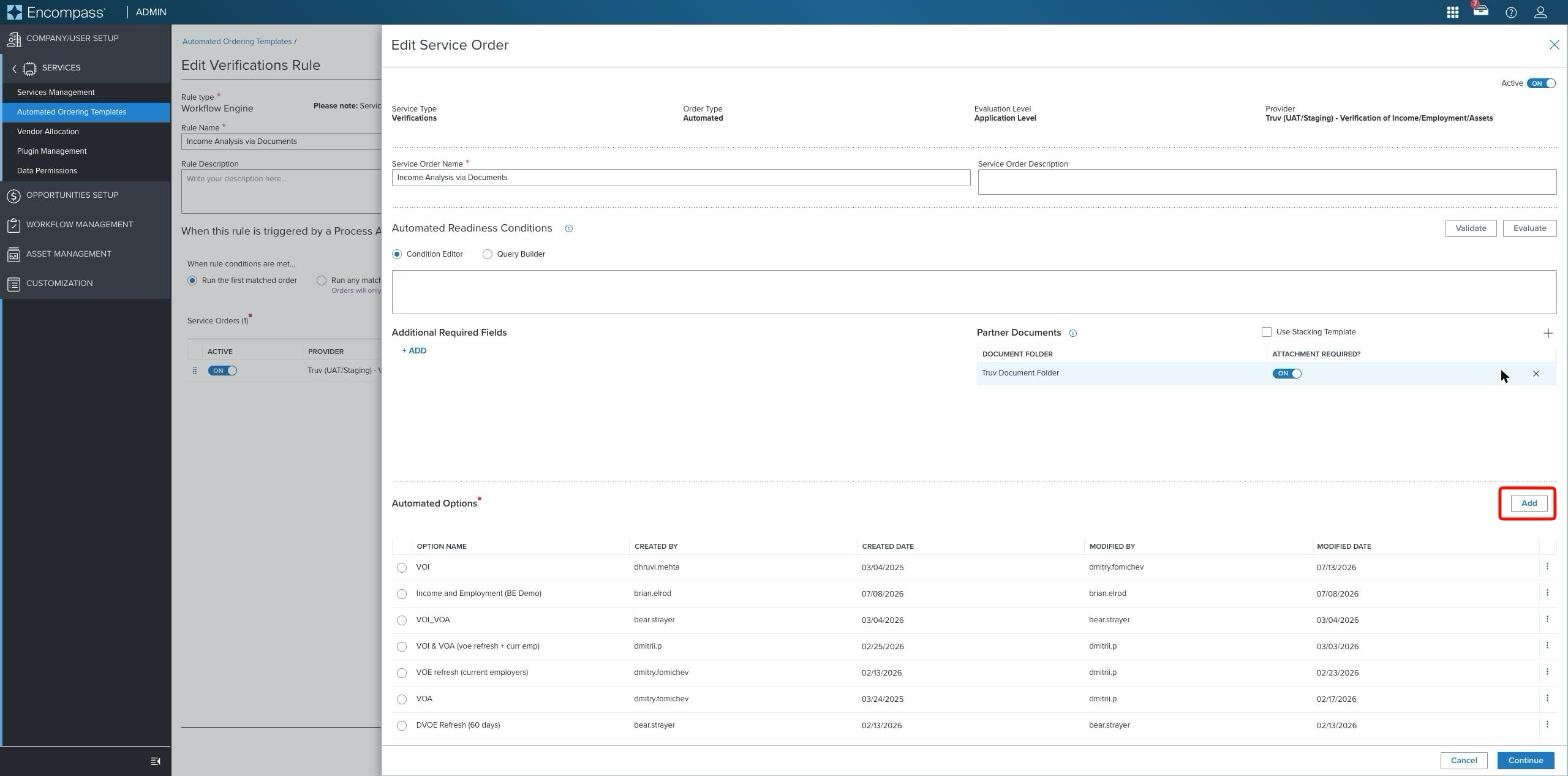
4
Create the Workflow Rule
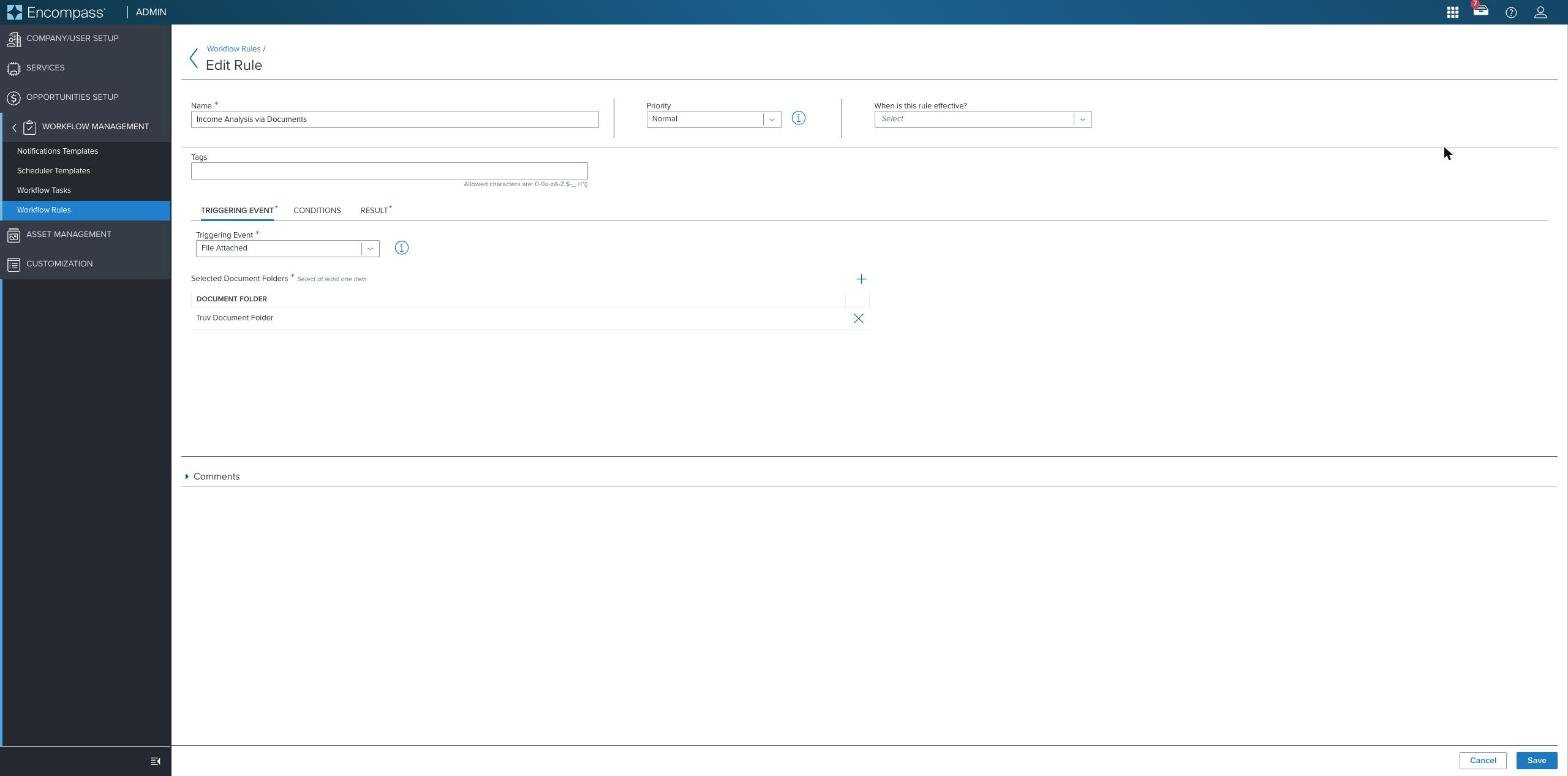
Navigate to Workflow Management > Workflow Rules and click New Rule.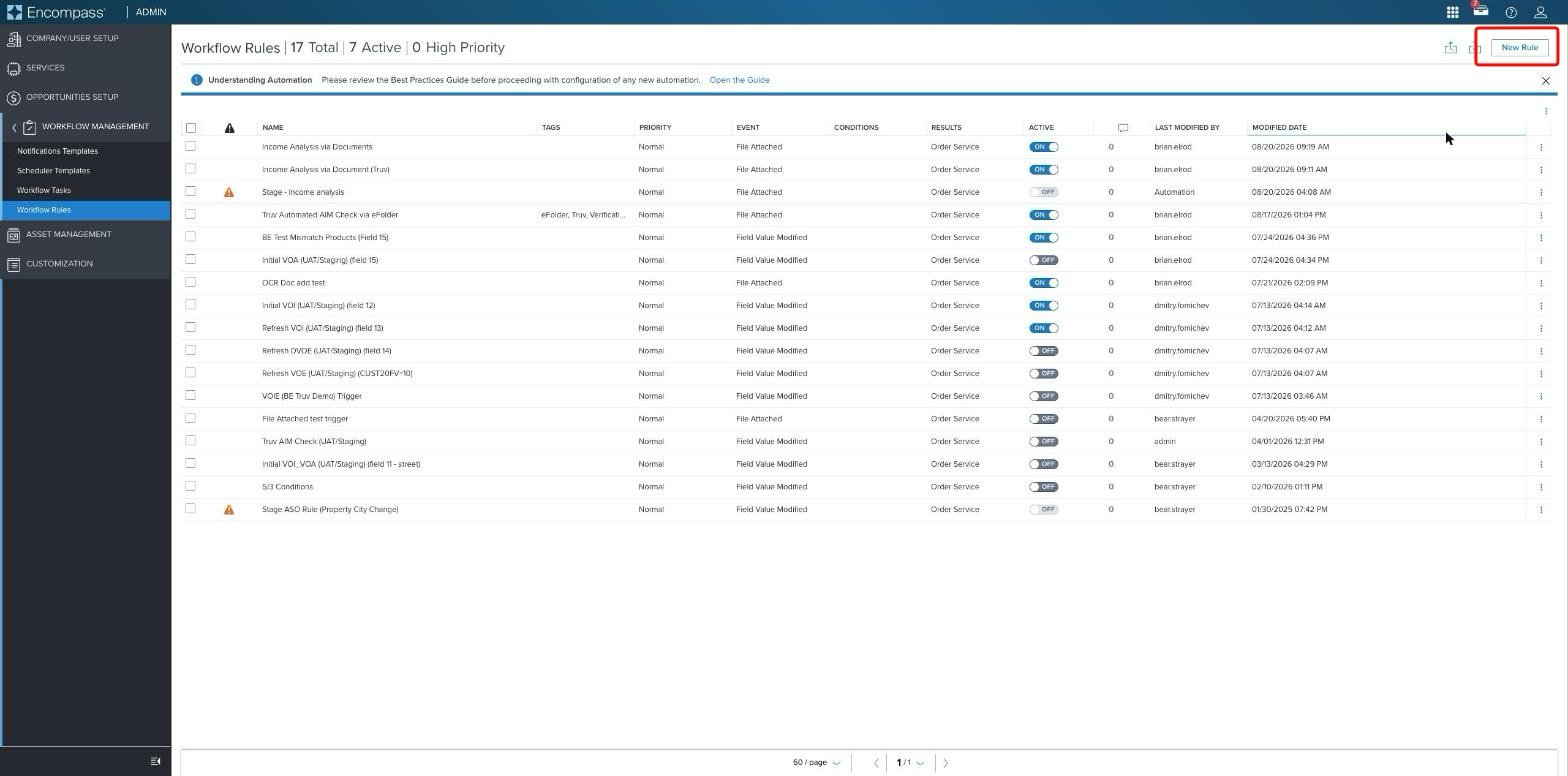
How It Works
- When triggered, the documents in the configured Source eFolder are passed to Truv, which parses the pay stub and W-2 documents found there. At least one of each document type is required.
- Upon completion, Truv generates the AIM Check report, returns it to the configured Return eFolder, and writes the Report ID to the corresponding Freddie Mac fields (
GSEVENDOR.X43/X44) for applicable borrowers.
Truv doesn’t pick the destination folder directly. Encompass files the returned PDF according to your Inbound Document Mapping, keyed on the document type Truv declares on the file it returns (
aim_check_report), which is what you configured in Step 2 above.Good to Know
- Missing borrowers are silent, not errors. Truv only processes borrowers/co-borrowers with a first name, last name, and SSN present. A co-borrower with no documents in the folder simply gets no report. That’s expected behavior, not a failure to flag.
- A returned PDF doesn’t guarantee eligibility. If employment data wasn’t present in the submission, Freddie’s AIM engine can still return a report. It just prints “employment not submitted” and marks the borrower ineligible on the PDF itself. Don’t treat a returned PDF as proof the income assessment succeeded.
- Source documents aren’t cleaned up. Truv currently leaves the original W-2/pay stub files in the Source folder after processing. eFolder cleanup by partners is currently not available from ICE.
Next steps
AIM Check via ASO
The payroll-connection alternative: AIM Check triggered by a fulfilled VOIE order
Automated Service Ordering (ASO)
Set up initial and refresh ASO rules in Encompass
Customization
Templates, eFolder mapping, and notification settings