> ## Documentation Index
> Fetch the complete documentation index at: https://docs.truv.com/llms.txt
> Use this file to discover all available pages before exploring further.
# Lodasoft Integration
> Real-time income and employment verification embedded in the Lodasoft mortgage platform
Truv integrates with Lodasoft to provide instant income and employment verification directly from source payroll systems. When borrowers reach the income verification stage, they connect their payroll accounts through Truv's secure interface. Verification reports are delivered automatically to the loan file.
Eliminate manual documentation reviews with instant, source-verified income and employment data
Source-verified payroll data minimizes fraud risk and increases accuracy
Deploy as embedded verification, a borrower task, or both. Adapts to your workflow.
Connected accounts monitored for new payroll information throughout the loan process
***
## How it works
When borrowers reach the income verification stage, they connect their payroll accounts through Truv's secure interface, giving instant access to verified employment and income details.
Once accounts are connected, Lodasoft automatically receives comprehensive Truv verification reports. If a borrower skips the step, a task is created prompting them to complete it later.
Connected accounts are continuously monitored for new payroll information throughout the loan process.
In Lodasoft, Truv can be implemented as Embedded and/or Task-based:
* **Embedded**: Truv verification presented to all borrowers during the application flow
* **Task-based**: Truv verification assigned as a to-do item for borrowers to complete at their convenience
***
## Lodasoft Setup Guide
**Step 1:** Contact Lodasoft Customer Success for one-time admin configuration.
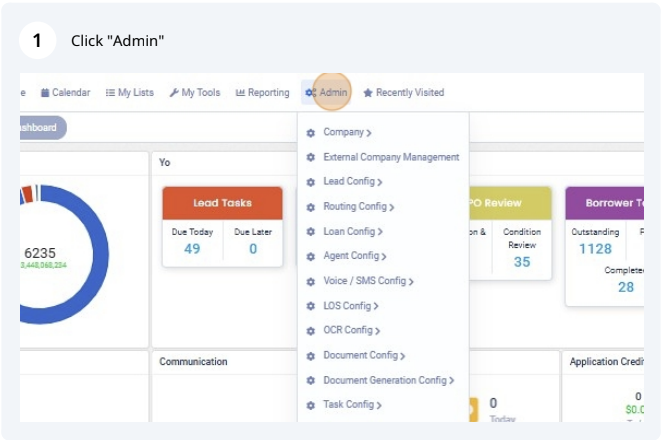
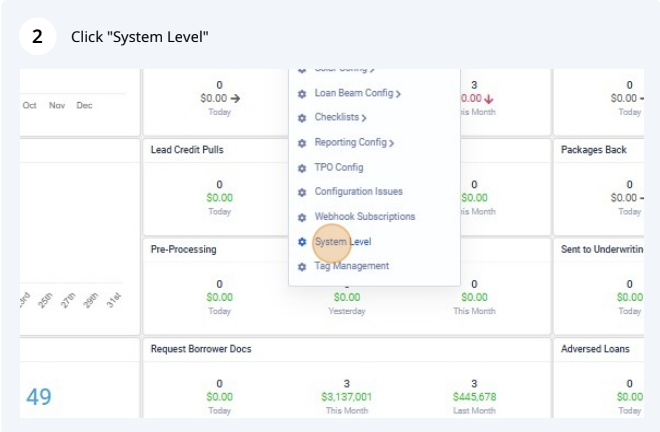
**Step 2:** Navigate to **Admin → System Level** in Lodasoft.
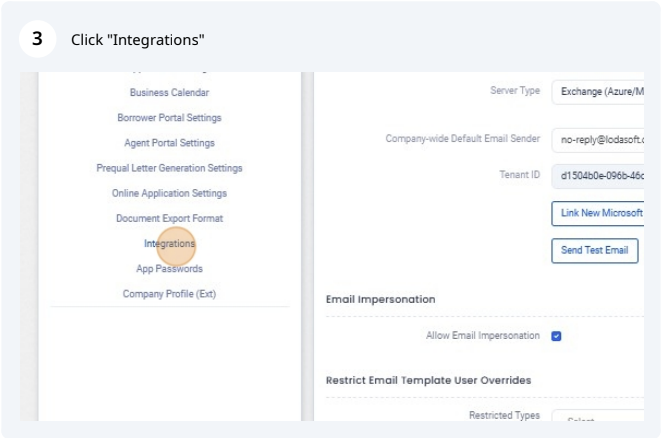
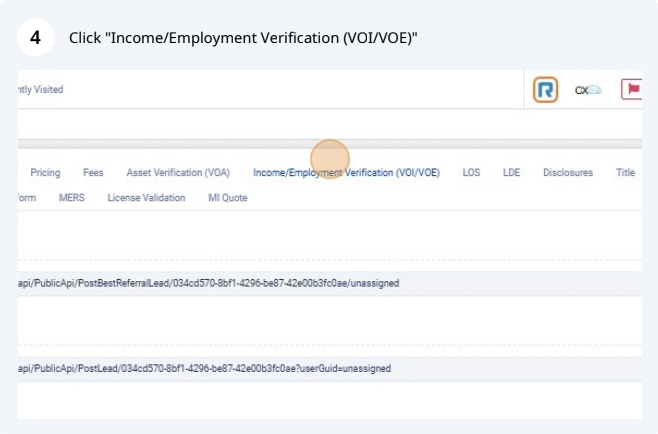
**Step 3:** Go to **Integrations → Income/Employment Verification (VOI/VOE)** tab.
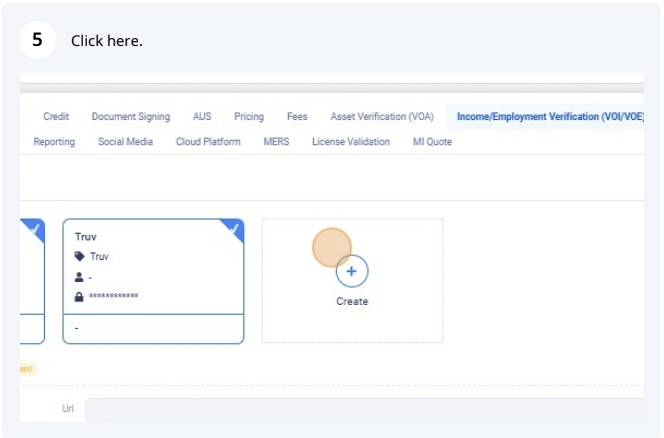
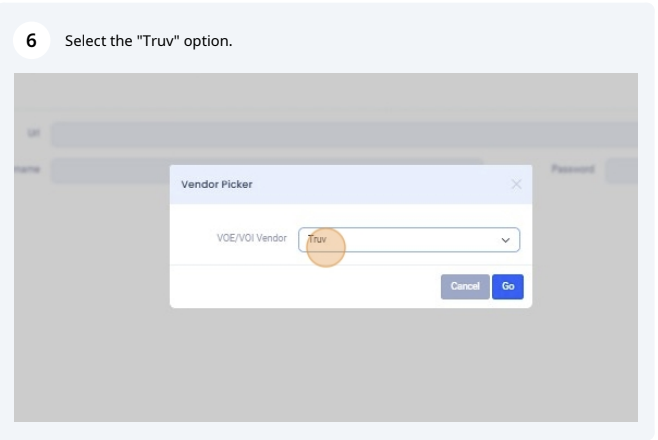
**Step 4:** Select **Create New** and choose **Truv** from the vendor dropdown.
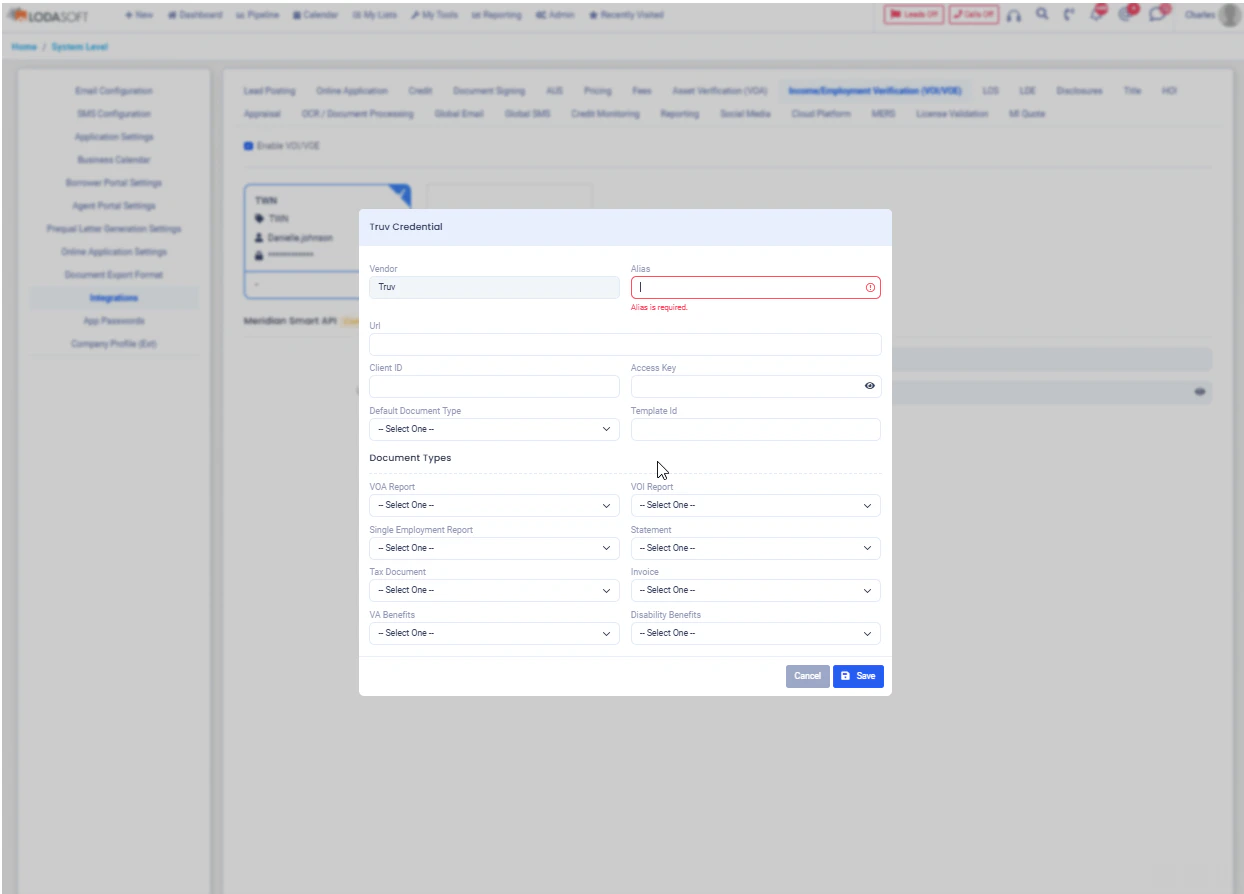
**Step 5:** Enter your Truv credentials and Template ID:
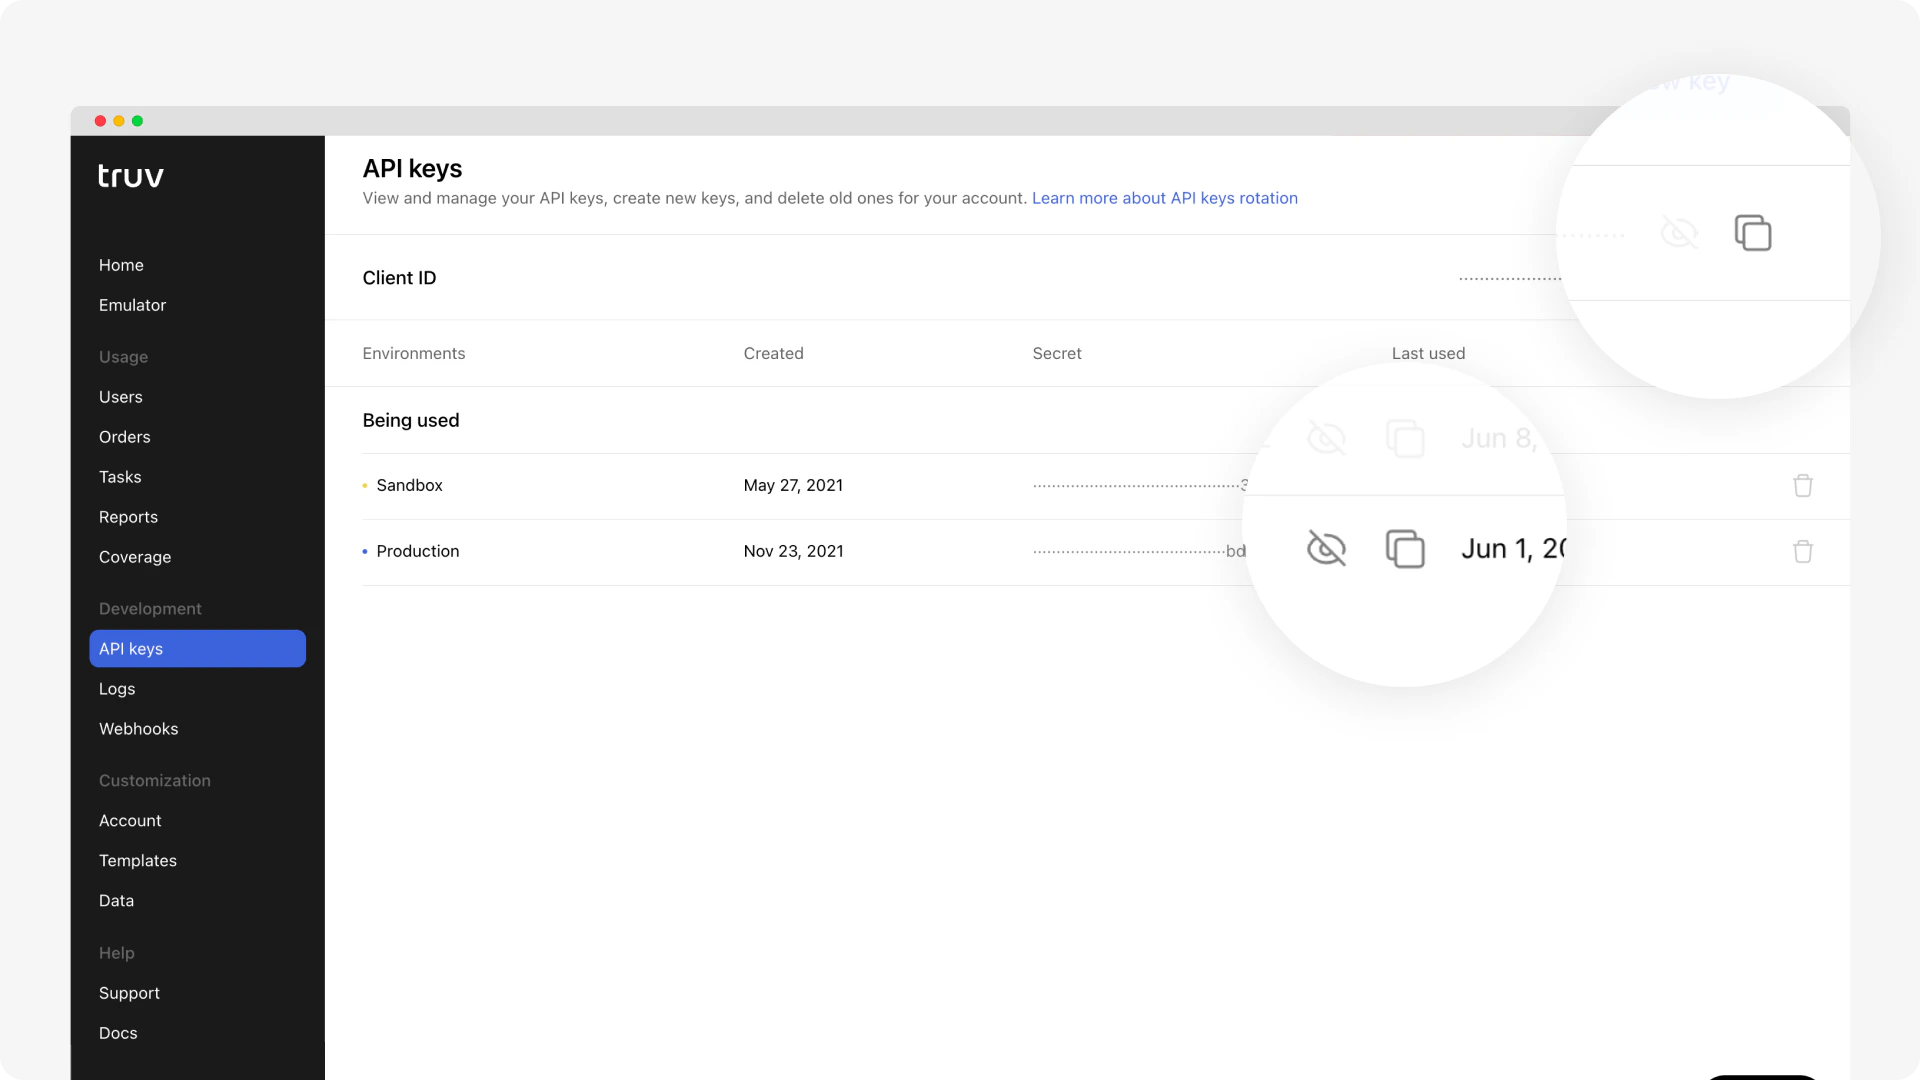
* Copy your **Client ID** and **Access Secret** from the [Truv Dashboard](https://dashboard.truv.com/app/home)
* In Lodasoft, navigate to **Admin → System Level → Integrations → Income/Employment Verification**
* Paste your **Client ID** and **Access Key**, then click **Save**
* Add your Truv Template ID to the Template ID field
 **Step 6:** Configure webhooks in the Truv Dashboard:
* Navigate to **Settings → Webhooks**
* Add webhook URL: `https://publicapi.lodasoft.com/api/truv/receive-event`
* Enable for both **Sandbox** and **Production** environments
* Select **all Events**
**Step 7:** Test the full borrower flow in **sandbox mode** using Truv's test credentials.
**Step 8:** Obtain production access and complete end-to-end setup with DU (Desktop Underwriter) and LPA (Loan Product Advisor) systems.
**Step 9:** Go live. Your operations team is ready to verify income and employment within Lodasoft.
***
## Next steps
View all POS integration options
Test your integration in sandbox
***
## Support
[support@truv.com](mailto:support@truv.com)
All supported POS systems
**Step 6:** Configure webhooks in the Truv Dashboard:
* Navigate to **Settings → Webhooks**
* Add webhook URL: `https://publicapi.lodasoft.com/api/truv/receive-event`
* Enable for both **Sandbox** and **Production** environments
* Select **all Events**


**Step 7:** Test the full borrower flow in **sandbox mode** using Truv's test credentials.
**Step 8:** Obtain production access and complete end-to-end setup with DU (Desktop Underwriter) and LPA (Loan Product Advisor) systems.
**Step 9:** Go live. Your operations team is ready to verify income and employment within Lodasoft.
***
## Next steps
View all POS integration options
Test your integration in sandbox
***
## Support
[support@truv.com](mailto:support@truv.com)
All supported POS systems