> ## Documentation Index
> Fetch the complete documentation index at: https://docs.truv.com/llms.txt
> Use this file to discover all available pages before exploring further.
# TPO Connect
> Set up Truv in Encompass TPO Connect for broker, wholesale, and correspondent channels
Truv Verification of Assets, Income, and Employment can be enabled in Encompass TPO Connect, allowing broker, wholesale, and correspondent channels to order Truv verifications before submitting the loan to Encompass LOS. Once a loan is submitted, all verification data and files are automatically transmitted to Encompass LOS.
If using Truv in both Encompass TPO Connect and Encompass LOS, set up and test LOS first. See the [Encompass LOS Setup Guide](/mortgage/integration/ice-encompass/setup).
***
## One-Time Setup Guide
Follow these four steps to configure Truv in Encompass TPO Connect.
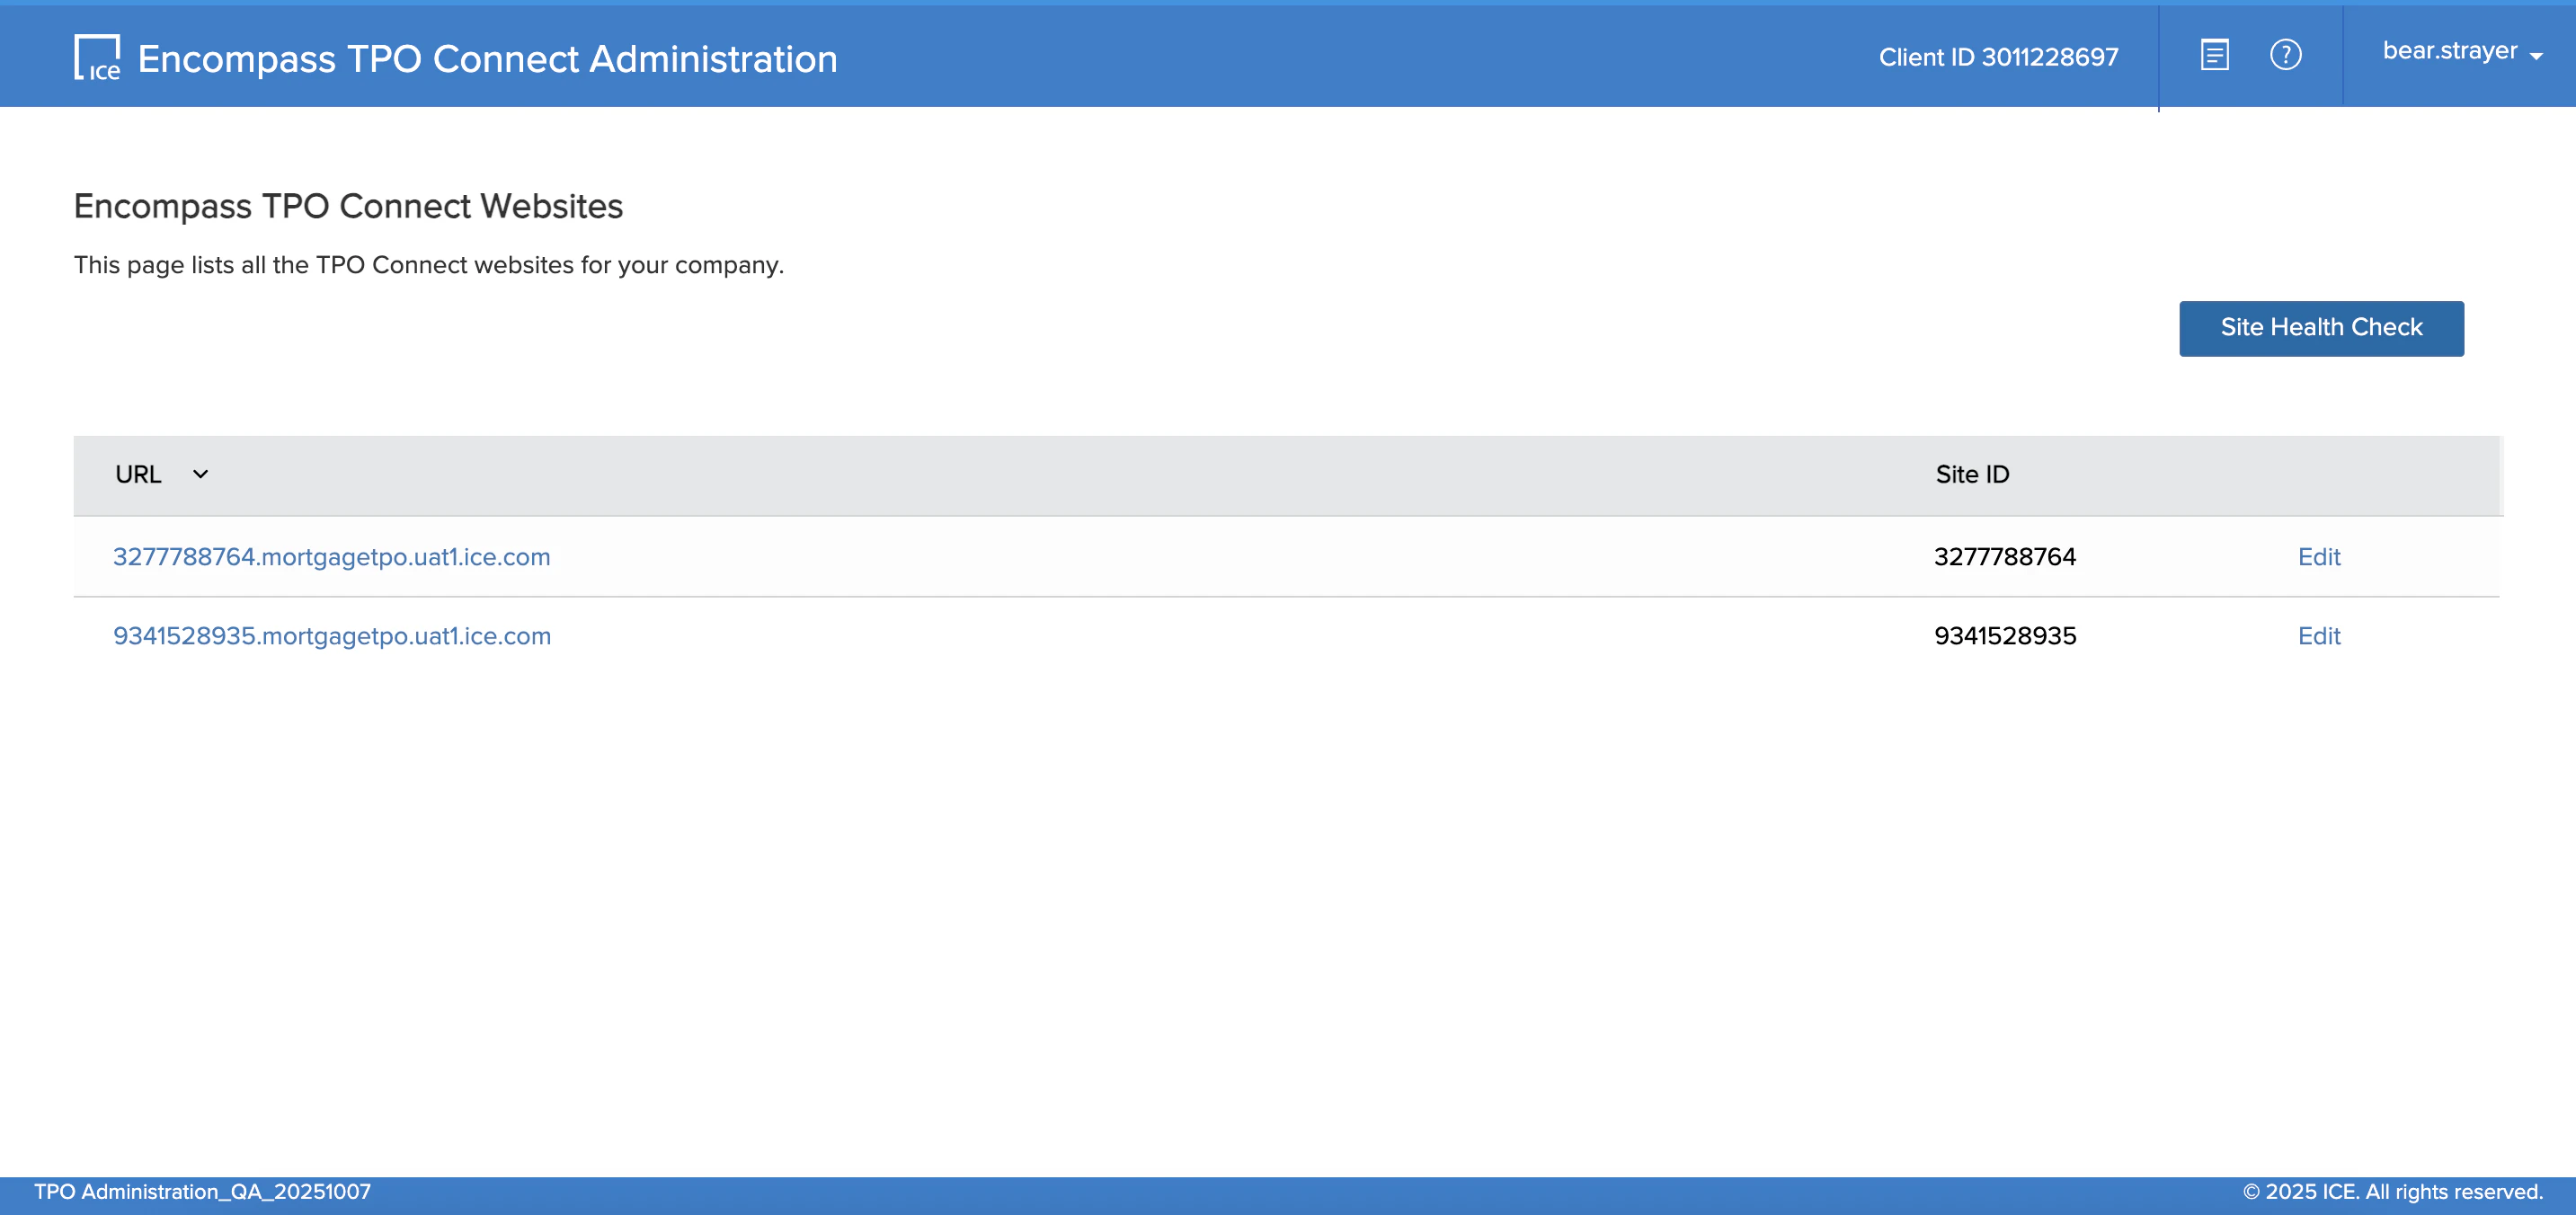
**Step 1:** Open Encompass TPO Connect Admin at [beta.tpo.ellielabs.com/tpoadmin](https://beta.tpo.ellielabs.com/tpoadmin/#/home). Enter your Instance ID and log in as an administrator. Find your TPO Connect website URL and click **Edit**.
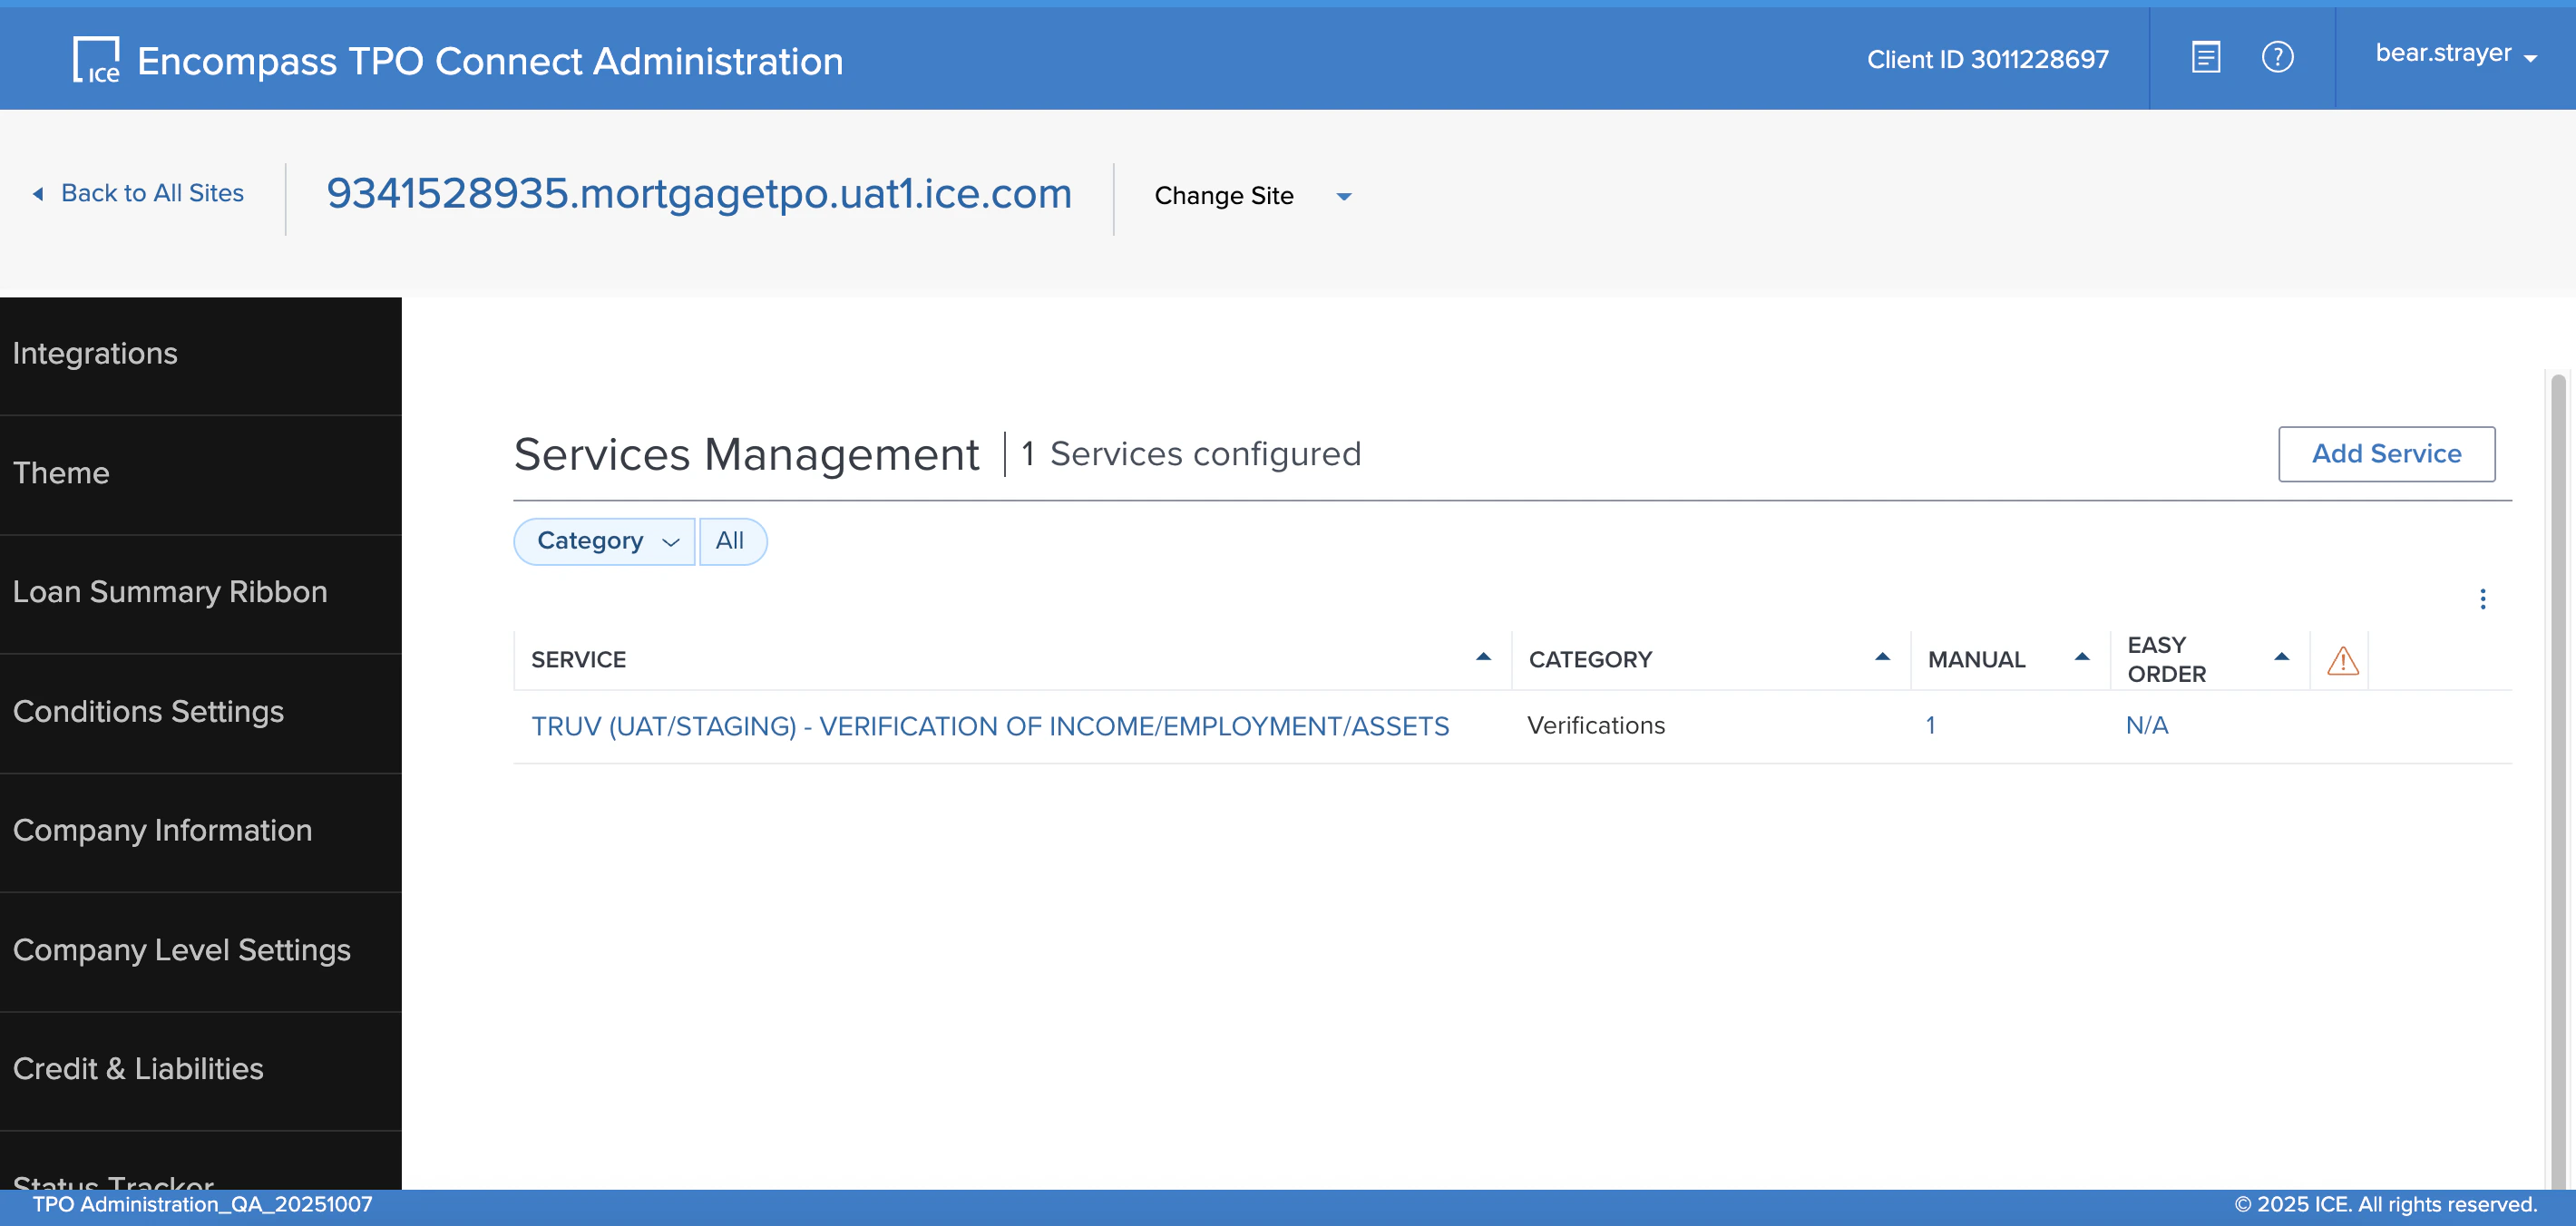
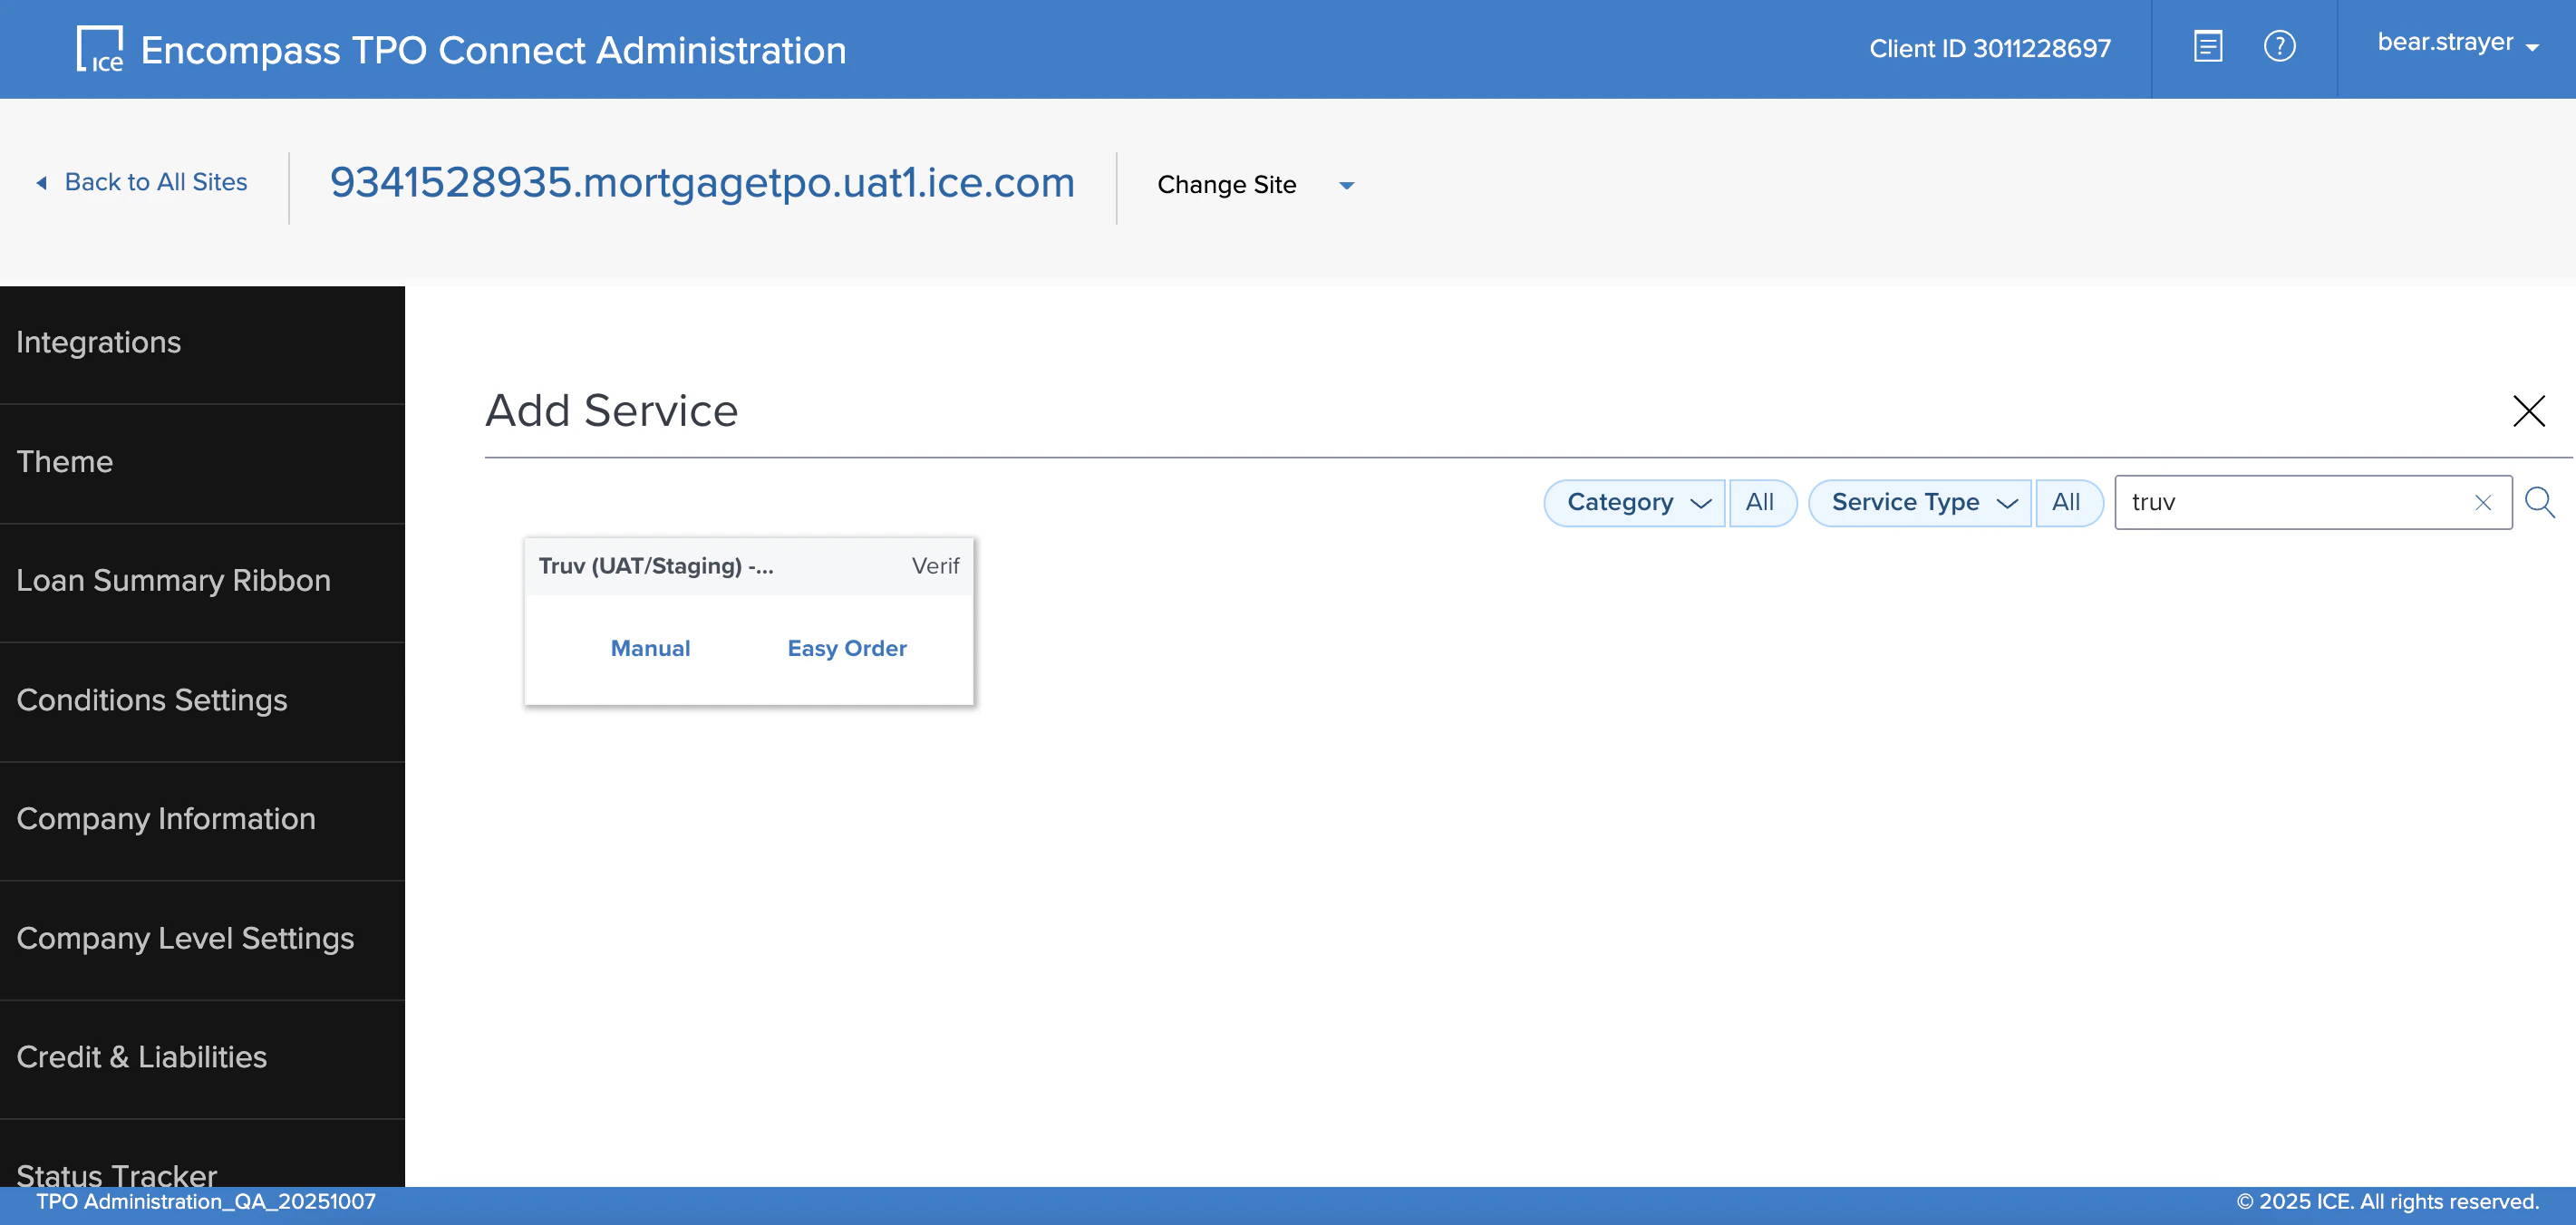
Scroll down and select **Services Management** from the left sidebar. Click **Add Service**, search for "Truv", and select the **Manual** option.
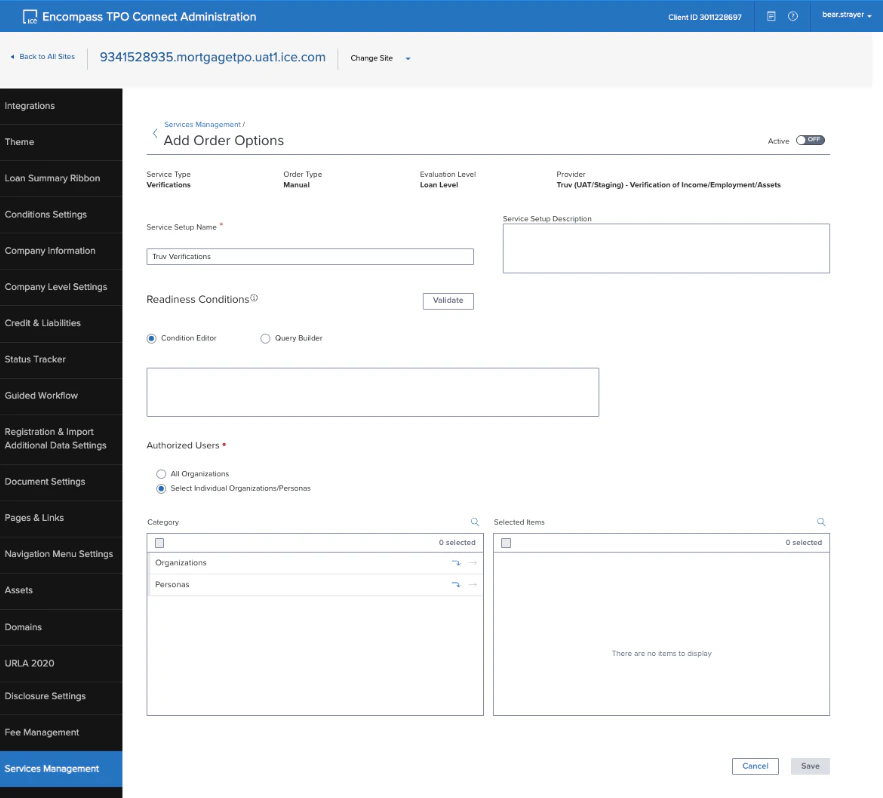
On the **Add Order Options** page:
* Add a **Service Setup Name**
* (Optional) Configure **Authorized Users** at the Organization or Persona level, or leave **All Organizations** selected
Click **Save**. You should now see "Truv - VERIFICATION OF INCOME/EMPLOYMENT/ASSETS" in the Services Management table.
 **Step 2:** Visit the [Truv Dashboard](https://dashboard.truv.com/app/home) as an Owner, Admin, or Developer. Select the **API Keys** tab and copy the credential values using the **Copy** icon.
If using both Encompass TPO Connect and Encompass LOS, enter the same API Keys into both platforms so Truv data flows automatically when loans are submitted from TPO Connect to LOS.
Truv provides **sandbox** and **production** environments, each with its own Access Secret. Use sandbox to check structure and get sample data. Confirm your configurations in sandbox before moving to production.
**Step 2:** Visit the [Truv Dashboard](https://dashboard.truv.com/app/home) as an Owner, Admin, or Developer. Select the **API Keys** tab and copy the credential values using the **Copy** icon.
If using both Encompass TPO Connect and Encompass LOS, enter the same API Keys into both platforms so Truv data flows automatically when loans are submitted from TPO Connect to LOS.
Truv provides **sandbox** and **production** environments, each with its own Access Secret. Use sandbox to check structure and get sample data. Confirm your configurations in sandbox before moving to production.
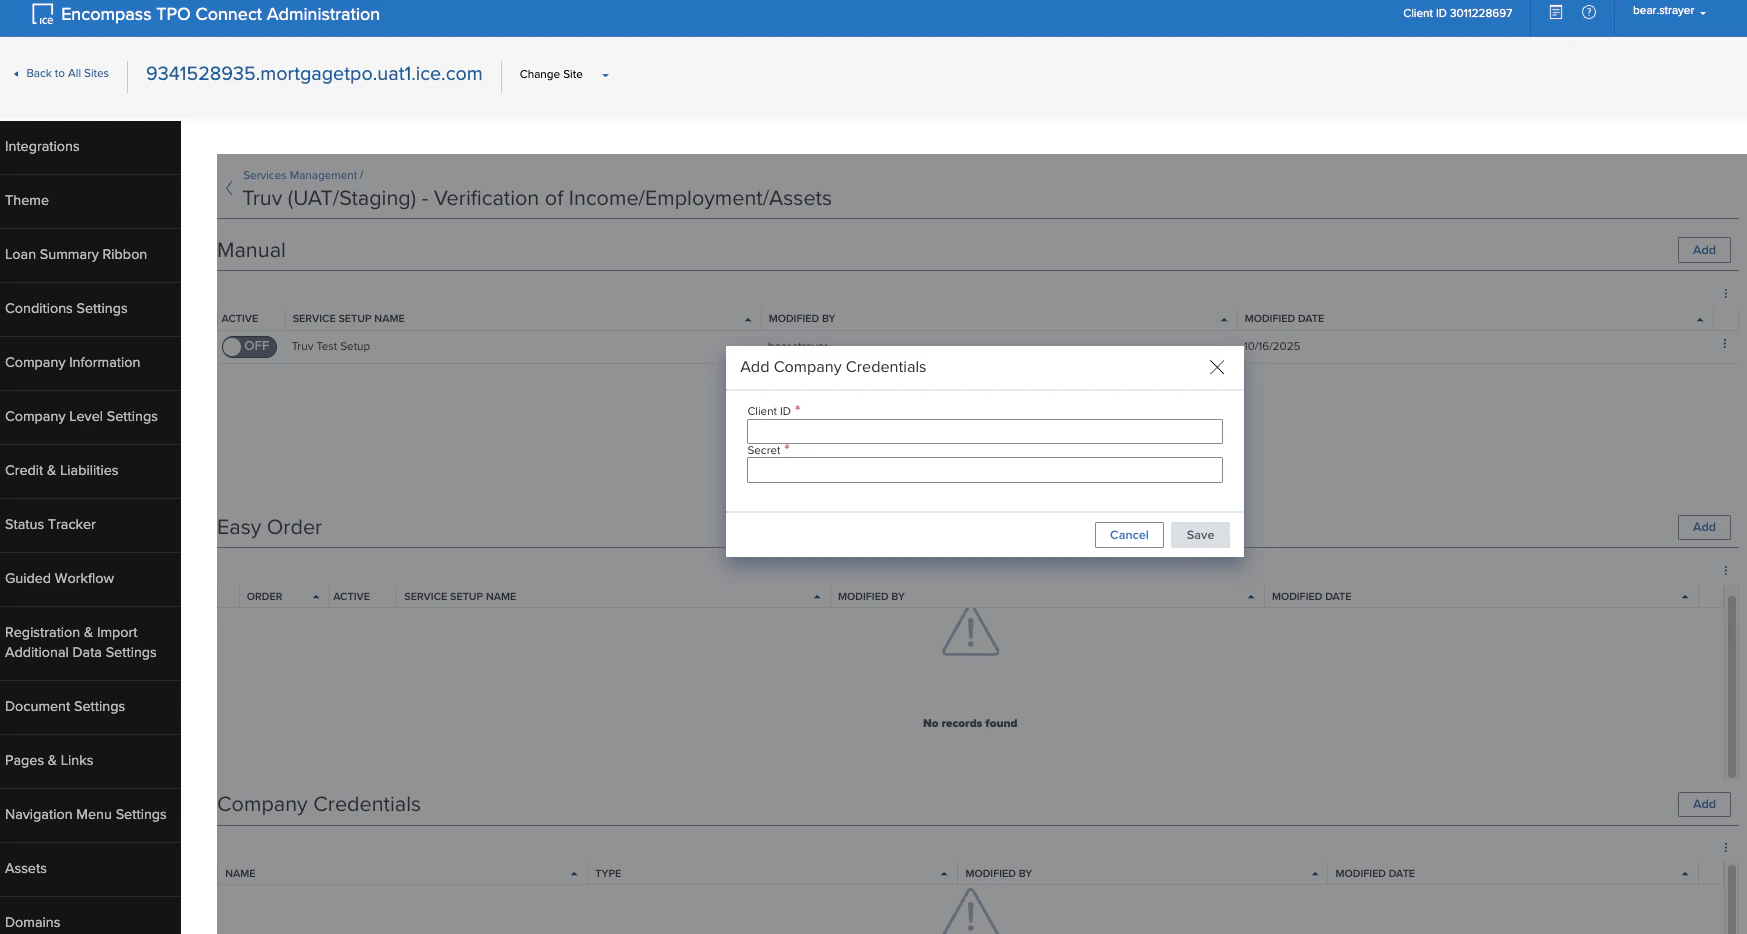
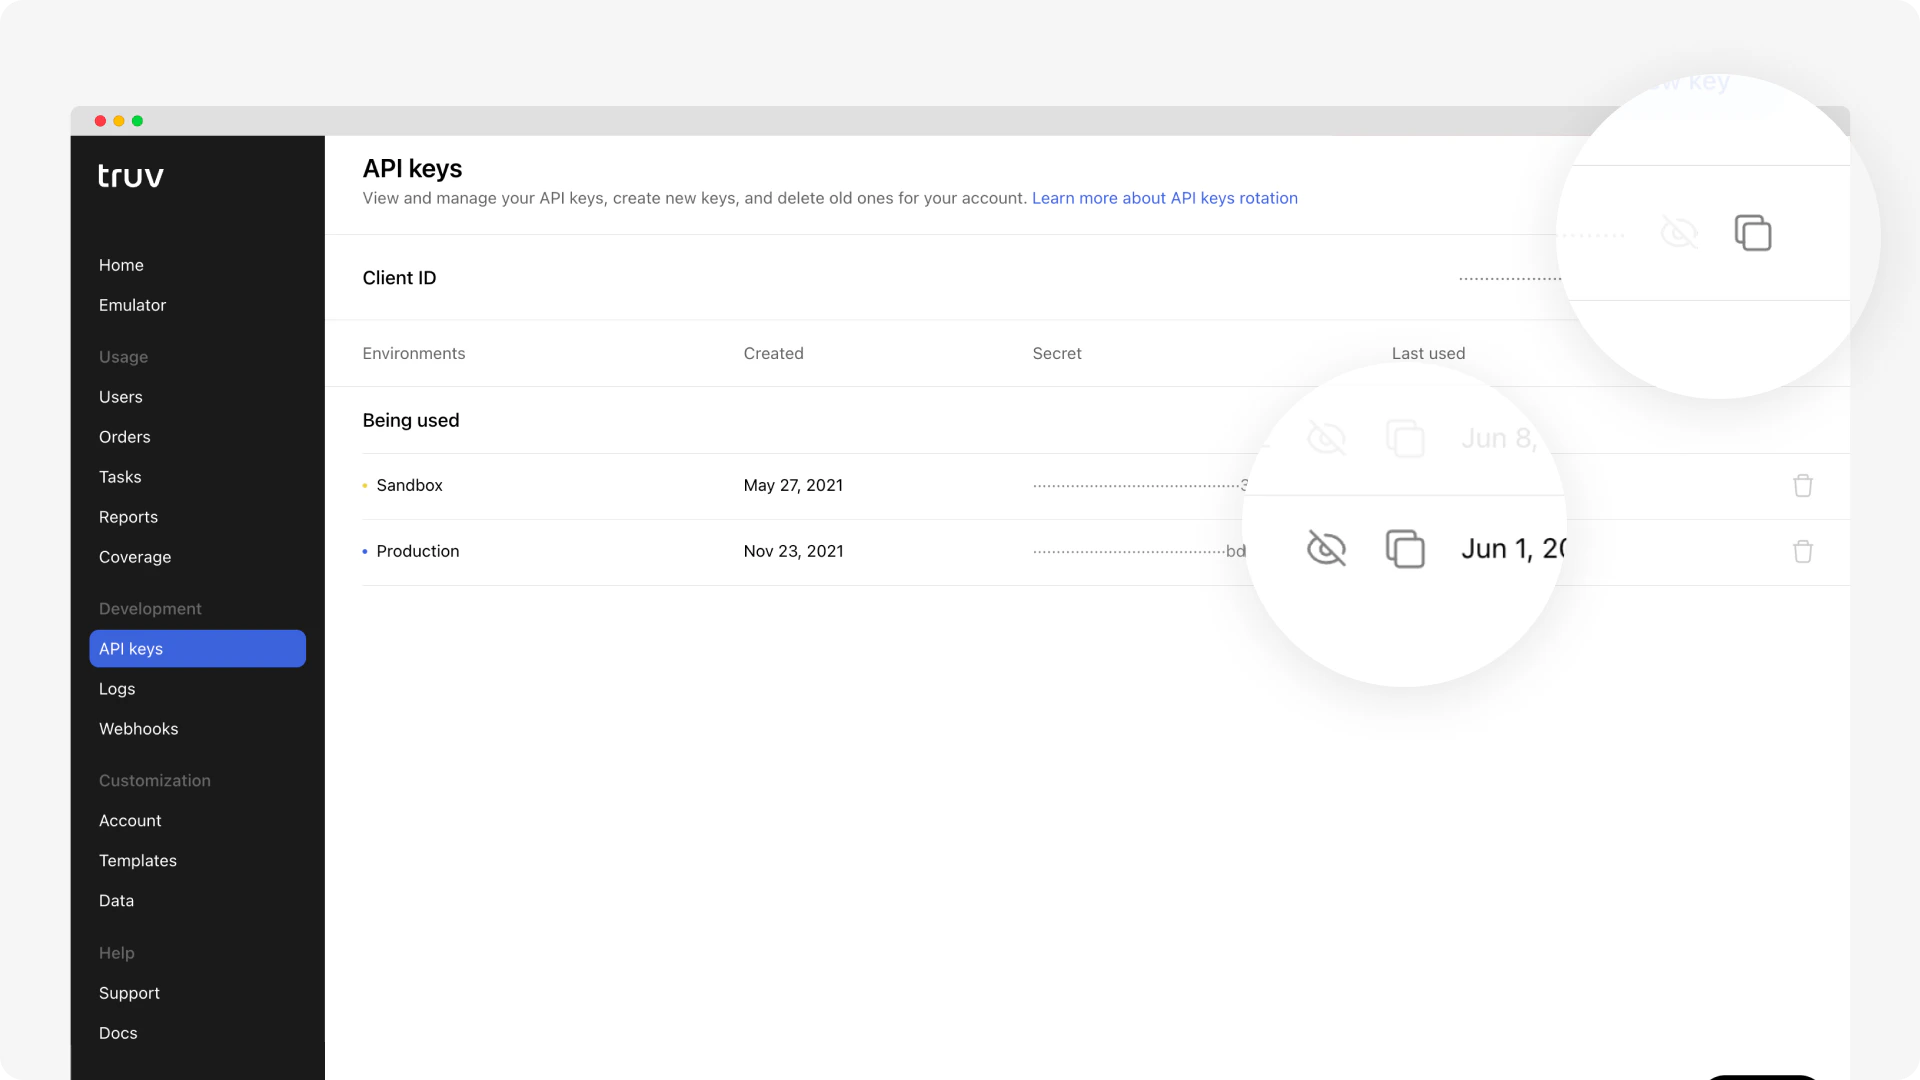 **Step 3:** From the **Services Management** page, scroll to the **Company Credentials** section and click **Add**. In the **Add Company Credentials** pop-up, paste the **Client ID** and **Secret** from the Truv Dashboard. Press **Save**.
 **Step 4:** After saving credentials, toggle the **Active** switch to "ON" to enable Truv as a Service Order option for loan files in TPO Connect.
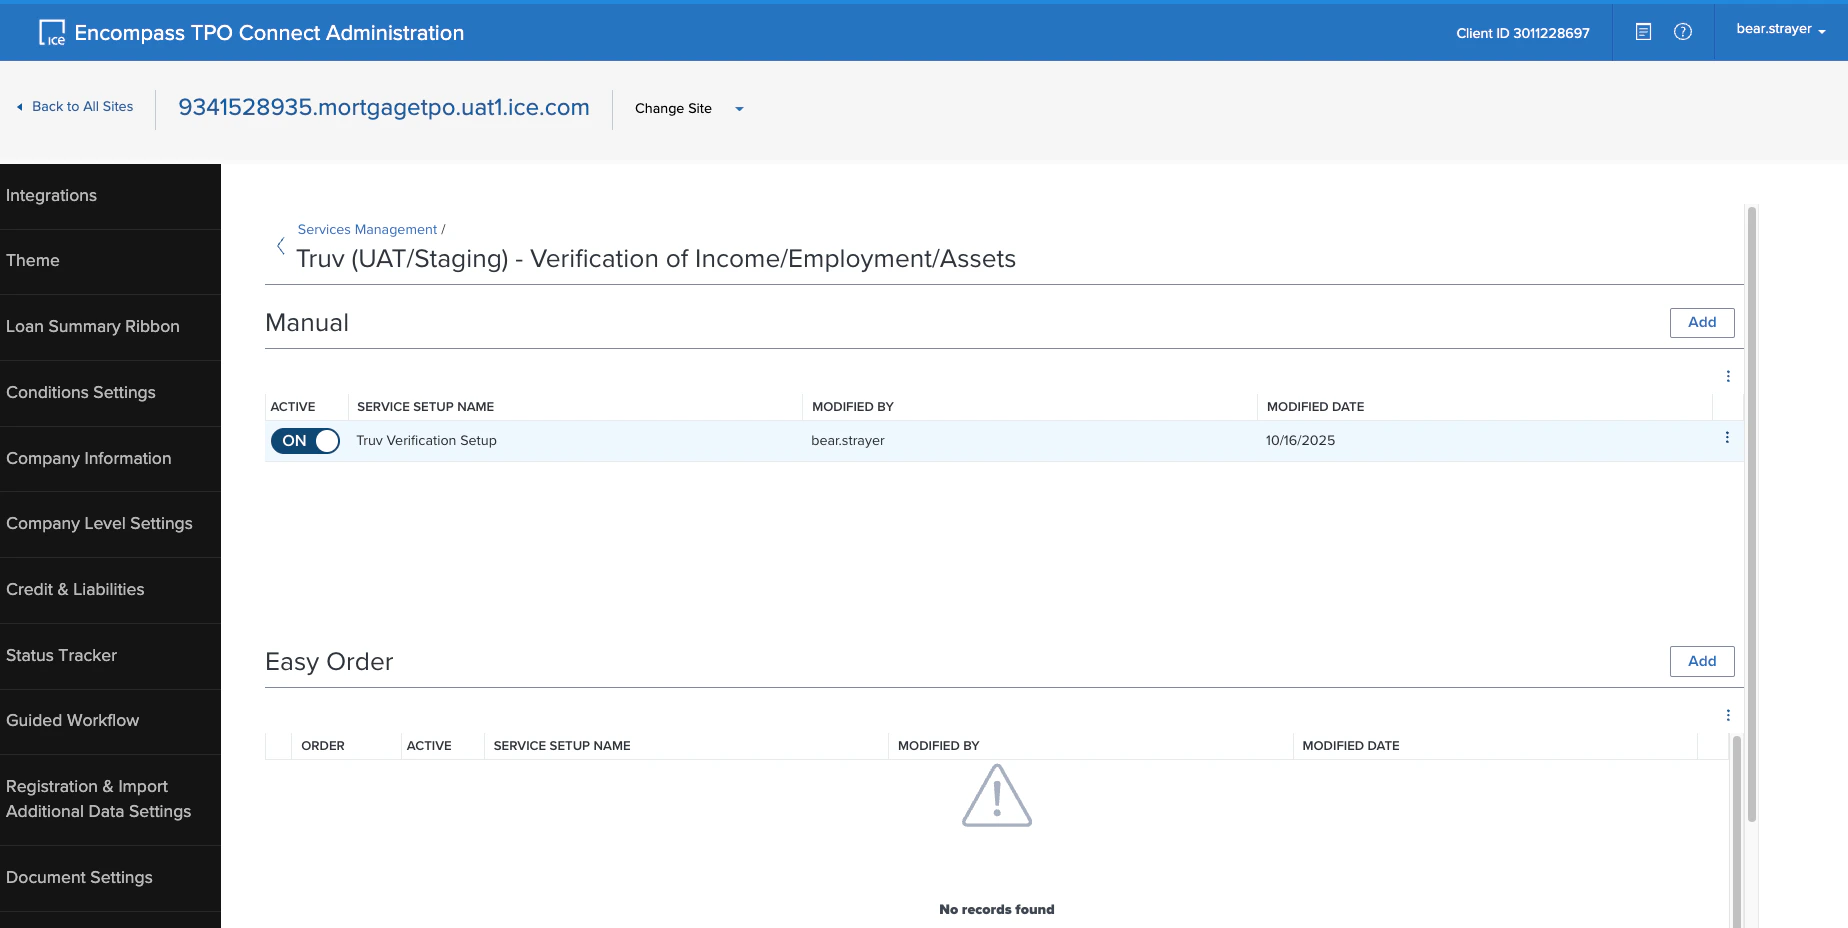 Truv is now activated for Encompass TPO Connect.
***
## Next steps
One-time Encompass LOS configuration
Manual ordering for VOIE, VOE, VOA, and Income and Assets
Personalize borrower-facing notifications with the loan officer's name
[support@truv.com](mailto:support@truv.com)
Truv is now activated for Encompass TPO Connect.
***
## Next steps
One-time Encompass LOS configuration
Manual ordering for VOIE, VOE, VOA, and Income and Assets
Personalize borrower-facing notifications with the loan officer's name
[support@truv.com](mailto:support@truv.com)