> ## Documentation Index
> Fetch the complete documentation index at: https://docs.truv.com/llms.txt
> Use this file to discover all available pages before exploring further.
# Encompass LOS Setup Guide
> Setup Truv within ICE Encompass® (SmartClient/Desktop and web editions)
Truv helps loan officers and processors submit income and employment verification requests on behalf of borrowers. With the Encompass® integration, customers retrieve and refresh aggregate reports and store them in the Encompass® eFolder during the mortgage loan origination process.
***
## Encompass LOS Setup Guide
The steps below cover each part of setting Truv up with Encompass® using administrator privileges.
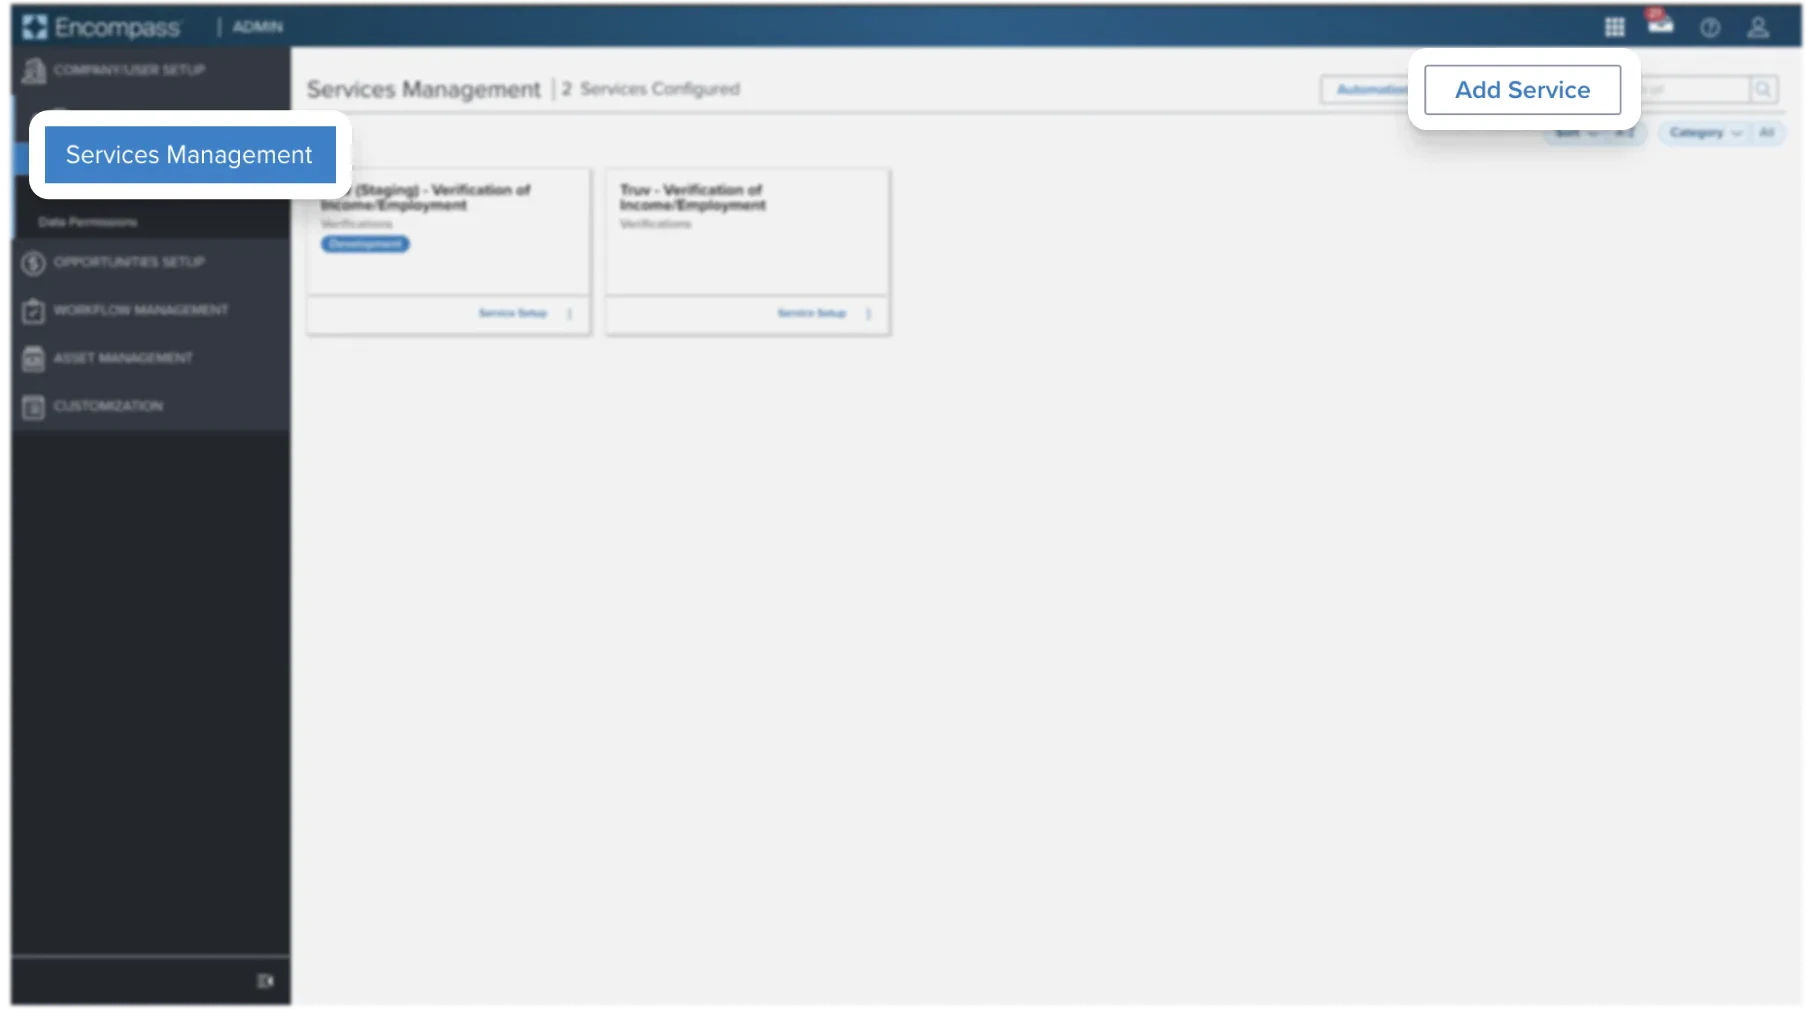
**Step 1:** Log into Encompass® as an administrator using [Encompass® Web](https://encompassloconnect.com/admin). Navigate to the **Admin** tab at the top of the screen, select **Services** on the left navigation. Select **Services Management** and then **Add Service** on the right.
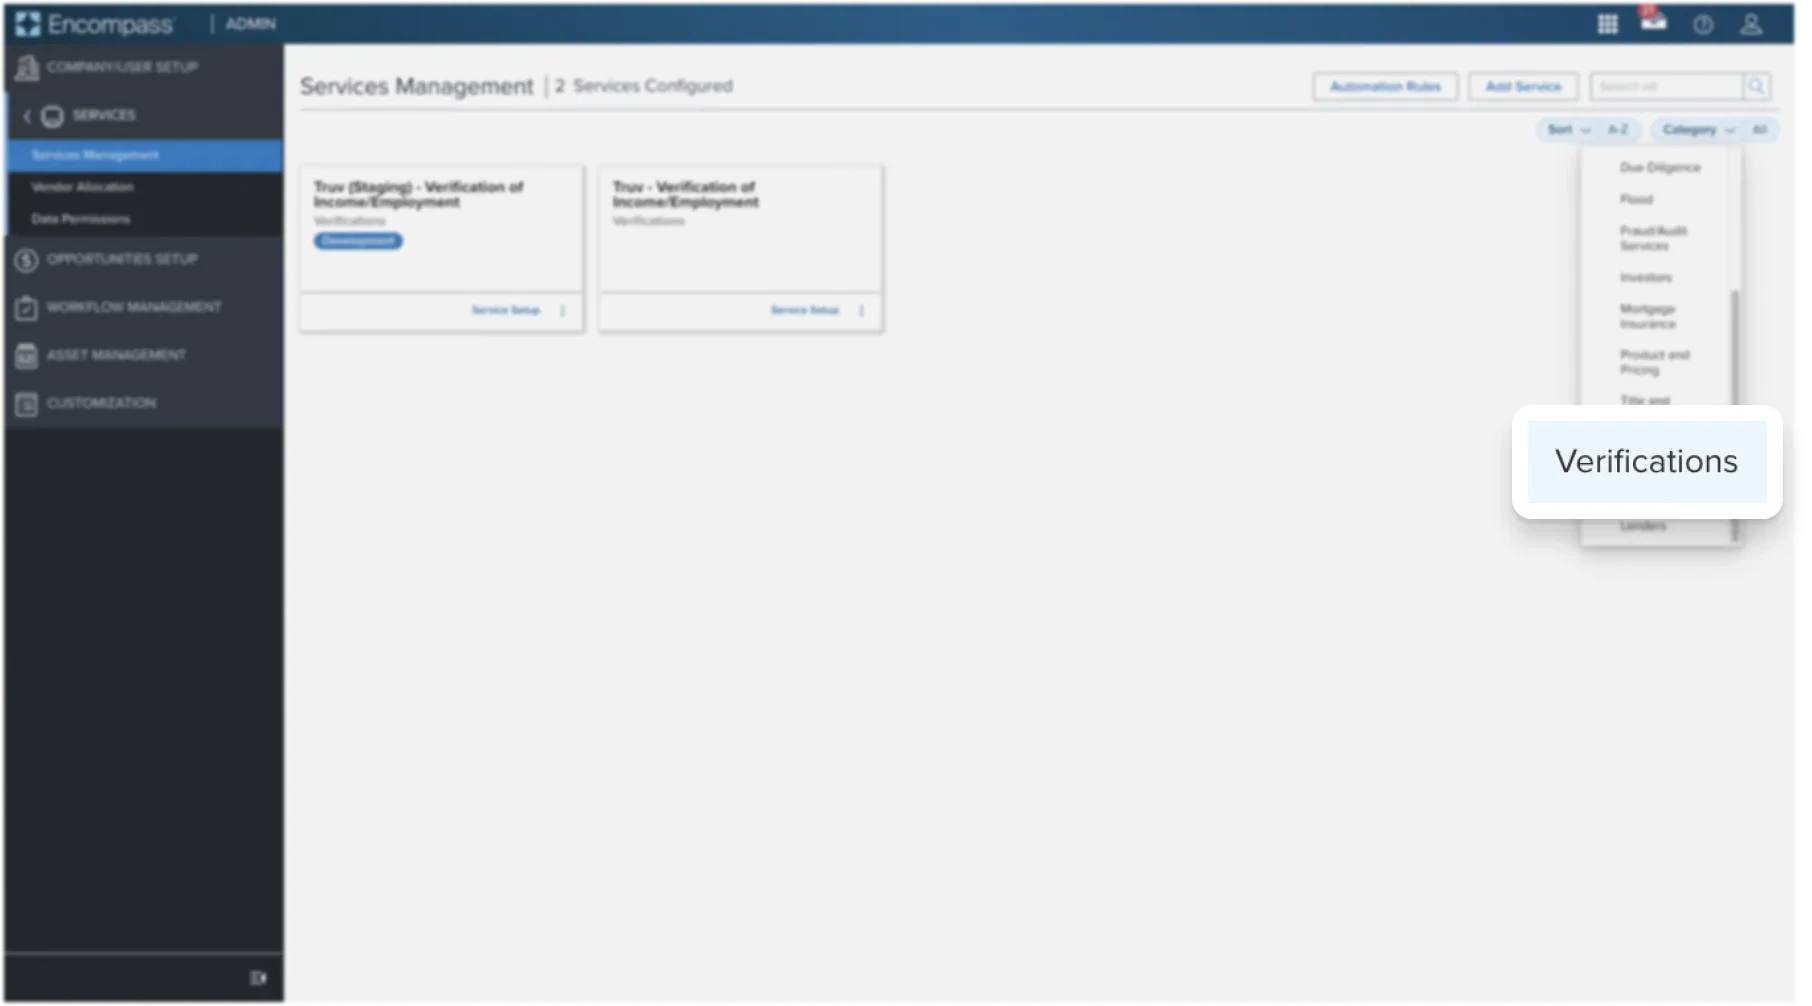
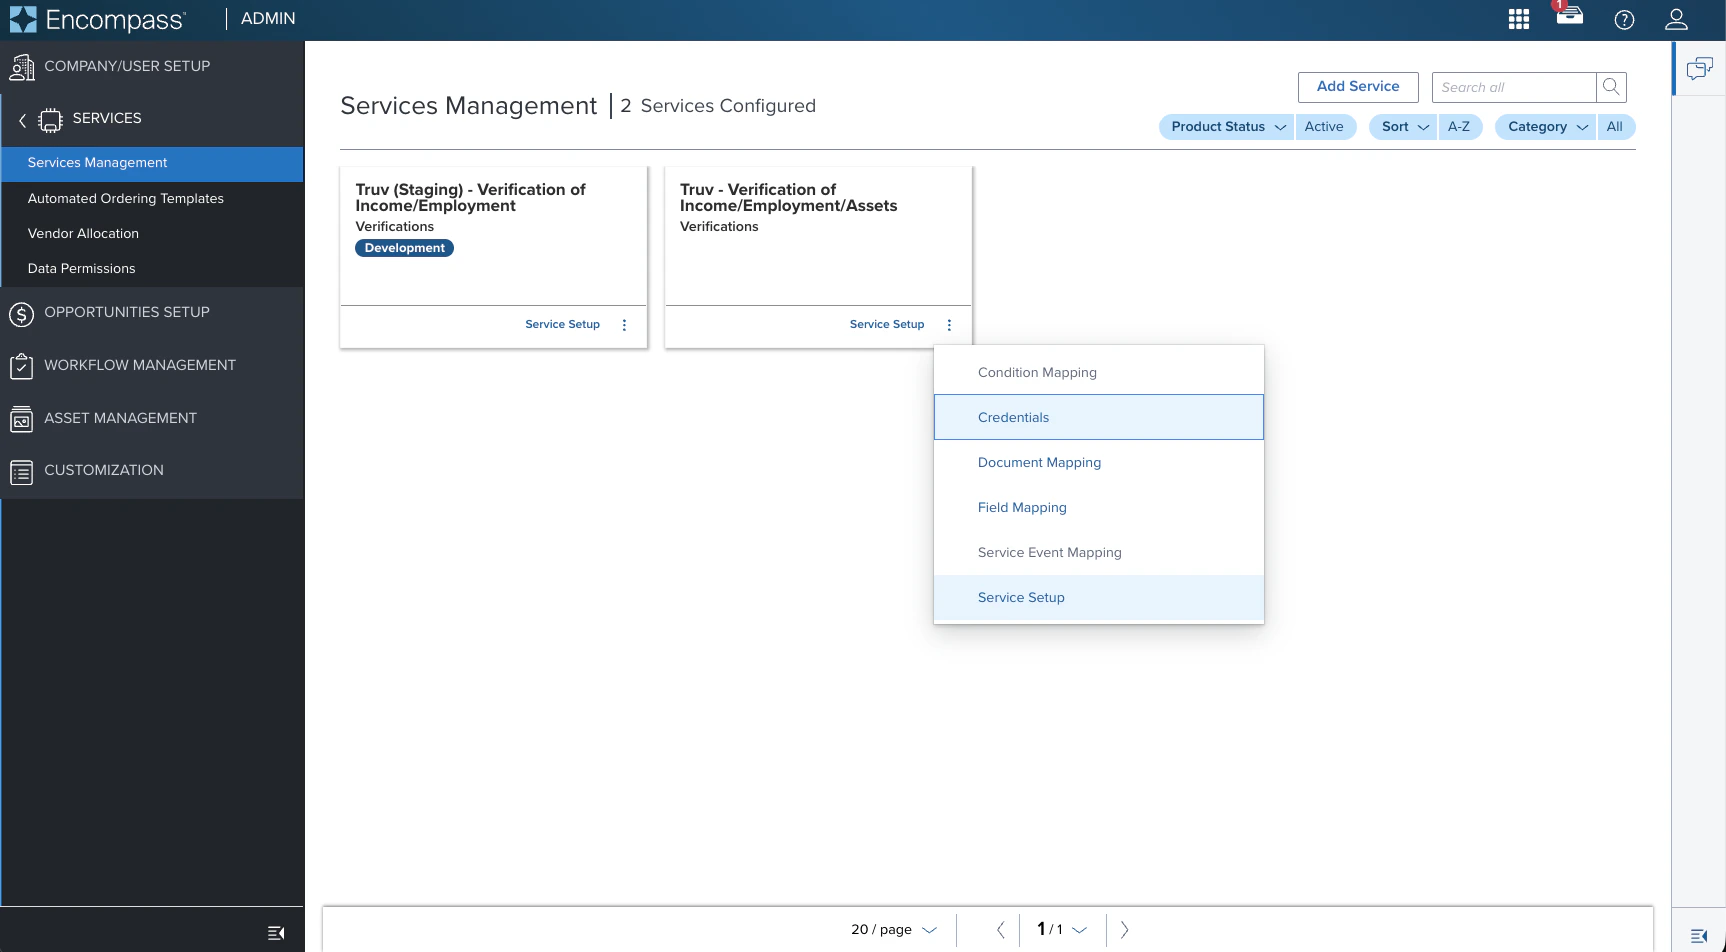
**Step 2:** Select **Verifications** in the **Category** dropdown on the right. Select the **Truv** tile to add it to the Service page. Then select **Credentials**.
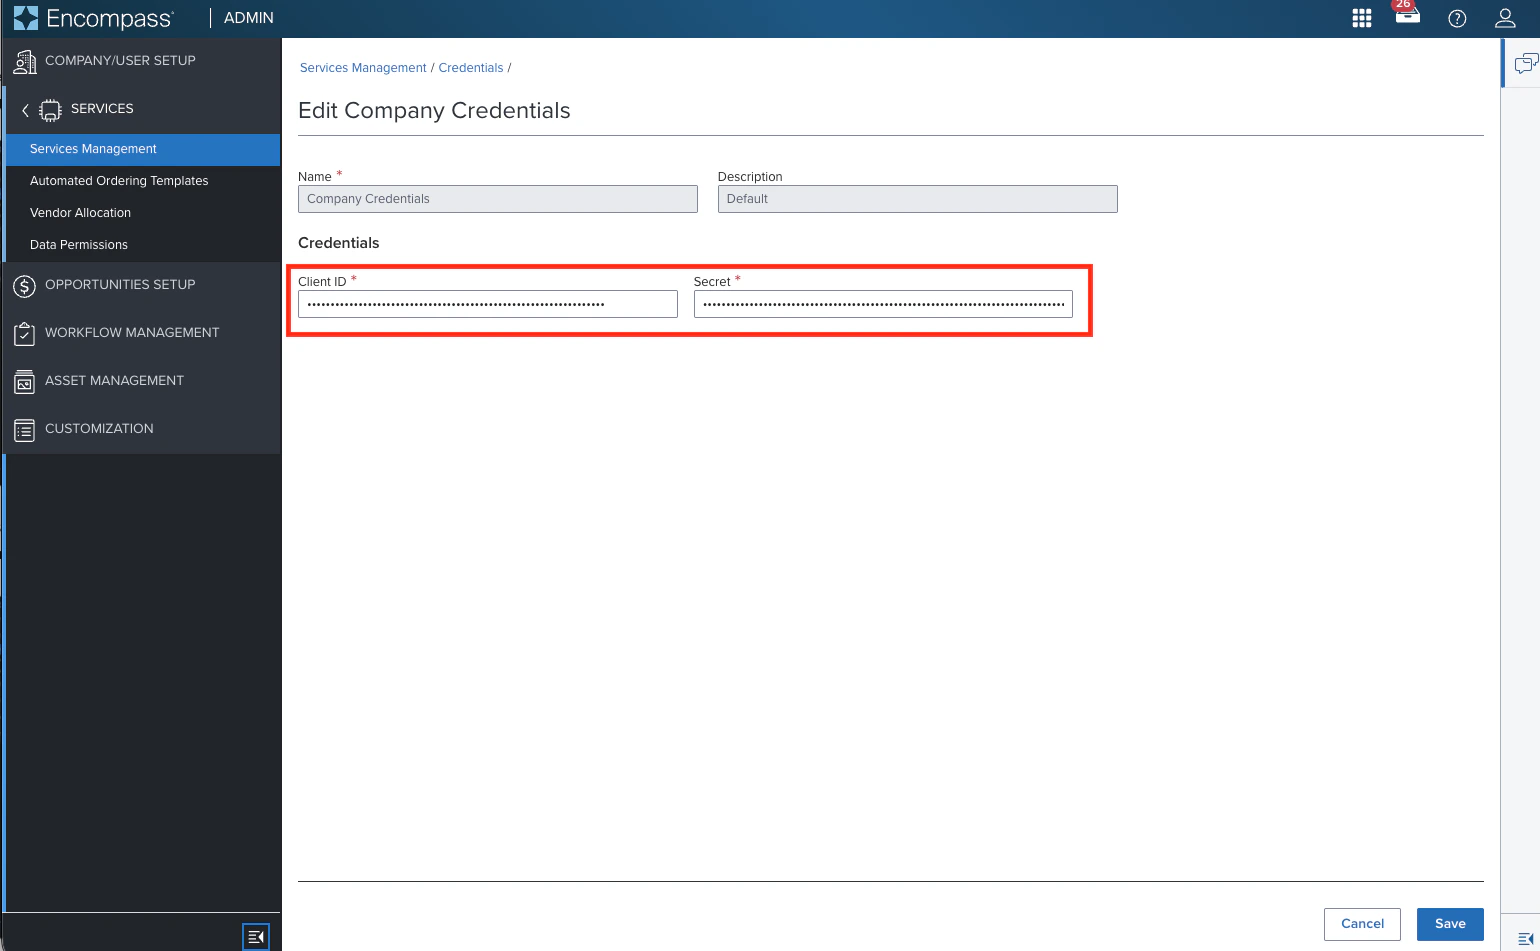
**Step 3:** On the company credentials page.
* Select **Add** under **Company Credentials**.
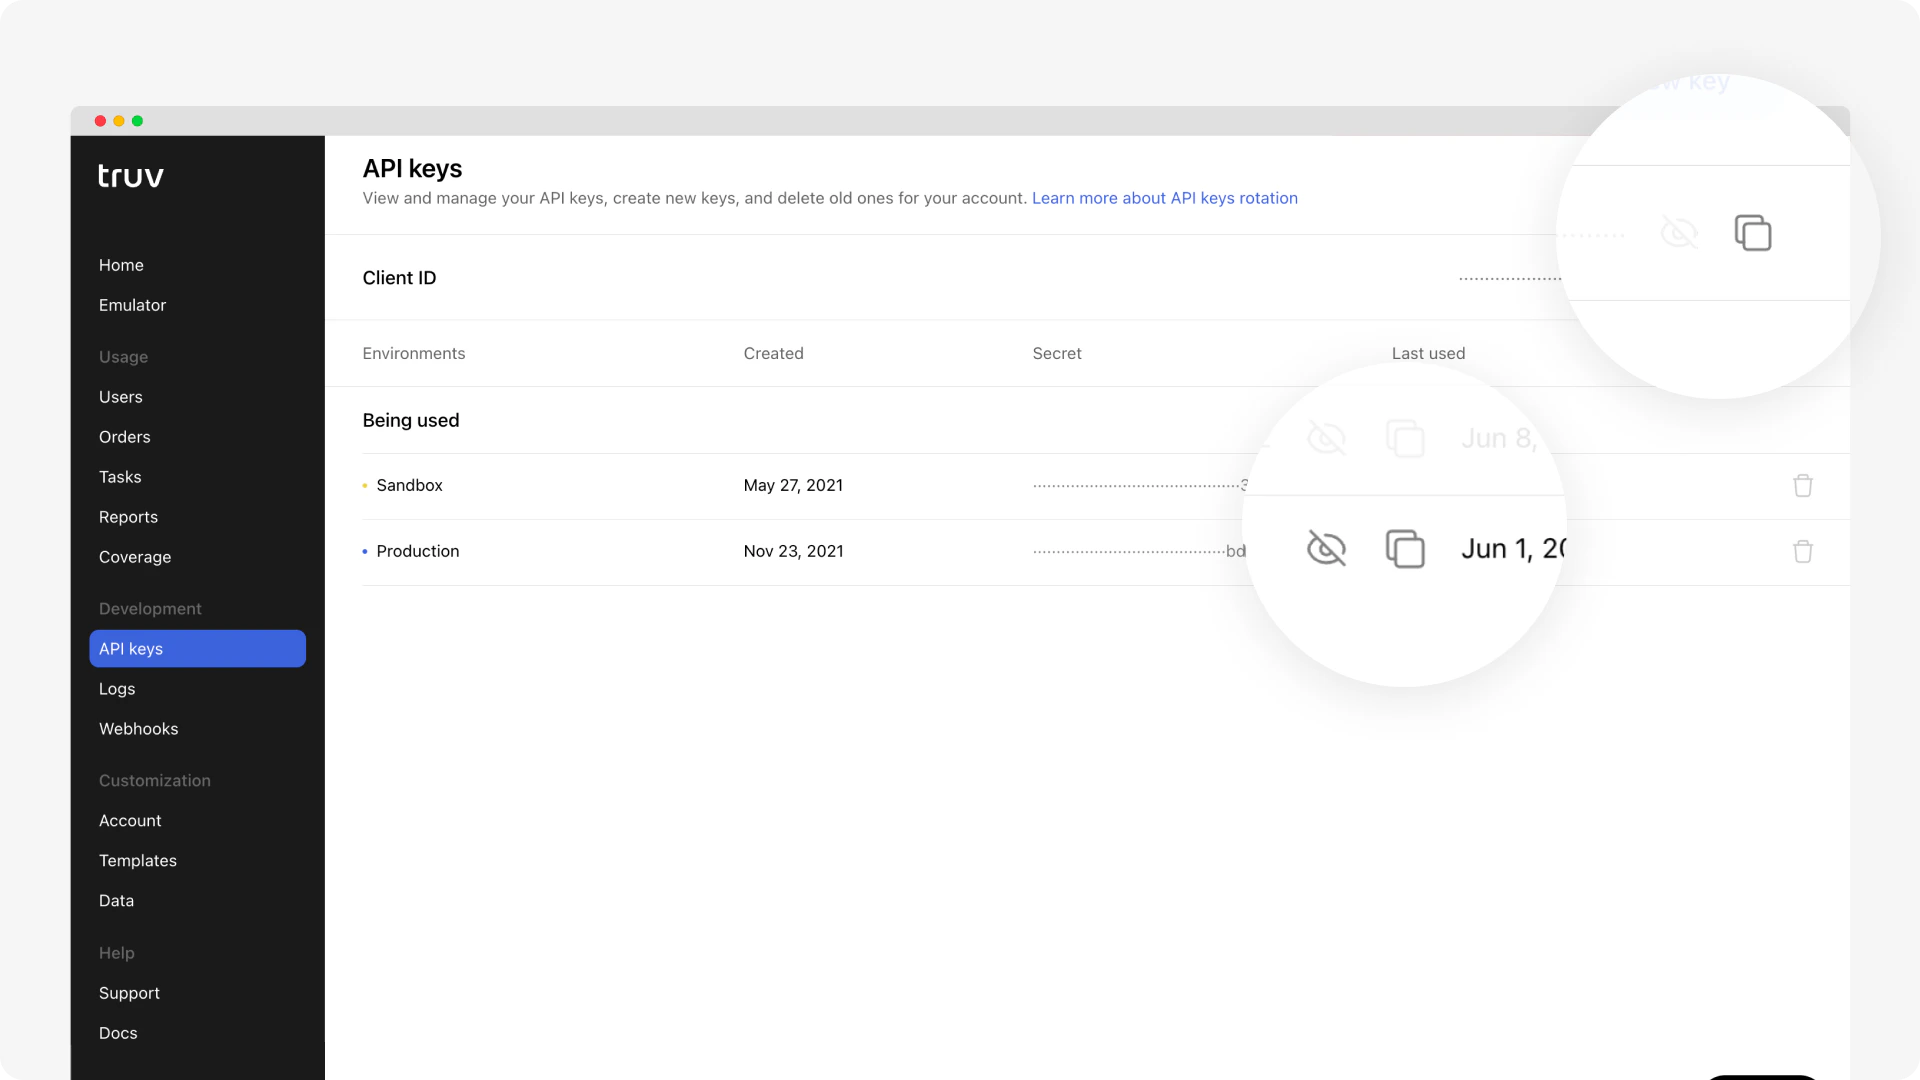
* Copy and paste the Client ID and Production API Key Secret from your Truv Dashboard → **API Keys** tab into the corresponding fields in Encompass.
* Repeat this step to add an Automation Credential using default Company Credentials. This will ensure any automation workflows function smoothly.
Truv provides **sandbox** and **production** environments, each with its own Access Secret. Use sandbox to check structure and get sample data. Confirm your configurations in sandbox before moving to production.
**Step 4:** Return to the **Services Management** page and click the three dots on the Truv tile to open the options:
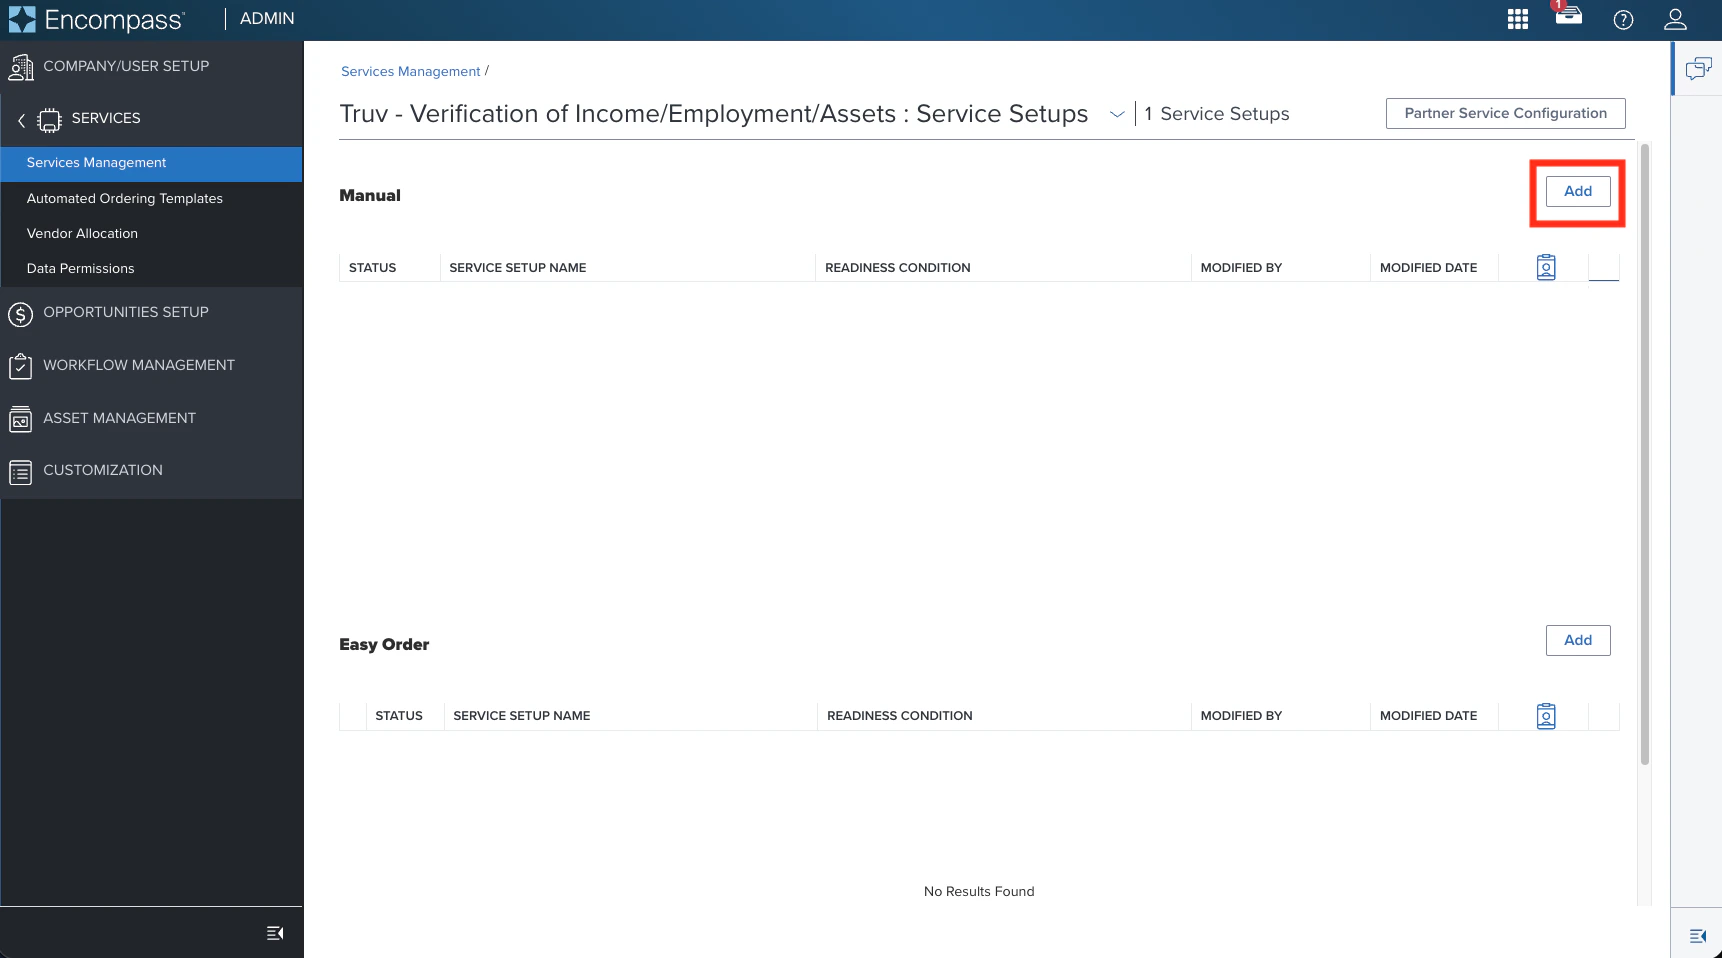
* Select **Service Setups** in the options. On the next page click **Add** on the Manual option.
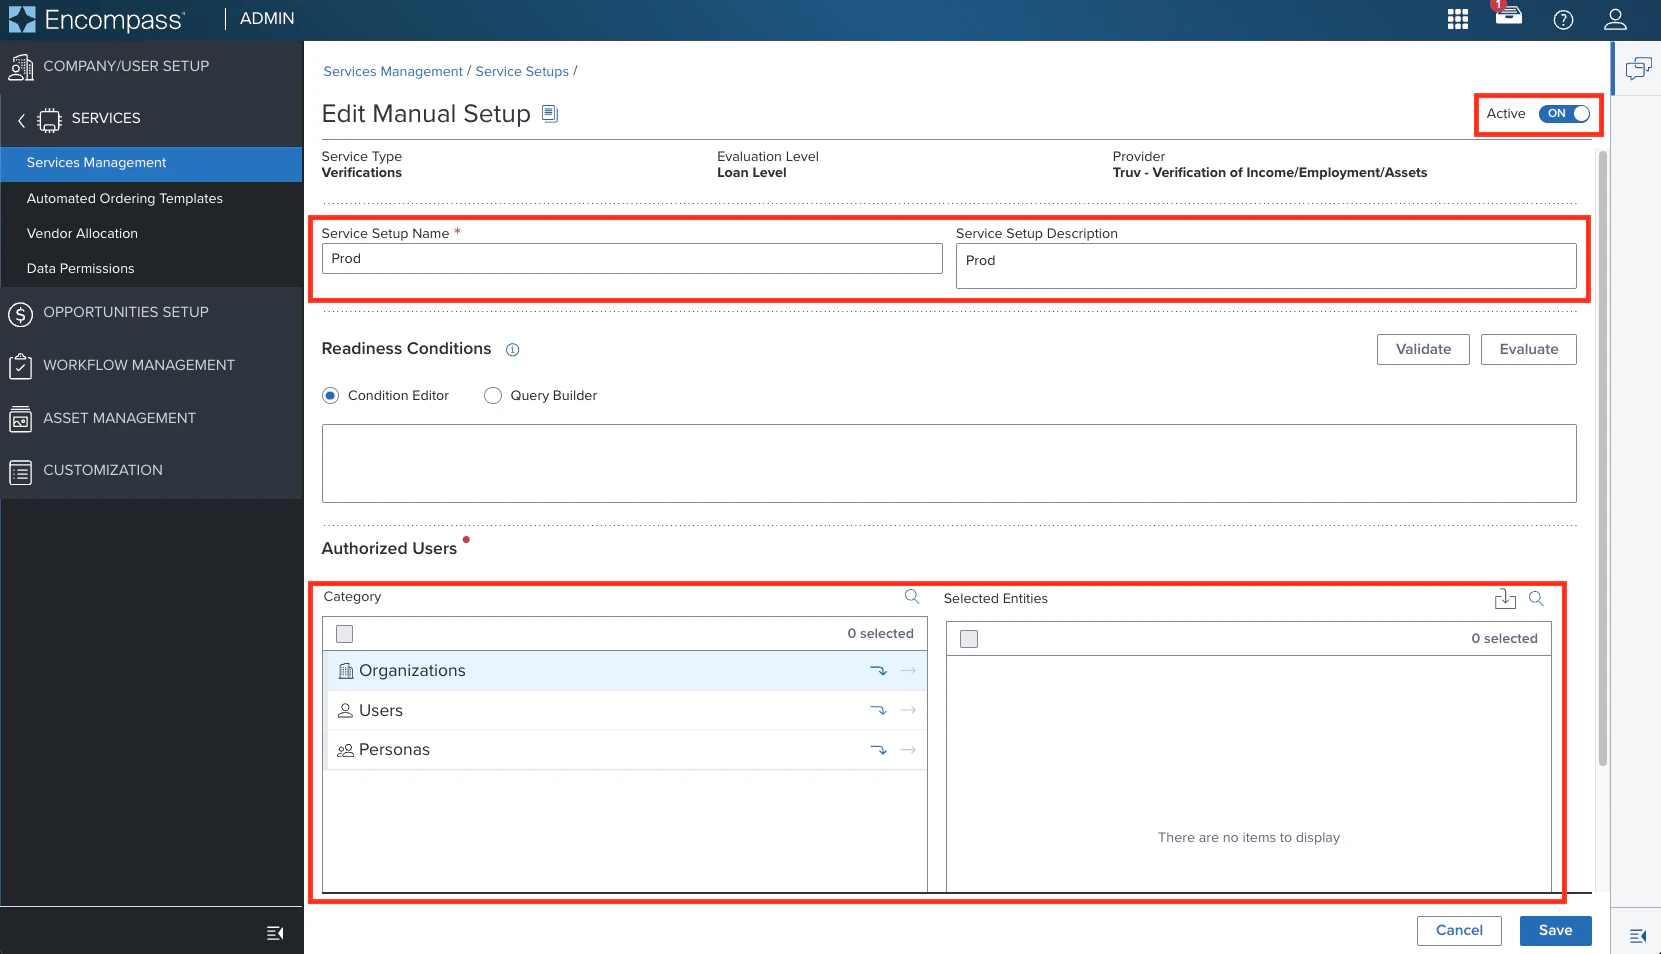
* Add a **Service Setup Name**, then enable the service at the highest organization level so all Encompass users can access. Then switch the Manual setup to **Active** in the top right.
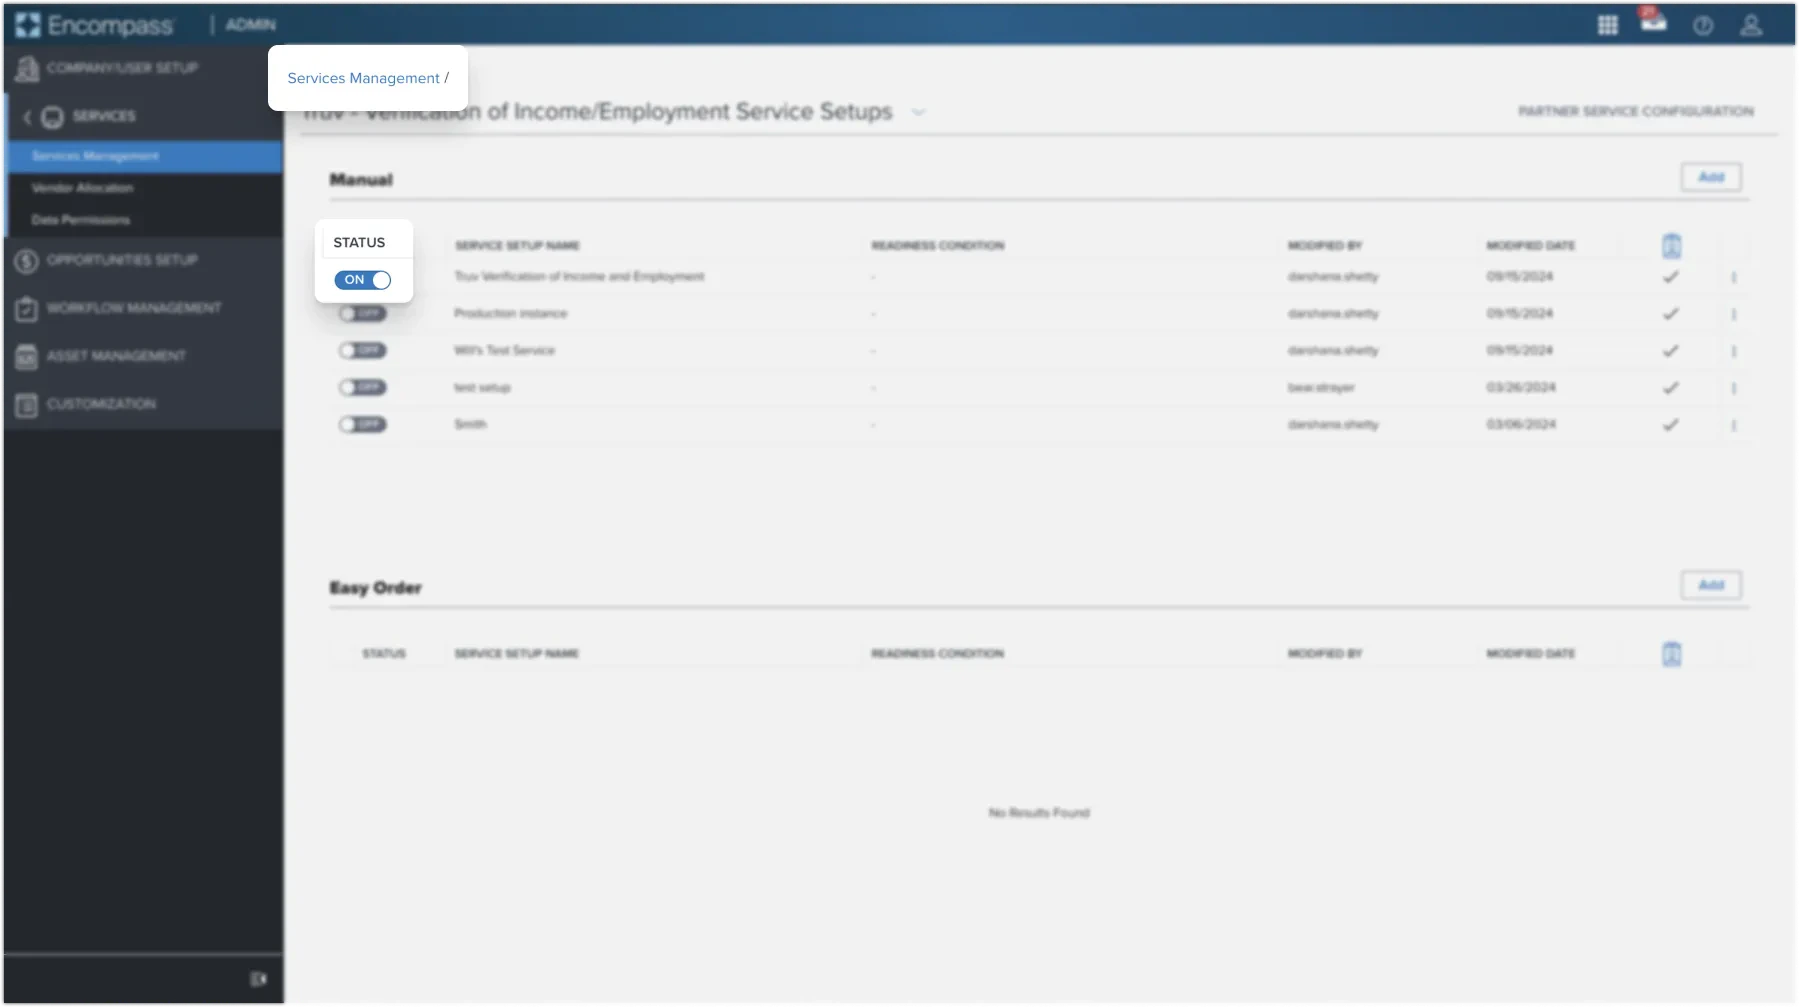
**Step 5:** Activate the Truv verification by toggling the **Status** button for the service setup. If the Client ID and Access Secret are incorrect, an error message appears when creating an order.
***
## Setup guide for manual ordering with Encompass®
***
## Next steps
Manual ordering, ASO configuration, and AIM Check
Templates, eFolder mapping, and notification settings
Manage credentials and templates
[support@truv.com](mailto:support@truv.com)
 **Step 2:** Select **Verifications** in the **Category** dropdown on the right. Select the **Truv** tile to add it to the Service page. Then select **Credentials**.
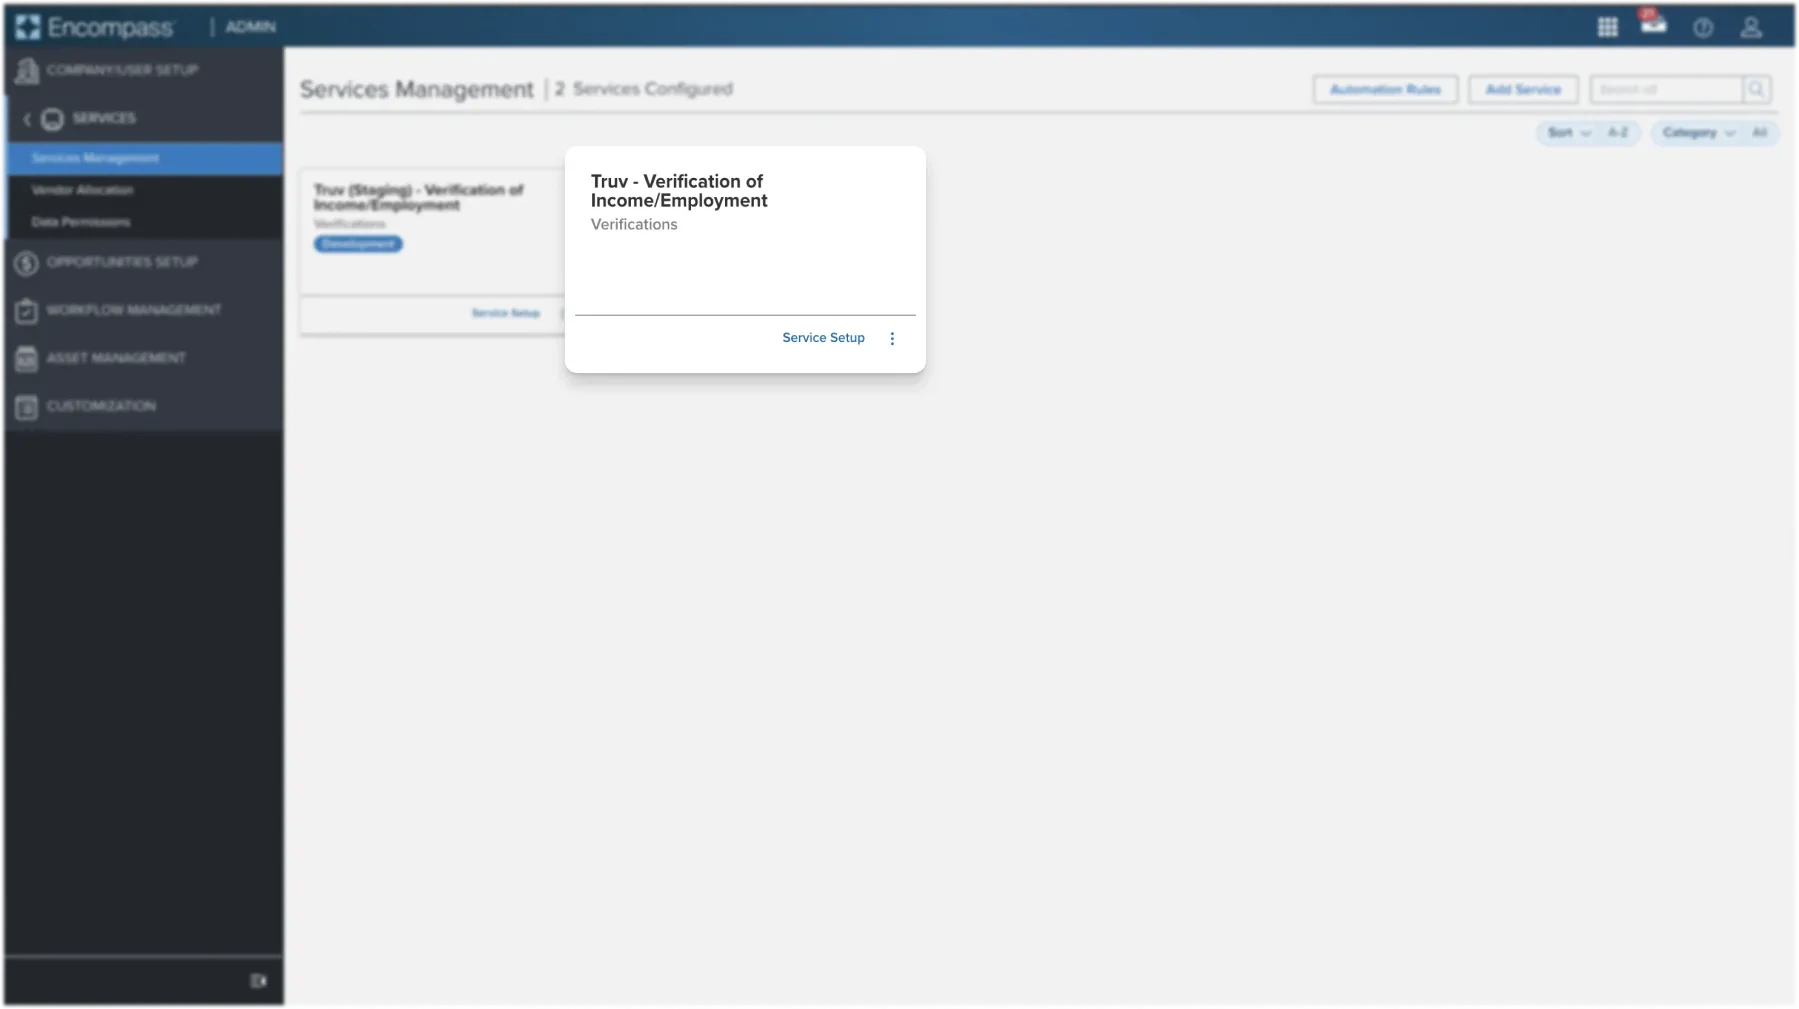 **Step 3:** On the company credentials page.
* Select **Add** under **Company Credentials**.
* Copy and paste the Client ID and Production API Key Secret from your Truv Dashboard → **API Keys** tab into the corresponding fields in Encompass.
* Repeat this step to add an Automation Credential using default Company Credentials. This will ensure any automation workflows function smoothly.
**Step 3:** On the company credentials page.
* Select **Add** under **Company Credentials**.
* Copy and paste the Client ID and Production API Key Secret from your Truv Dashboard → **API Keys** tab into the corresponding fields in Encompass.
* Repeat this step to add an Automation Credential using default Company Credentials. This will ensure any automation workflows function smoothly.
 **Step 5:** Activate the Truv verification by toggling the **Status** button for the service setup. If the Client ID and Access Secret are incorrect, an error message appears when creating an order.
 ***
## Setup guide for manual ordering with Encompass®
***
## Next steps
***
## Setup guide for manual ordering with Encompass®
***
## Next steps