> ## Documentation Index
> Fetch the complete documentation index at: https://docs.truv.com/llms.txt
> Use this file to discover all available pages before exploring further.
# Encompass Consumer Connect
> Set up Truv in Encompass Consumer Connect for borrower-facing verification
Truv Verification of Income and Employment (VOIE) can be enabled in Encompass Consumer Connect (ECC). Applicants can automatically import their income and employment data into the loan application, avoiding manual data entry. Once the application is submitted, frontline staff will have verified data, paystubs, W-2s, and a Truv VOIE report for GSE submission.
As the loan approaches closing, the original verification data can be refreshed in Encompass LOS for a 10-day pre-closing verification.
If using Truv in both ECC and Encompass LOS, set up and test LOS first. See the [Encompass Setup Guide](/mortgage/integration/ice-encompass/setup).
***
## One-Time Setup
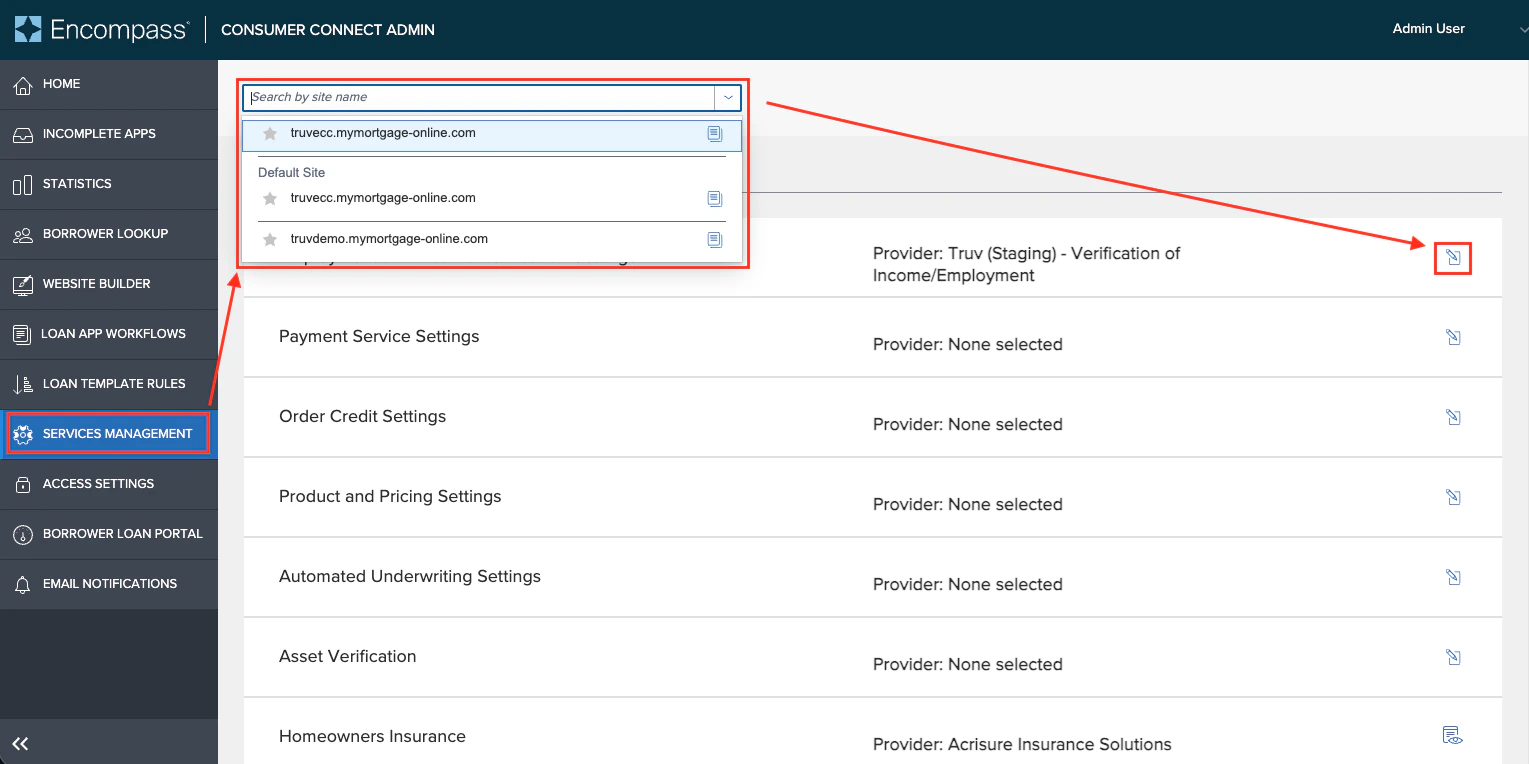
Open the [ECC Admin](https://admin.elliemae.com/encompassconsumerconnect/) site, enter your Instance ID and log in as an administrator.
1. Click **Services Management** from the left sidebar
2. Select the correct **site name** in the dropdown
3. Check the box in the **Employment and Income Verification Settings** row
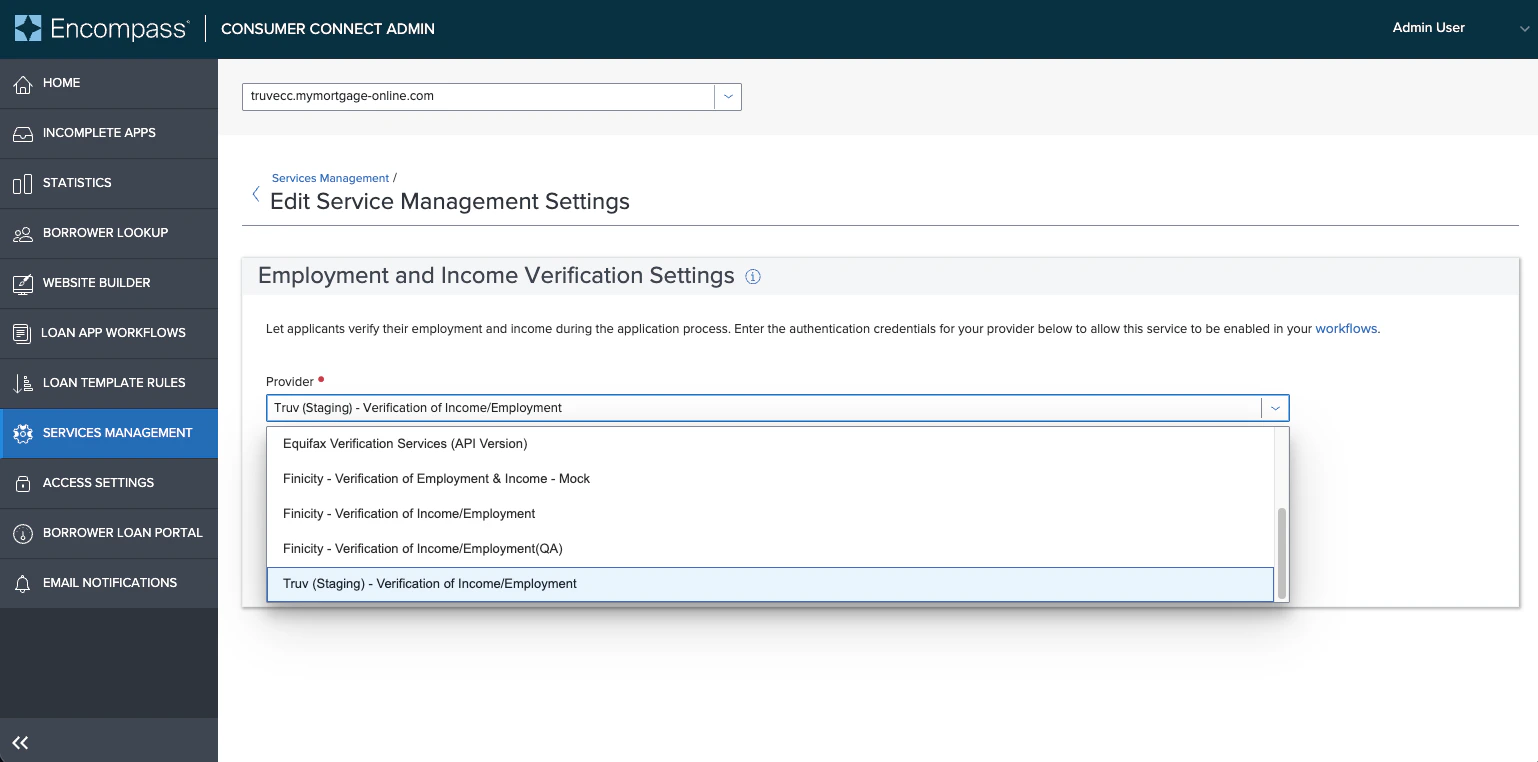
 Select **Truv - Verification of Income/Employment/Assets** from the **Provider** dropdown.
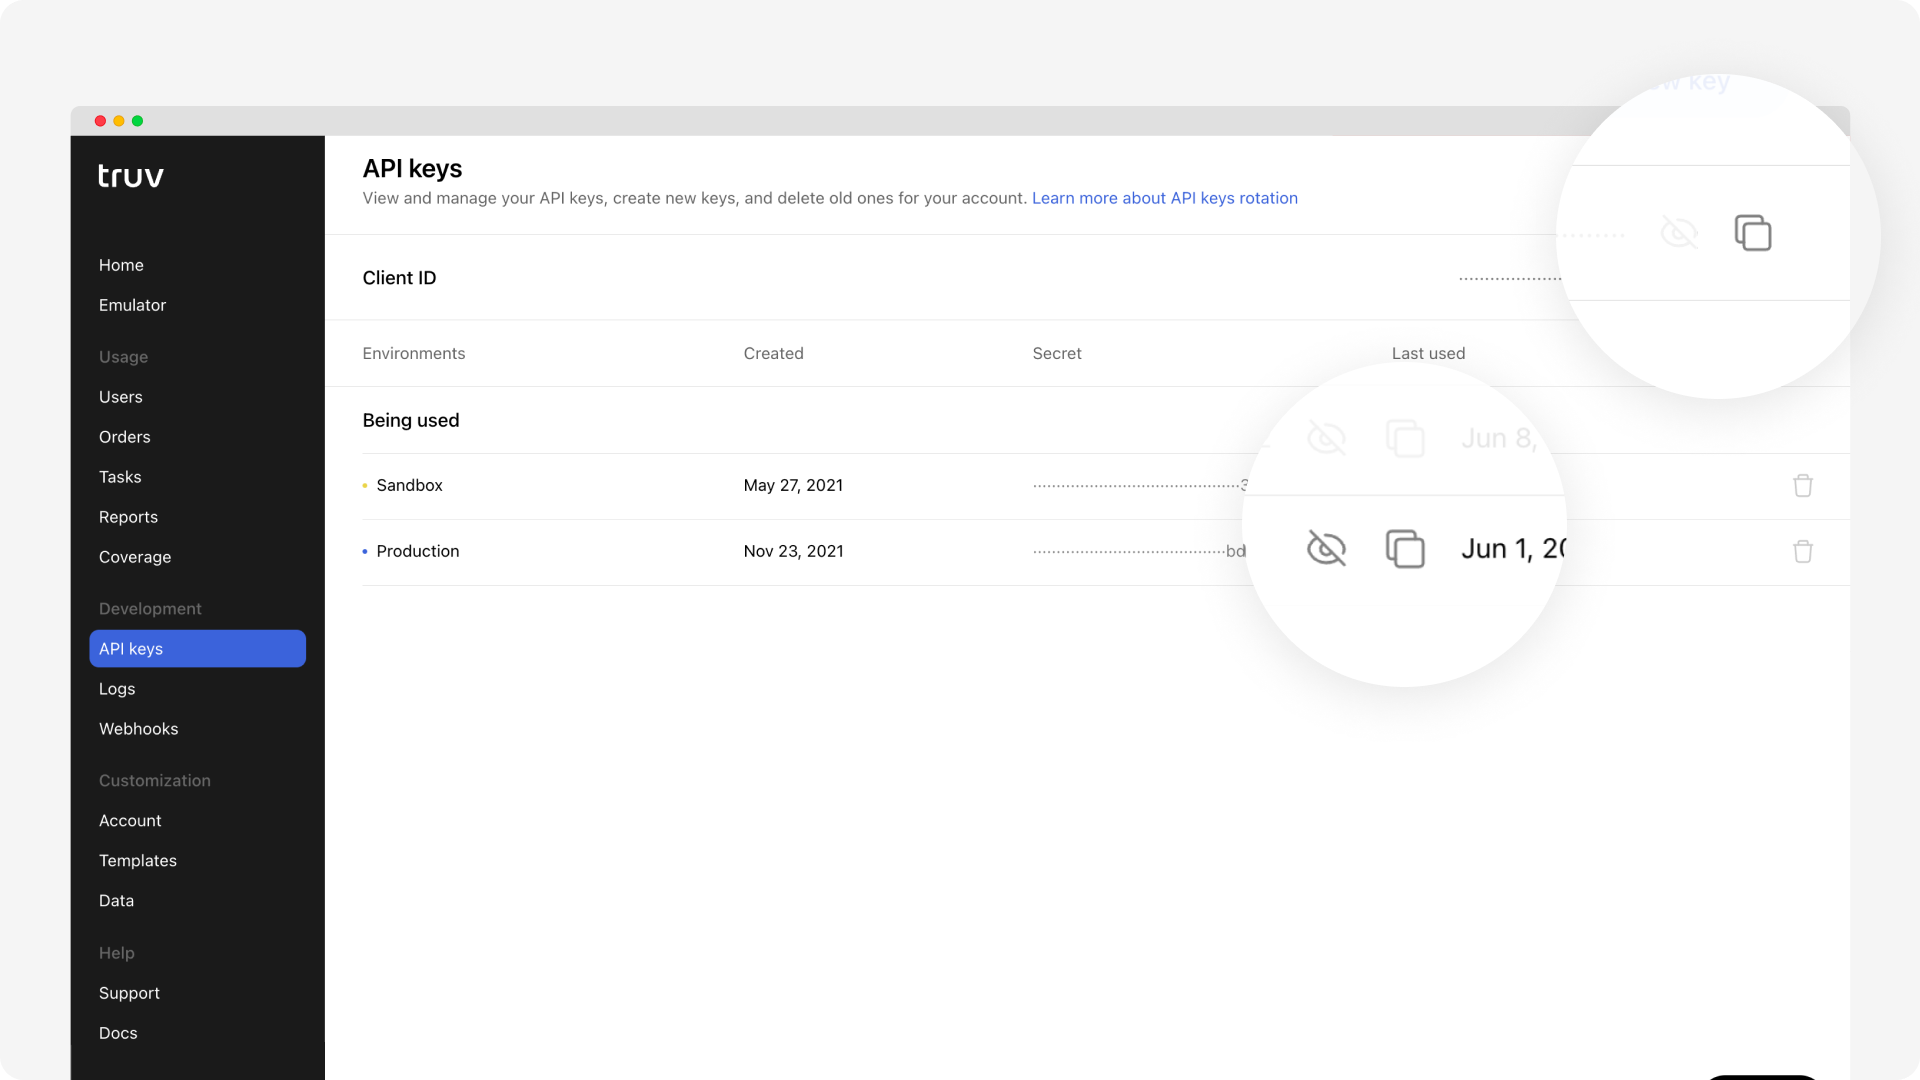
 The **Client ID** field in ECC requires three comma-separated values:
1. **Client ID** from the [Truv Dashboard API Keys page](https://dashboard.truv.com/app/development/keys)
2. The word `income` (to distinguish the product type)
3. A **Template ID** from **Customization → Templates** in the Truv Dashboard
Example: `4f11be5894534fd9a024c289ade4082a,income,46067a16e38b4b8c8c83b7fbe911b23a`
The **Secret** can be copied directly from API Keys. After entering both fields, press **Save**.
The **Client ID** field in ECC requires three comma-separated values:
1. **Client ID** from the [Truv Dashboard API Keys page](https://dashboard.truv.com/app/development/keys)
2. The word `income` (to distinguish the product type)
3. A **Template ID** from **Customization → Templates** in the Truv Dashboard
Example: `4f11be5894534fd9a024c289ade4082a,income,46067a16e38b4b8c8c83b7fbe911b23a`
The **Secret** can be copied directly from API Keys. After entering both fields, press **Save**.
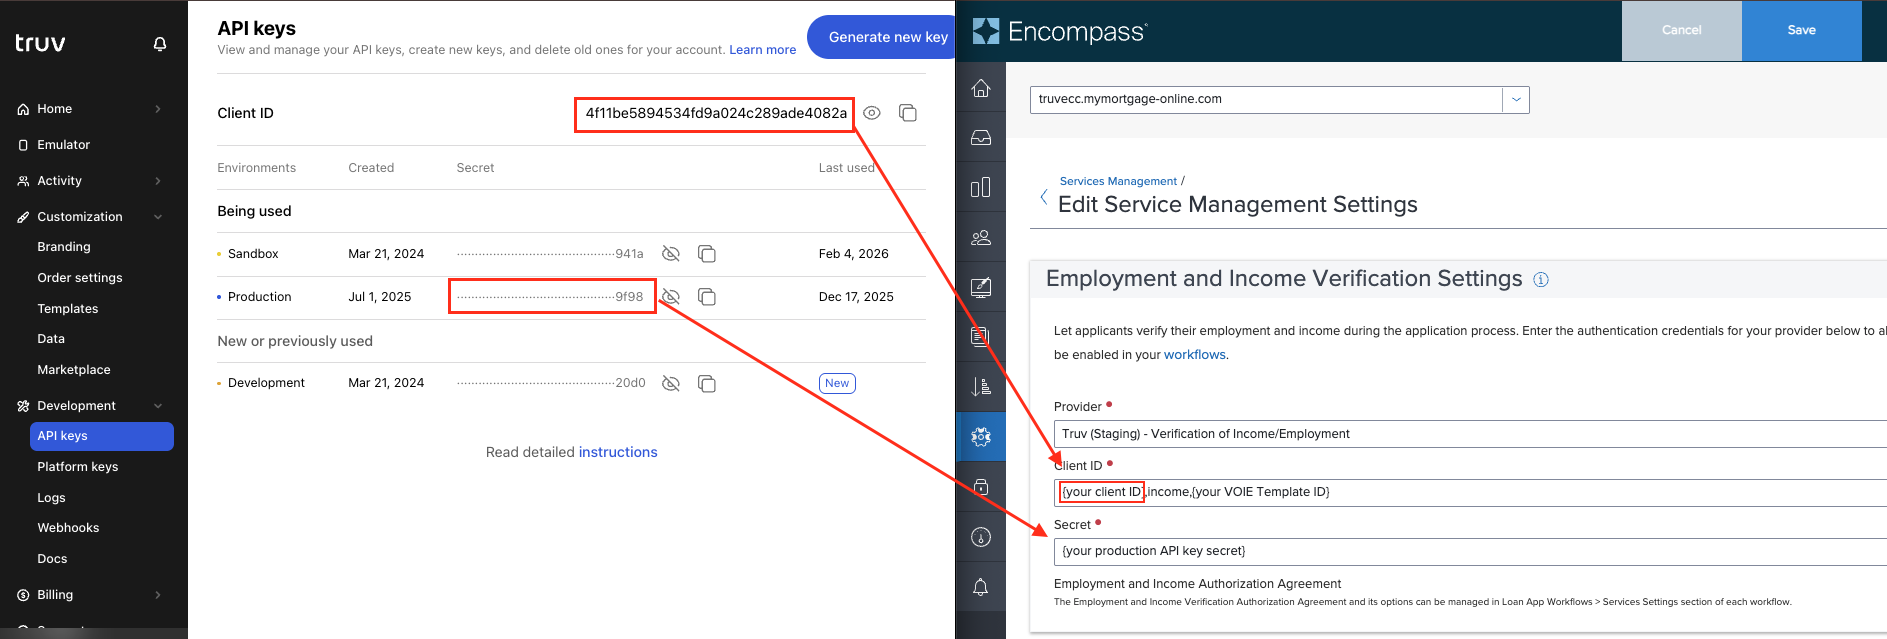
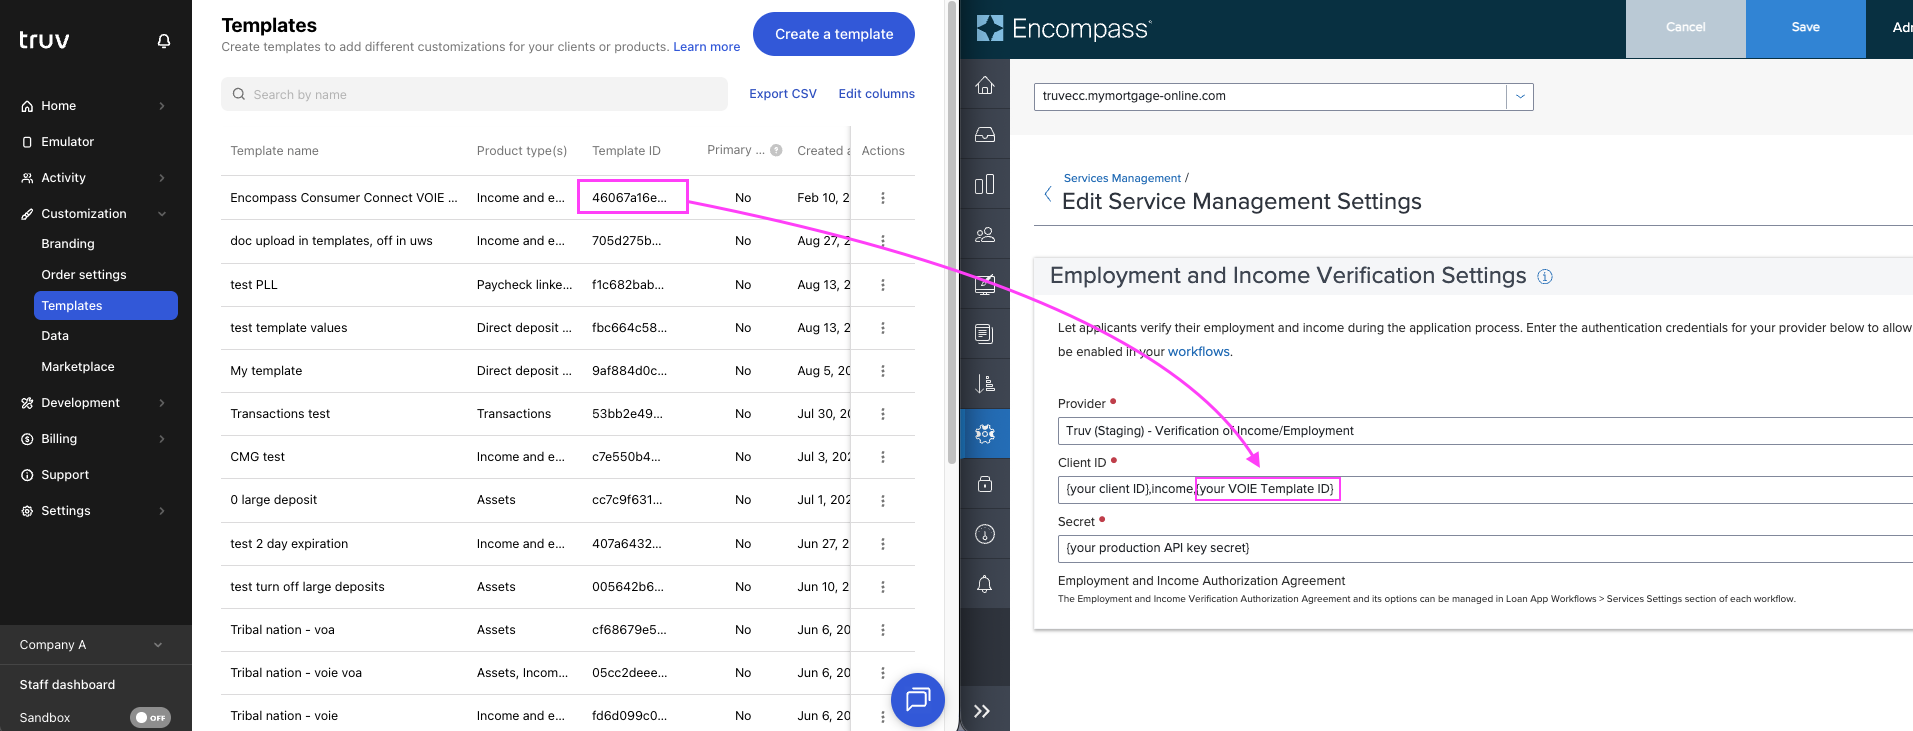 Adding `income` and the Template ID into the **Client ID** field is a requirement for ECC only. Do not add these to the **Client ID** field in Encompass LOS setup.
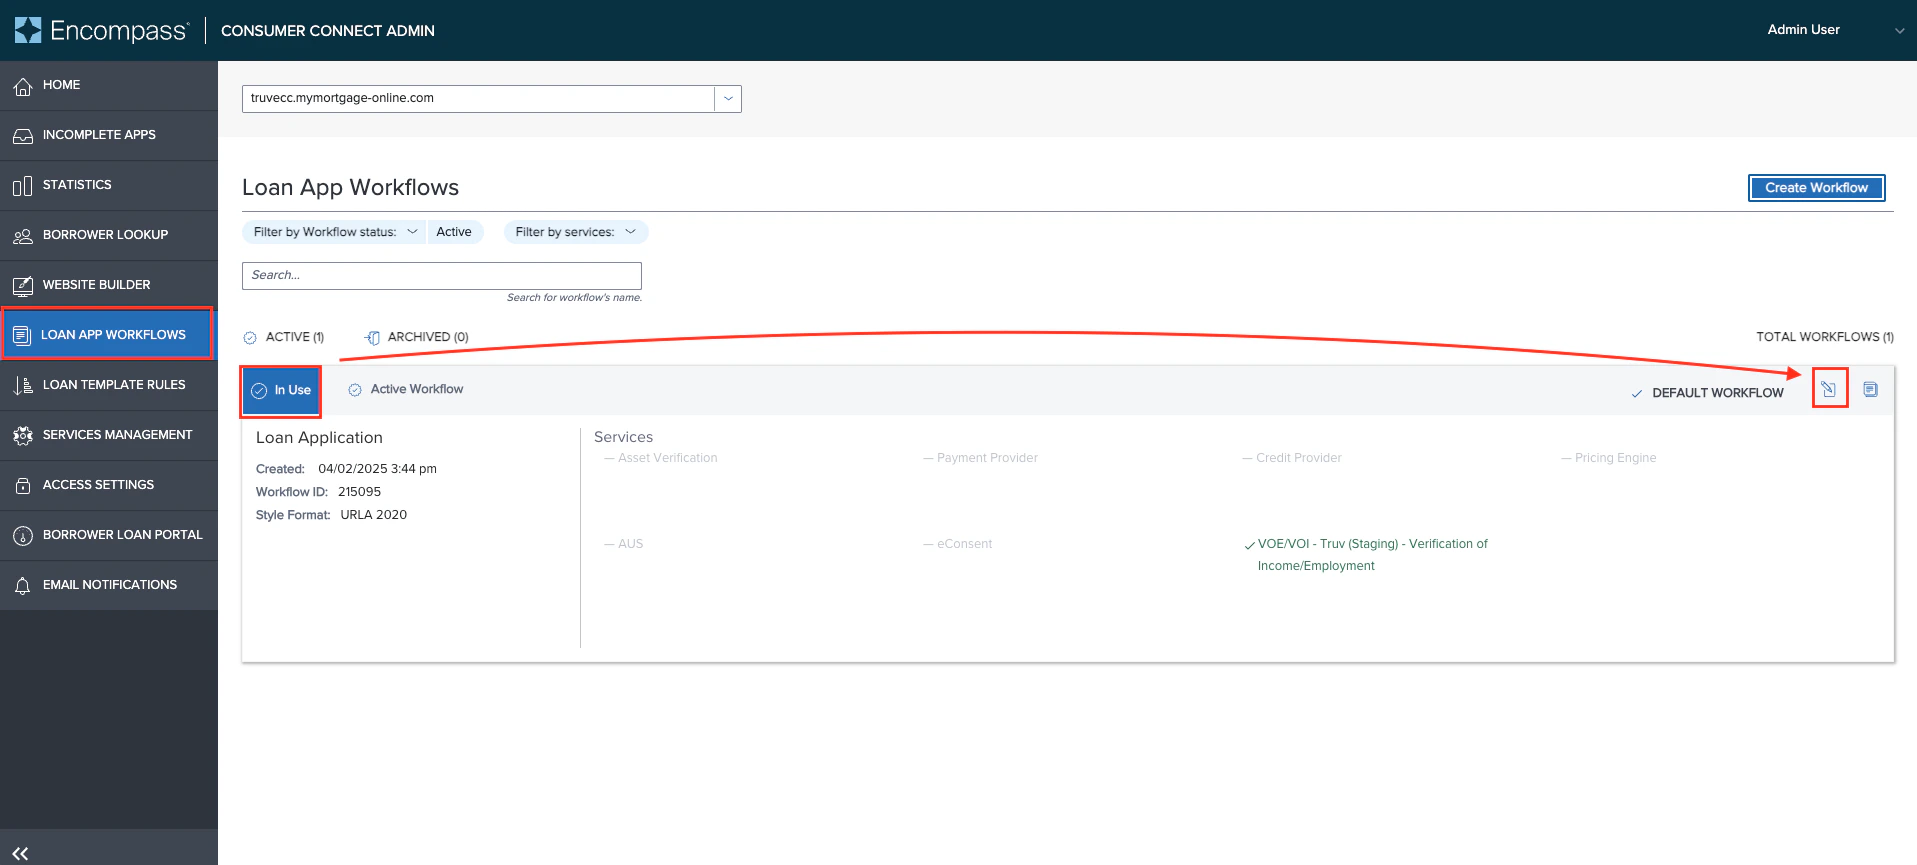
1. Navigate to the **Loan App Workflows** tab. Find the **In Use** workflow and click the edit icon.
Adding `income` and the Template ID into the **Client ID** field is a requirement for ECC only. Do not add these to the **Client ID** field in Encompass LOS setup.
1. Navigate to the **Loan App Workflows** tab. Find the **In Use** workflow and click the edit icon.
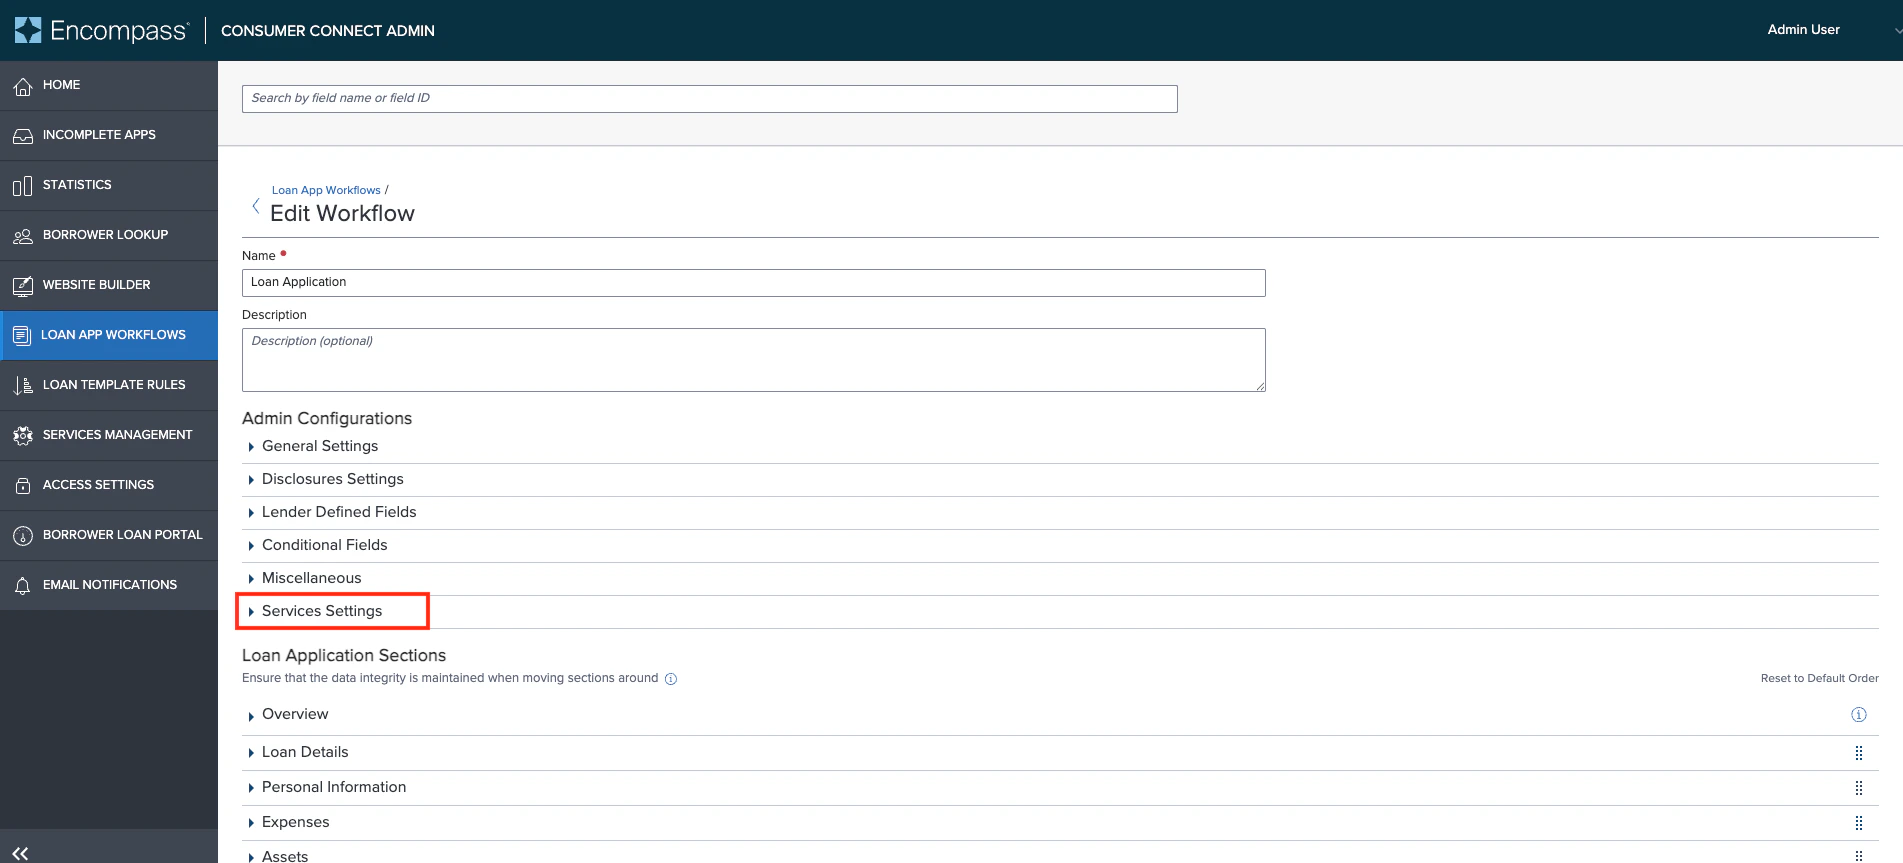
 2. Scroll to **Services Settings**, expand it, and enable **VOE/VOI**.
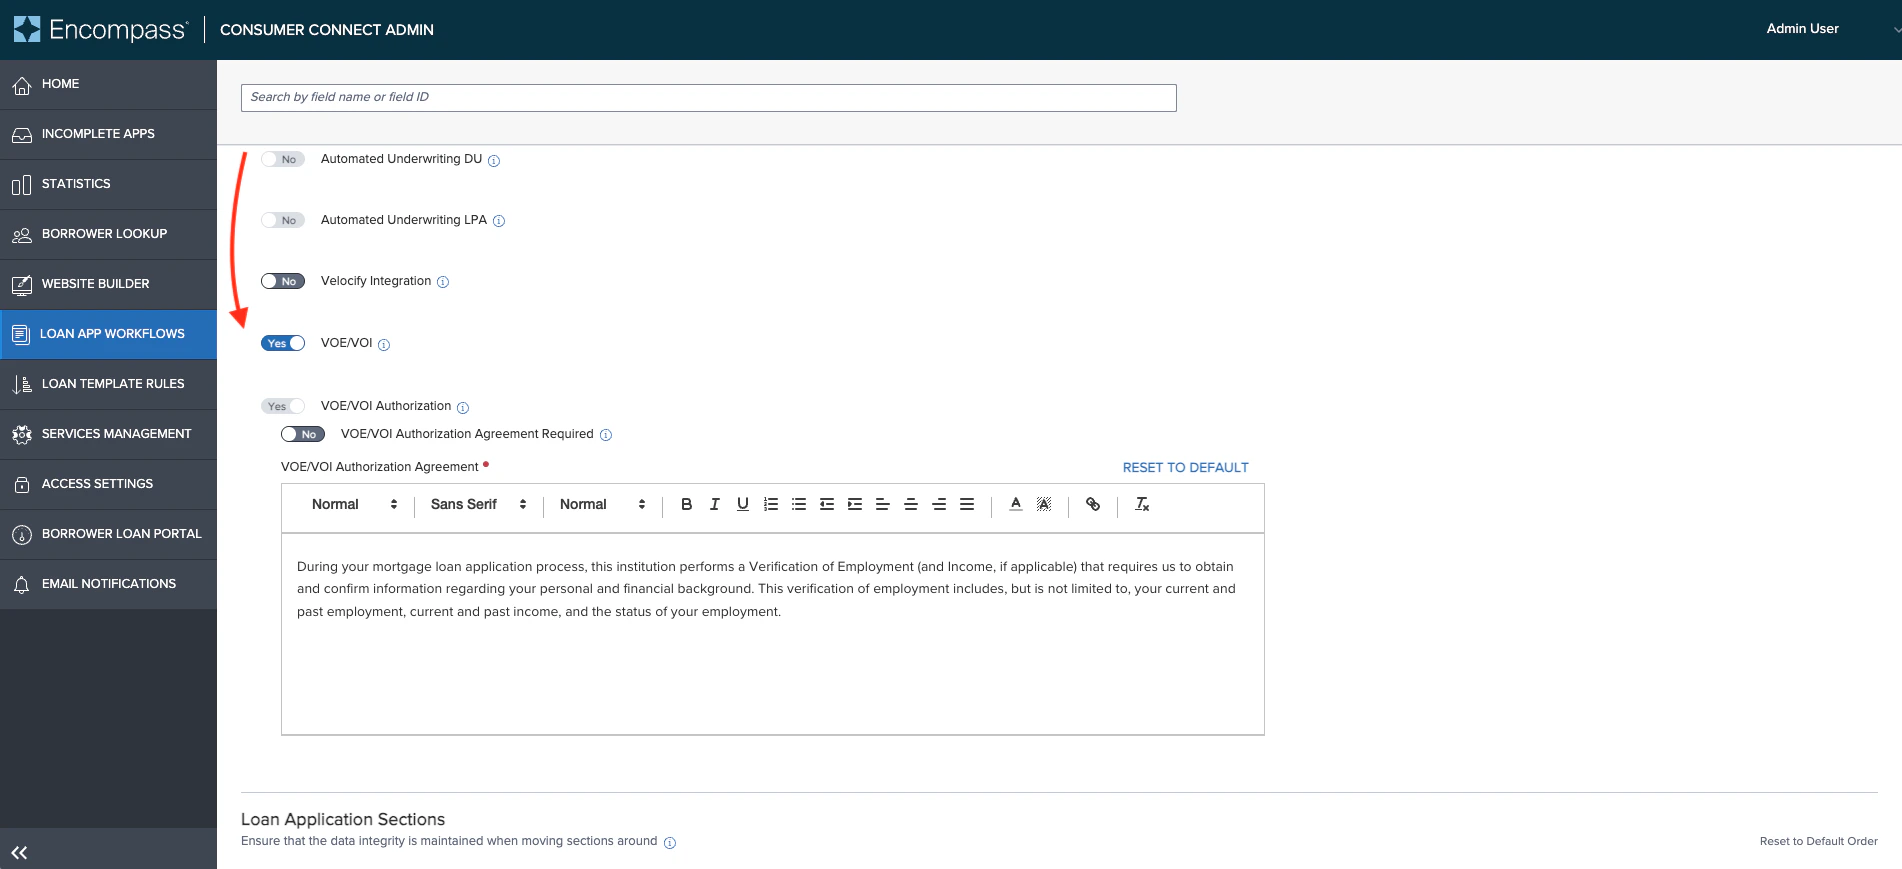 3. The **VOE/VOI Authorization** setting is mandatory when enabled. The **Authorization Agreement Required** setting is optional.
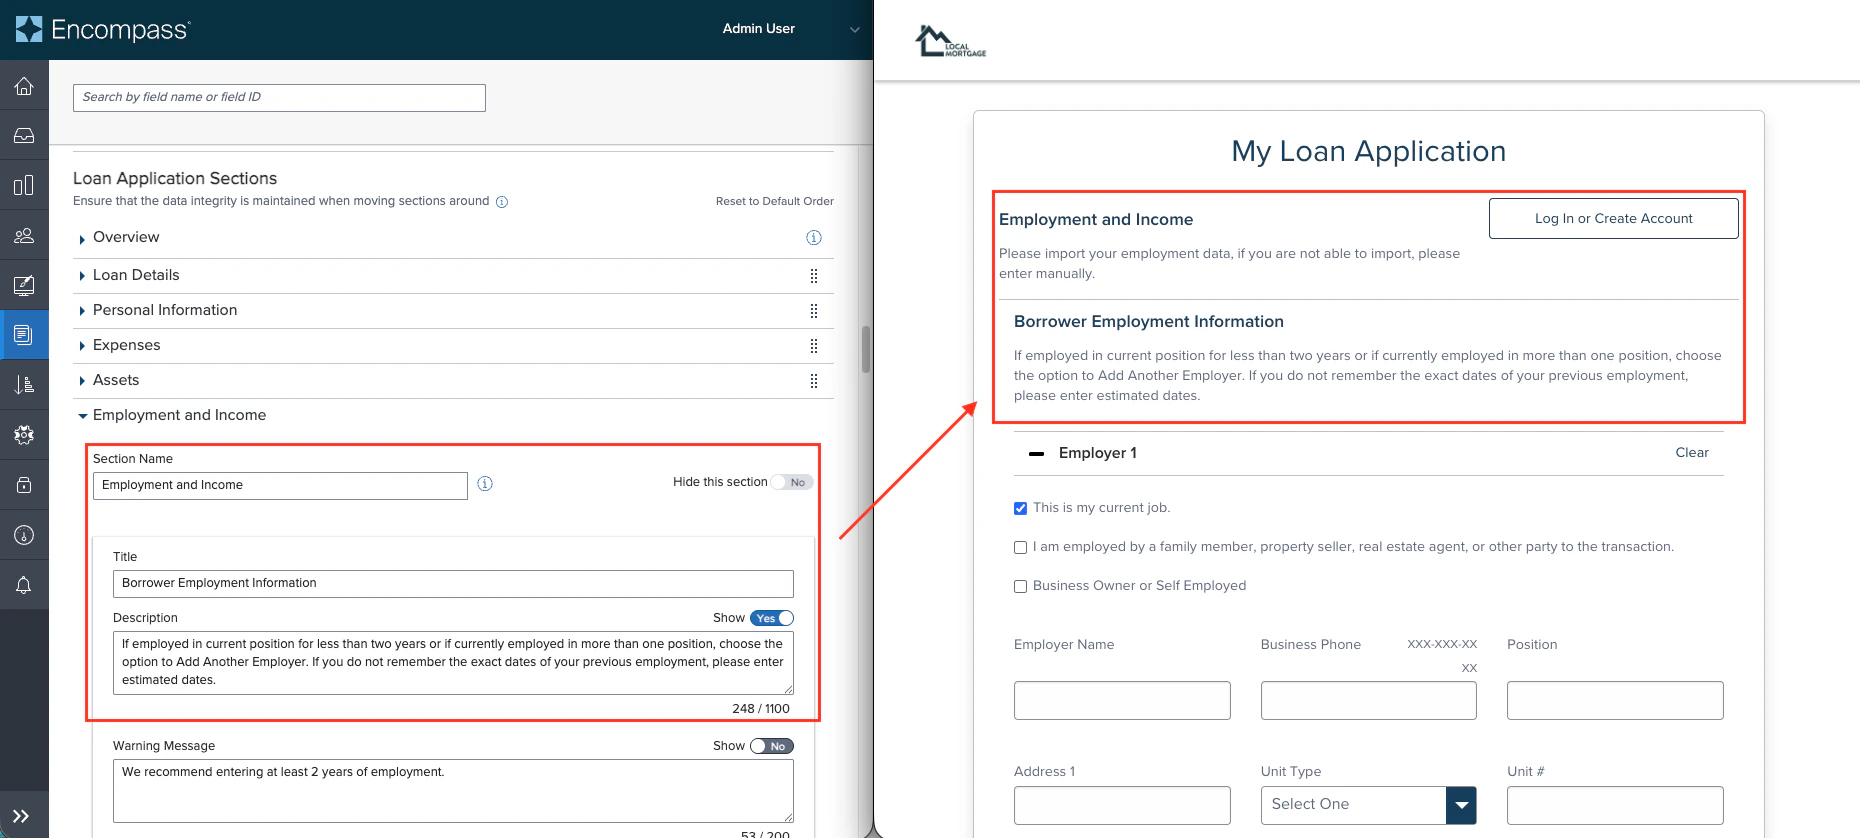
4. Optionally update the header and body copy on the **Employment and Income** application page so borrowers understand when to use Truv versus manual entry.
3. The **VOE/VOI Authorization** setting is mandatory when enabled. The **Authorization Agreement Required** setting is optional.
4. Optionally update the header and body copy on the **Employment and Income** application page so borrowers understand when to use Truv versus manual entry.
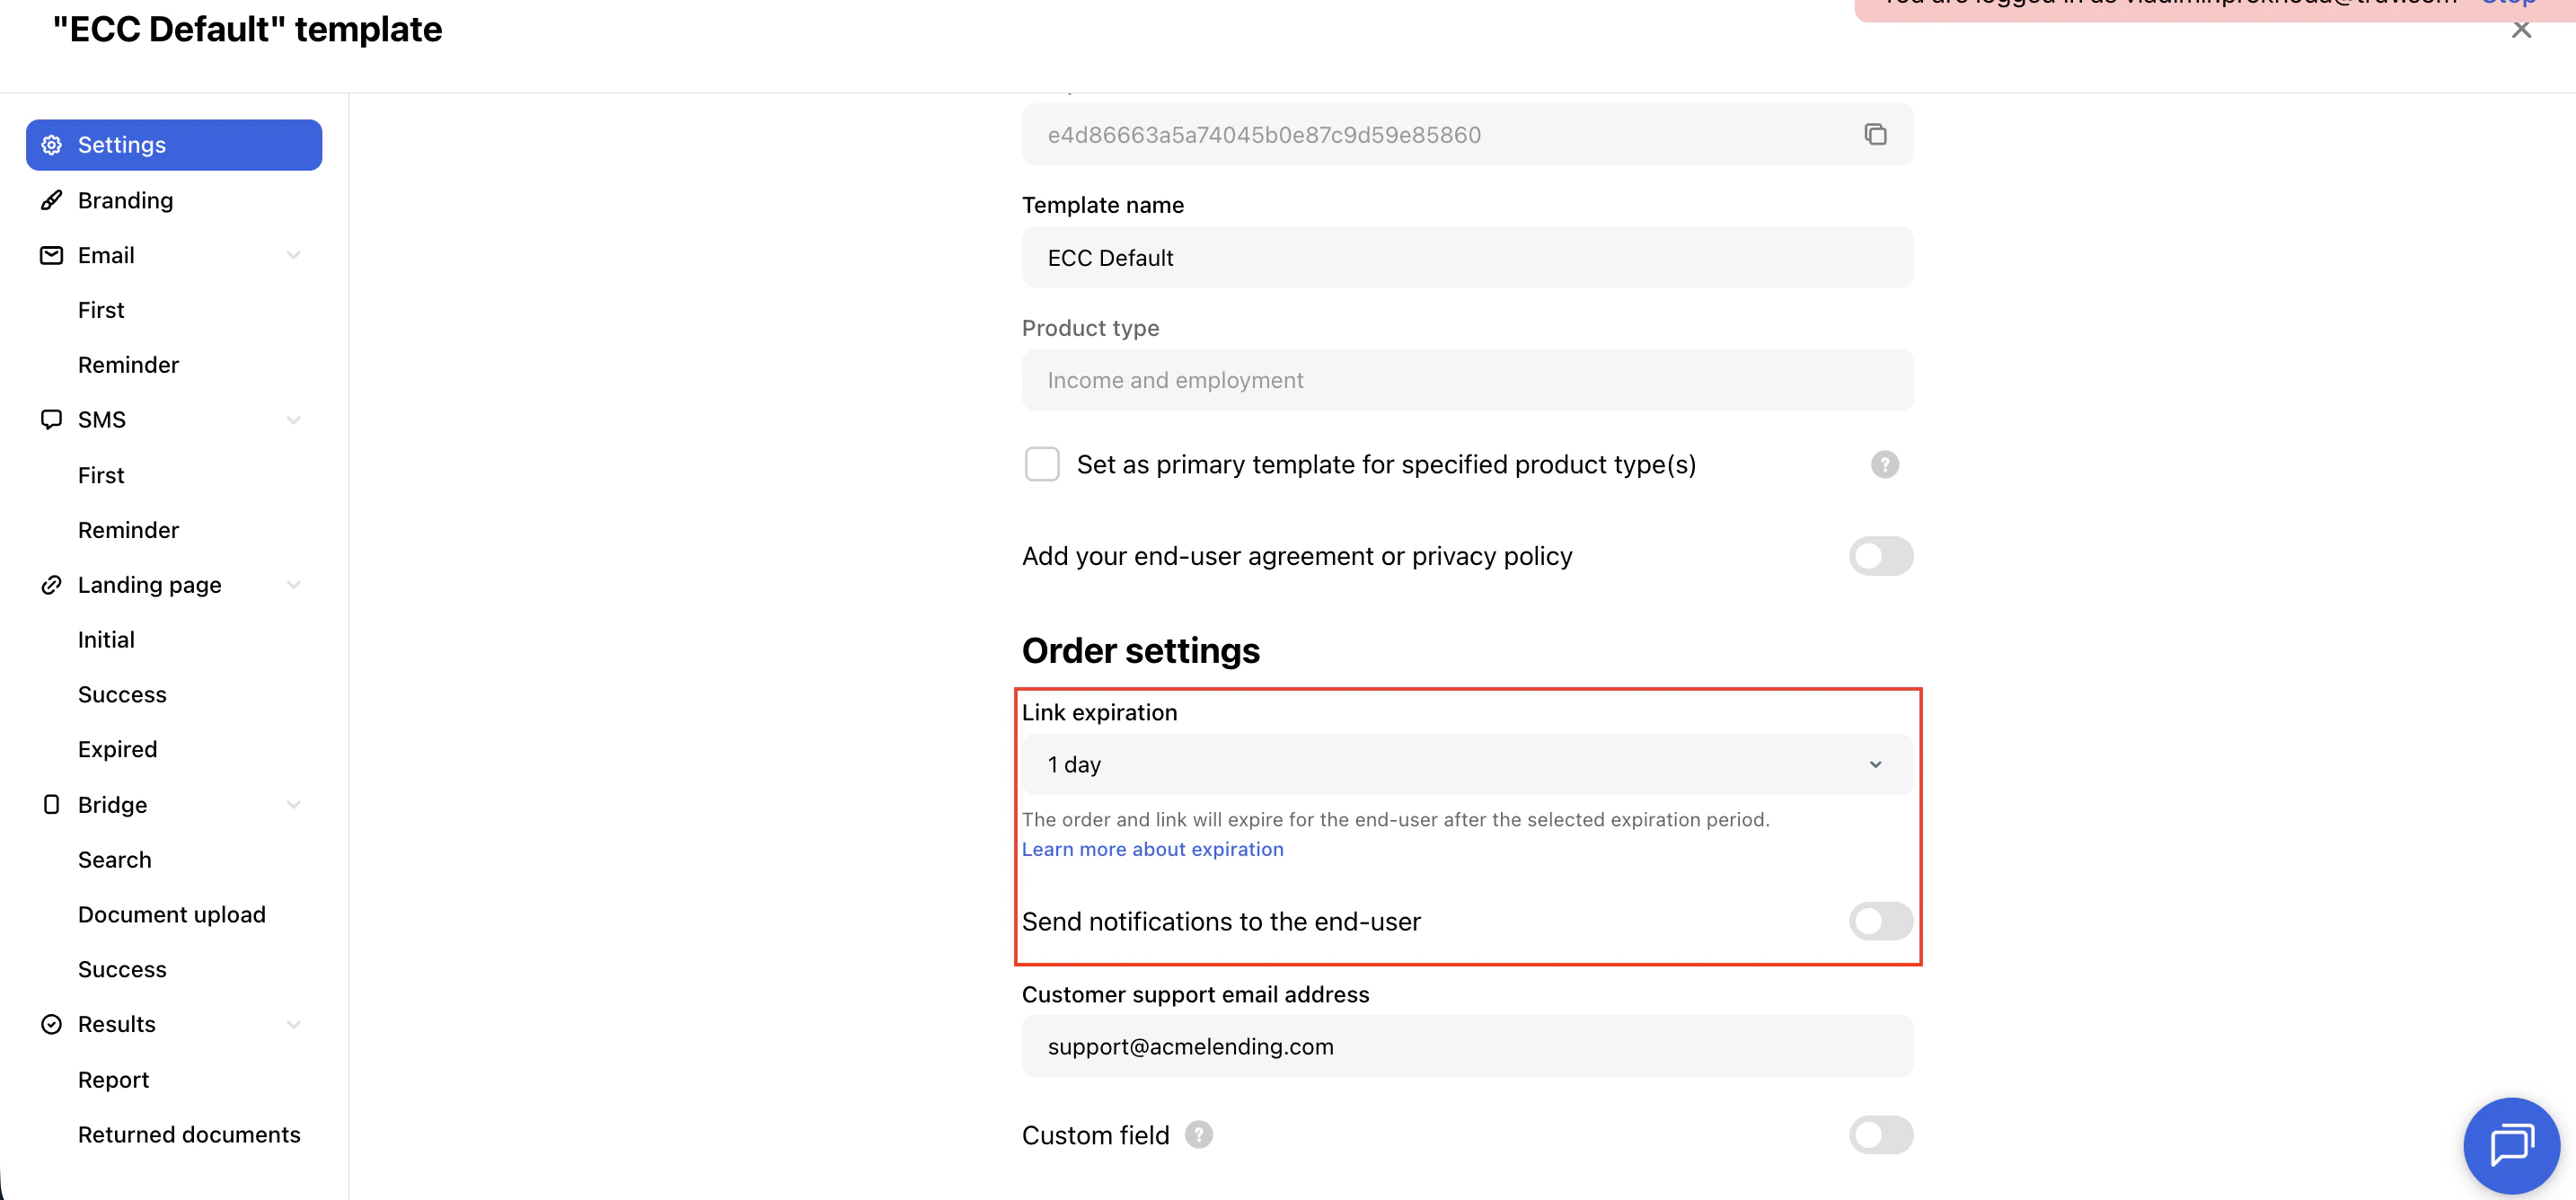
 In the [Truv Dashboard](https://dashboard.truv.com/app/customization/templates), open the template configured in Step 2.
**Settings tab:**
* Set **Link expiration** to **1 day**
* Set **Send notifications to the end-user** to disabled
In the [Truv Dashboard](https://dashboard.truv.com/app/customization/templates), open the template configured in Step 2.
**Settings tab:**
* Set **Link expiration** to **1 day**
* Set **Send notifications to the end-user** to disabled
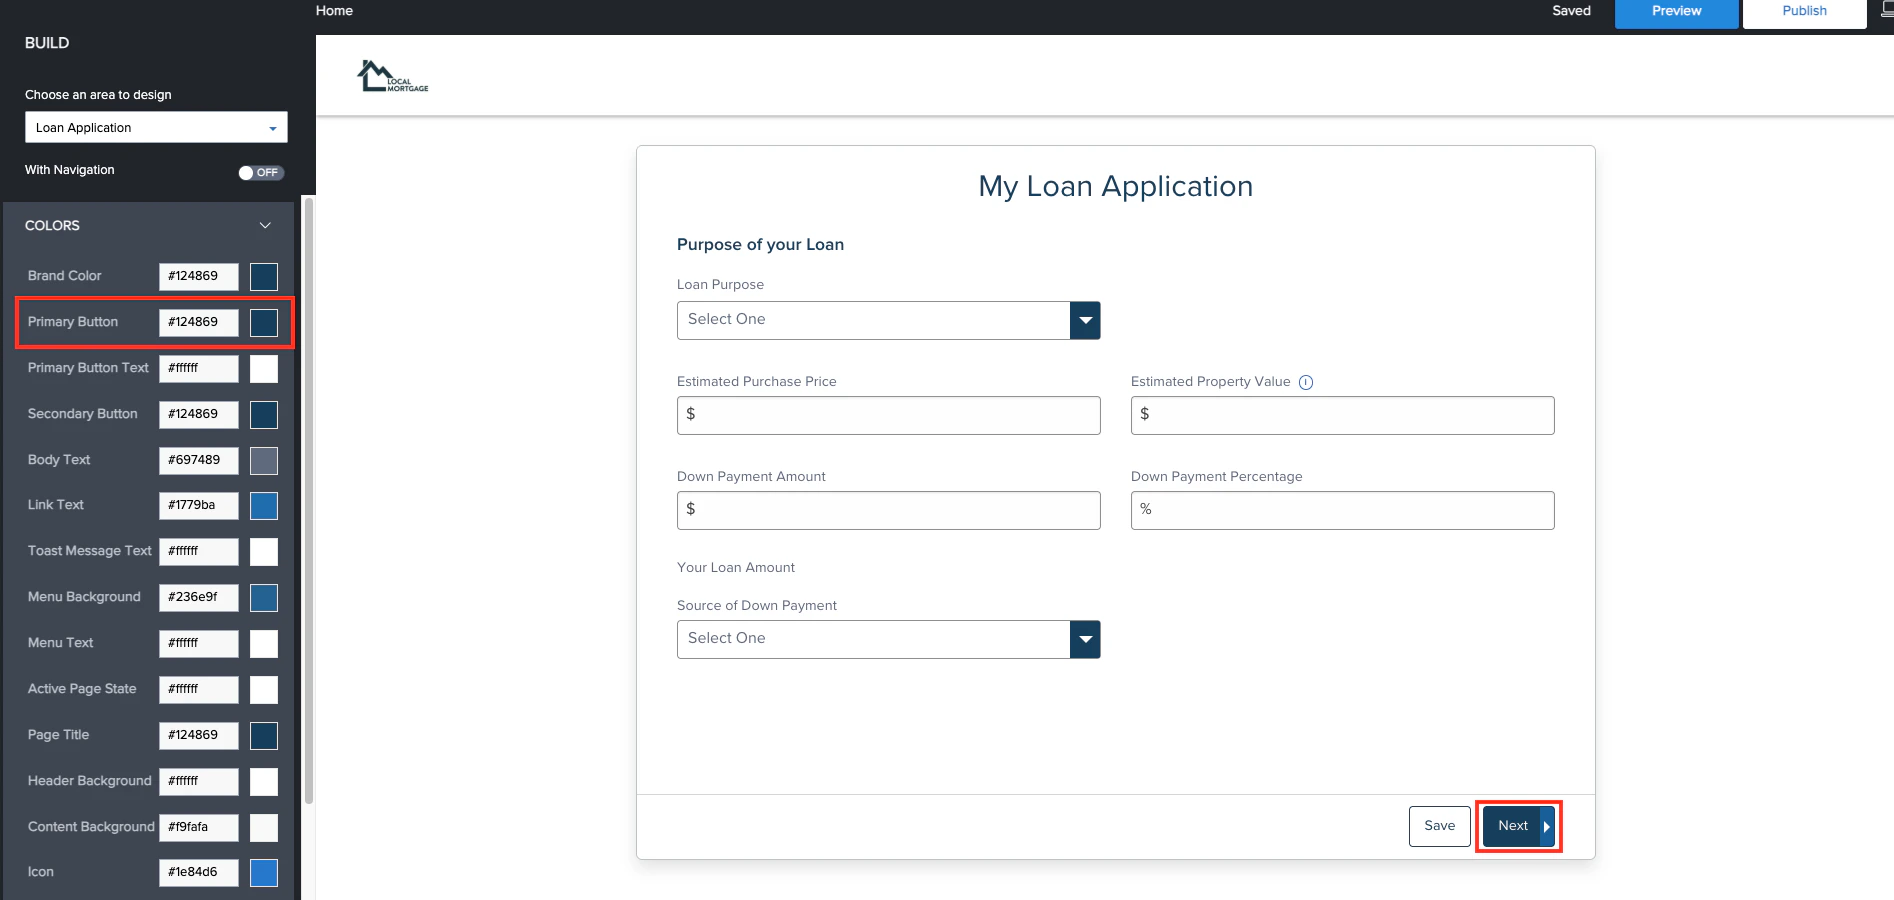
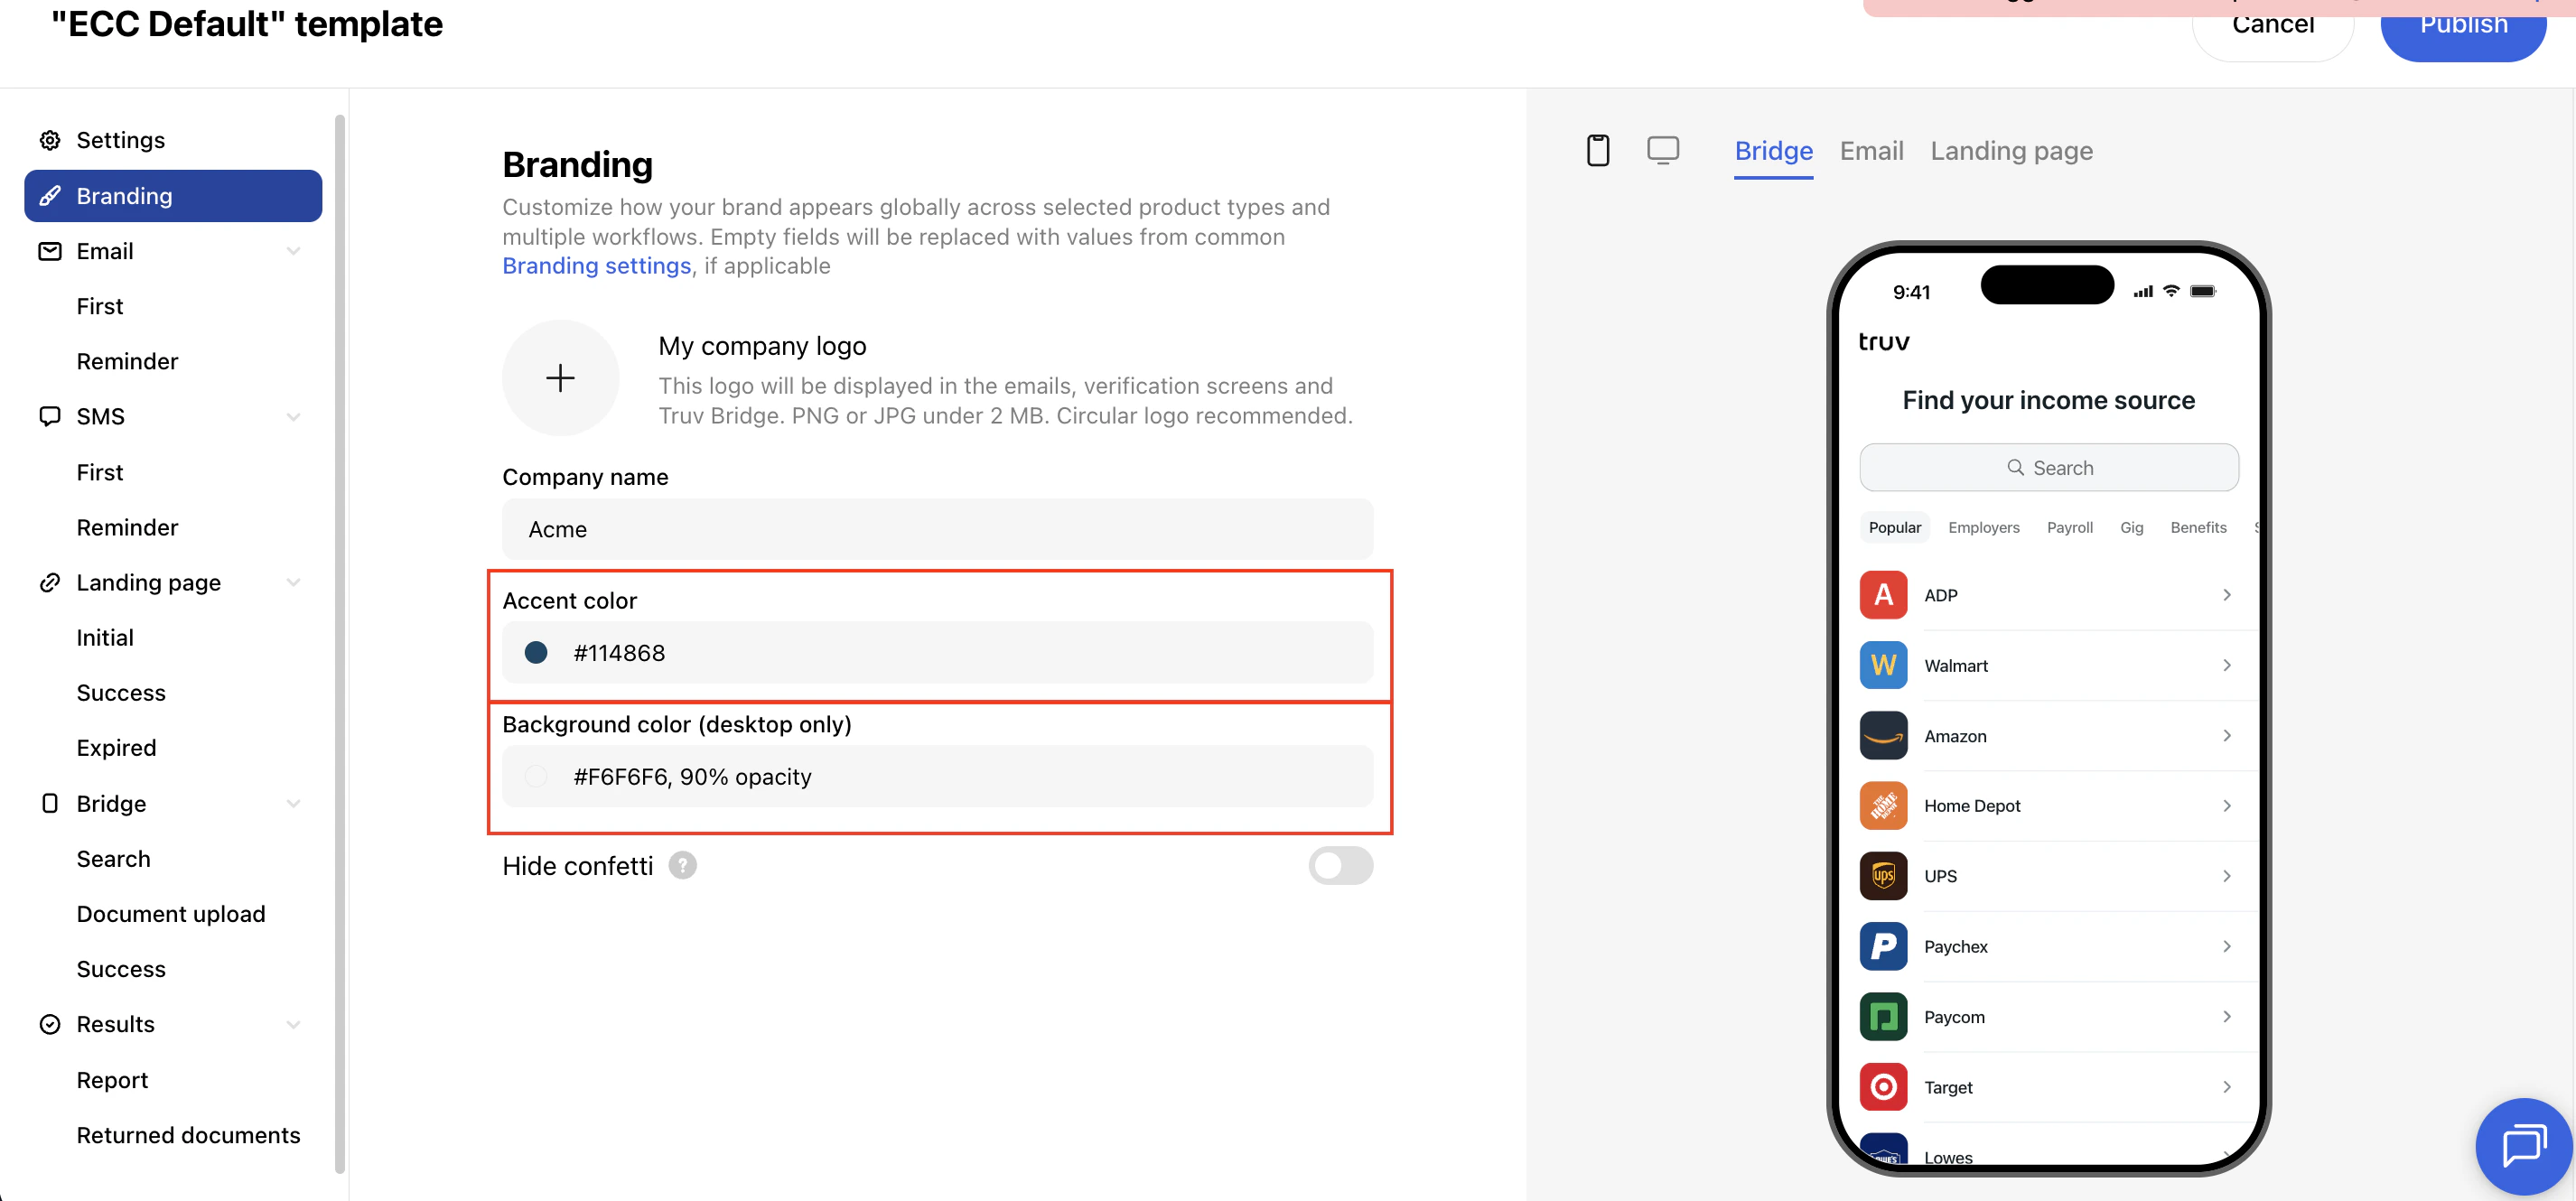
 **Branding tab:**
* Set the **Accent color** to match your ECC primary button color (found in Website Builder)
* Set the **Background color** to white with opacity 0.9 (R: 246, G: 246, B: 246, A: 0.9)
**Branding tab:**
* Set the **Accent color** to match your ECC primary button color (found in Website Builder)
* Set the **Background color** to white with opacity 0.9 (R: 246, G: 246, B: 246, A: 0.9)
 ***
## Borrower Experience Demo
***
## Next steps
Back to Encompass integration overview
Test your integration
[support@truv.com](mailto:support@truv.com)
***
## Borrower Experience Demo
***
## Next steps
Back to Encompass integration overview
Test your integration
[support@truv.com](mailto:support@truv.com)