> ## Documentation Index
> Fetch the complete documentation index at: https://docs.truv.com/llms.txt
> Use this file to discover all available pages before exploring further.
# Floify Integration
> Use Truv income and employment verification within the Floify point-of-sale system
Truv's integration with Floify speeds up the verification process by allowing borrowers to quickly connect and authenticate their employment and income details directly within the Floify borrower portal. All data is sourced from authenticated payroll accounts. No manual document uploads required.
Quickly verify employment and income details during the application stage
Accurate information and payroll documents sourced directly from trusted accounts
Connected accounts monitored continuously. Updated reports generated throughout the loan process.
One-time admin configuration. No development work needed.
***
## How it works
During the pre-application stage, borrowers are prompted to connect their payroll accounts and share income and employment information through Truv.
Once accounts are connected, Truv generates verification reports and delivers them, along with payroll documents (pay stubs, W-2s, employer reports), to the connected LOS (e.g., Encompass®) and eFolder.
Connected accounts are continuously monitored for new payroll documents, enabling updated verification reports throughout the mortgage origination process.
***
## Go Live with Truv in Floify
Confirm your one-time admin setup with the Floify team.
Activate the integration using the setup steps below.
Set up verification templates in the Truv Dashboard for branding and document delivery.
Test the integration in Sandbox mode to validate the borrower flow.
Obtain production access and configure DU (Desktop Underwriter) and LPA (Loan Product Advisor) system submissions.
***
## Floify Setup Guide
### Company Dashboard
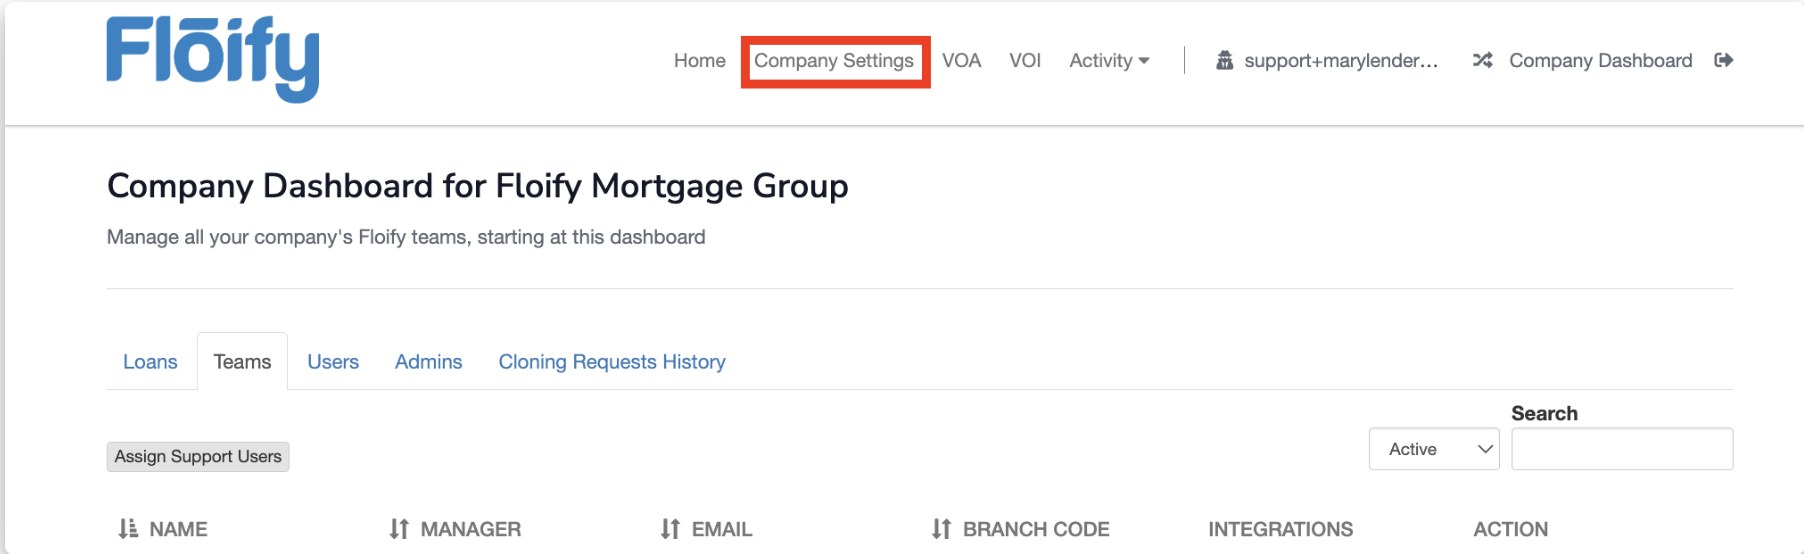
**Step 1:** Go to the **Company Dashboard** and select **Company Settings**.
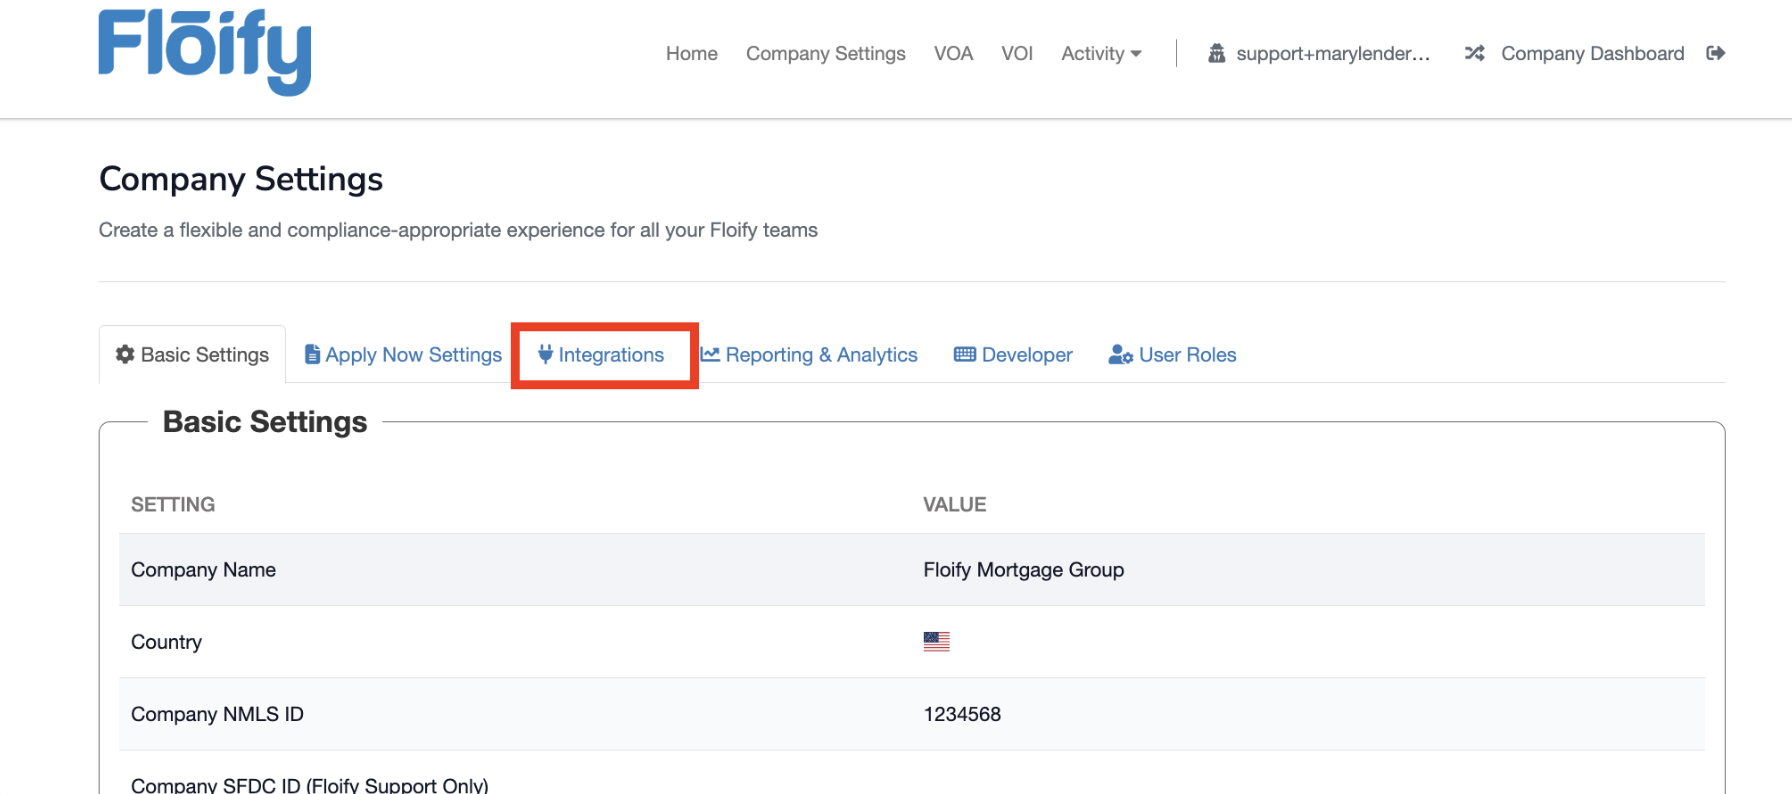
**Step 2:** Click the **Integrations** tab.
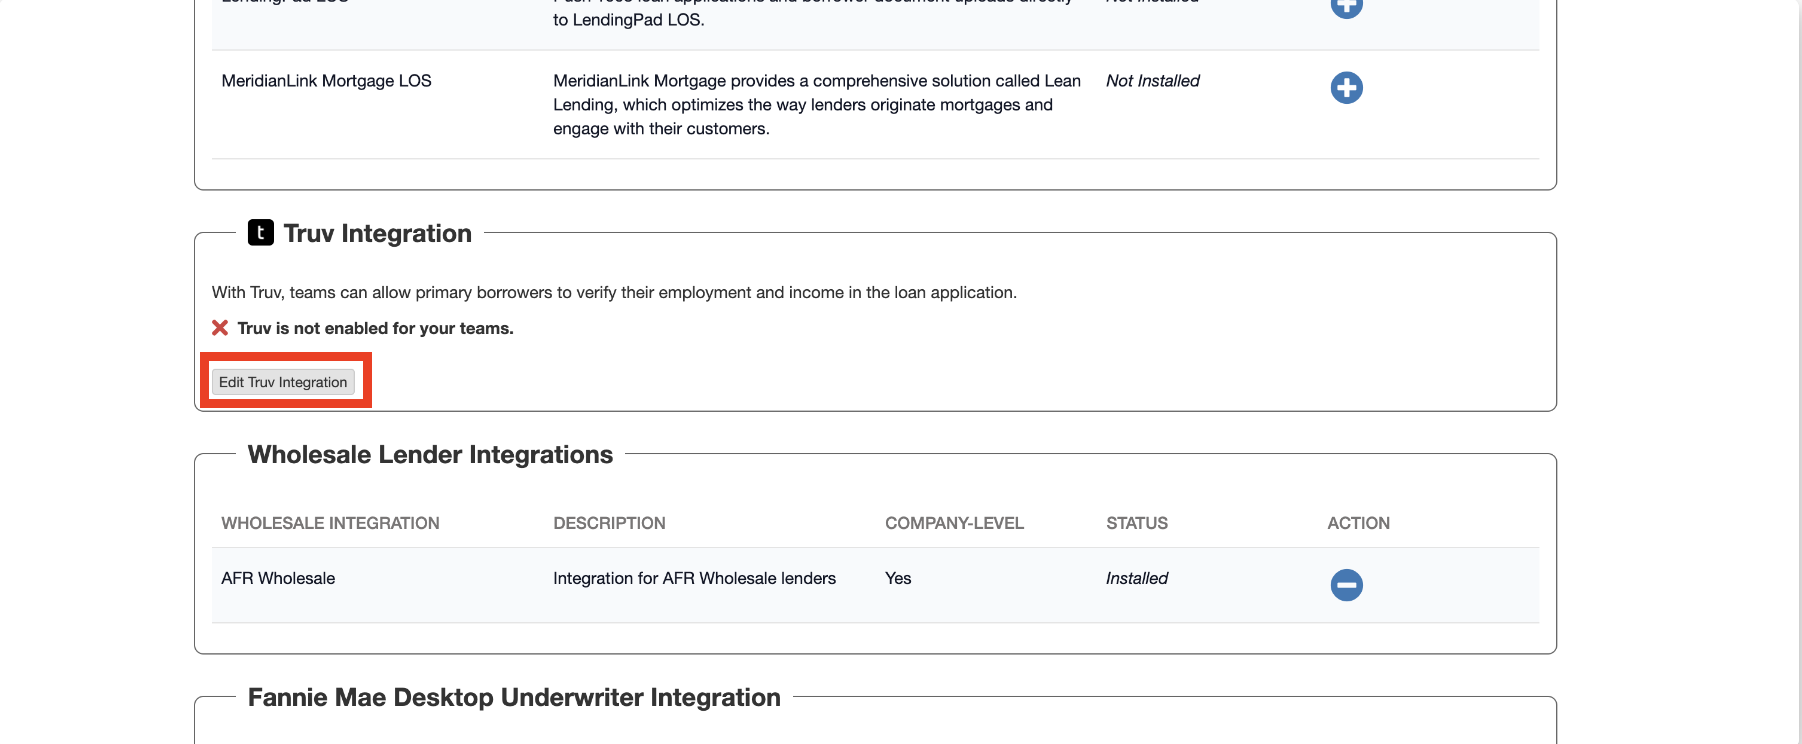
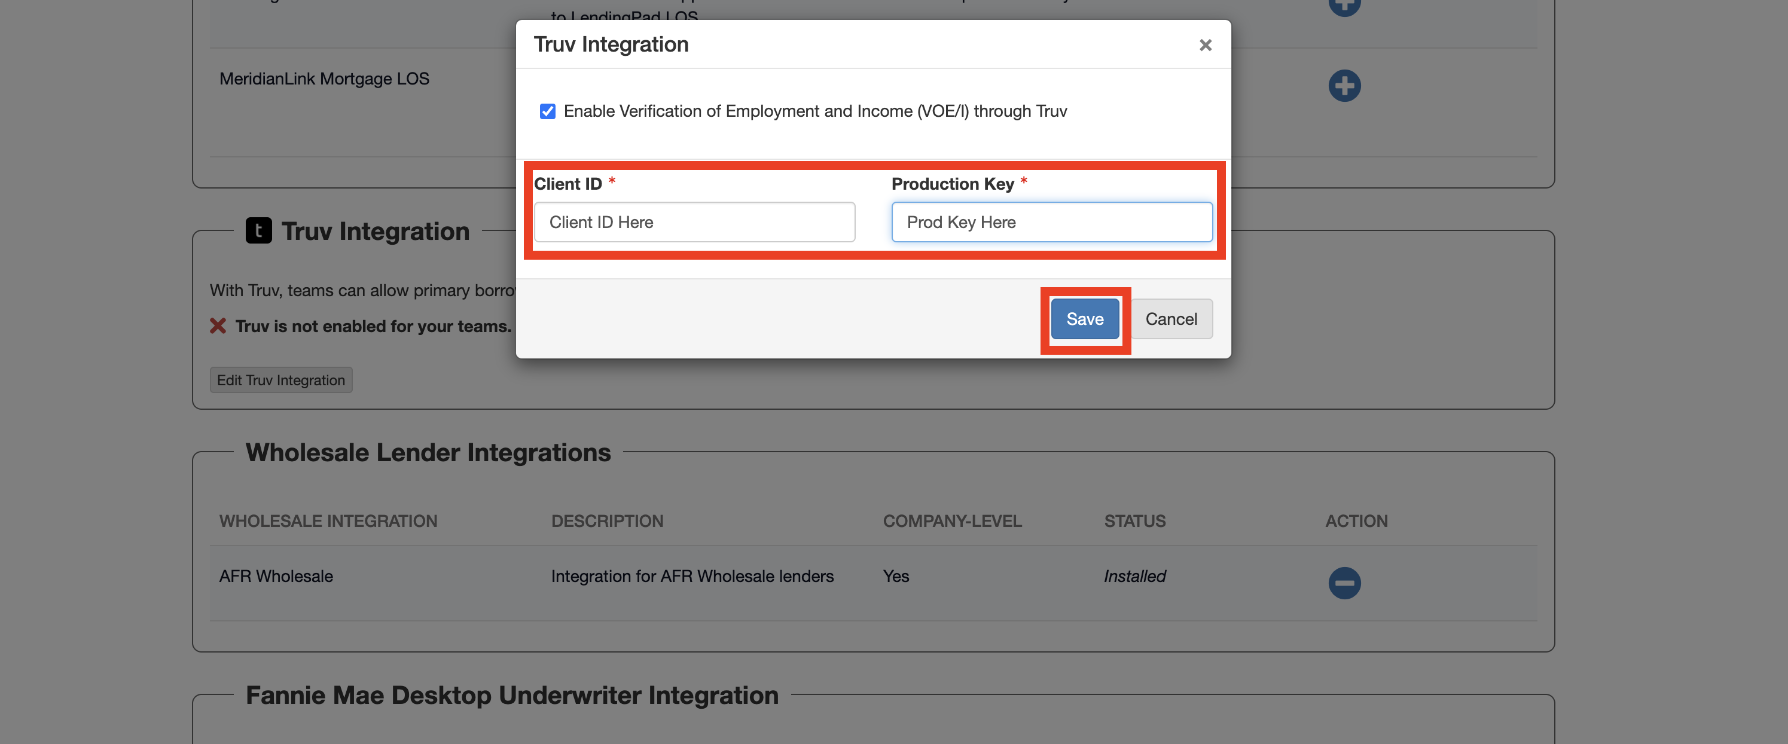
**Step 3:** Locate the **Truv Integration** section and choose **Edit Truv Integration**.
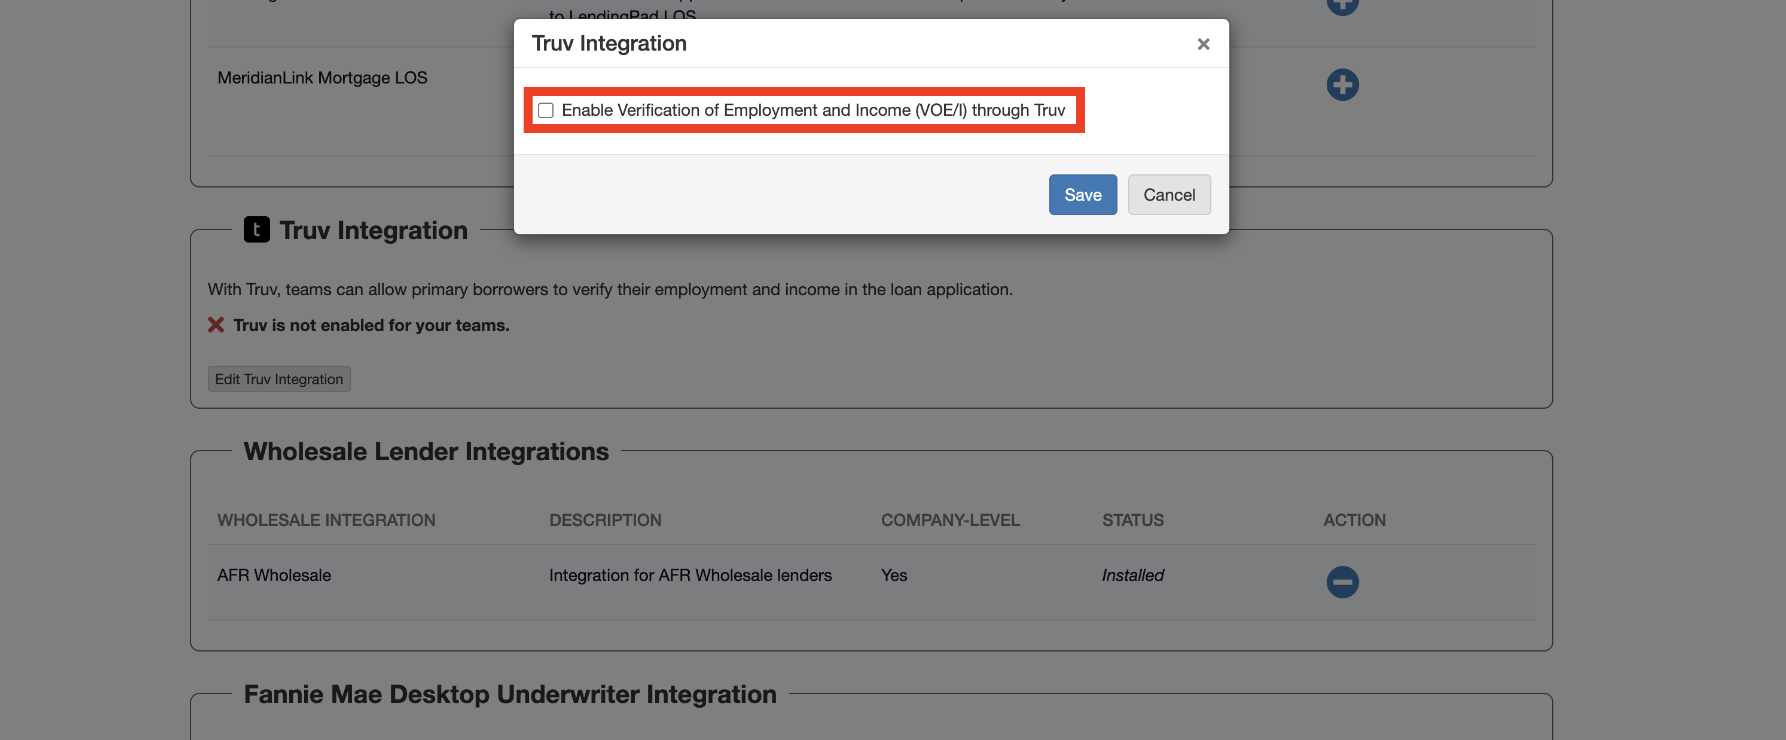
**Step 4:** Check the box to **Enable Verification of Employment and Income (VOE/I)** through Truv.
**Step 5:** Input the **Client ID** and **Access Secret** (Production Key) from your [Truv Dashboard](https://dashboard.truv.com).
### Team Dashboard
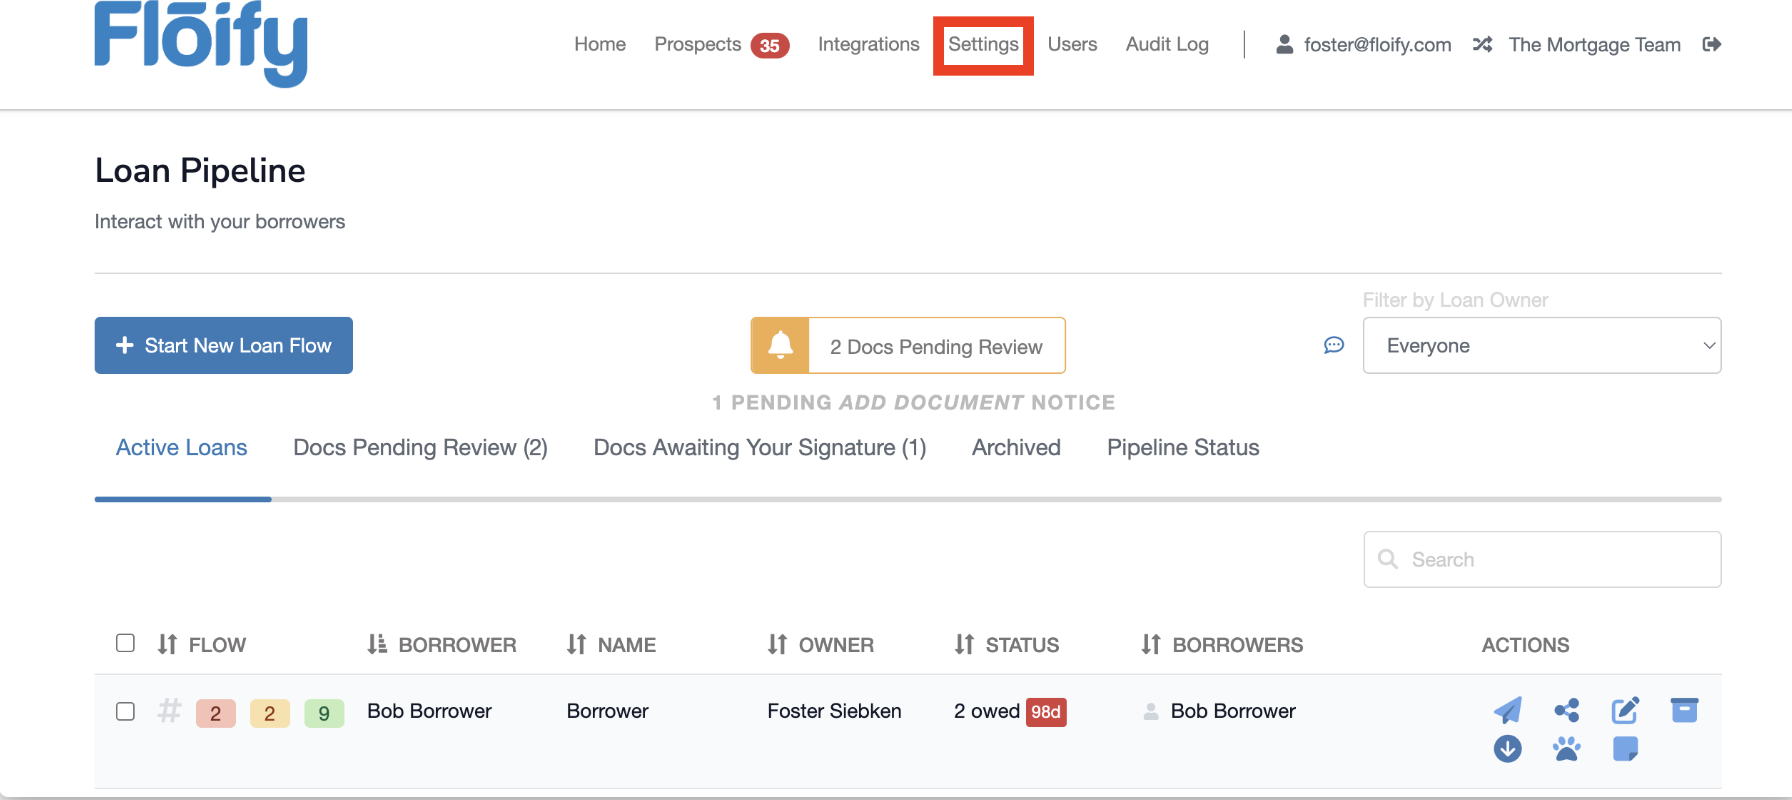
**Step 1:** Navigate to the **Team Dashboard** and select **Team Settings**.
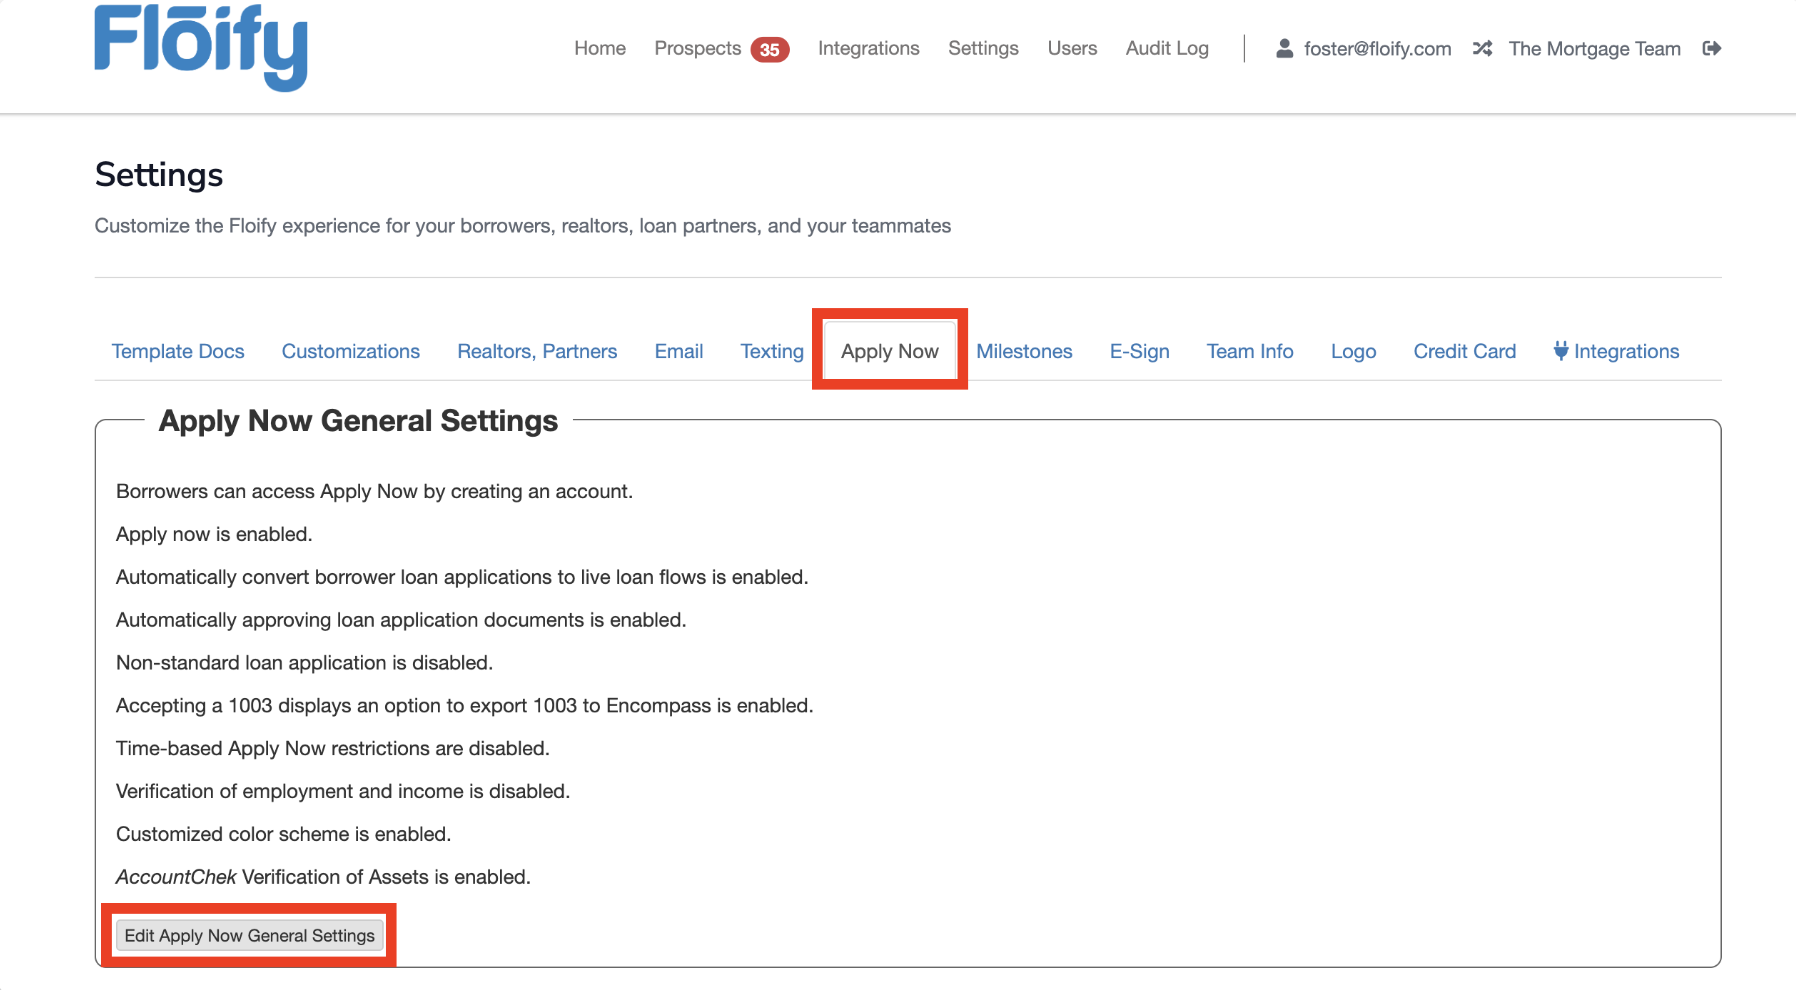
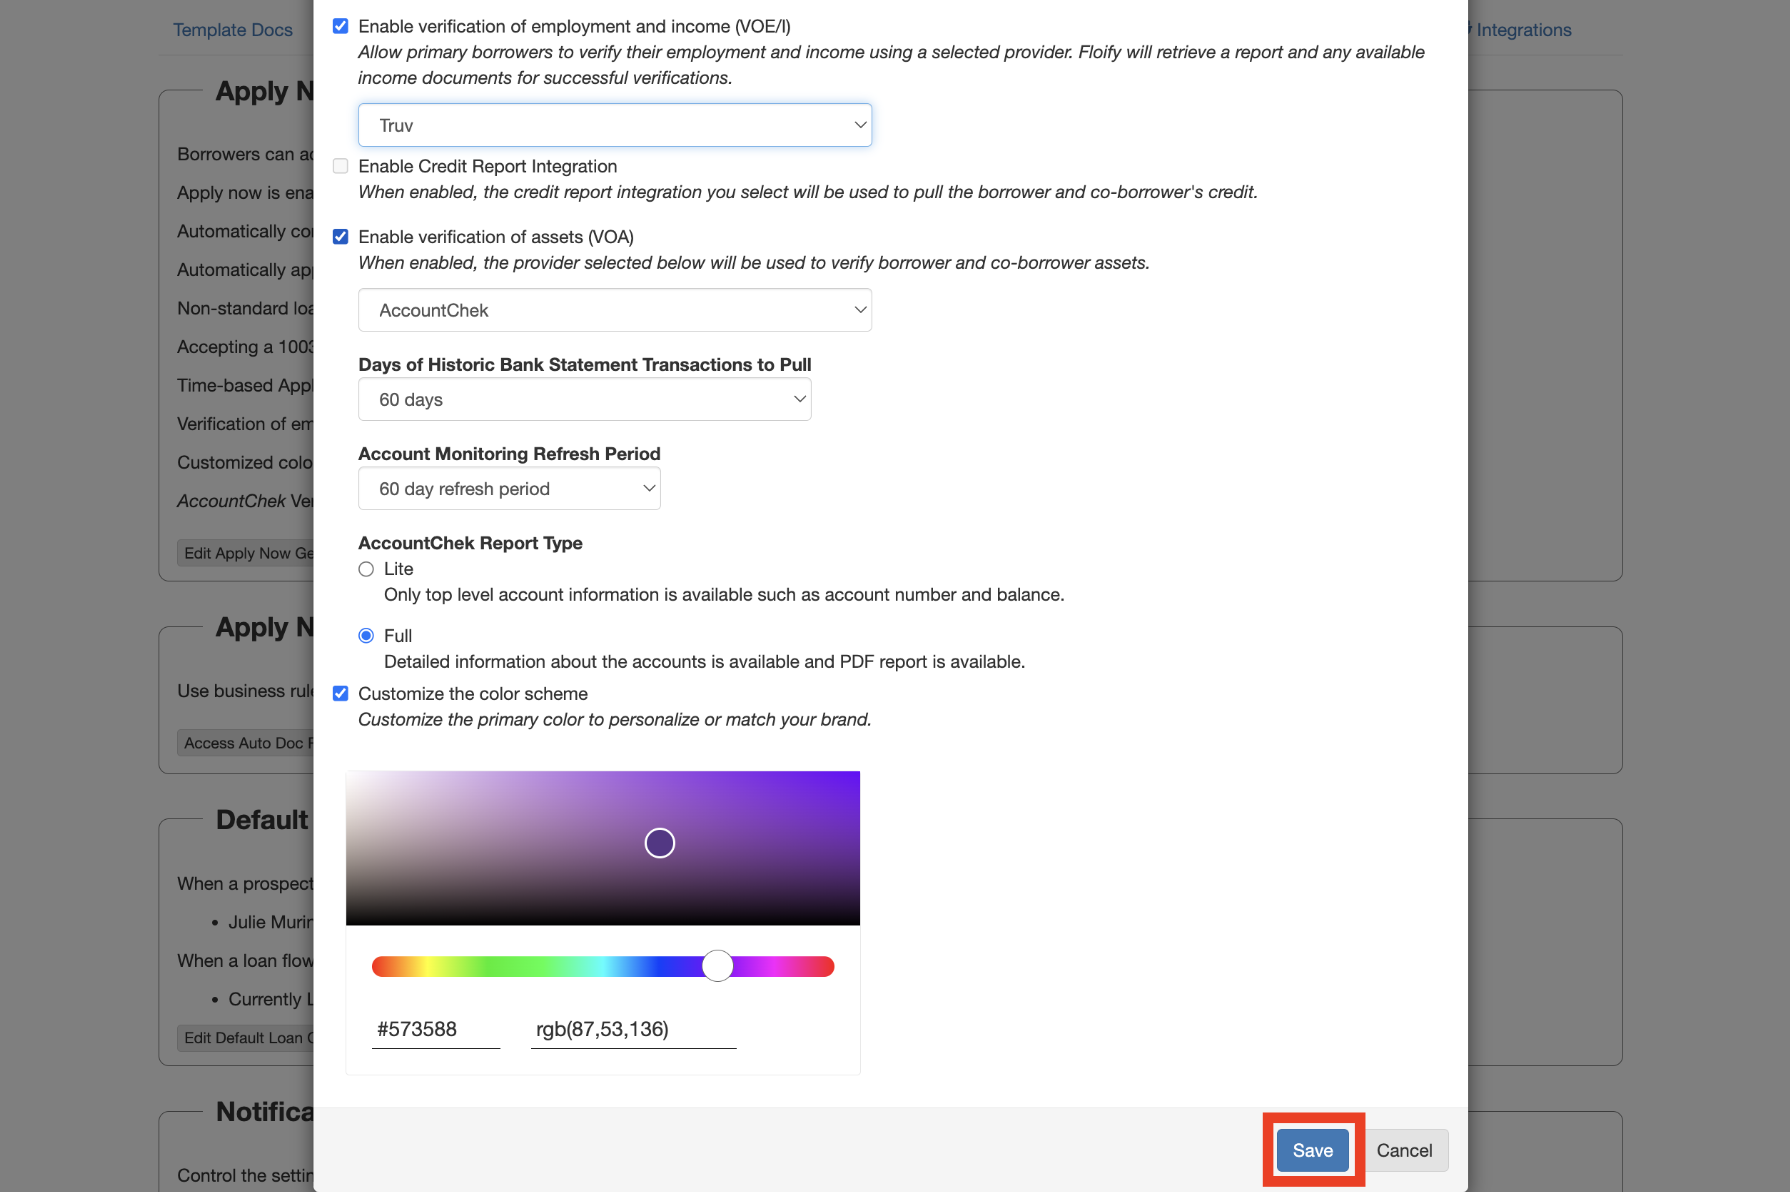
**Step 2:** Go to **Apply Now → Edit Apply Now General Settings**.
**Step 3:** Check the box to enable **Verification of Employment and Income (VOE/I)**.
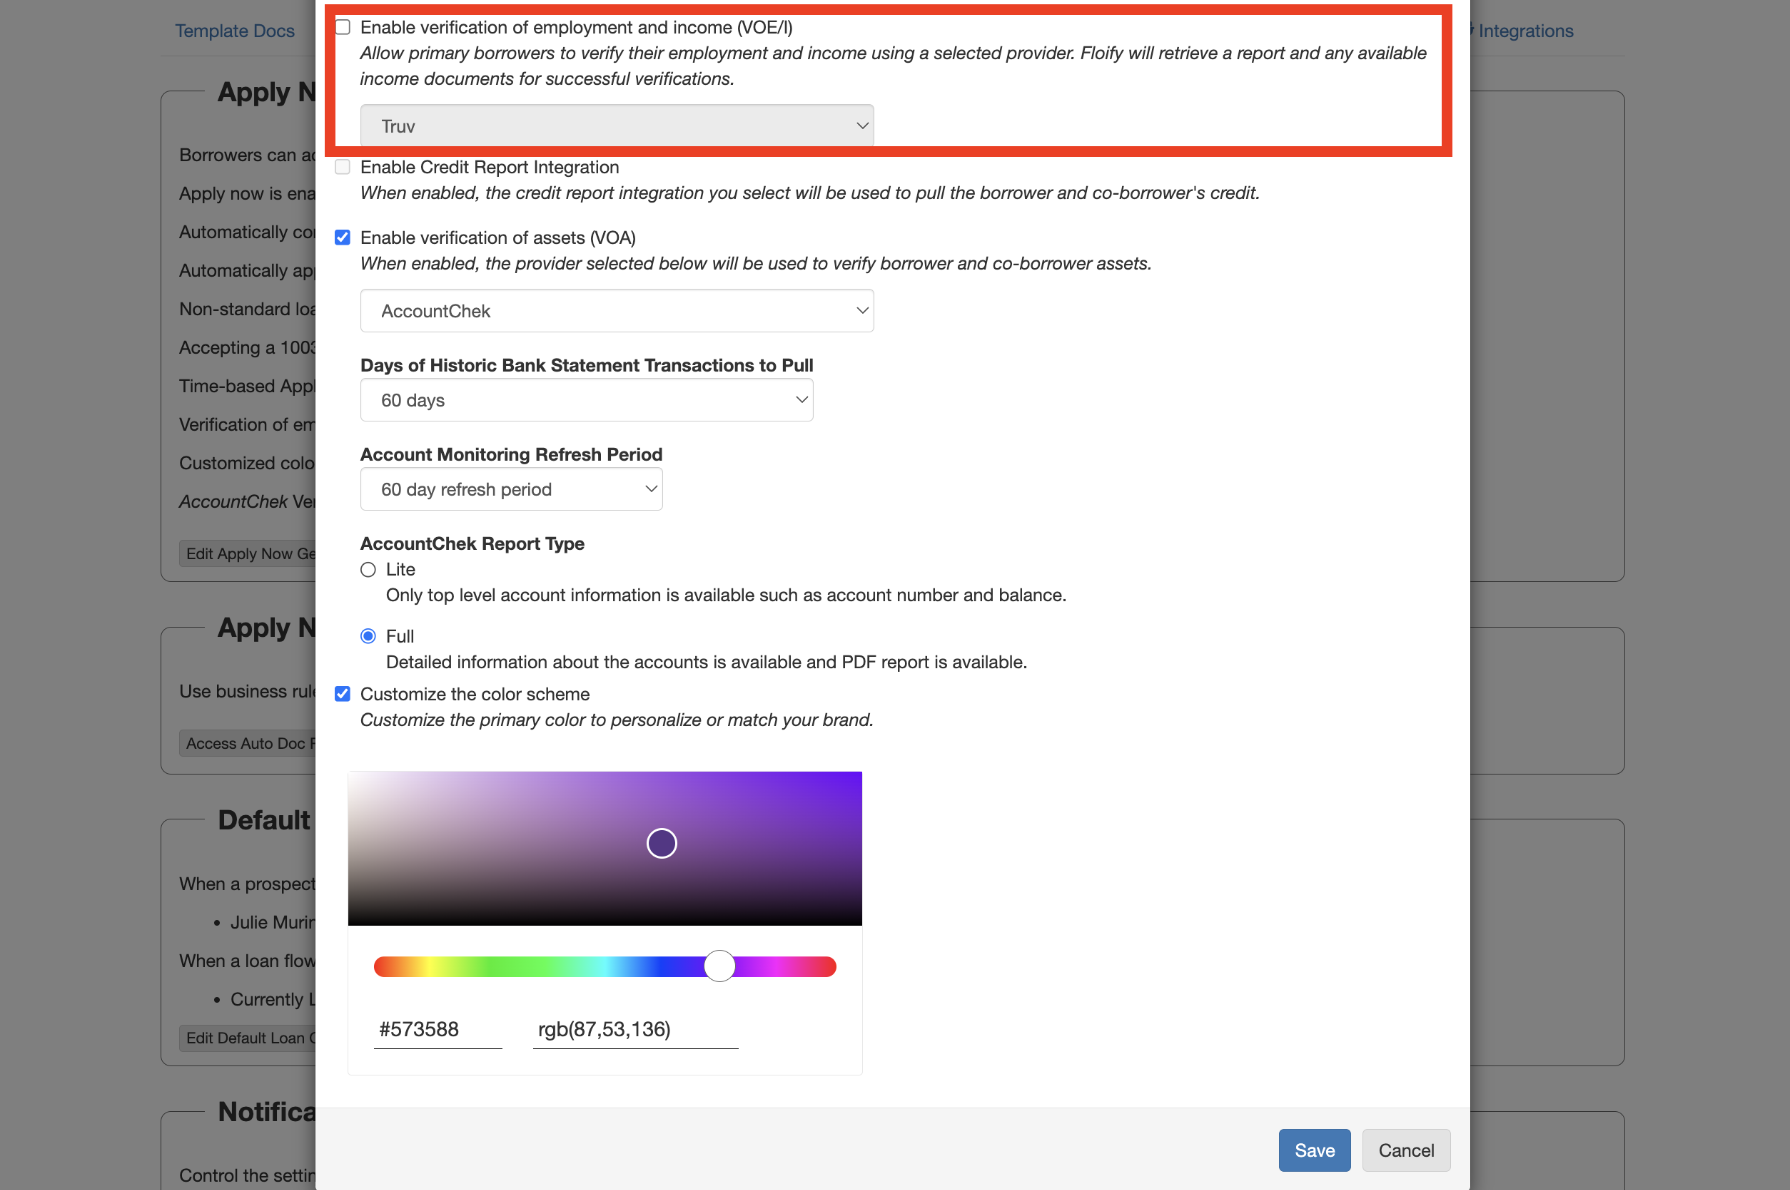
**Step 4:** Choose **Truv** from the dropdown menu and click **Save**.
***
## Borrower workflow
Borrowers enter their employment and income details, then proceed to the **Verify Income** section of their application to link their accounts and/or upload relevant documents. All connected data, including manually uploaded files and tax documents pulled from payroll, flows directly into the loan process.
***
## Next steps
View all POS integration options
Test your integration in sandbox
***
## Support
[support@truv.com](mailto:support@truv.com)
Contact Floify customer success for platform-specific issues