> ## Documentation Index
> Fetch the complete documentation index at: https://docs.truv.com/llms.txt
> Use this file to discover all available pages before exploring further.
# Multi-Tenancy
> Manage separate Dashboard instances for different business units
Multi-tenancy allows your organization to manage multiple separate [Dashboard](/developers/dashboard) instances, each with its own orders, customization templates, API keys, and team configuration. Team members can belong to multiple companies and switch between them instantly.
This is useful for:
* **Business unit separation**: distinct divisions operating independently
* **Brand management**: different brands with separate branding and templates
* **Per-environment isolation**: a separate company per customer-side environment (Dev / UAT / Prod) so orders, templates, and webhooks never cross
* **Testing isolation**: separating sandbox and production setups across teams
***
## How it works
### Company Toggle
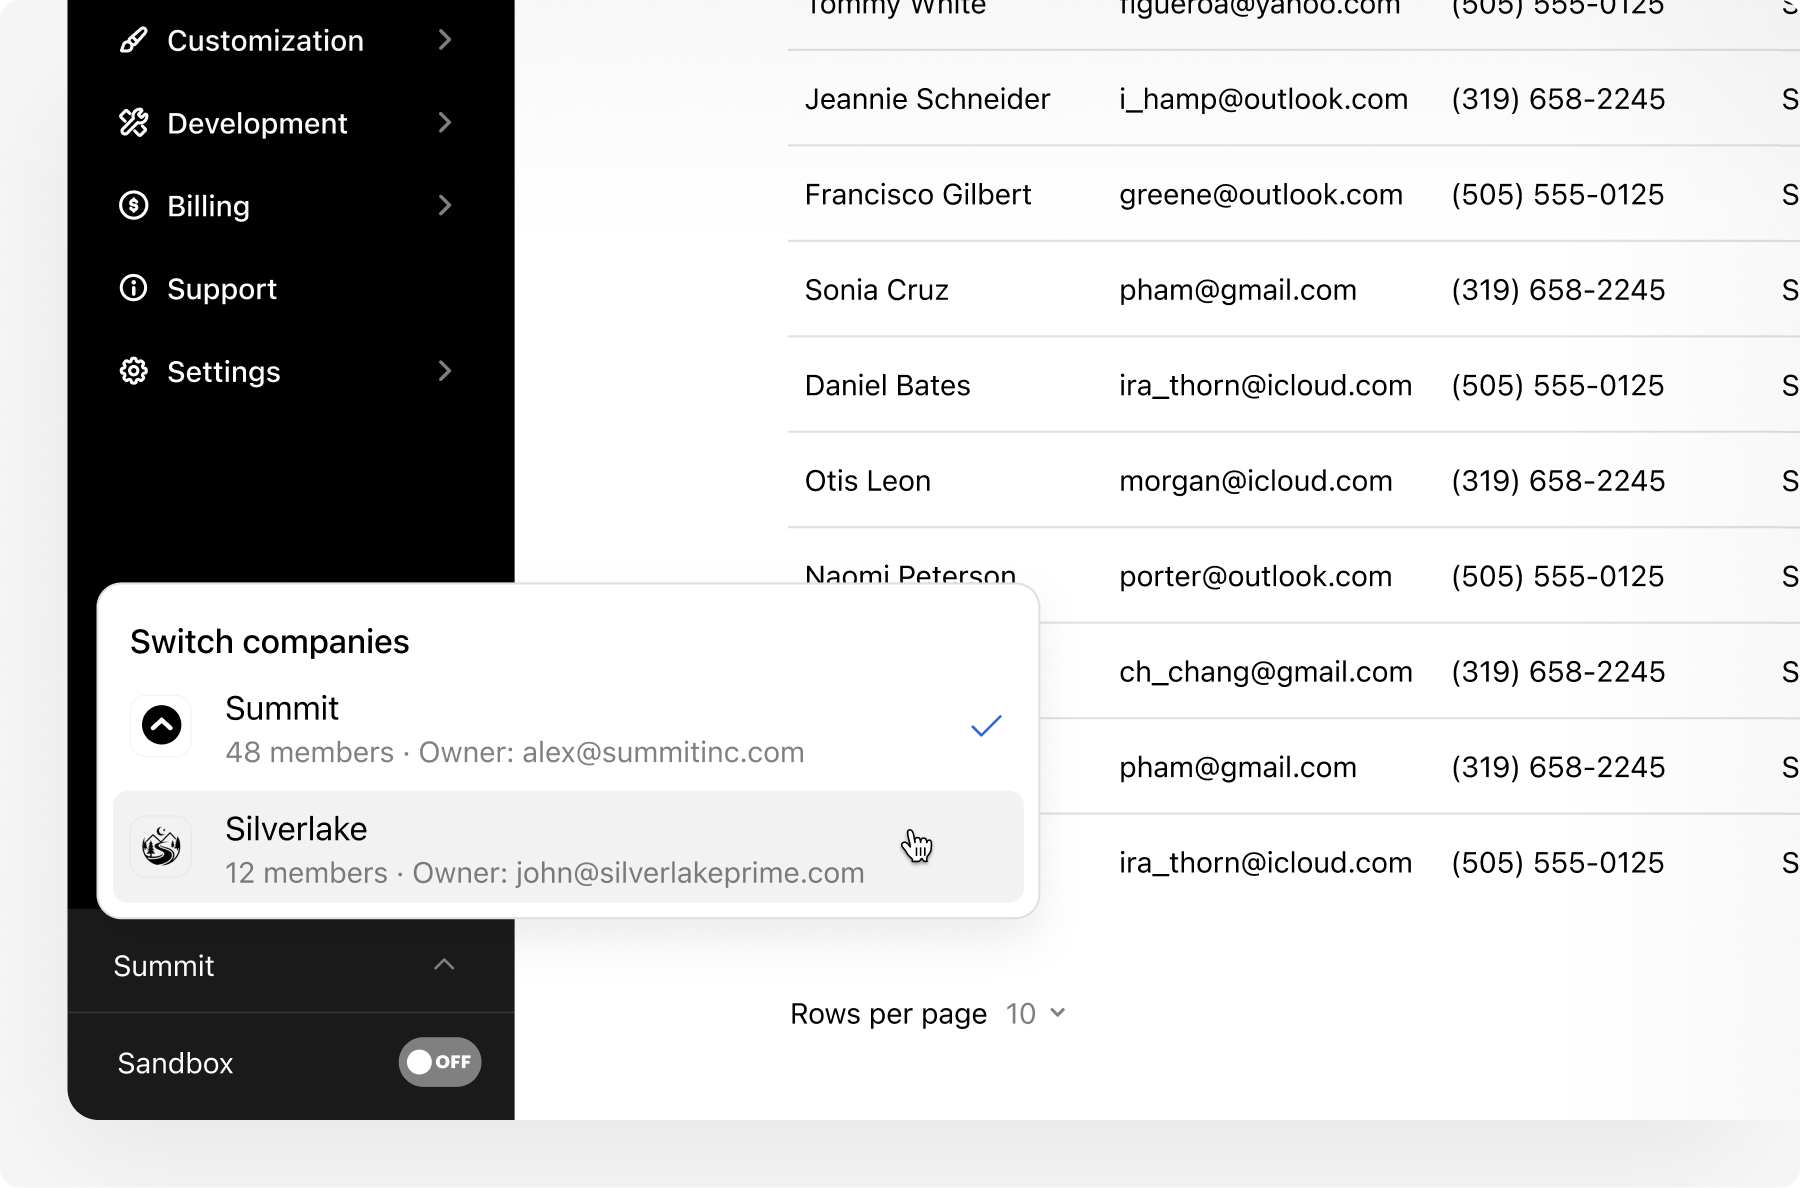
A company toggle appears in the bottom-left of the Dashboard Home page. It shows your current company and an expandable list of all companies you belong to, with member counts and owner email addresses.
 ### Shared Credentials
Team members use the **same login credentials** across all assigned companies. No separate accounts needed. When access to a company is removed, it simply disappears from the toggle list.
Members can have **different roles** in each company. For example, you could be an Owner in one company and a Developer in another. See [Team Roles & Permissions](/developers/dashboard#team-roles-and-permissions) for the full roles matrix.
### Company Identification
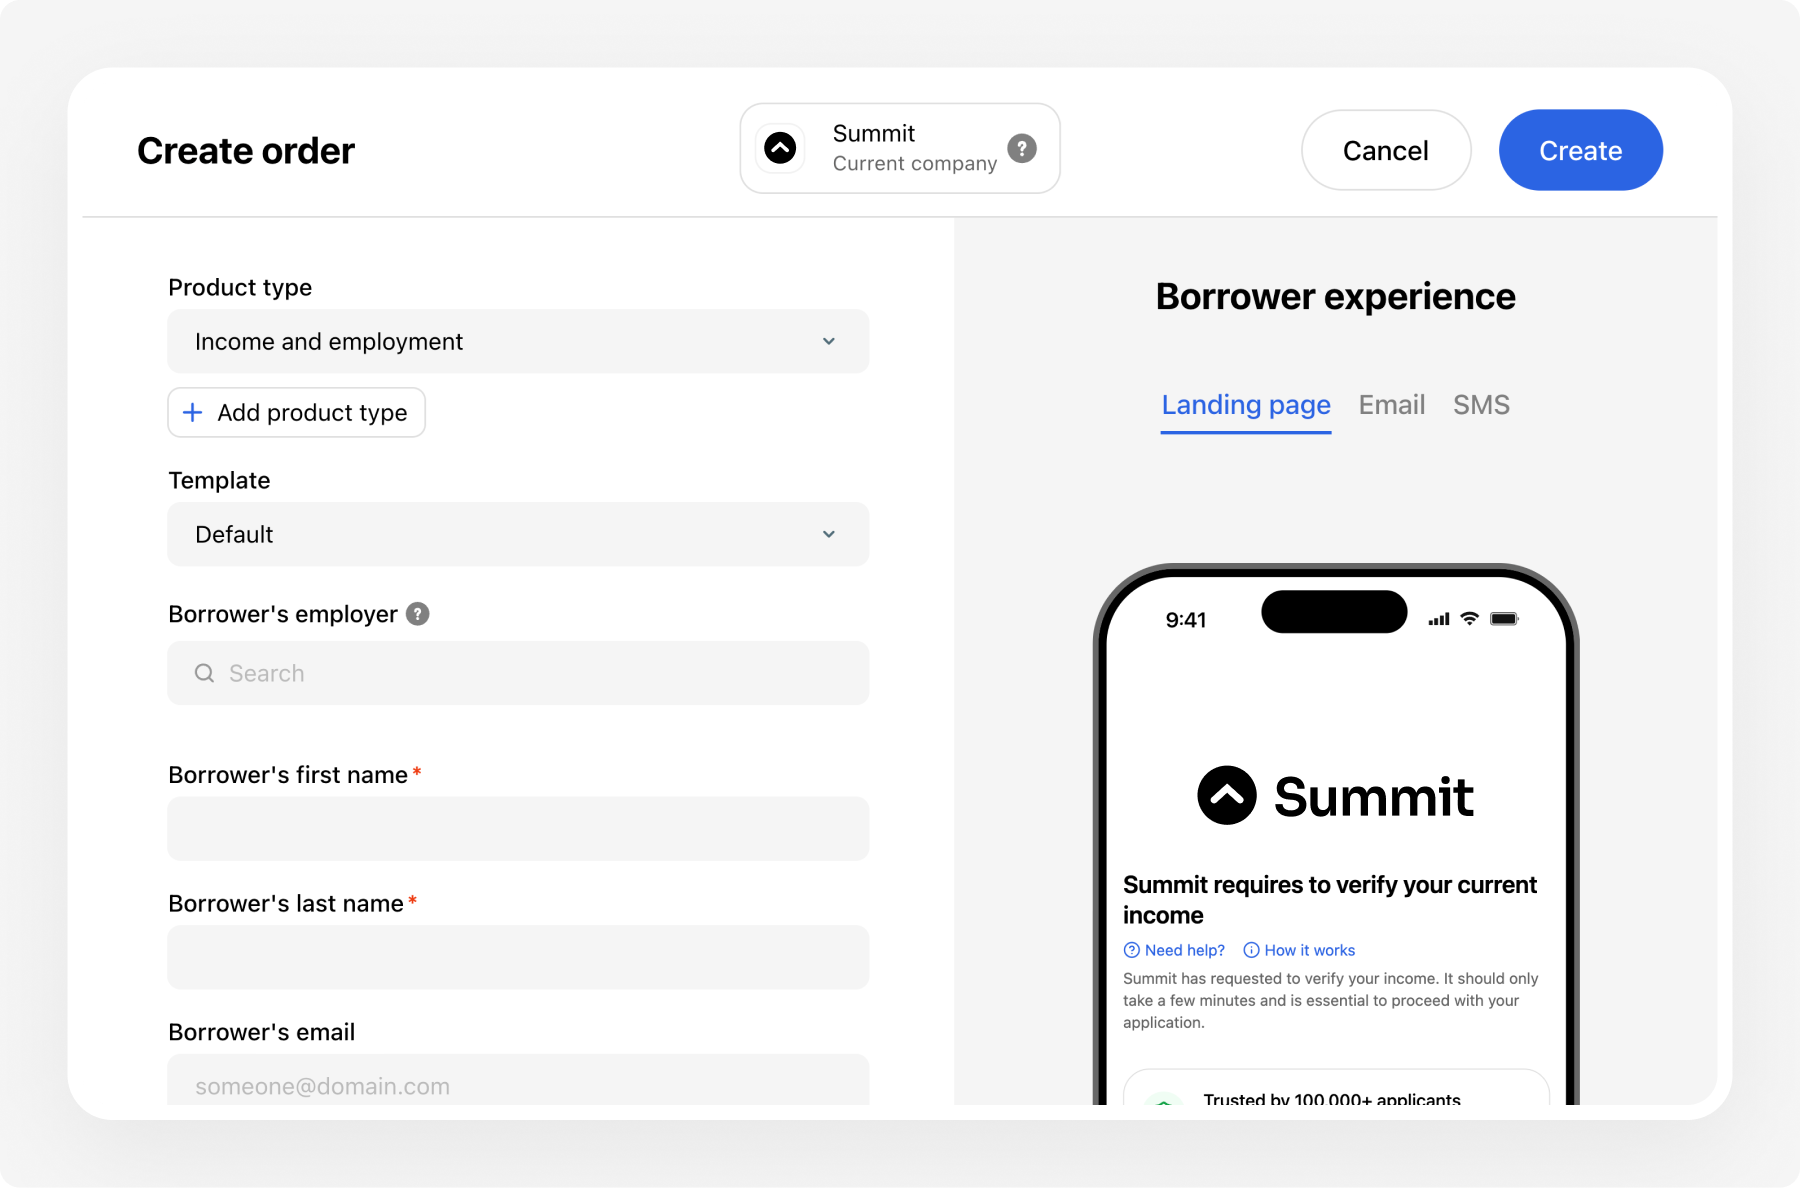
A static company tile appears in the header on key pages (Create Order, New Template, Add Member) so you always know which company context you're working in.
### Shared Credentials
Team members use the **same login credentials** across all assigned companies. No separate accounts needed. When access to a company is removed, it simply disappears from the toggle list.
Members can have **different roles** in each company. For example, you could be an Owner in one company and a Developer in another. See [Team Roles & Permissions](/developers/dashboard#team-roles-and-permissions) for the full roles matrix.
### Company Identification
A static company tile appears in the header on key pages (Create Order, New Template, Add Member) so you always know which company context you're working in.
 ***
## Set up multi-tenancy
For customers running separate Dev / UAT / Prod environments on their side (common for large financial institutions and state agencies), provision one Truv company per environment with its own designated owner. Each company has independent API keys, webhook URLs, customization templates, and order history — preventing UAT traffic from contaminating production order data.
Provide the following for each new company:
* Company name (include the environment in the name when relevant, e.g., "Acme — UAT")
* Designated owner (one owner per company)
* Billing rollup preferences
* Any specific configuration requirements
Your CSM creates the company and sends invitations. Existing active members get automatic access without needing a new invite email.
For each new company, you'll need to:
* Request production API keys
* Set up [customization templates](/developers/customization) with the correct branding
* Configure [webhooks](/api-reference/webhooks) and data settings as needed
***
## Manage teams
Add members to any company via **Settings > Team > Add member**. When adding a member, specify:
* Name and email
* Role for this specific company
* Available order templates
Adding a member who already has a Truv account automatically grants them access to the new company through their existing login.
***
## Next steps
Navigate the Dashboard interface
Manage API credentials for each company
Set up branding per company
***
## Set up multi-tenancy
For customers running separate Dev / UAT / Prod environments on their side (common for large financial institutions and state agencies), provision one Truv company per environment with its own designated owner. Each company has independent API keys, webhook URLs, customization templates, and order history — preventing UAT traffic from contaminating production order data.
Provide the following for each new company:
* Company name (include the environment in the name when relevant, e.g., "Acme — UAT")
* Designated owner (one owner per company)
* Billing rollup preferences
* Any specific configuration requirements
Your CSM creates the company and sends invitations. Existing active members get automatic access without needing a new invite email.
For each new company, you'll need to:
* Request production API keys
* Set up [customization templates](/developers/customization) with the correct branding
* Configure [webhooks](/api-reference/webhooks) and data settings as needed
***
## Manage teams
Add members to any company via **Settings > Team > Add member**. When adding a member, specify:
* Name and email
* Role for this specific company
* Available order templates
Adding a member who already has a Truv account automatically grants them access to the new company through their existing login.
***
## Next steps
Navigate the Dashboard interface
Manage API credentials for each company
Set up branding per company