> ## Documentation Index
> Fetch the complete documentation index at: https://docs.truv.com/llms.txt
> Use this file to discover all available pages before exploring further.
# Truv Dashboard
> Your central hub for managing verifications, teams, customization, billing, integrations and more.
 The [Truv Dashboard](https://dashboard.truv.com) is the central management interface for your Truv account. You can create and manage verification orders, monitor activity, customize the user experience, and administer your team, all without writing any code.
The Dashboard can be used as a **standalone platform**. Some teams manage their entire verification workflow through the Dashboard, though Truv is most effective when integrated in the platform your end-users and frontline team use.
***
## Dashboard sections
View order summaries filtered by environment, add team members, access reporting, and see a snapshot of verification activity.
Simulate the [Truv Bridge](/developers/sdks/overview) flow with pre-configured values. Test different product types, preview the user experience, and view real-time event logs with full JSON details.
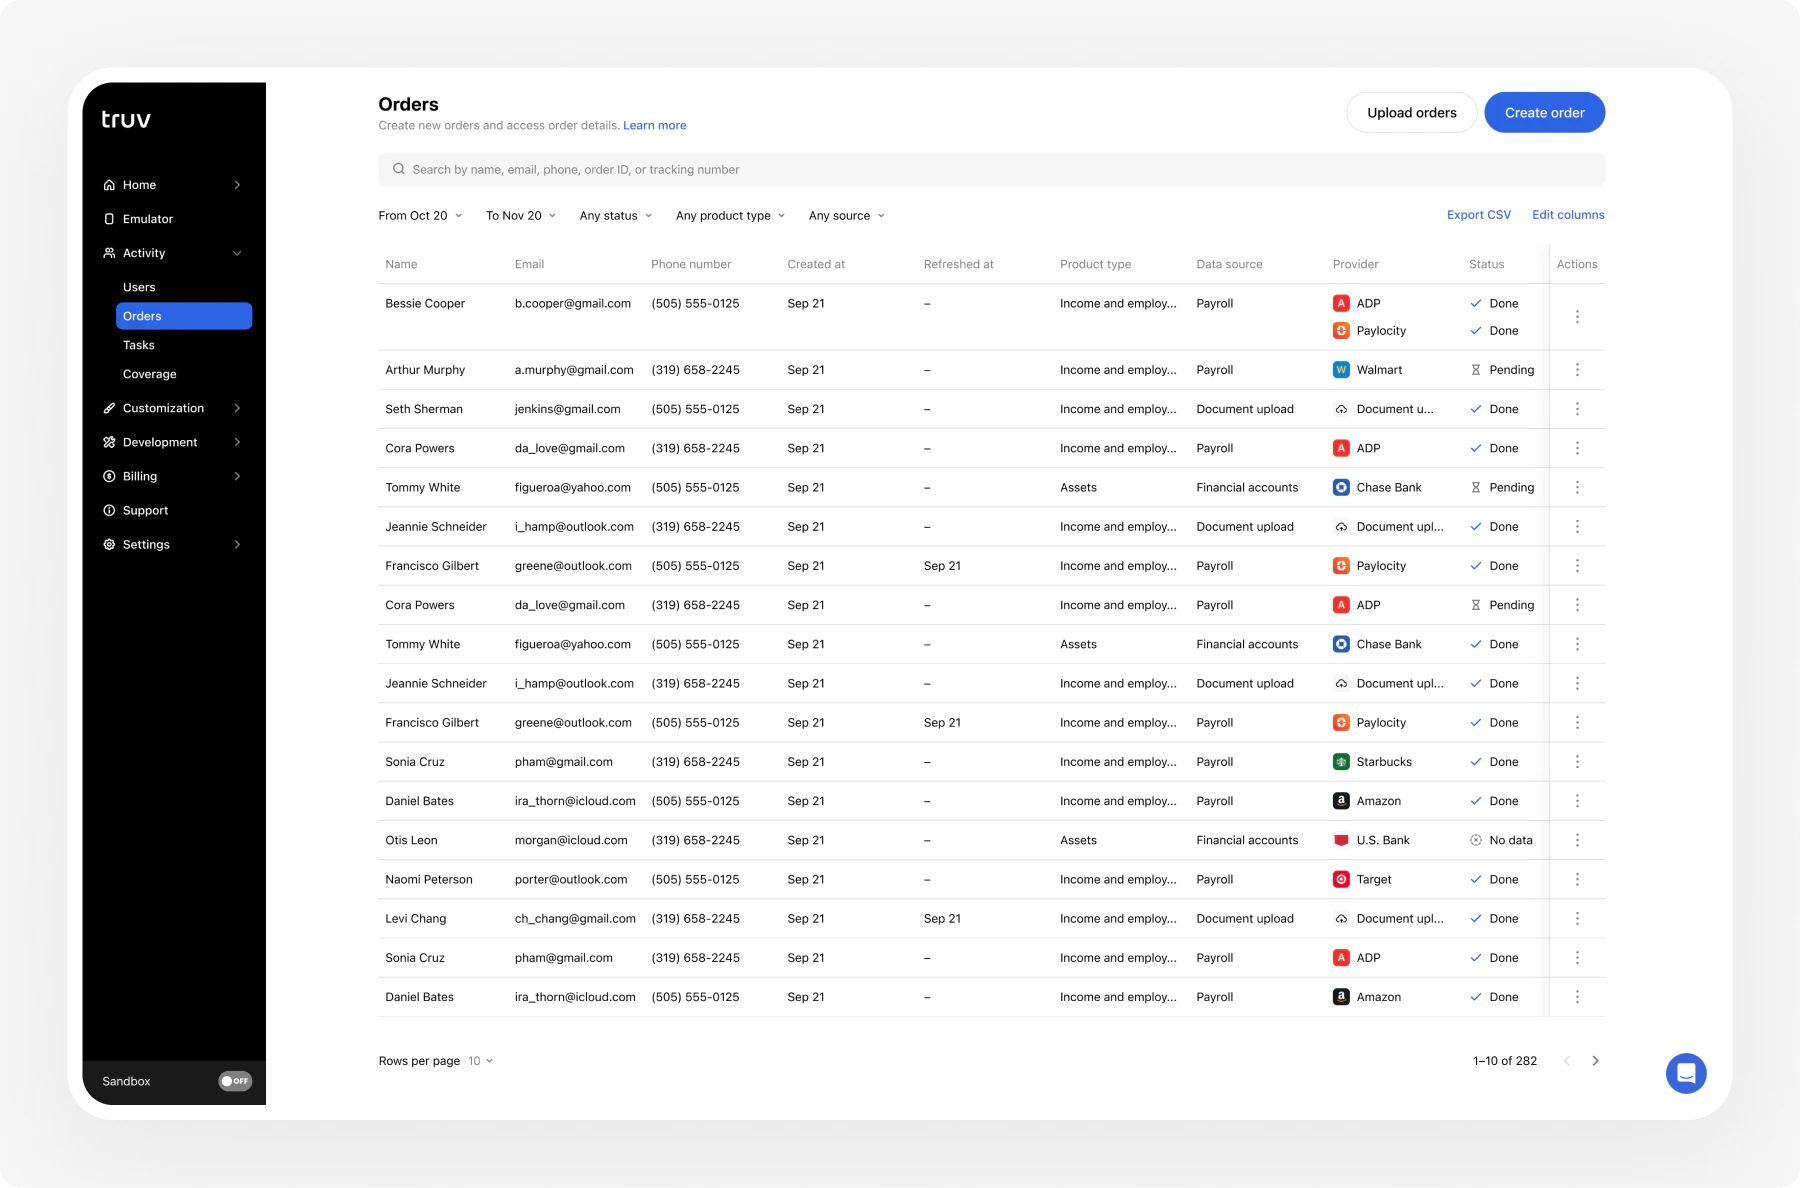
Search and filter across three tabs: **Users** (end-user information), **Orders** (create and manage orders), and **Tasks** (historical data retrieval details).
View Truv's data source coverage statistics: population reach and supported payroll provider and bank integrations.
Create and manage [customization templates](/developers/customization) to brand Bridge, emails, SMS messages, and landing pages. Configure data field selections per product type.
Manage API keys (Client ID and Access secret), view API event logs, and configure [webhook](/api-reference/webhooks) endpoints and notification settings.
View your subscription, invoices, usage breakdown, and download monthly usage reports.
Team management, [single sign-on (SSO)](/developers/sso) configuration, [multi-tenancy](/developers/multi-tenancy) company switching, and account-level settings like order expiration windows.
***
## Environments
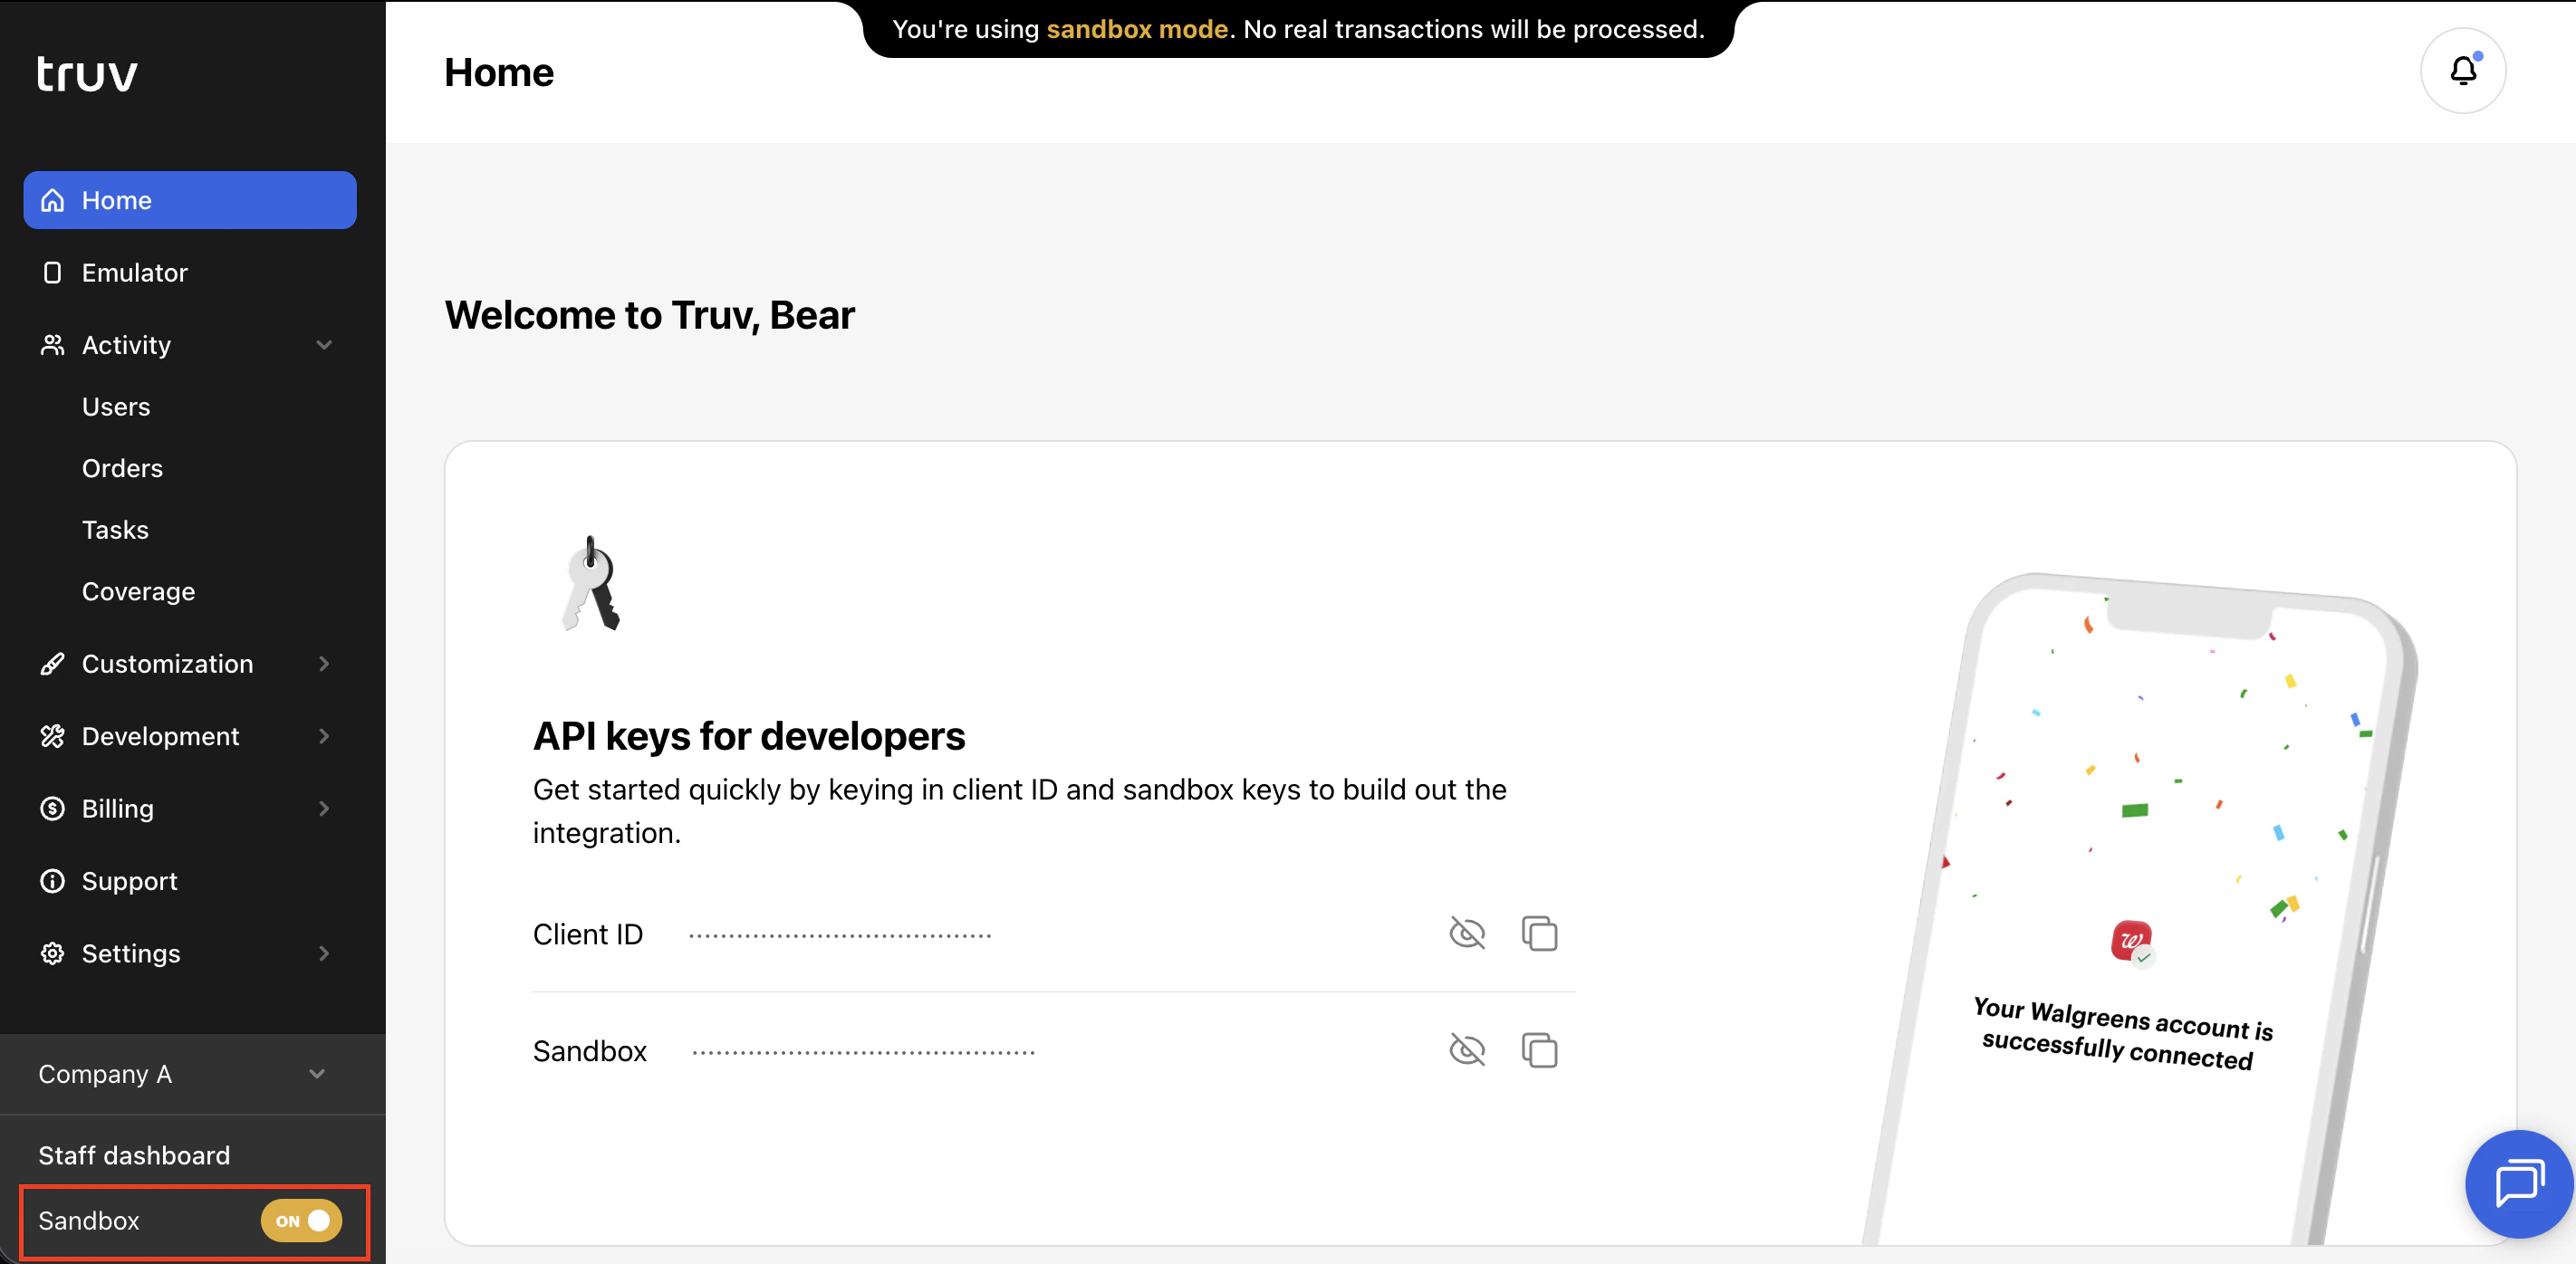
The Dashboard supports two environments. Owners and Administrators have access to toggle Sandbox mode On or Off.
| Environment | Purpose |
| -------------- | -------------------------------------------------------------------------------------------------------------------- |
| **Sandbox** | Test with simulated data and [test credentials](/developers/testing/test-credentials). No real provider connections. |
| **Production** | Live environment with real user data and production API keys. |
When Sandbox mode is enabled in your Dashboard, it is enabled for all users. Once testing is complete, ensure that you have switched Sandbox mode off.
The [Truv Dashboard](https://dashboard.truv.com) is the central management interface for your Truv account. You can create and manage verification orders, monitor activity, customize the user experience, and administer your team, all without writing any code.
The Dashboard can be used as a **standalone platform**. Some teams manage their entire verification workflow through the Dashboard, though Truv is most effective when integrated in the platform your end-users and frontline team use.
***
## Dashboard sections
View order summaries filtered by environment, add team members, access reporting, and see a snapshot of verification activity.
Simulate the [Truv Bridge](/developers/sdks/overview) flow with pre-configured values. Test different product types, preview the user experience, and view real-time event logs with full JSON details.
Search and filter across three tabs: **Users** (end-user information), **Orders** (create and manage orders), and **Tasks** (historical data retrieval details).
View Truv's data source coverage statistics: population reach and supported payroll provider and bank integrations.
Create and manage [customization templates](/developers/customization) to brand Bridge, emails, SMS messages, and landing pages. Configure data field selections per product type.
Manage API keys (Client ID and Access secret), view API event logs, and configure [webhook](/api-reference/webhooks) endpoints and notification settings.
View your subscription, invoices, usage breakdown, and download monthly usage reports.
Team management, [single sign-on (SSO)](/developers/sso) configuration, [multi-tenancy](/developers/multi-tenancy) company switching, and account-level settings like order expiration windows.
***
## Environments
The Dashboard supports two environments. Owners and Administrators have access to toggle Sandbox mode On or Off.
| Environment | Purpose |
| -------------- | -------------------------------------------------------------------------------------------------------------------- |
| **Sandbox** | Test with simulated data and [test credentials](/developers/testing/test-credentials). No real provider connections. |
| **Production** | Live environment with real user data and production API keys. |
When Sandbox mode is enabled in your Dashboard, it is enabled for all users. Once testing is complete, ensure that you have switched Sandbox mode off.
 ***
## Team roles and permissions
The Dashboard supports five roles with granular access control:
| Access | Owner | Administrator | Developer | Orders Manager | Billing Manager |
| --------------------------- | ----- | ------------- | --------- | -------------- | --------------- |
| **Reporting** | Yes | Yes | Yes | Yes | Yes |
| **Orders / Users** | Yes | Yes | Yes | Yes | No |
| **Tasks** | Yes | Yes | Yes | Yes | No |
| **Development** | Yes | Yes | Yes | No | No |
| **Customization** | Yes | Yes | Yes | No | No |
| **Customization Templates** | Yes | Yes | Yes | No | No |
| **Company settings** | Yes | Yes | Yes | No | No |
| **Team** | Yes | Yes | No | No | No |
| **Billing** | Yes | Yes | No | No | Yes |
| **Usage** | Yes | Yes | No | No | Yes |
| **Support tickets** | Yes | Yes | Yes | Yes | Yes |
| **Can be deleted** | No | Yes | Yes | Yes | Yes |
Every company must have at least one Owner. In a [multi-tenancy](/developers/multi-tenancy) setup, members can have different roles in each company.
### Manage Team Members
Navigate to **Settings > Team > Add member** and provide the member's name, email, role, and available order templates.
To edit a team member's role or access, find the user in the Team Members table, click their row, and change any settings.
### Restrict access by template
Truv supports controlling Order Manager access through Template assignment. If an Order Manager is assigned specific templates, they will only be able to create orders using those templates and see orders that were created using those templates. This is convenient if team members belong to specific branches or regions and need to create orders with that branding and only see orders for their team.
***
## Get started
Test the full verification flow using [sandbox credentials](/developers/testing/test-credentials) before going live.
Switch Sandbox mode off and run a real verification with production API keys.
Go to **Settings > Team > Add member** to invite your team and assign roles.
Go to **Customization > Branding** to upload your logo and set your brand colors.
Explore **Customization > Templates** to configure the verification experience for each workflow.
Confirm production settings, ensure Sandbox mode is off, and begin processing real verifications.
Pick your vertical (Mortgage, Consumer Credit, Retail Banking, Public Sector, Screening) from the top navigation and follow the matching integration guide.
***
## Team roles and permissions
The Dashboard supports five roles with granular access control:
| Access | Owner | Administrator | Developer | Orders Manager | Billing Manager |
| --------------------------- | ----- | ------------- | --------- | -------------- | --------------- |
| **Reporting** | Yes | Yes | Yes | Yes | Yes |
| **Orders / Users** | Yes | Yes | Yes | Yes | No |
| **Tasks** | Yes | Yes | Yes | Yes | No |
| **Development** | Yes | Yes | Yes | No | No |
| **Customization** | Yes | Yes | Yes | No | No |
| **Customization Templates** | Yes | Yes | Yes | No | No |
| **Company settings** | Yes | Yes | Yes | No | No |
| **Team** | Yes | Yes | No | No | No |
| **Billing** | Yes | Yes | No | No | Yes |
| **Usage** | Yes | Yes | No | No | Yes |
| **Support tickets** | Yes | Yes | Yes | Yes | Yes |
| **Can be deleted** | No | Yes | Yes | Yes | Yes |
Every company must have at least one Owner. In a [multi-tenancy](/developers/multi-tenancy) setup, members can have different roles in each company.
### Manage Team Members
Navigate to **Settings > Team > Add member** and provide the member's name, email, role, and available order templates.
To edit a team member's role or access, find the user in the Team Members table, click their row, and change any settings.
### Restrict access by template
Truv supports controlling Order Manager access through Template assignment. If an Order Manager is assigned specific templates, they will only be able to create orders using those templates and see orders that were created using those templates. This is convenient if team members belong to specific branches or regions and need to create orders with that branding and only see orders for their team.
***
## Get started
Test the full verification flow using [sandbox credentials](/developers/testing/test-credentials) before going live.
Switch Sandbox mode off and run a real verification with production API keys.
Go to **Settings > Team > Add member** to invite your team and assign roles.
Go to **Customization > Branding** to upload your logo and set your brand colors.
Explore **Customization > Templates** to configure the verification experience for each workflow.
Confirm production settings, ensure Sandbox mode is off, and begin processing real verifications.
Pick your vertical (Mortgage, Consumer Credit, Retail Banking, Public Sector, Screening) from the top navigation and follow the matching integration guide.